Install ChargePoint® Home
To install ChargePoint Home Flex, complete the following steps:
-
This unit must be installed by a professional electrician.
a. Pick the correct charging current.
Homeowner and electrician should select correct charging current (16 A, 20 A, 24 A or 32 A) based on panel capacity and vehicle specification. Homeowner will select the breaker rating in the ChargePoint app after installation. Electrician will complete the following tasks:
-
Install the correct 230 V breaker (16 A, 20 A, 24 A or 32 A)
-
Install new 30 mA Type B residual current detection at the service panel
-
Ensure input wires are rated for the selected charging current
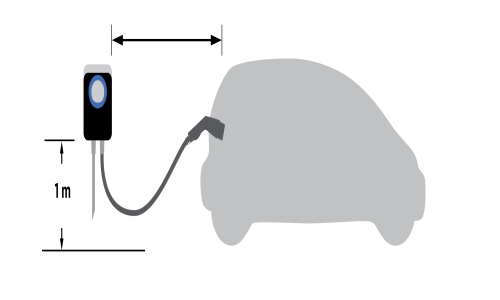
b. Choose an appropriate installation location.
Ensure the homeowner has chosen an installation location that allows the charging cable to easily reach the car’s charging port.
Ensure charging cable reaches car without any tension
Ensure installation is close to input wires
Install about 1 meter from the ground
-
- Watch the Installation Video.
Watch the How to install your ChargePoint Home (EU) video from ChargePoint on YouTube or download the ChargePoint app, select Home Charger from the main menu and watch the home installation video.
-
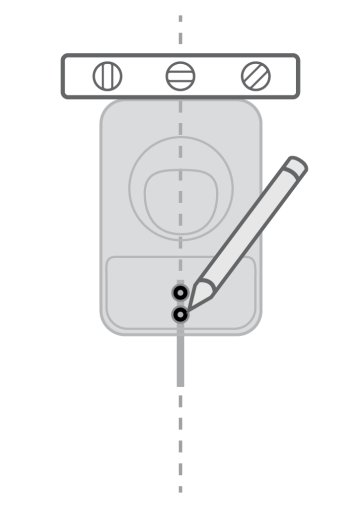
Mark the installation location
-
Place the station against the wall
-
Choose a location that can support the weight of the station and cable
-
Mark the two lower mounting holes
-
-
Mark the mounting location
-
Line up the mounting holes and tape the installation template against the wall
-
Mark the top mounting hole on the wall with the installation template
-
Remove the template
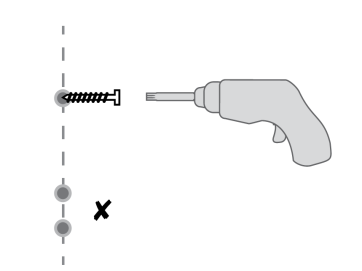
 Before beginning to drill, make sure the area has no water pipes or electrical wiring. You may need to relocate the station to avoid these.
-
-
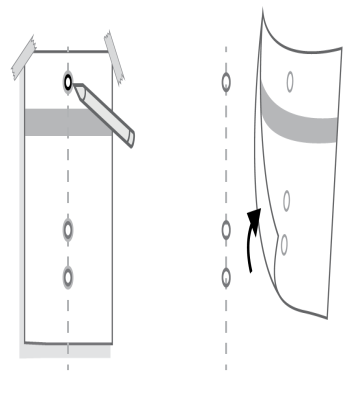
a. For concrete walls
-
Drill three holes with concrete drill bit
-
Install anchors
b. For wood walls
-
Drill three holes with standard drill bit
-
-
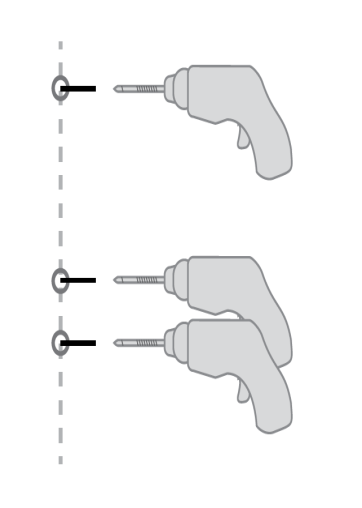
Install top mounting screw
-
Use driver bit to drill a screw into the top-most mounting hole, leaving a 3 mm gap under the screw head to hang the station on
-
Keep the remaining 2 screws for use later
-
-
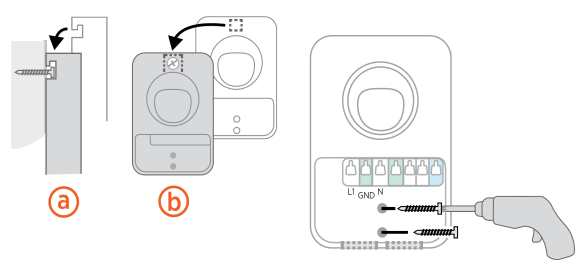
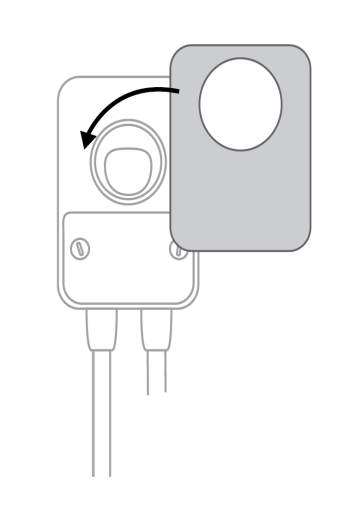
Mount the station
-
Hang the station on the screw using the notch on the back of the station
Side view (a); Front view (b) -
Using the Torx driver bit, drive the remaining 2 screws into the bottom mounting holes or anchors to secure the station
-
-
Wire the station
-
Install the ducting connector or strain relief, as appropriate
-
Trim the service wiring to remove excess length while ensuring that the wiring can easily reach the connectors on the charging station’s terminal block
-
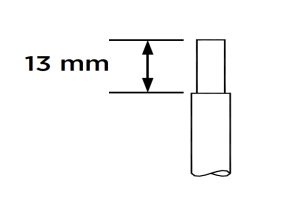
Strip each wire 13 mm
-
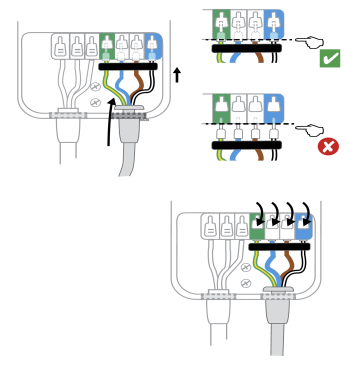
Fully insert wires into the connectors on the left side of the terminal block, as shown
-
On each connector, press the white levers all the way down until it snaps into place
Ensure each wire is fully inserted into the connector before snapping down the white levers. The metal wire should not be visible.
 Keep fingers away from underneath the white levers as you snap them down.
 -
-
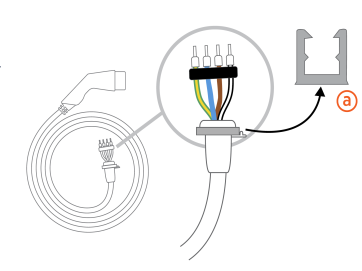
Remove the cable clip
Remove the cable clip (a) connected to the wire end of the cable, but do not discard it; you’ll need it in a few steps.
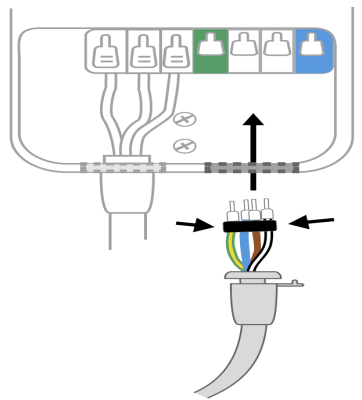
Connect the charging cable
-
-
Fold the wire ends and insert them into the bottom hole of the station
-
Match the green/yellow wire to the green connector block and the black/white wire to the blue connector block
-
Insert the exposed wires into the corresponding holes, pushing the cables up until the metal conductors are no longer visible
-
Snap the white levers all the way down on each wire
-
-
Attach the cable clip
Push the cable up and slide the cable clip around the inner part of the strain relief.
 The cable clip protects the cable from damage.
 -
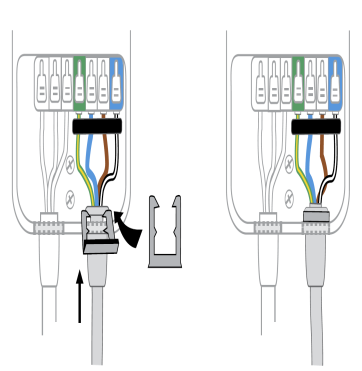
Lock the wire cover in place
-
Place the cover over the wiring area
-
Using a coin, lock the cover in place
 To avoid damage, do not use a screwdriver.
 -
-
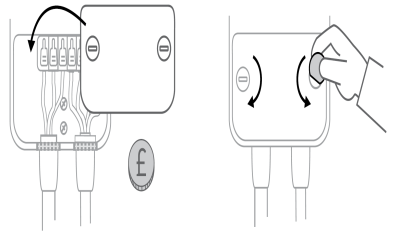
Snap the cover on the station
-
Turn in the station
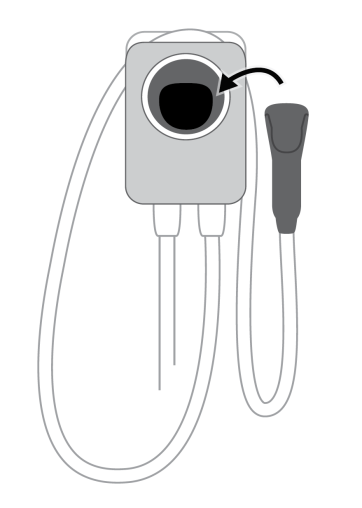
-
Wrap the charging cable around the top of the station and dock the connector
-
Restore power to the station
The front status light will glow white when the station is on.
-
-
Help the homeowner activate the station and select breaker rating
-
Turn on Bluetooth
-
Open the ChargePoint app. On the main menu, click Home Charger
-
Select “Set Up Home Charger”
-
Select “Activate”
-
Select the breaker rating to charge at more than 16 amps, if appropriate
-
