Verify Station Wiring and Voltage
To verify the station wiring, voltage readings and connection, follow these steps:
Tools Needed
|
|
T10 Security screwdriver |
|
Alligator clip leads or pass-through leads (optional) |
|
|
Solenoid Voltage Meter (Wiggy) |
|
Digital Multi-Meter (DMM) |



Station Wiring Checks
-
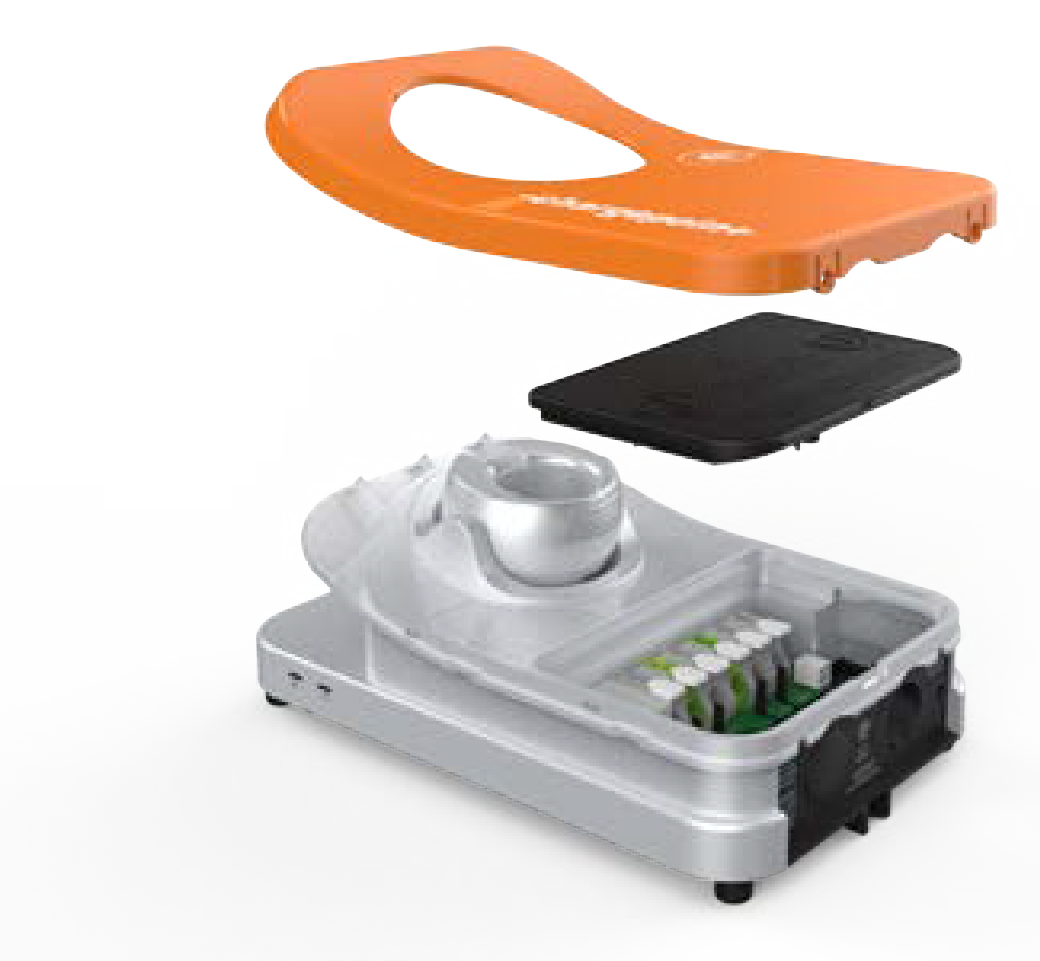
Using a T10 Security screwdriver, remove the screws fastening the faceplate to the bottom of the station.
Retain the screws for reuse.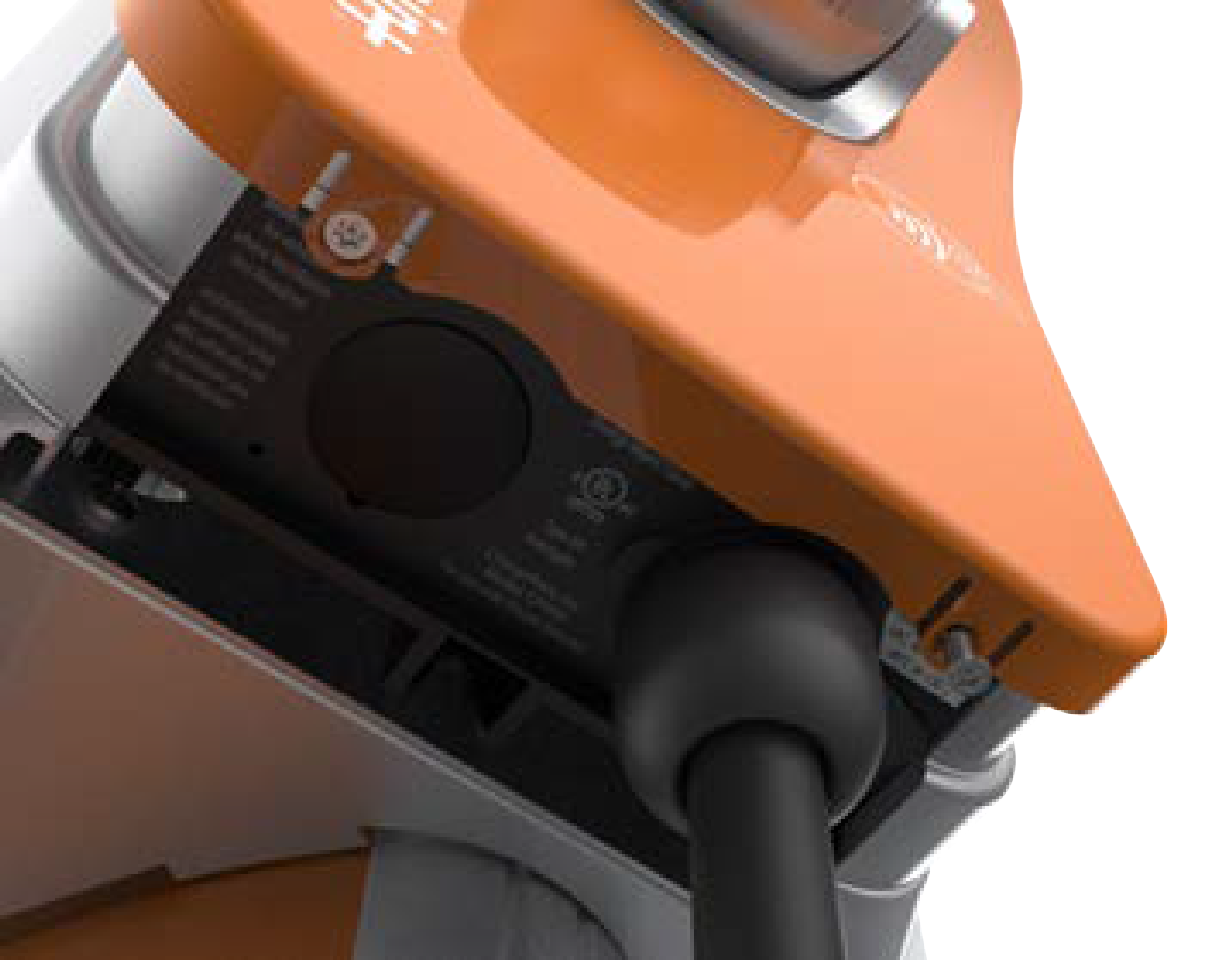
-
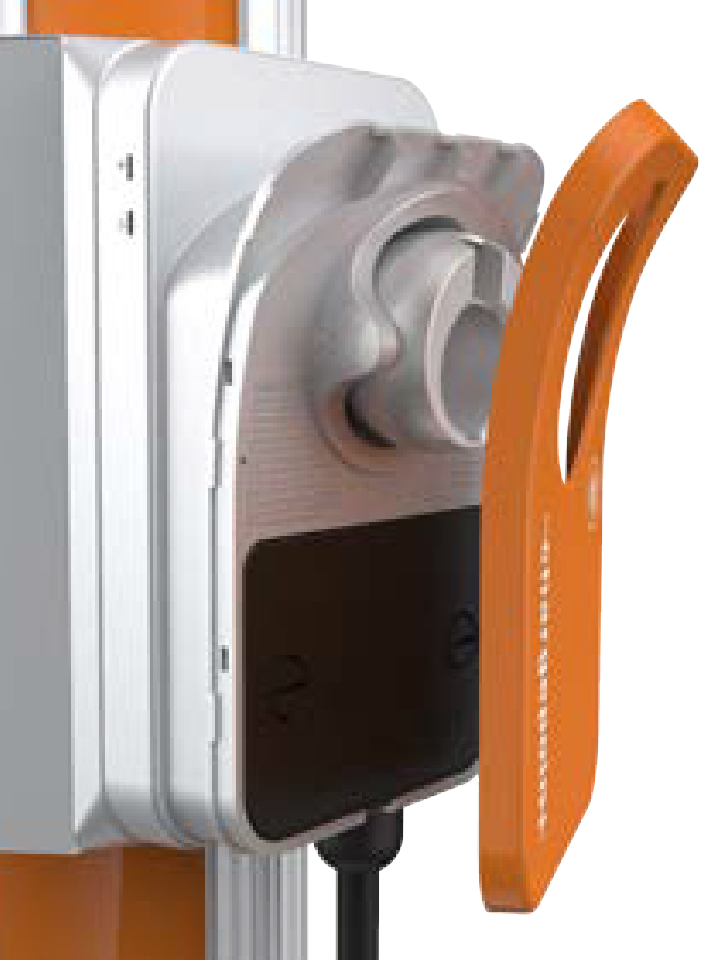
Lift the faceplate off the charging station.
-
Use a coin to unlock the wire cover.
Do not use a screwdriver, to avoid damage to the wire cover.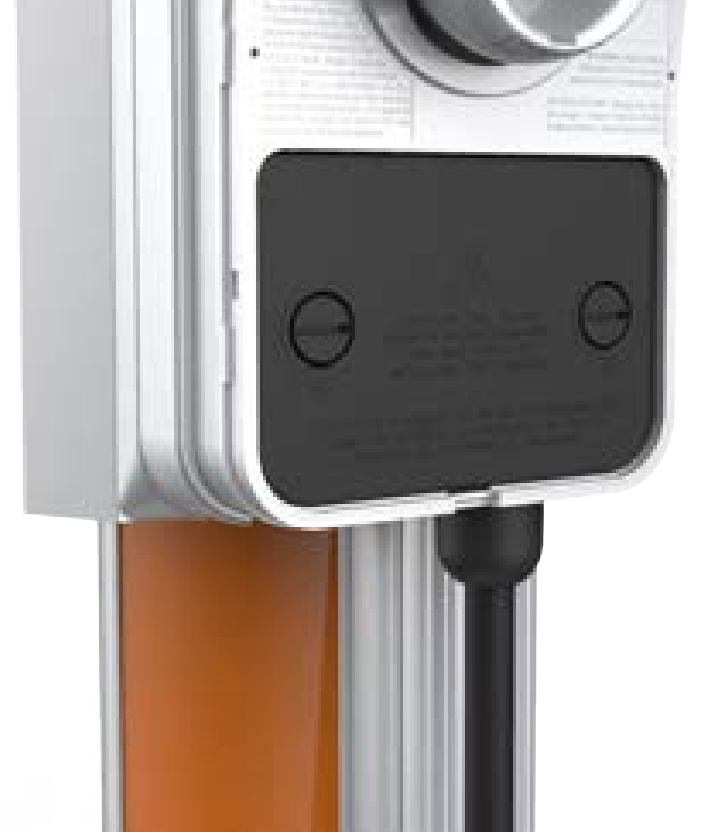
-
Lift the wire cover off.
Verifying Voltages
Once proper wire placement has been verified, you need to check the voltages and impedances using a Digital multimeter (DMM) in parallel with a Solenoid voltage meter (wiggy).
Since digital meters (DMM) are high impedance devices, the amount of current that flows through the circuit while testing voltage with one is negligible.
- Adding the voltage measurements in parallel will confirm that the voltage measurements do not significantly deviate with current flow (unexpected impedance) and are not the result of a "floating" voltage on any wire.
- If voltages are not measured with some additional load -- like a parallel wiggy or dummy load -- the values will not confirm useful functionality or impedance, instead they will only verify proper placement of phases and ground. Loaded values must be measured for complete troubleshooting.
-
Power on the station.
-
Test each wire relative to each other wire in the block, phase to phase, and phase to ground:
-
First, by connecting the DMM by itself and noting the voltage.
-
Next, by adding the wiggy in parallel and noting the voltage, while there is current flowing (using the alligator clips or pass through leads, if available).
-
-
Insert the meter probes into the holes under each lever and check the input voltage as listed in the "Expected Voltage Readings".
Readings with and without the wiggy in parallel should be near 208 V or 240 V (Bonded Neutral Wye or Split Phase) phase to phase and 120 V phase to ground.- A significant deviation from these values can denote a wiring problem or unsupported supply type, refer to the CPF25 Data Sheet available at ChargePoint Product Reference Documentation.
-
A significant deviation from these values only with the wiggy in parallel would indicate an unexpected impedance in the system. This includes any of the following:
- A possibly worn or damaged beaker (or, pole within that breaker)
- Corrosion or insufficient bonding of the breaker to the bus bar or the breaker leads
- Insufficient bonding of neutral to ground at the panel.
Expected Voltage Readings
The following table lists the expected input voltage measurements
|
Connection Points (Measure Between) |
Volts (Nominal) |
|
L1 – L2 |
208/240 |
|
L1 – GND |
120 |
|
L2 – GND |
120 |

Voltage Readings (with the DMM alone)
Record the voltage readings in the below table.
|
Connection Points (Measure Between) |
Results: Volts (Nominal) |
|
L1 – L2 |
|
|
L1 – GND |
|
|
L2 – GND |
Voltage Readings (with the DMM in parallel with the Solenoid Voltage Meter)
Record the voltage readings in the below table.
|
Connection Points (Measure Between) |
Results: Volts (Nominal) |
|
L1 – L2 |
|
|
L1 – GND |
|
|
L2 – GND |
Verifying Connections
-
If the voltages are not as expected, ensure that the wiring has been properly connected. Refer to the detailed wiring diagrams below.
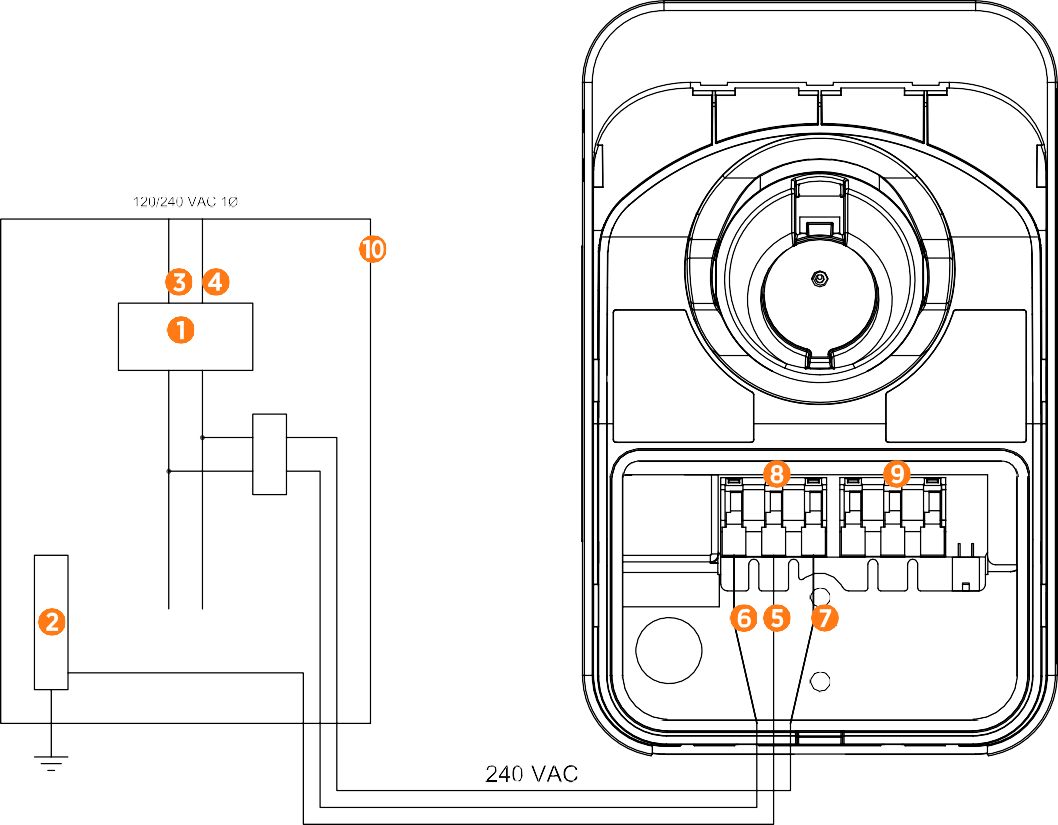
(1) Main Breaker
(2) Ground Bus
(3) L1
(4) L2
(5) Ground
(6) L1
(7) L2
(8) Input Terminal Block
(9) Output Terminal Block
(10) Local Service or Sub Panel
-
For grounding requirements, refer to the CPF25 Data Sheet available at ChargePoint Product Reference Documentation.
-
Resolve any wiring issues and ensure that voltages are as expected.
-
Power off the station.
