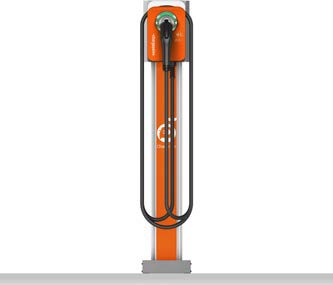
NACS Conversion and Cable Replacement Kit
This section describes the procedure to replace the charging cable.
Before performing any procedure, the technician must disconnect the power to the charging station at the service panel. Follow local code to de-energize the applicable circuit and lockout/tagout the upstream breaker before proceeding. Use a multimeter and check that the power is off. Keep power off for the circuit until all cover panels are correctly reinstalled and the work is complete.
FAILURE TO FOLLOW THESE INSTRUCTIONS CAN RESULT IN SERIOUS INJURY, LOSS OF LIFE, OR PROPERTY DAMAGE.
- If the charging station is not installed, commissioned, or serviced by a ChargePoint certified technician using a ChargePoint-approved method, it is excluded from all ChargePoint and other warranties and ChargePoint is not responsible.
- You must be a licensed electrician and complete training at https://www.chargepoint.com/partners/training-certification to become ChargePoint certified and to access ChargePoint's web-based installer tools or ChargePoint Installer app.
Product Disposal
![]() Applicable to NA - Do not dispose of as part of unsorted domestic waste. Inquire with local authorities regarding proper disposal. Product materials are recyclable as marked.
Applicable to NA - Do not dispose of as part of unsorted domestic waste. Inquire with local authorities regarding proper disposal. Product materials are recyclable as marked.
For assistance, go to chargepoint.com/support and contact technical support using the appropriate region-specific number.
Required Tools and Materials
-
T10 Security Torx driver
-
CMK
 Cable Management Kit Service Tool
 -
T25 Torx screwdriver
-
Phillips screwdriver
Contents
Ensure that you have the correct box and that it contains the correct contents. There are six variants of this replacement kit.
|
Part Number |
Charging Cable Replacement Type |
Contents |
|---|---|---|
|
99-004604-xx |
5.5 m (18 ft) 50 Amp Charging Cable Replacement for CPF50 |
|
|
99-004606-xx |
7 m (23 ft) 50 Amp Charging Cable Replacement for CPF50 and Home Flex |
|
|
99-004605-xx |
5.5 m (18 ft) 50 Amp Charging Cable Replacement for CPF50 with CMK |
|
|
99-004607-xx |
7 m (23 ft) 50 Amp Charging Cable Replacement for CPF50 with CMK |
|
|
99-004615-01 |
7 m (23 ft) 50 Amp NACS |
|
|
99-004616-01 |
5.5 m (18 ft) 50 Amp NACS |
|
|
99-004636-xx |
5.5 m (18 ft) 50 Amp Cut-Resistant Charging Cable Replacement for CPF50 |
|
|
99-004637-xx |
7 m (23 ft) 50 Amp Cut-Resistant Charging Cable Replacement for CPF50 |
|
|
99-004638-xx |
7 m (23 ft) 50 Amp NACS |
|
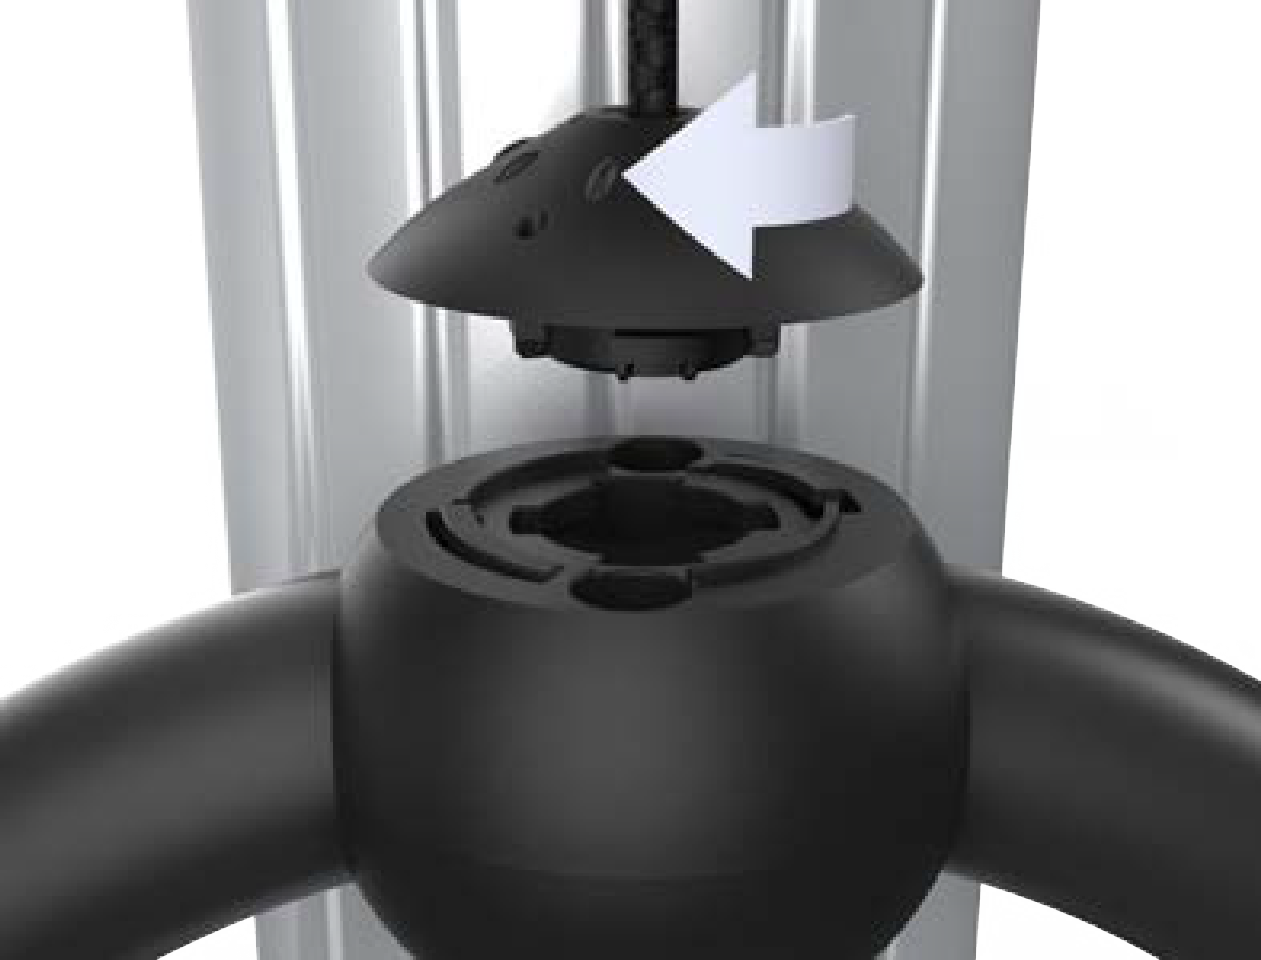
Remove the Knot Bearing Ball from the Charging Cable
(For CPF50 stations equipped with a Cable Management Kit (CMK![]() Cable Management Kit) only)
Cable Management Kit) only)
-
Position the cable clamps at waist height.
-
Insert the CMK
Cable Management Kit service tool (shown below) into the two holes at the top of the knot bearing ball.
-
Turn the knot bearing ball and service tool one-quarter turn counter-clockwise. Once the ball is turned, the cable will separate from the CMK
Cable Management Kit. Do not let go, otherwise the CMK Cable Management Kit rope will retract into the CMK Cable Management Kit and the cable will drop. 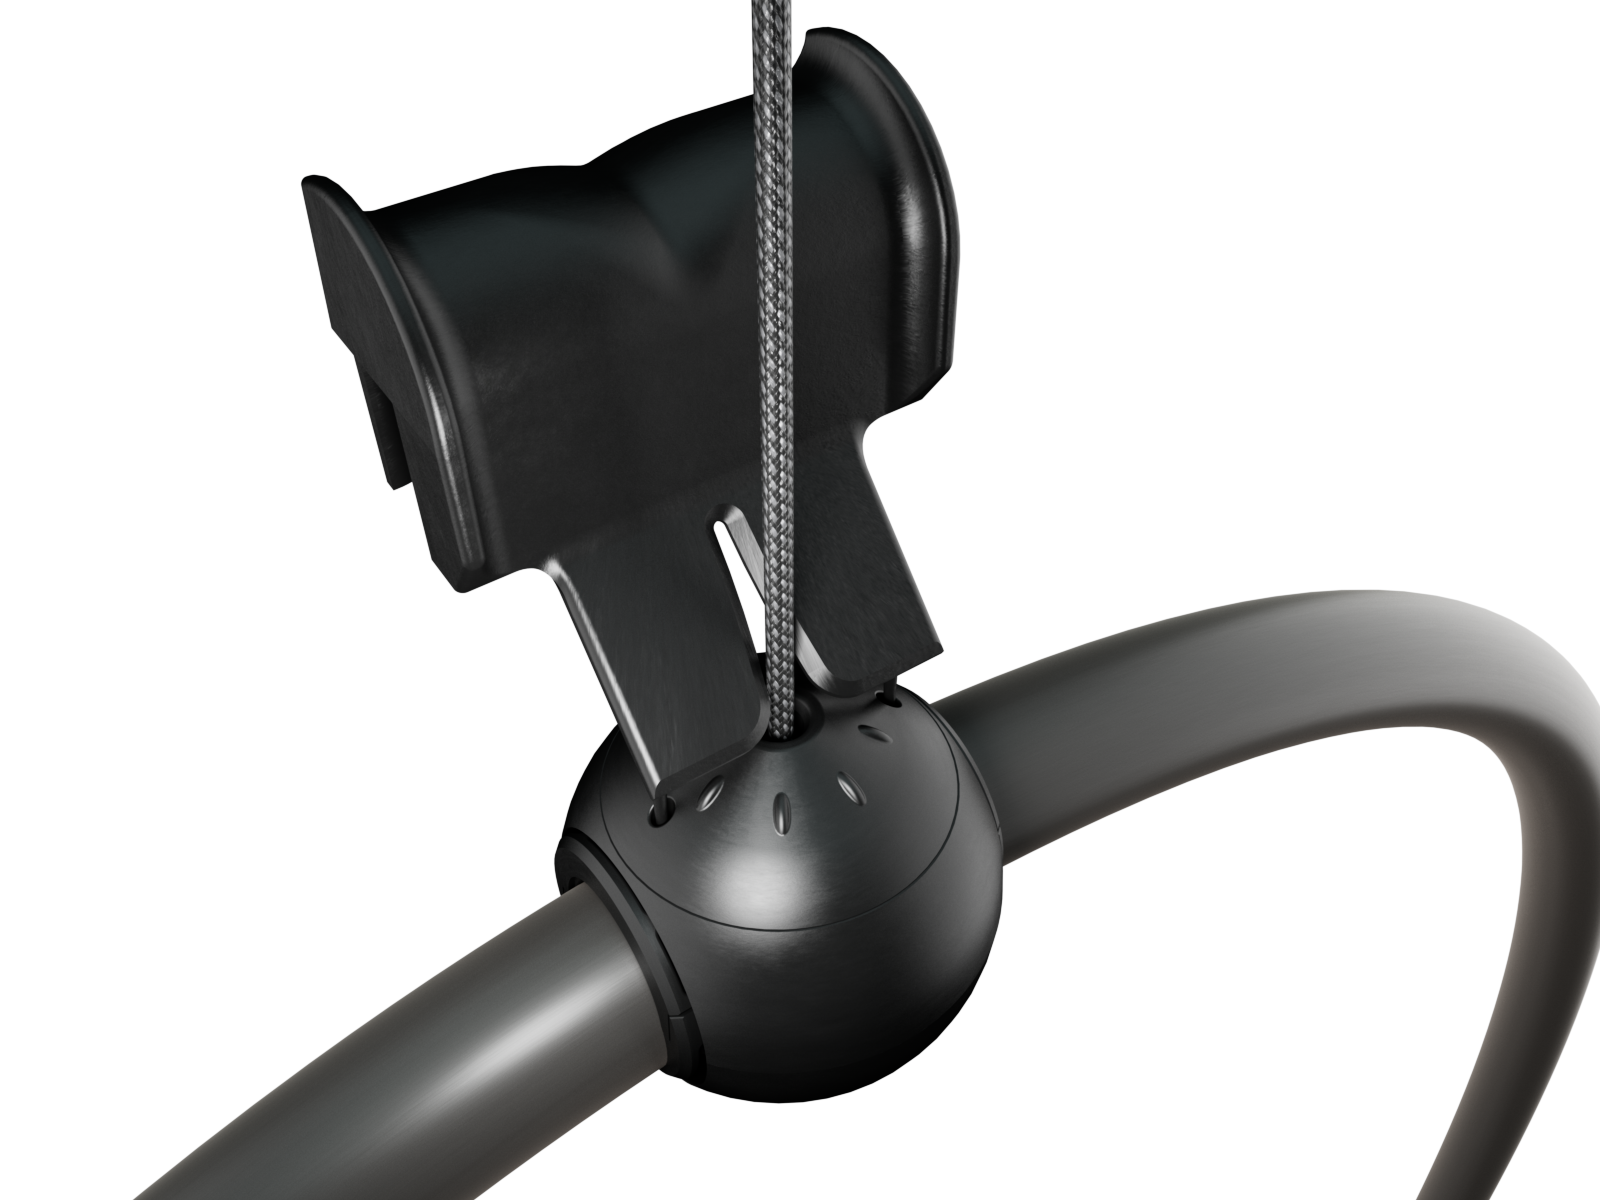
-
Gently guide CMK
Cable Management Kit rope back into the top of the CMK Cable Management Kit.
Remove the Charging Cable
-
Using a T10 Security Torx driver, remove the screws fastening the faceplate to the bottom of the station. Retain the screws for reuse.

-
Lift the faceplate off of the charging station.
-
Use a coin to unlock the wire cover.
To avoid damage to the wire cover, do not use a screwdriver.
-
Lift the wire cover off.
-
Lift the charging cable and slide the cable clip out.
-
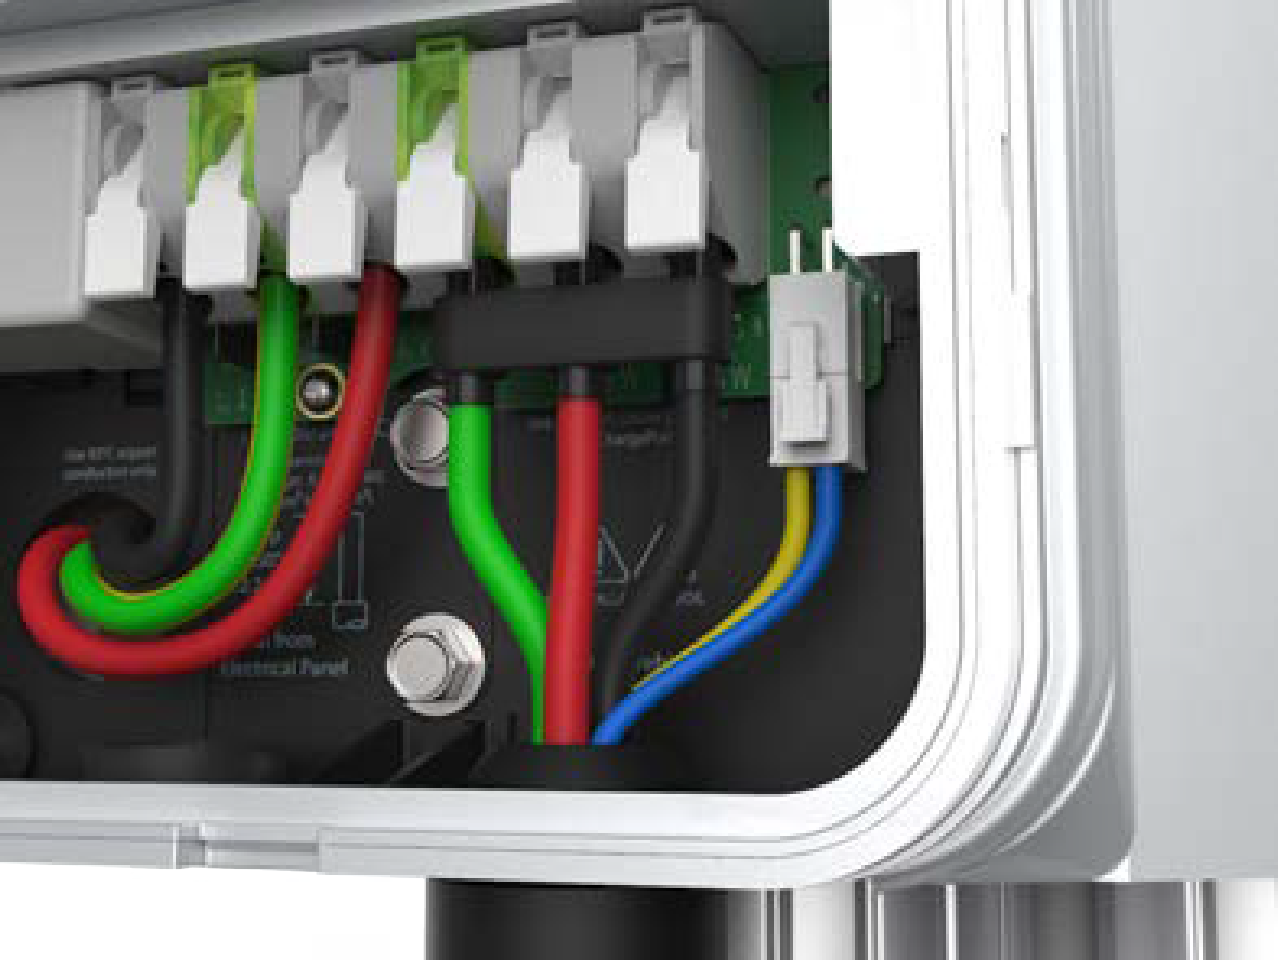
Lift the three levers on the right side of the terminal block.

-
Unplug the 4-pin connector.
-
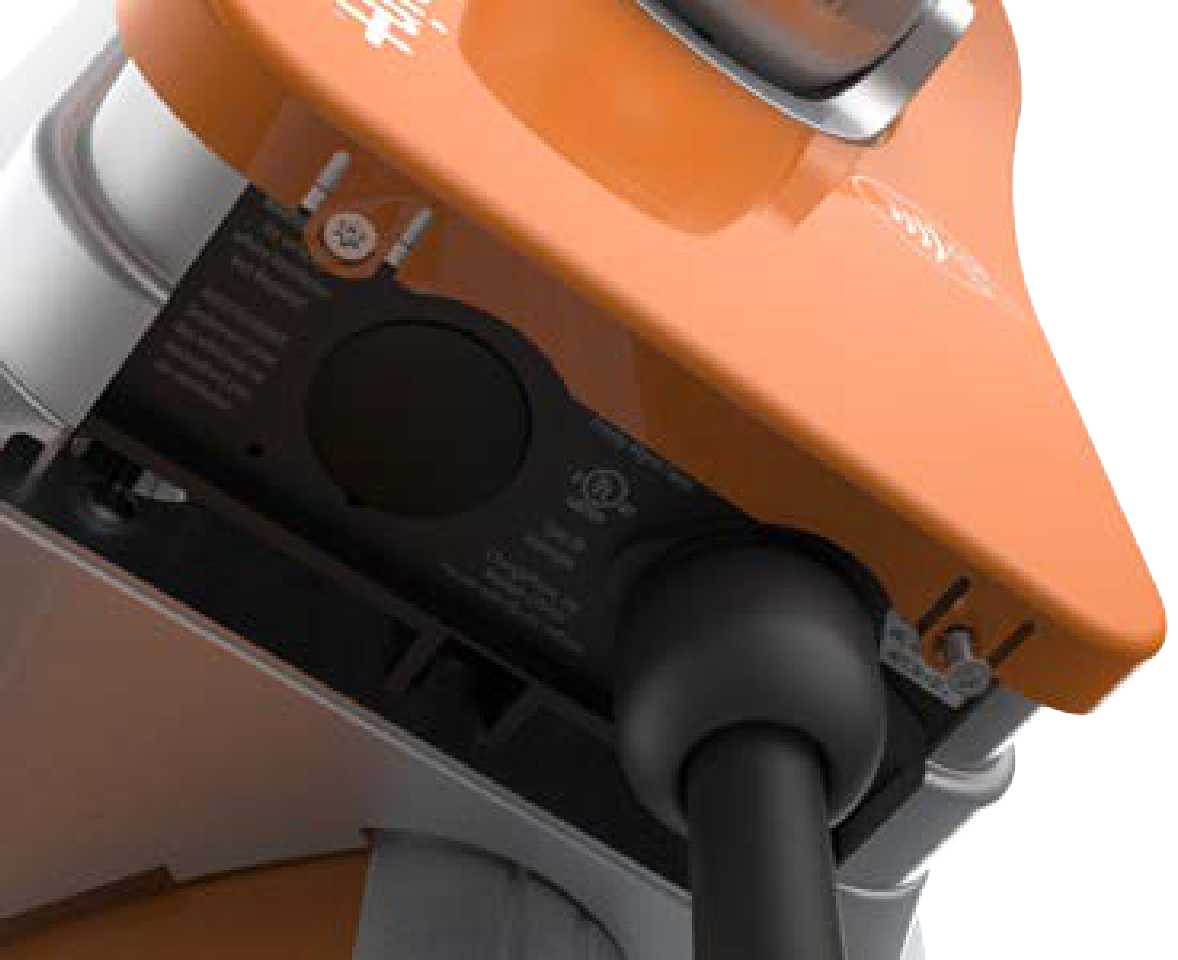
Fold the wires together to slide the charging cable out through the hole at the bottom of the station.
Replace the Charging Cable
-
Unwrap the new charging cable.
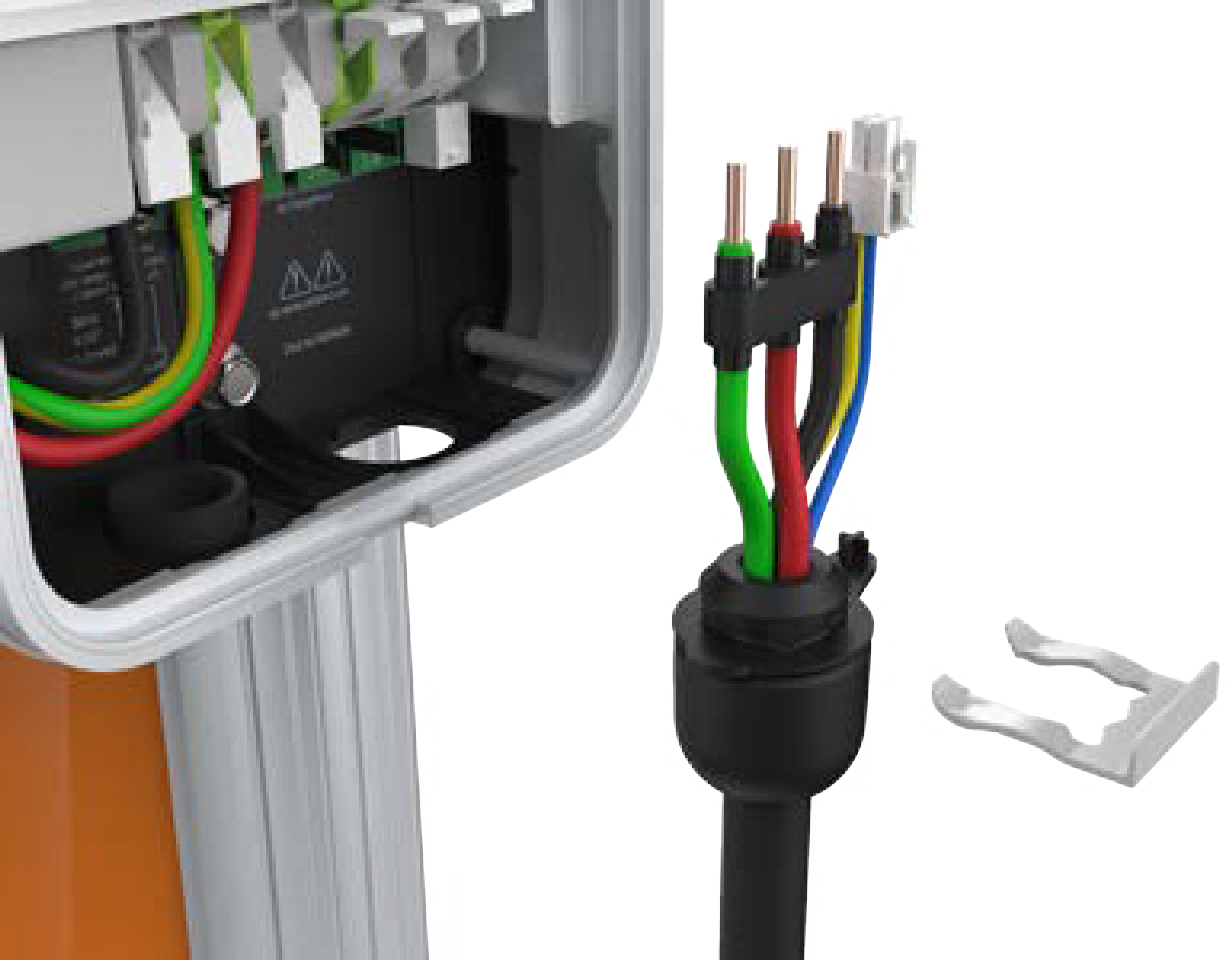
-
Fold the wire ends and insert them into the opening on the lower right side of the station, pushing up until the cable collar is flush against the enclosure.
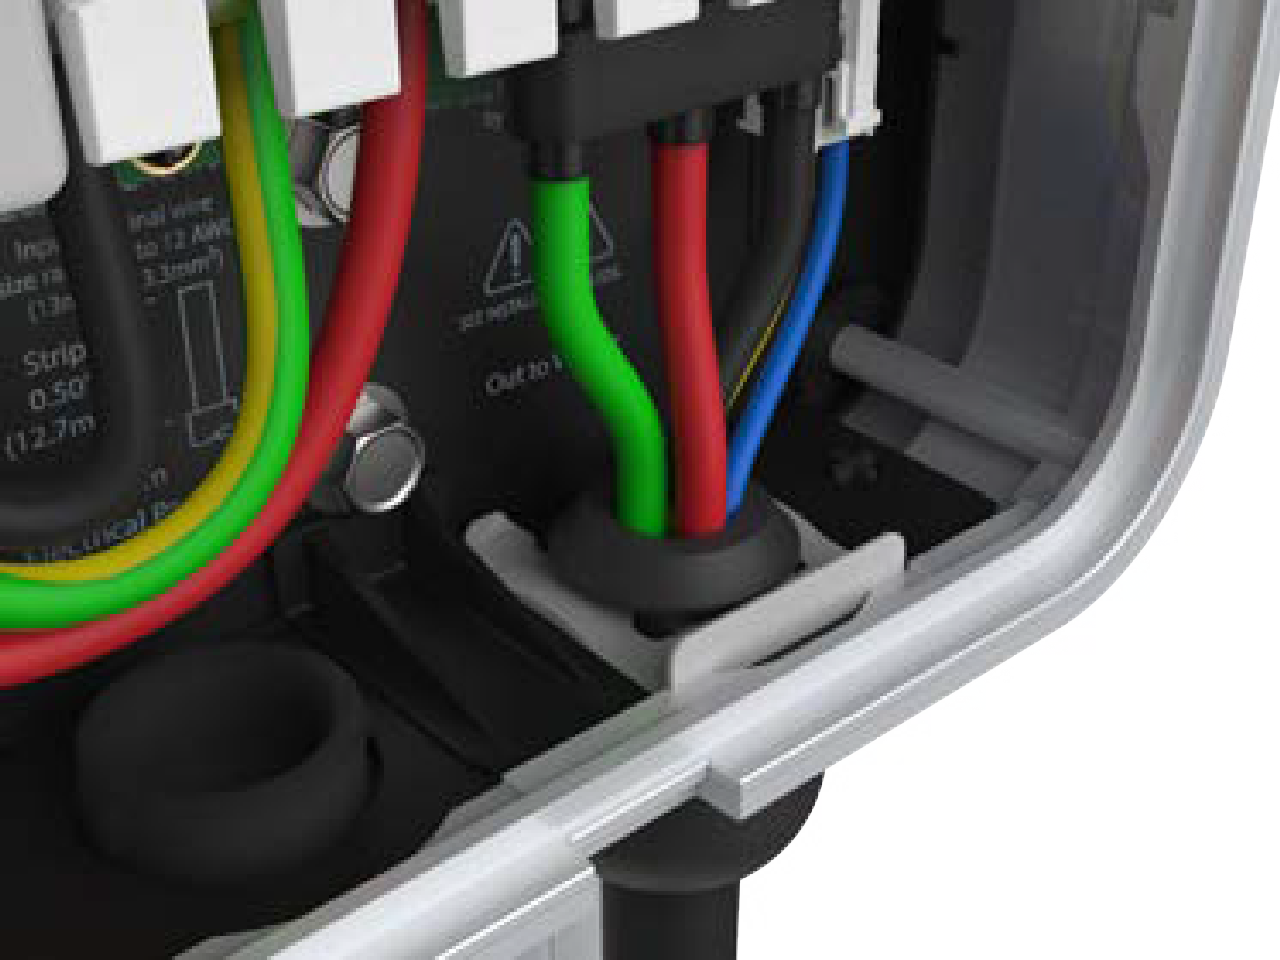
-
Insert the green wire in the third from the right terminal of the output block.
-
Insert the remaining wires into the corresponding connectors on the right side of the terminal block.
-
Push the cables up until the silver conductors are no longer visible.
-
Snap the white levers all the way down on each wire.
The levers snap shut with great force. Keep fingers away from underneath the levers. -
Insert the 4-pin plug into the connector to the right of the output supply wiring.
-
While pushing the cable up, slide the cable clip into the slot until it snaps into place. This secures the cable and provides strain relief.
Attach the Wire Cover and Faceplate
-
Reattach the wire cover over the exposed wiring.

-
Use a coin to lock the wire cover in place.
To avoid damage to the wire cover, do not use a screwdriver. -
Snap the faceplate onto the charging station.
-
Fasten the faceplate to the bottom of the station using the two T10 Security Torx screws that were removed in step 1 of the previous section.
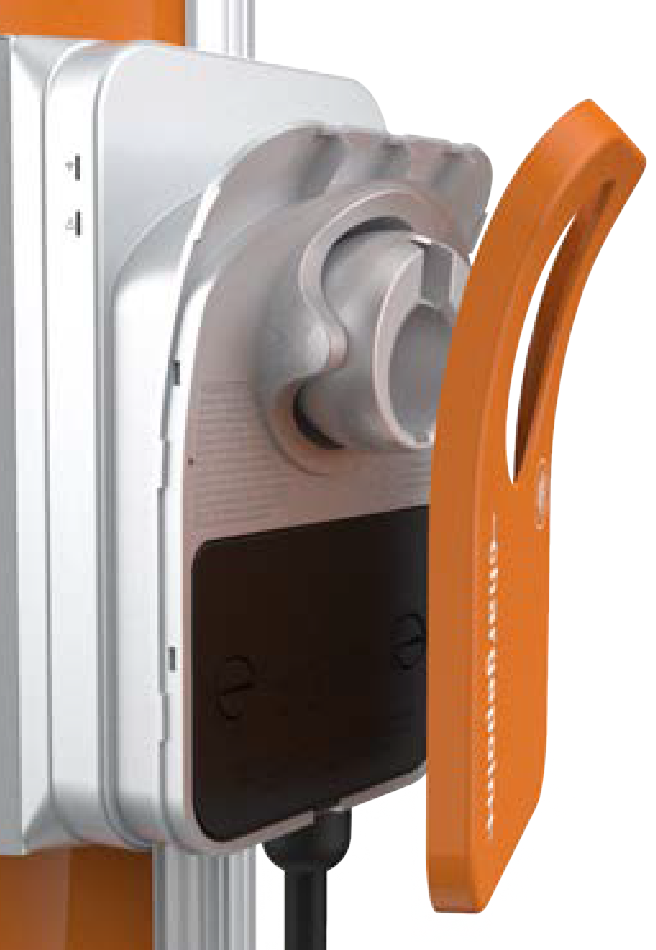
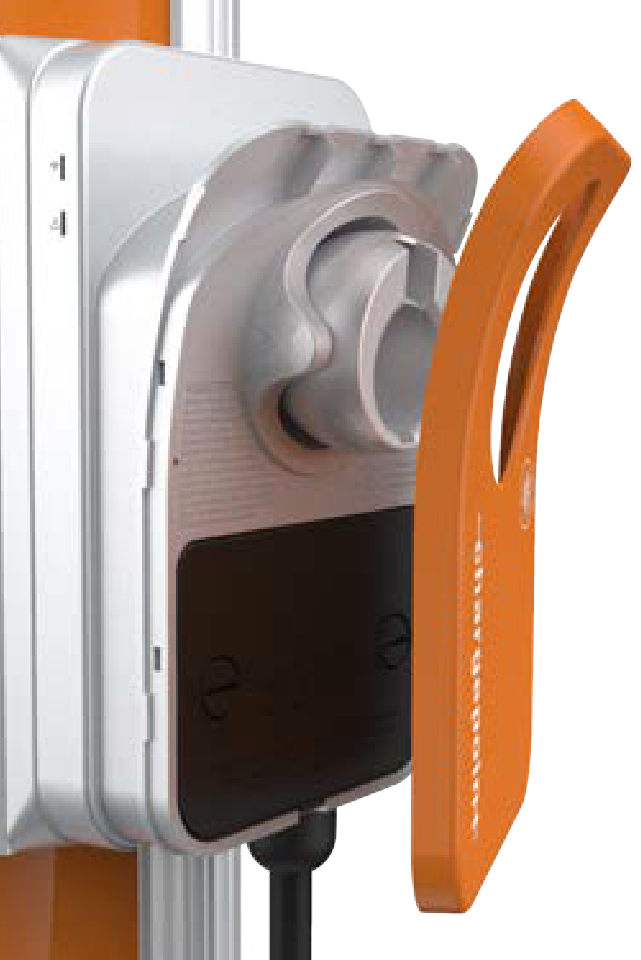
Installing NACS Holster Insert
Stations that use a NACS![]() North American Charging Standard cable can convert the holster to accept NACS
North American Charging Standard cable can convert the holster to accept NACS![]() North American Charging Standard cables by installing the NACS
North American Charging Standard cables by installing the NACS![]() North American Charging Standard holster insert that ships with the NACS
North American Charging Standard holster insert that ships with the NACS![]() North American Charging Standard cable kit.
North American Charging Standard cable kit.
-
Insert the holster insert with the kit into the holster. The insert should click when fully secured.

-
Insert the cable into the holster and ensure it does not fall out.
Prepare the Charging Cable for Use
Stations Without a CMK
-
Inspect the charging cable. If the cable is cut-resistant, a CMK
Cable Management Kit ball is attached on it.You can remove the CMK Cable Management Kit ball or leave it in place.xxkeep it attached. -
To remove the CMK
Cable Management Kit ball from the charging cable, do the following steps:-
Using a Phillips screwdriver, remove the screws (x2) that hold the top to the bottom of the CMK
Cable Management Kit ball. -
Remove the top and bottom halves of the CMK
Cable Management Kit ball, along with the adhesive tape.
You can store the CMK Cable Management Kit ball for future use with a CMK Cable Management Kit charging station. -
-
Extend the charging cable to its full length to remove any kinks or twists.
-
Drape the charging cable over the top of the charging station.
-
Insert the connector in its holster.
Stations With a CMK
-
Extend the charging cable to its full length to remove any kinks or twists.
-
Align the CMK
Cable Management Kit rope to its corresponding mating feature on the ball of cable on each rope to its corresponding mating feature on the cable clamp. -
Turn the knot bearing ball clockwise approximately one-quarter turn. Push down gently while turning the knot bearing ball.
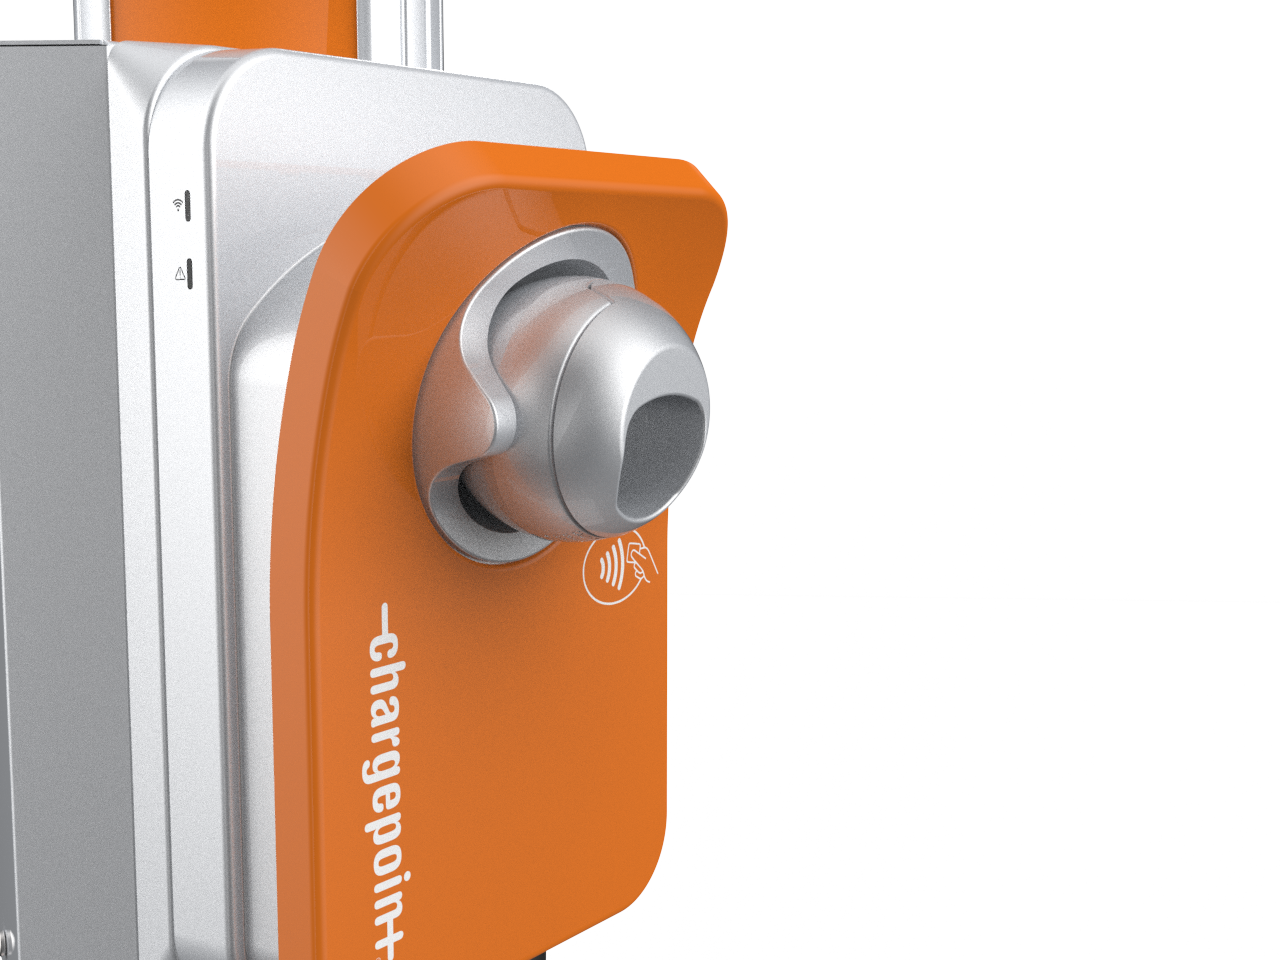
If you are installing a single station CPF50, attach the charging cable on the left side of the station (relative to driver facing the station) to minimize interference with the RFID
Radio Frequency IDentification reader.
Restore Power
-
Restore power to the station at the circuit breaker.
-
Verify that the charging cable now functions by starting a test session:
-
Initiate a charging session.
-
Plug the handle into a vehicle or a vehicle emulator (if available).
-
Return the handle to the holster.
-
