Replace the Cable Management Kit
This section describes the procedure to replace the Cable Management Kit (CMK Cable Management Kit).
Before you Begin
Complete the following steps to remove the charging cable:
-
Turn off power to the charging station at the circuit breaker.
-
Unplug the power cord, if present.
RISK OF SHOCK. Before performing any procedure, you must disconnect the power to the charging station at the service panel. Follow local code to de-energize the applicable circuit and lock out/tag out the disconnect before proceeding. Use a multimeter to test that power is off. Keep power off for the circuit until all cover panels are correctly reinstalled and the work is complete. FAILURE TO FOLLOW THESE INSTRUCTIONS CAN RESULT IN SERIOUS INJURY, LOSS OF LIFE, AND/OR PROPERTY DAMAGE.Do not plug the new power cord in before completing the replacement procedure.

Required Tools and Materials
-
CMK
Cable Management Kit service tool -
Needle Nose Pliers
-
T-25 L-Wrench
-
#2 Phillips screwdriver
-
7/16 inch wrench
-
Step ladder
-
Gloves
Remove the Cable Clamps
To remove the cable clamps, follow the steps below:
-
Disconnect the cable. Remove the cable clamp by turning the knot bearing anticlockwise approximately one-quarter turn. Push down gently while turning the knot bearing.
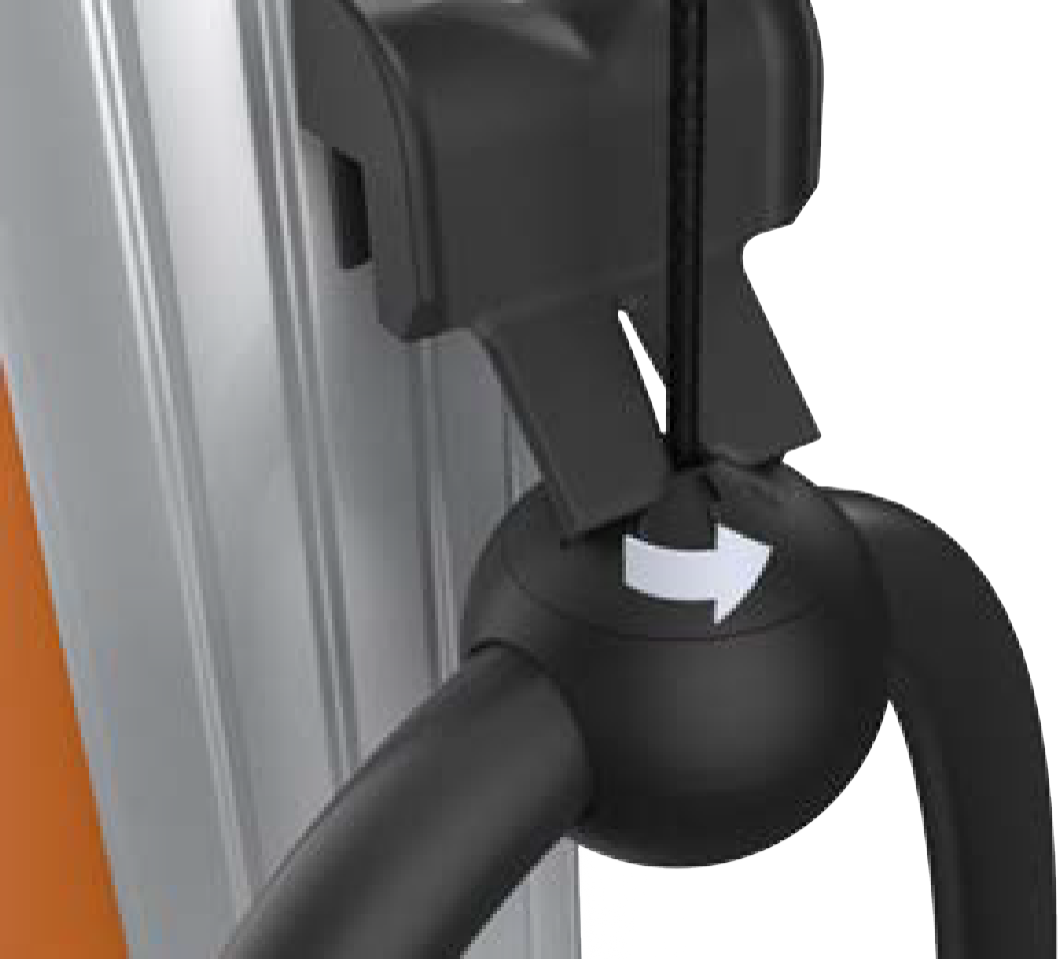
-
Remove the knot bearing on each rope to its corresponding mating feature on the cable clamp.
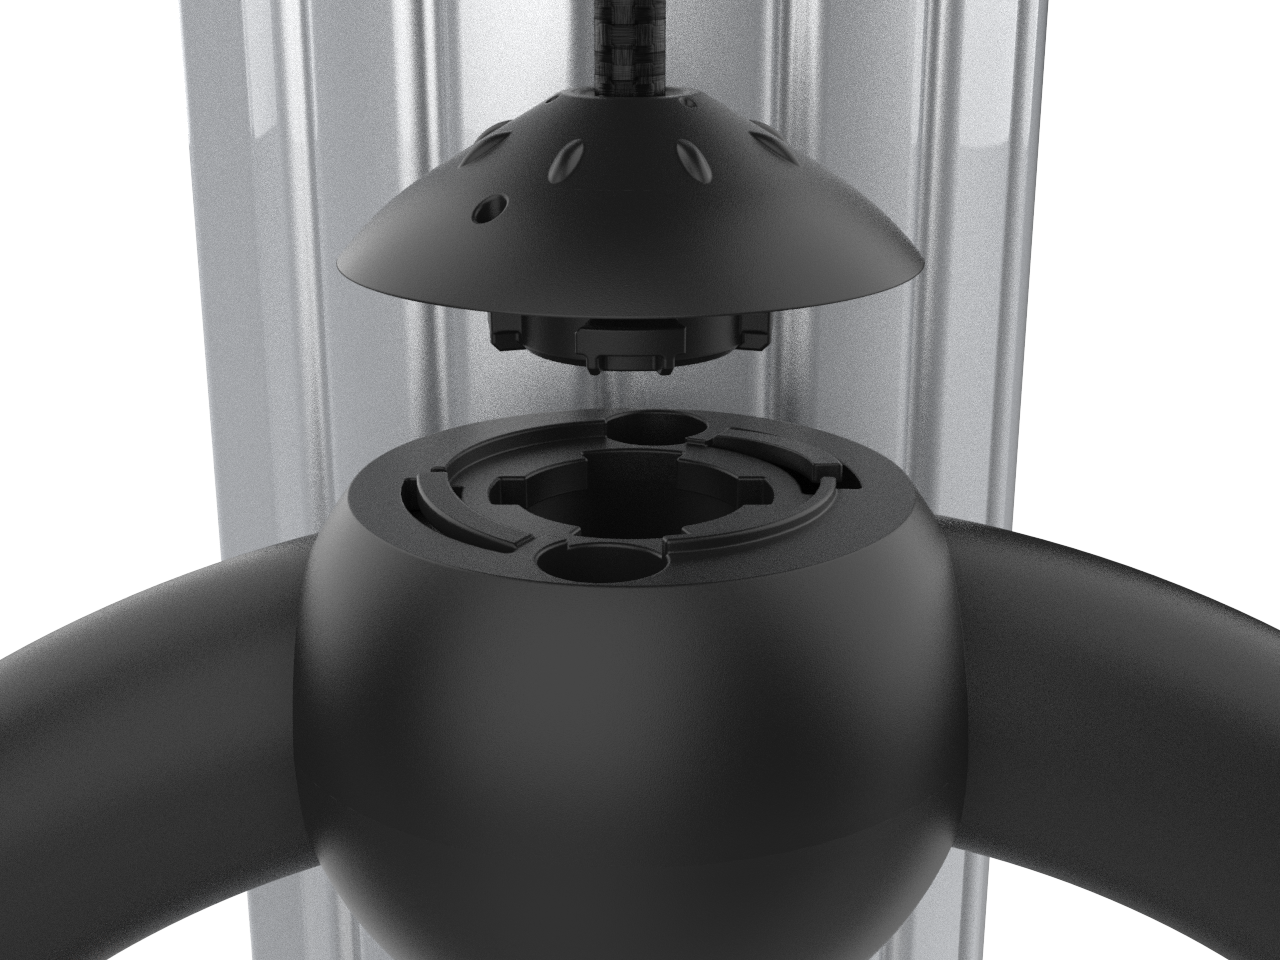
-
Remove the cable clamp(s) by removing its screws using a #2 Phillips screwdriver.
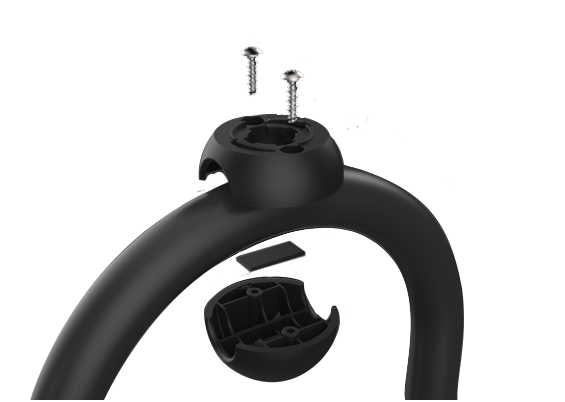
Remove the Head Assembly
To remove the existing head assembly, follow the steps below:
-
With the station powered on, scan your ChargePoint card, then remove the charging plug(s) from the holster(s).
You must scan an activated ChargePoint card to unlock the holster(s) and remove the charging plug(s). -
Disconnect the station’s power at the electrical panel.
-
Use needle nose pliers to remove the holster screw plugs.
Cover the screws using the two new plugs supplied with the kit.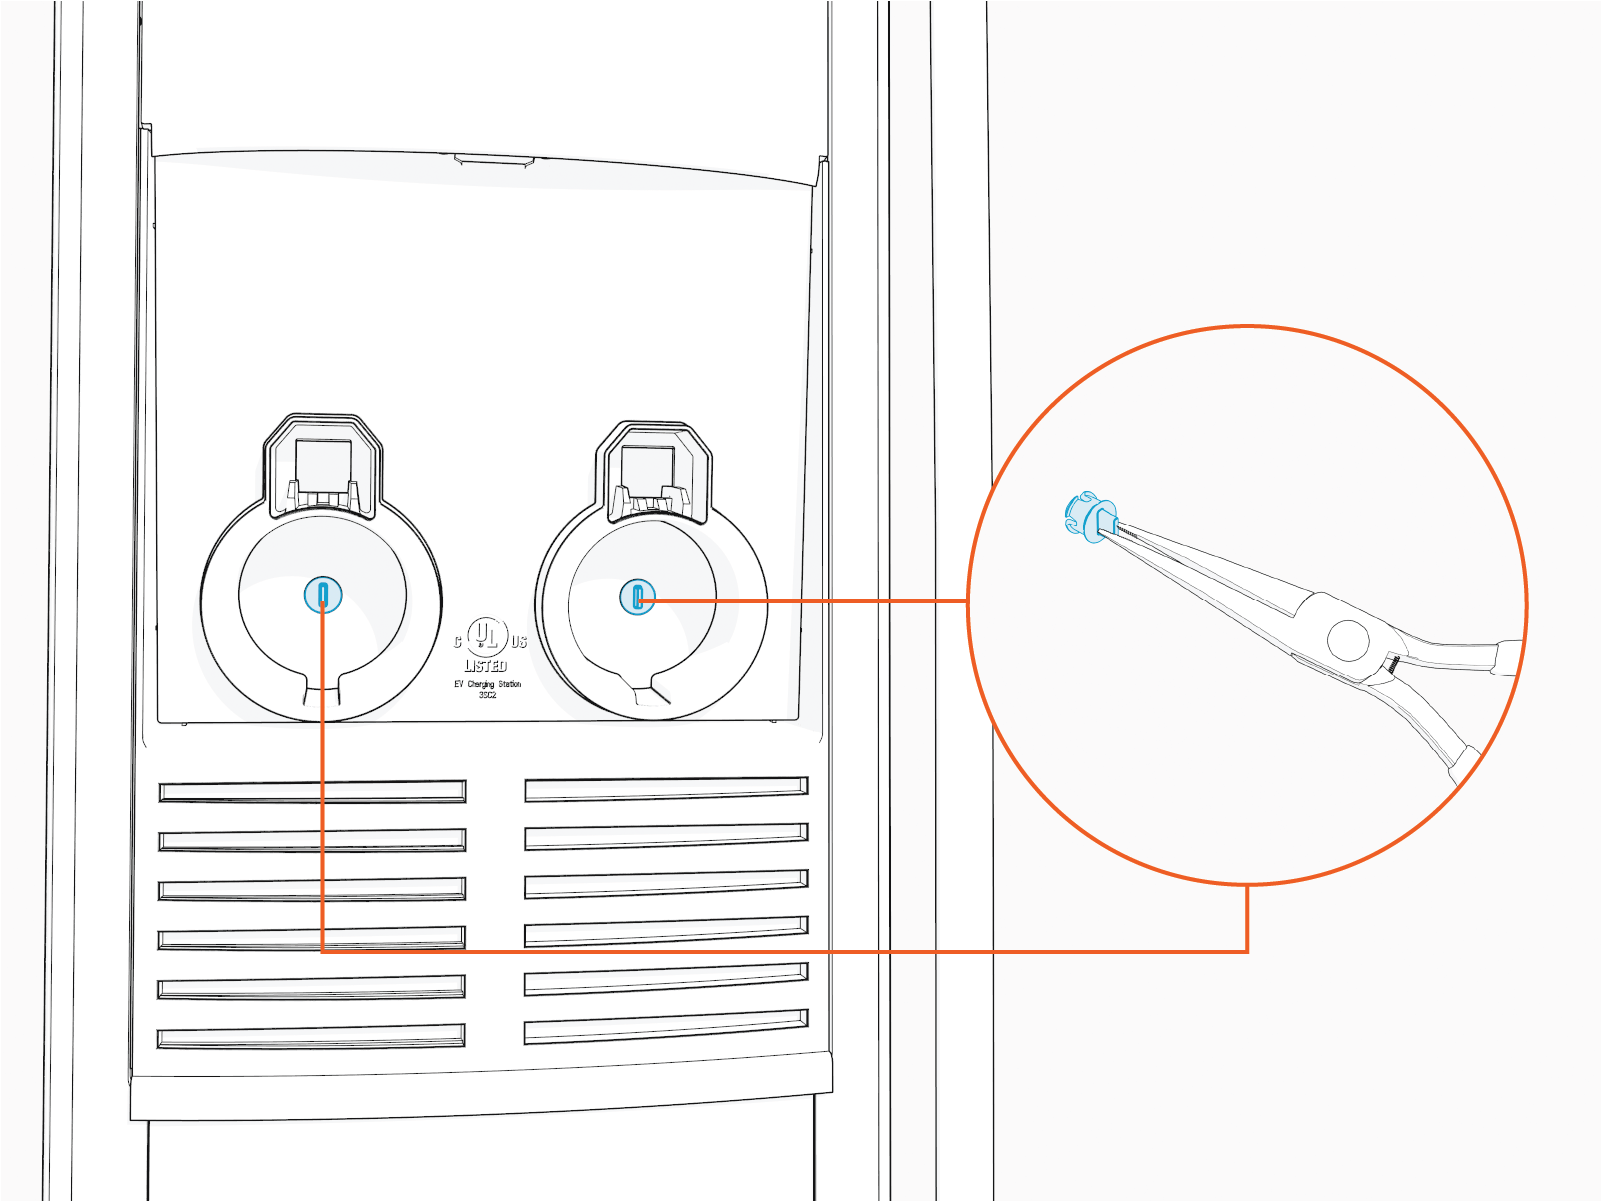
-
Use the L-wrench to loosen, but not remove, the security Torx screws.
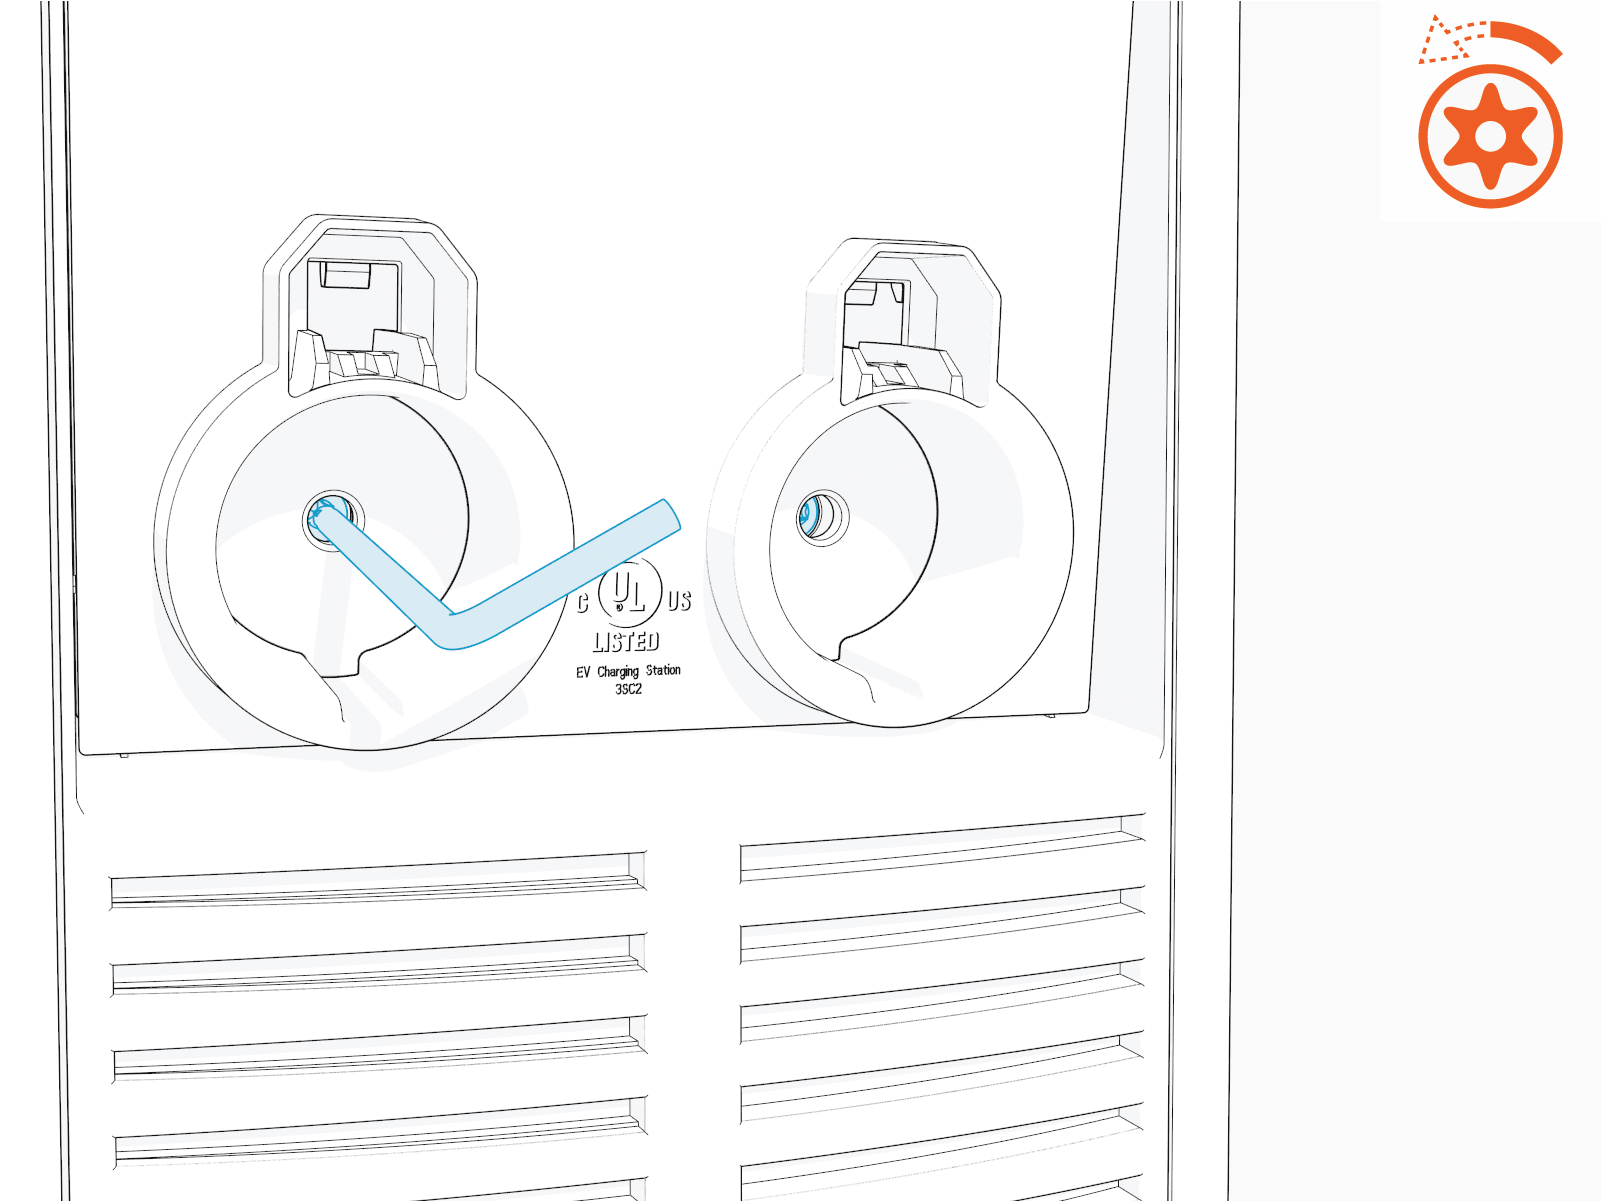 Torque the screws to approximately 25 to 30 in-lbs.
 -
Raise the head assembly.

Remove the Top Cap
To remove the top cap, follow the steps below:
-
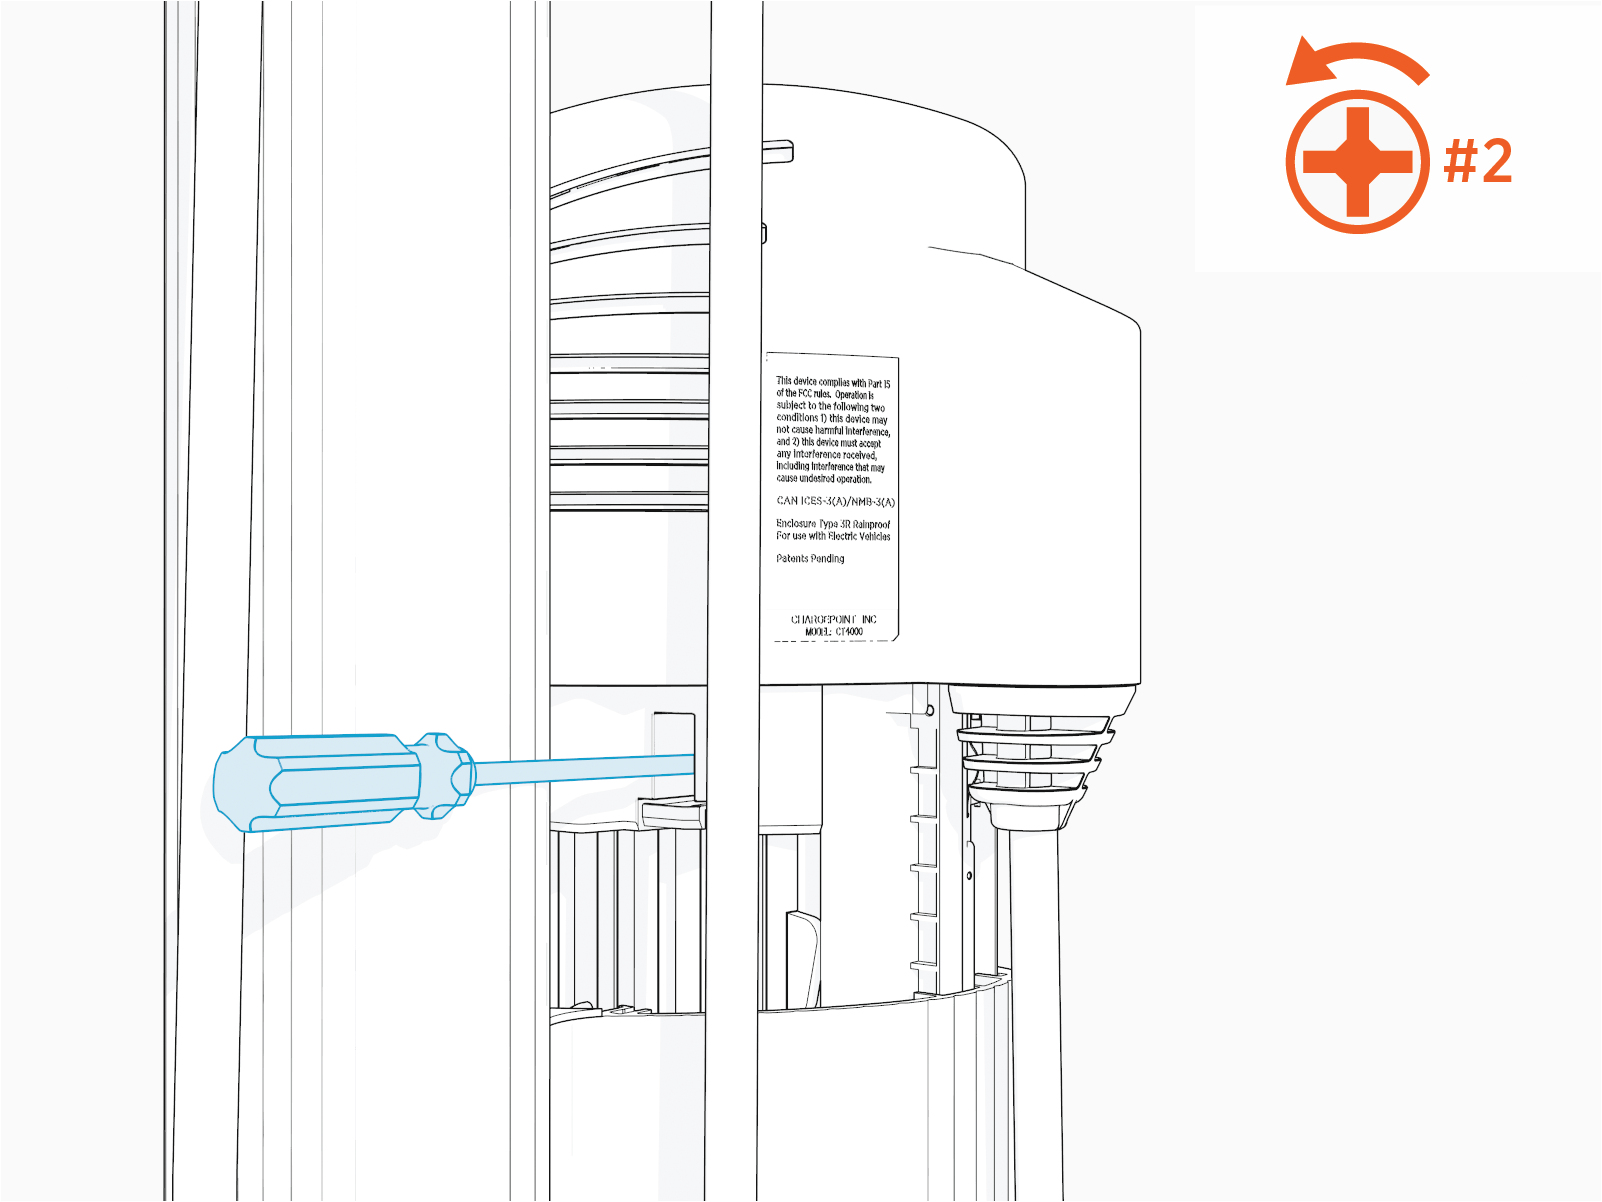
If screws are present, use the #2 Phillips screwdriver to remove (from back of the top cap).
-
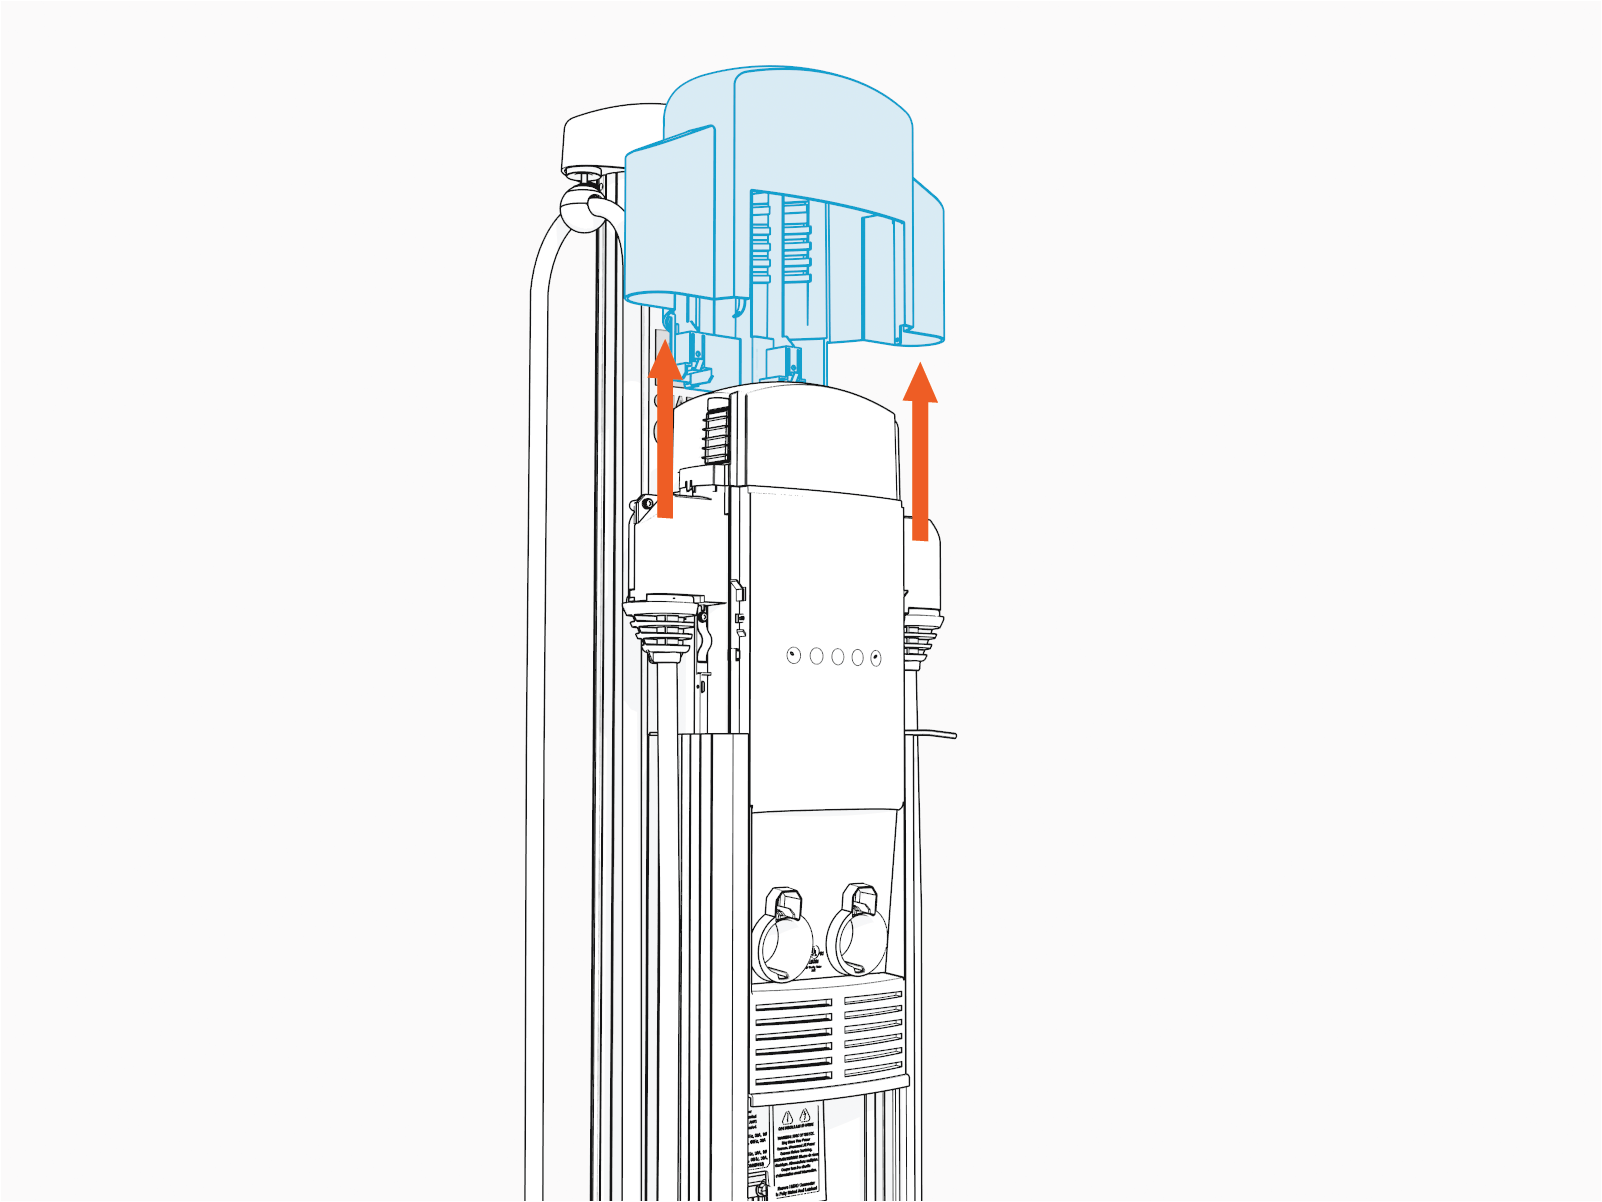
Remove the top cap.
Remove the Existing CMK
-
Loosen the screws using a Phillips screwdriver.
-
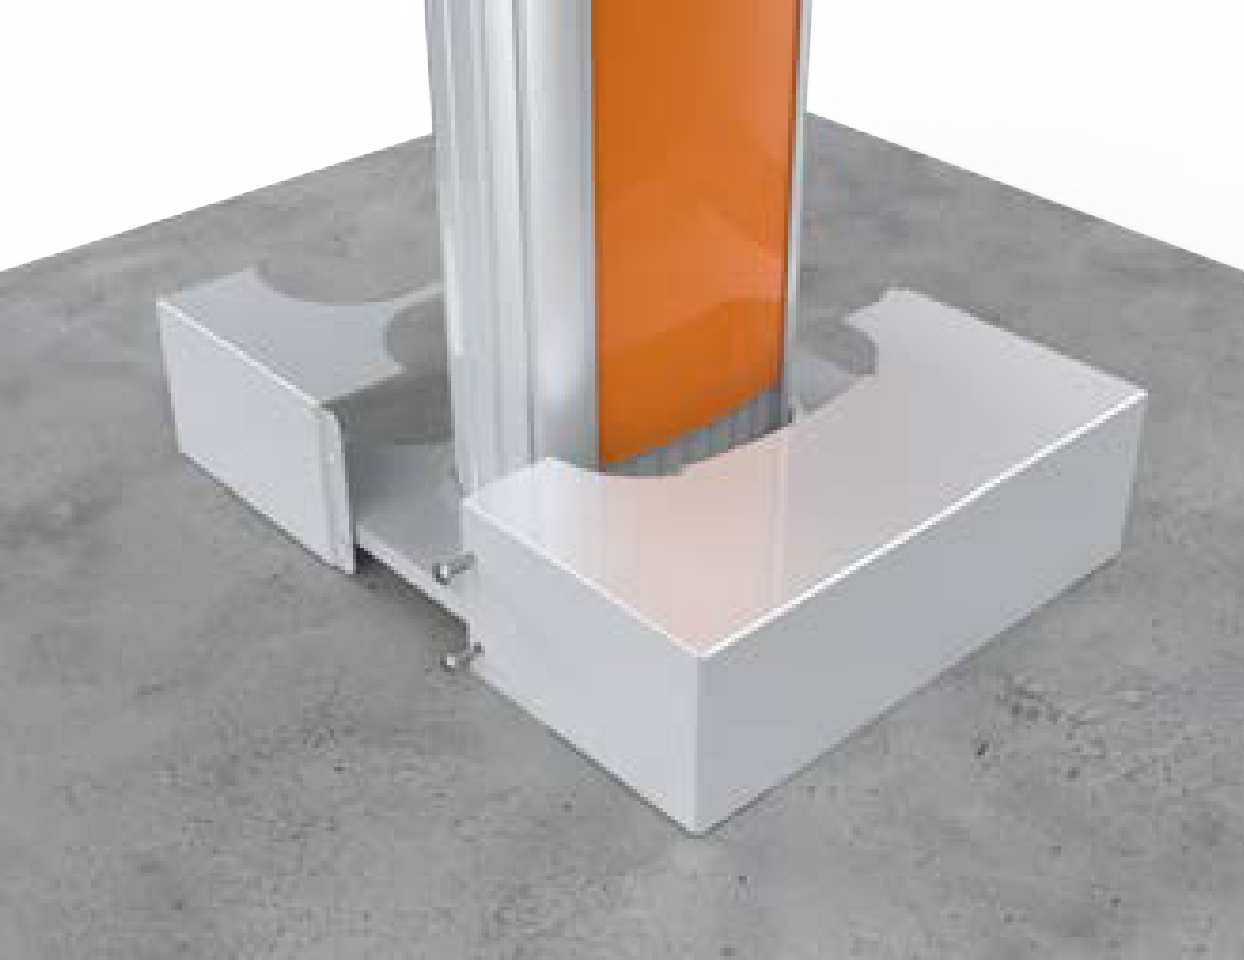
Remove the four 3/8 inch screws, two into each side of the pedestal cover.
-
Remove the two-piece pedestal cover from the bottom of the pedestal with the cutout for the CMK
Cable Management Kit. -
Support the CMK
Cable Management Kit with one hand while removing the screws. Save the screws for later.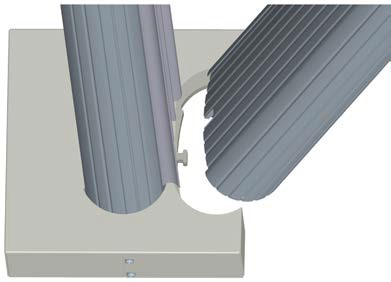
-
Remove the CMK
Cable Management Kit by lifting it up to disengage it from the bottom support nut, then moving it away from the bollard.
Replace the rope clips from the CMK Top Cap
-
Using the T-25 L-wrench, loosen the set screws on each side of the top cap.
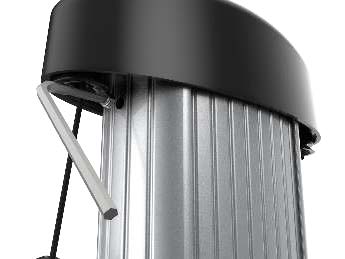
-
Lift the top cap up and pull down until the weights are nearly flush with the top of the housing. Pull the center rope until the weights are in position.
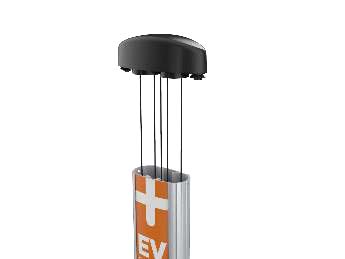
-
Use the CMK
Cable Management Kit service tool (or one Quick Grip clamp) to hold the center rope in place.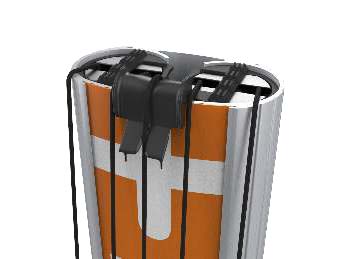
-
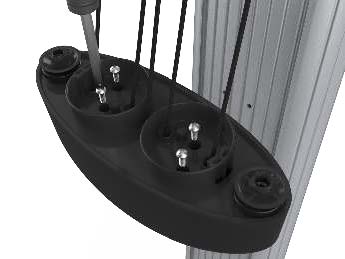
Use a Phillips head screwdriver to unscrew the four screws holding the helmet on the top cap assembly.
-
Place the four screws in the magnetic bowl.
-
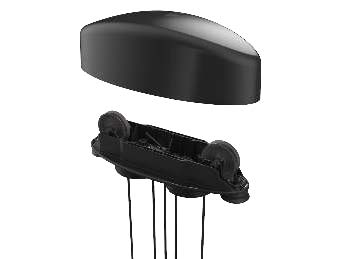
Remove the top cap hat.
-
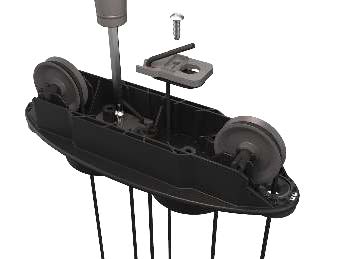
One side at a time, remove the screws used to hold the clip and remove the clip.
-
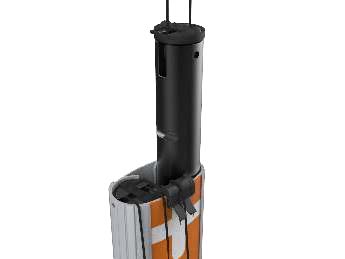
Gently lift one weight out of the housing.
-
Replace the weight in the housing.
-
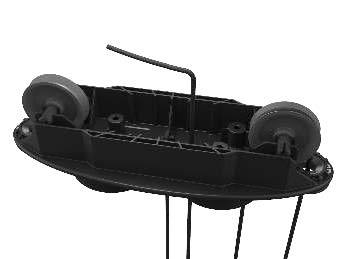
Lace the end of the rope through the hole where the screw holding the clip was removed.
-
Turn the top cap over and pull 100-150 mm (4-6 in) of rope through the hole.
-
Tie a overhand (thumb) knot in the tail about 55-75 mm (2-3 in) from the end of the rope. Use the opposite hole as a guide for the needed length.
: Do not cut the tail of the rope. Allow the tail to remain in place. The tail must be at least 55 mm (2 in) long.
-
Pull the knot tight by hand.
-
Replace the top cap using the four screws.
-
Tighten the screws in a diagonal pattern.
-
Holding the top cap tightly, release the center rope from the CMK
Cable Management Kit Service Tool or Quick Grip clamp. -
Lower the top cap gently, equalizing the tension on the ropes as you go.
-
Replace the set screws to lock the top cap into position. Tighten gently.
Install the Bracket and CMK
To mount a bracket and CMK Cable Management Kit, follow these steps:
Prepare the CMK
-
Position the CMK
Cable Management Kit packaging in a way that the bottom is located near where the charging station will be installed.Do not unwrap the ropes. -
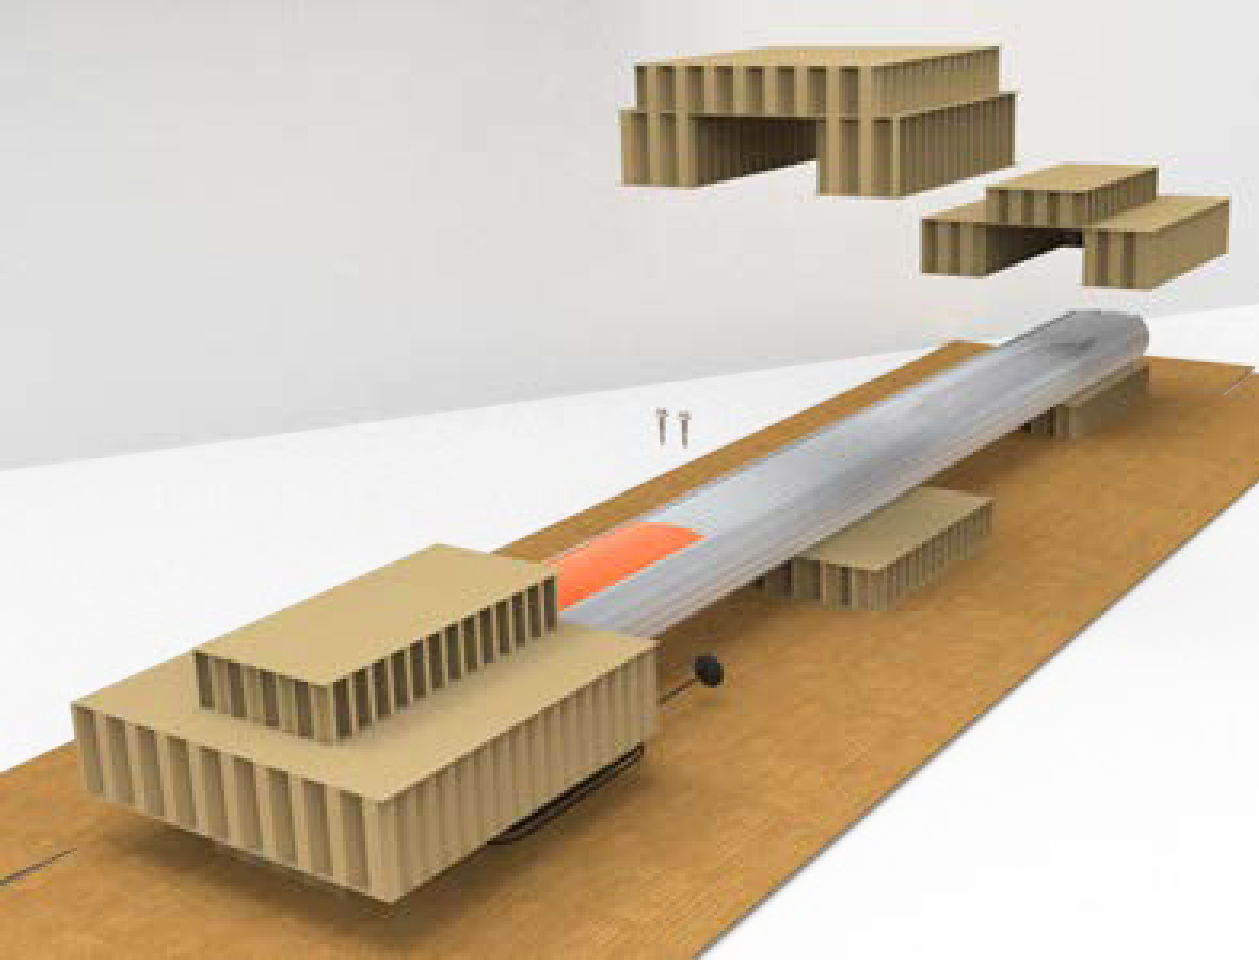
Remove and discard the two shipping screws from the front of the CMK
Cable Management Kit.When you remove the shipping screws, the counterweights are free to move in either direction. To prevent damage or injury, always carry the assembly with the top end higher than the bottom end. -
Remove the cardboard packaging.
Mount the Bracket and CMK
-
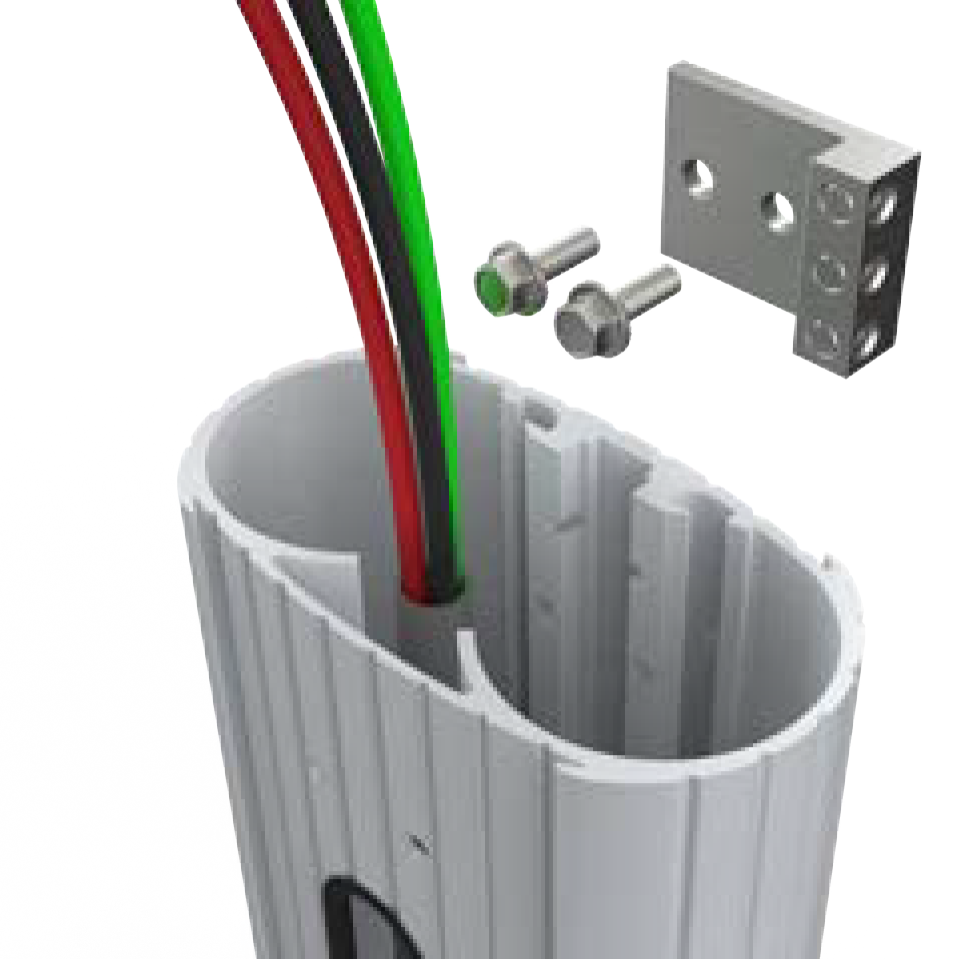
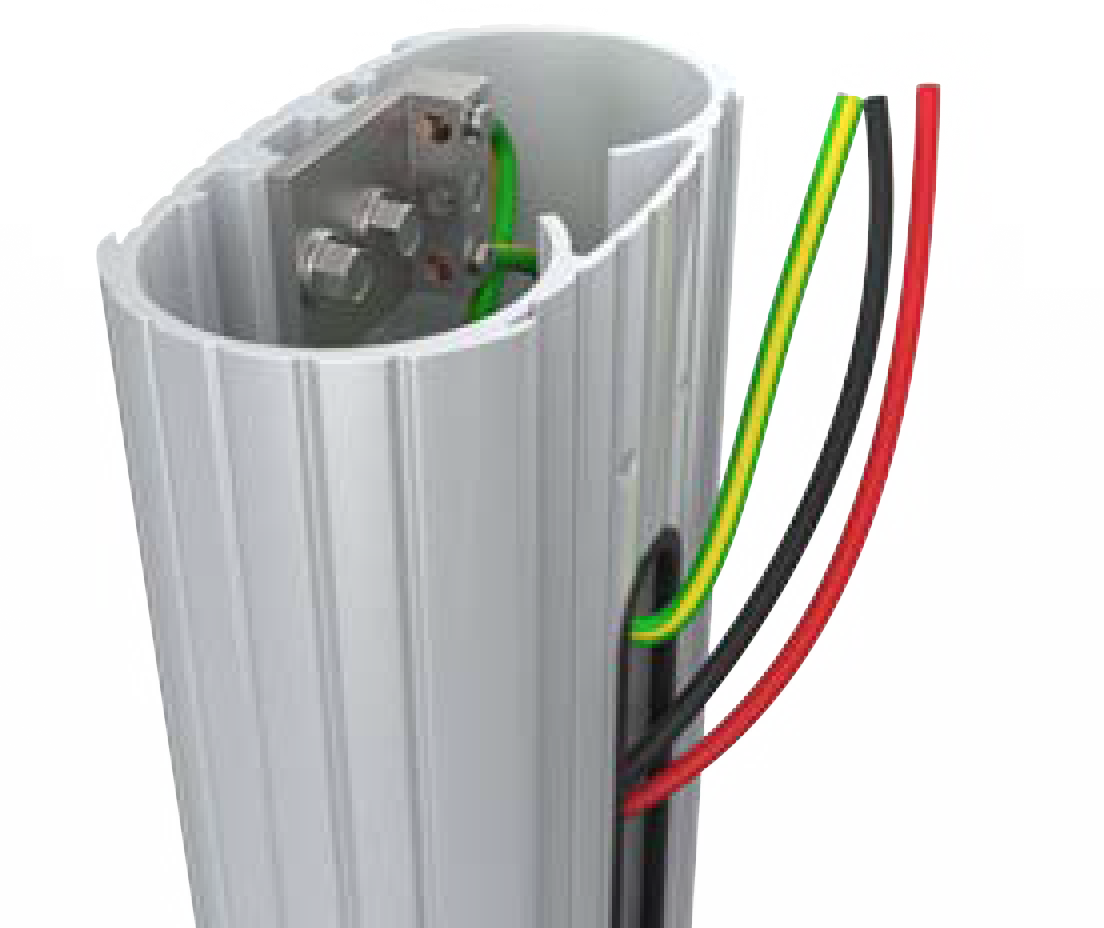
Use a 7/16 inch wrench and remove the ground lug from the pedestal. Save the screws to re-install later.
-
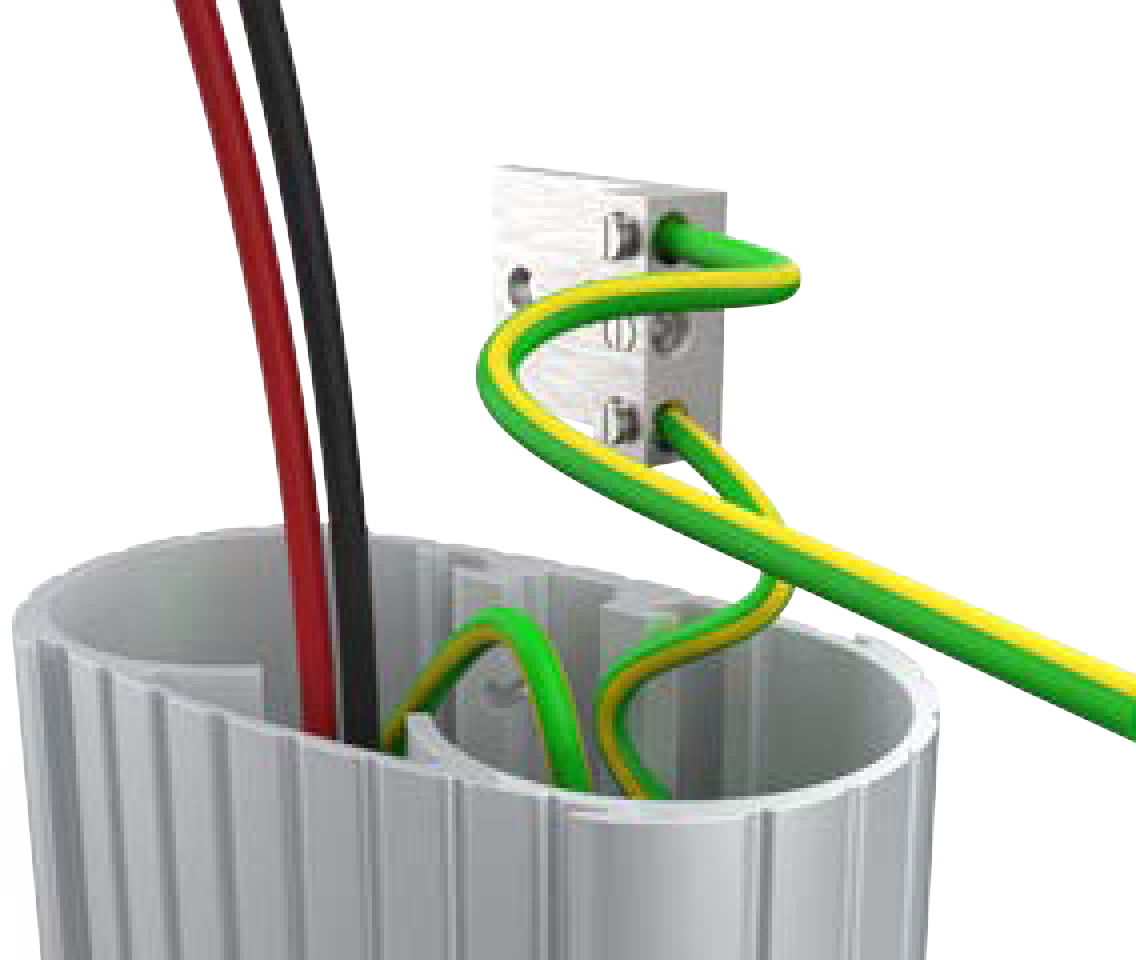
Connect the ground wire from the service wiring to the ground lug.
-
Run the ground wire from the ground lug through the wiring opening at the front of the pedestal.
-
Use the 7/16 inch wrench and re-install the ground lug to the pedestal with the two screws you removed.
-
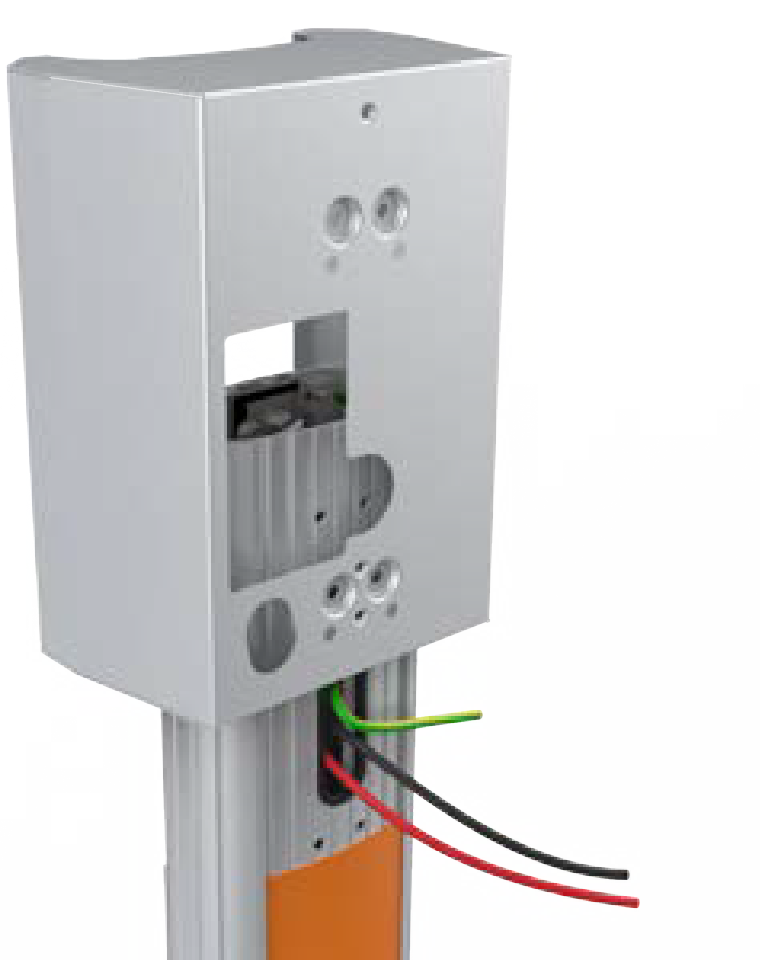
Slide the bracket over the pedestal while guiding the remaining service wiring through the opening at the front of the pedestal.
The bracket must slide over the service wiring. Lay the wiring as flat as possible against the pedestal to prevent damage. -
Align the two holes at the top and the two holes at the bottom of the bracket with the corresponding holes on the pedestal.
-
Insert four screws (4 inches) and four lock washers (#10) through the bracket at the pedestal.
The screws are loose until they are fastened to the CMK Cable Management Kit later.
-
Route the service wiring through the wiring hole at the front of the bracket.
-
Slowly lift the CMK
Cable Management Kit into position with the slot at the bottom of the CMK Cable Management Kit sliding onto the knob at the bottom of the pedestal.The ropes will rise as the weights inside the CMK Cable Management Kit lower. Guide the ropes to the top as you slowly lift the CMK Cable Management Kit.
-
Hold the CMK
Cable Management Kit against the back of the pedestal and align the four screws coming through the bracket and pedestal with the corresponding holes in the CMK Cable Management Kit.The spacer on the pedestal must slide into the ridges on the CMK Cable Management Kit.
-
Hold the bracket and CMK
Cable Management Kit in place and tighten the four screws with the 7/16 inch socket.
RE-INSTALL THE HEAD ASSEMBLY AND CABLE CLAMPS.
Prepare the Charging Cable for Use
To prepare the charging cable for use, complete the following steps:
-
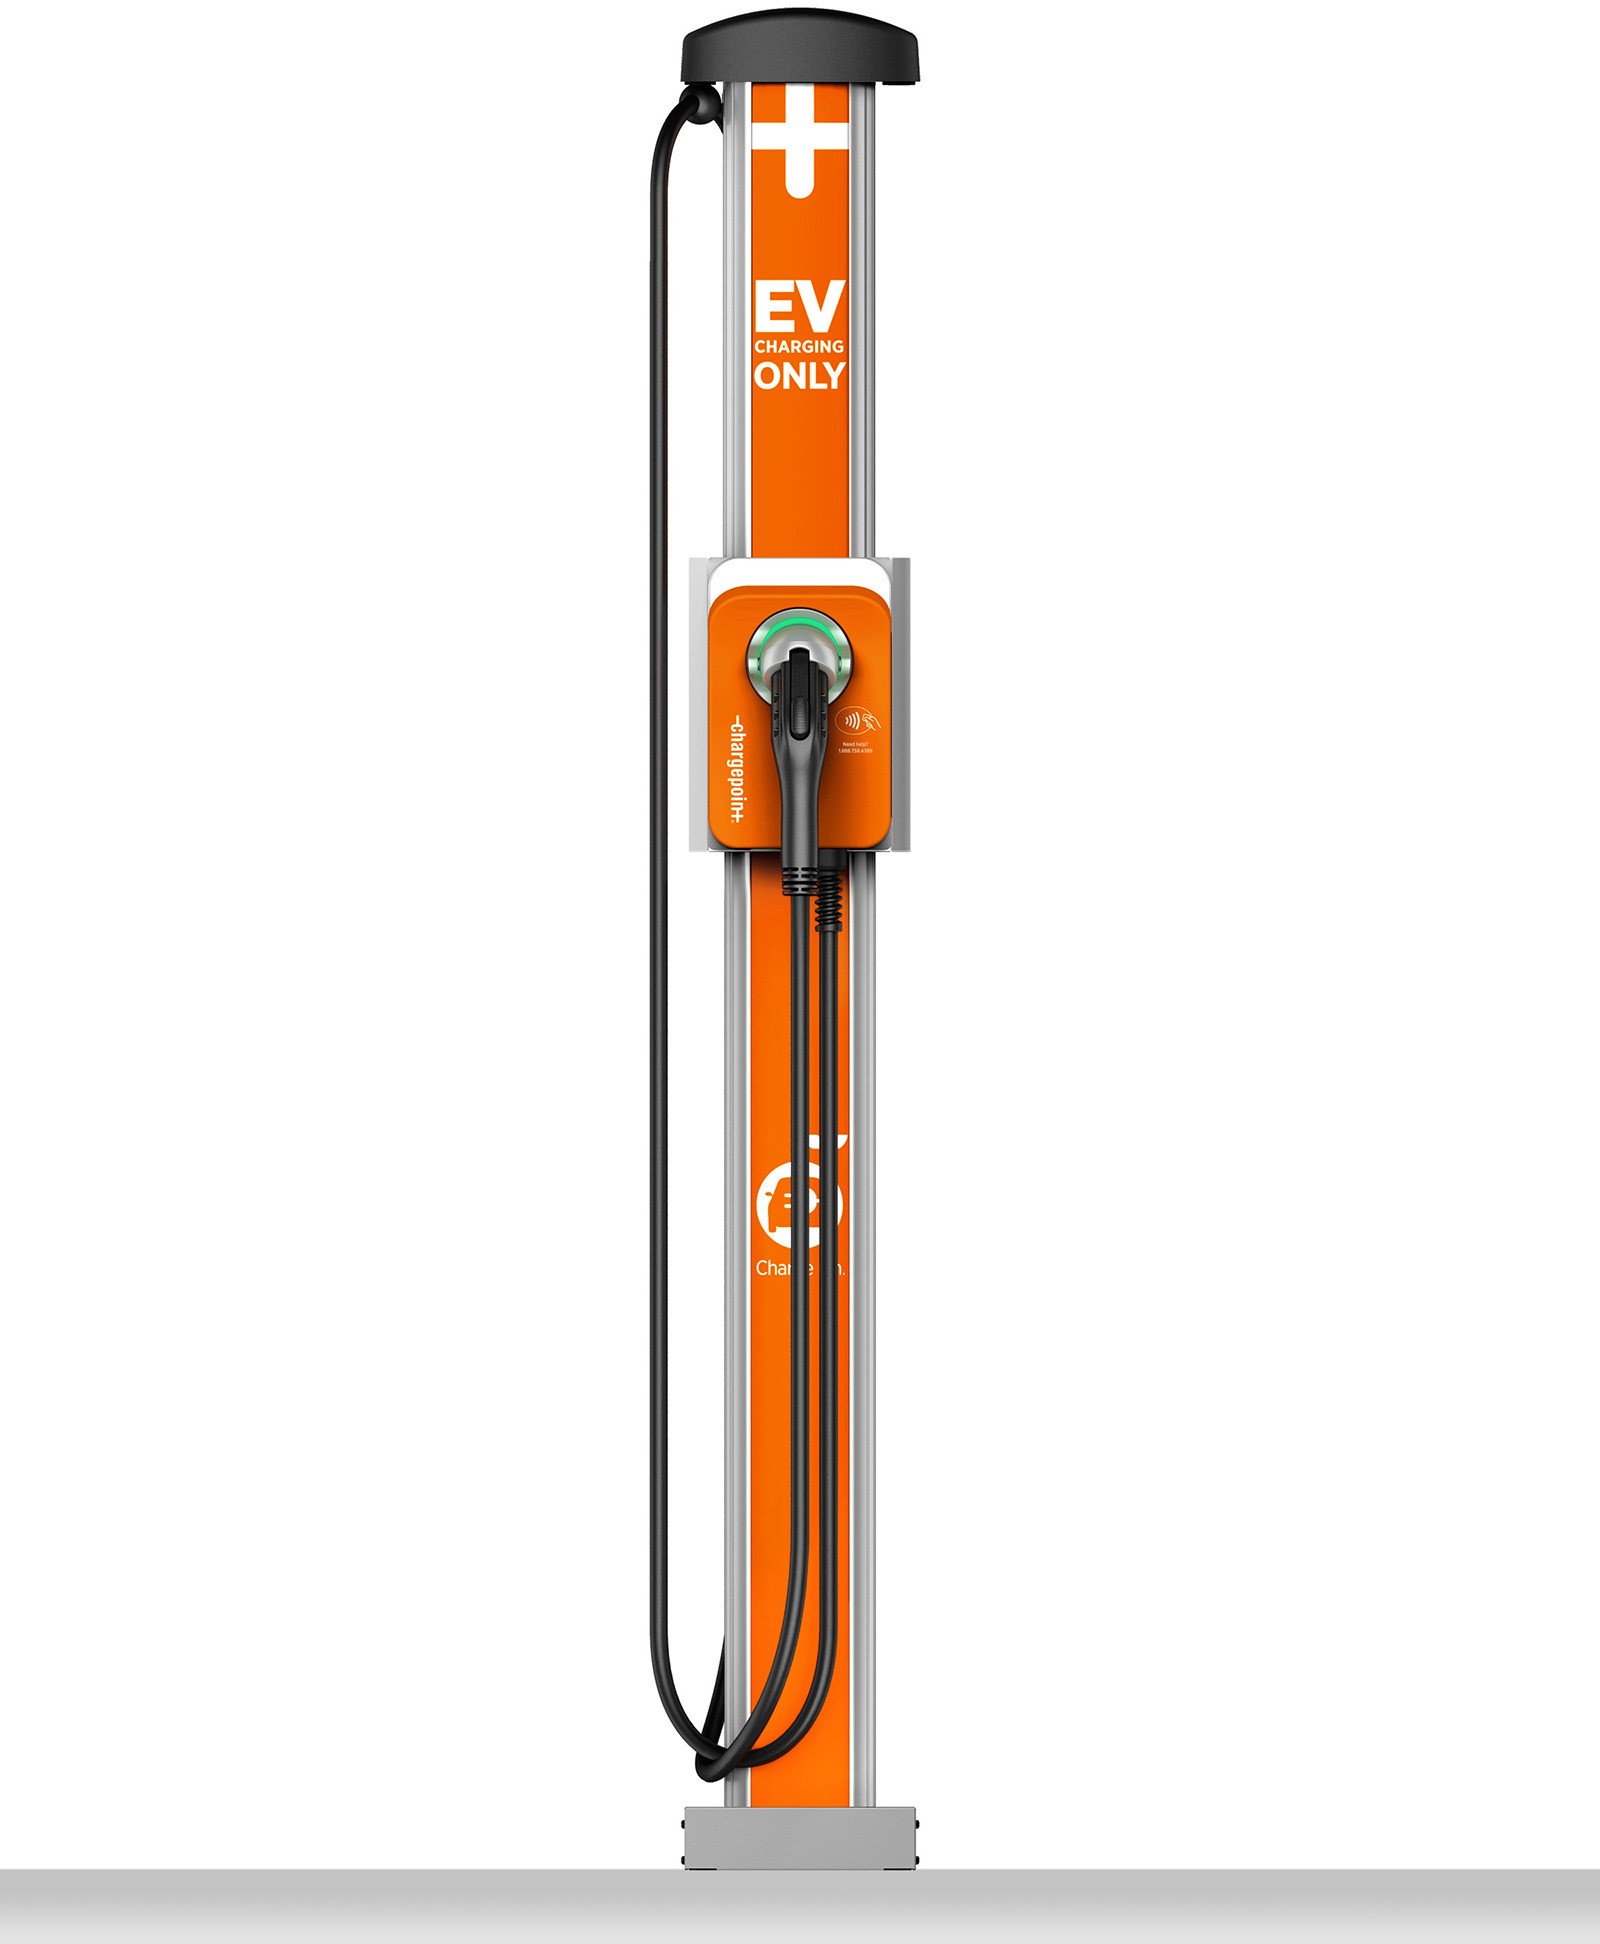
Extend the charging cable to its full length to remove any kinks or twists.
-
Wrap the charging cable over the top of the charging station.
-
Place the connector back into the holder on the station. If the connector locks in place and charges a vehicle, then it has been successfully repaired.
Restore Power
To restore power, complete the following steps:
-
Restore power to the station at the circuit breaker.
-
Verify that the charging cable now functions by starting a test session and configure the following steps:
-
Initiate a charging session.
-
Plug the handle into a vehicle.
-
Verify that the vehicle is charging.
-
Insert the connector in its holster.
-
