Mount the Charging Station
Choose the installation method below according to whether the input wiring will enter the charging station from the back (through the wall) or from the bottom (such as a site that runs conduit along the wall).
Mount the Charging Station for Wiring From the Back
-
At the installation site, align the grounding plate over the wiring. Ensure that the top of the grounding plate is approximately 127 cm from the ground. If that measurement is not true, check site drawings or contact ChargePoint before continuing.
-
Use a spirit level to ensure the grounding plate is perfectly level.
-
Using the grounding plate as a template, mark where to drill holes for the four mounting screws.
-
Using an M10 masonry drill bit, drill the holes.

-
(Optional) If required for the installation site, gently tap the included wall anchors into the holes.
-
Use the four included 58 mm M8 self-tapping Torx screws to secure the grounding plate to the wall. Torque the screws to 16.5 Nm.
-
Using wire strippers, strip approximately 34 cm off the outer jacket of the power cables.
-
Wrap electrical tape around the end of the cables. Taping the cable ends makes it easier to feed the cables into the charging station housing.
-
Gently lay the charging station face up on the padded ground covering.
-
Use the station key to unlock and open the door.
-
Use a screwdriver to remove the screw holding the component cover in place.
-
Remove the component cover and put it in a safe place for later reuse.
-
Gently lay the charging station face down on the padded ground covering, with the top of the station facing away from the wall.
-
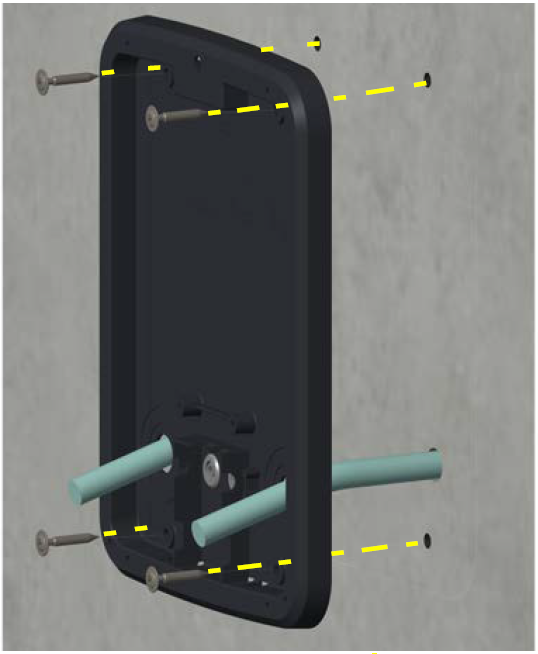
Locate the box of rubber grommets. Fit the grommets into the three holes (one larger, two smaller) in the back of the charging station.
-
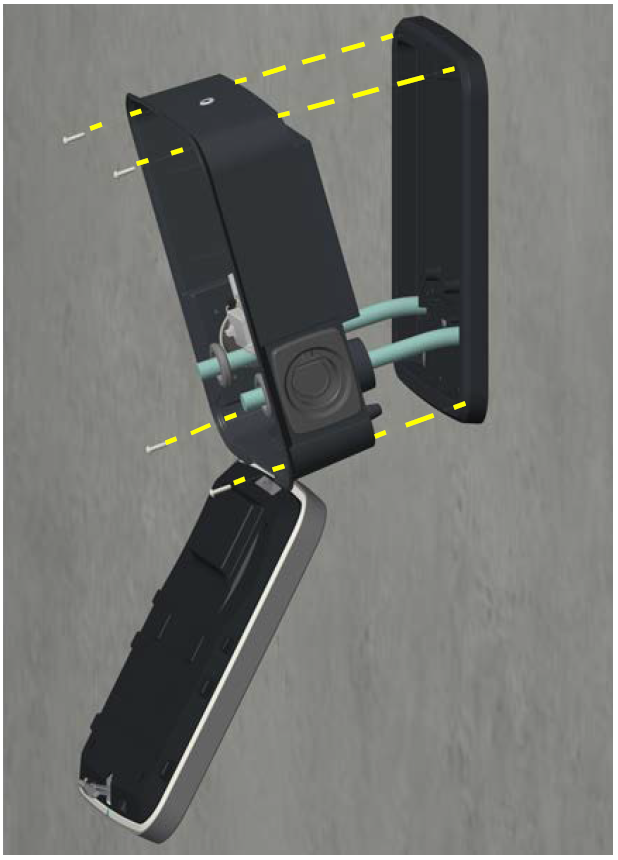
Lift the station and carefully allow the door to swing open.
-
Feed the power cables into the holes on the back of the station.
If only one installer is working, use a cart to support the weight of the charging station while you feed the power cables through. -
Seat the charging station into the grounding plate.
 Continue to support the charging station until it is secured in place with mounting screws.
 -
Using the four included 25 mm M6 self-tapping Torx screws, secure the charging station onto the grounding plate.
-
Tighten the screws to 6.5 Nm.
Mount the Charging Station for Wiring From the Bottom
-
At the installation site, measure and mark a spot 127 cm from the ground.
-
Align the top of the grounding plate with this mark. Use a spirit level to ensure the grounding plate is perfectly level.
-
Using the grounding plate as a template, mark where to drill holes for the four mounting screws.
-
Using an M10 masonry drill bit, drill the holes.

-
(Optional) If required for the installation site, gently tap the included wall anchors into the holes.
-
Use the four included 58 mm M8 self-tapping Torx screws to secure the grounding plate to the wall. Torque the screws to 16.5 Nm.

-
Using wire strippers, strip approximately 34 cm off the outer jacket of the power cables.
-
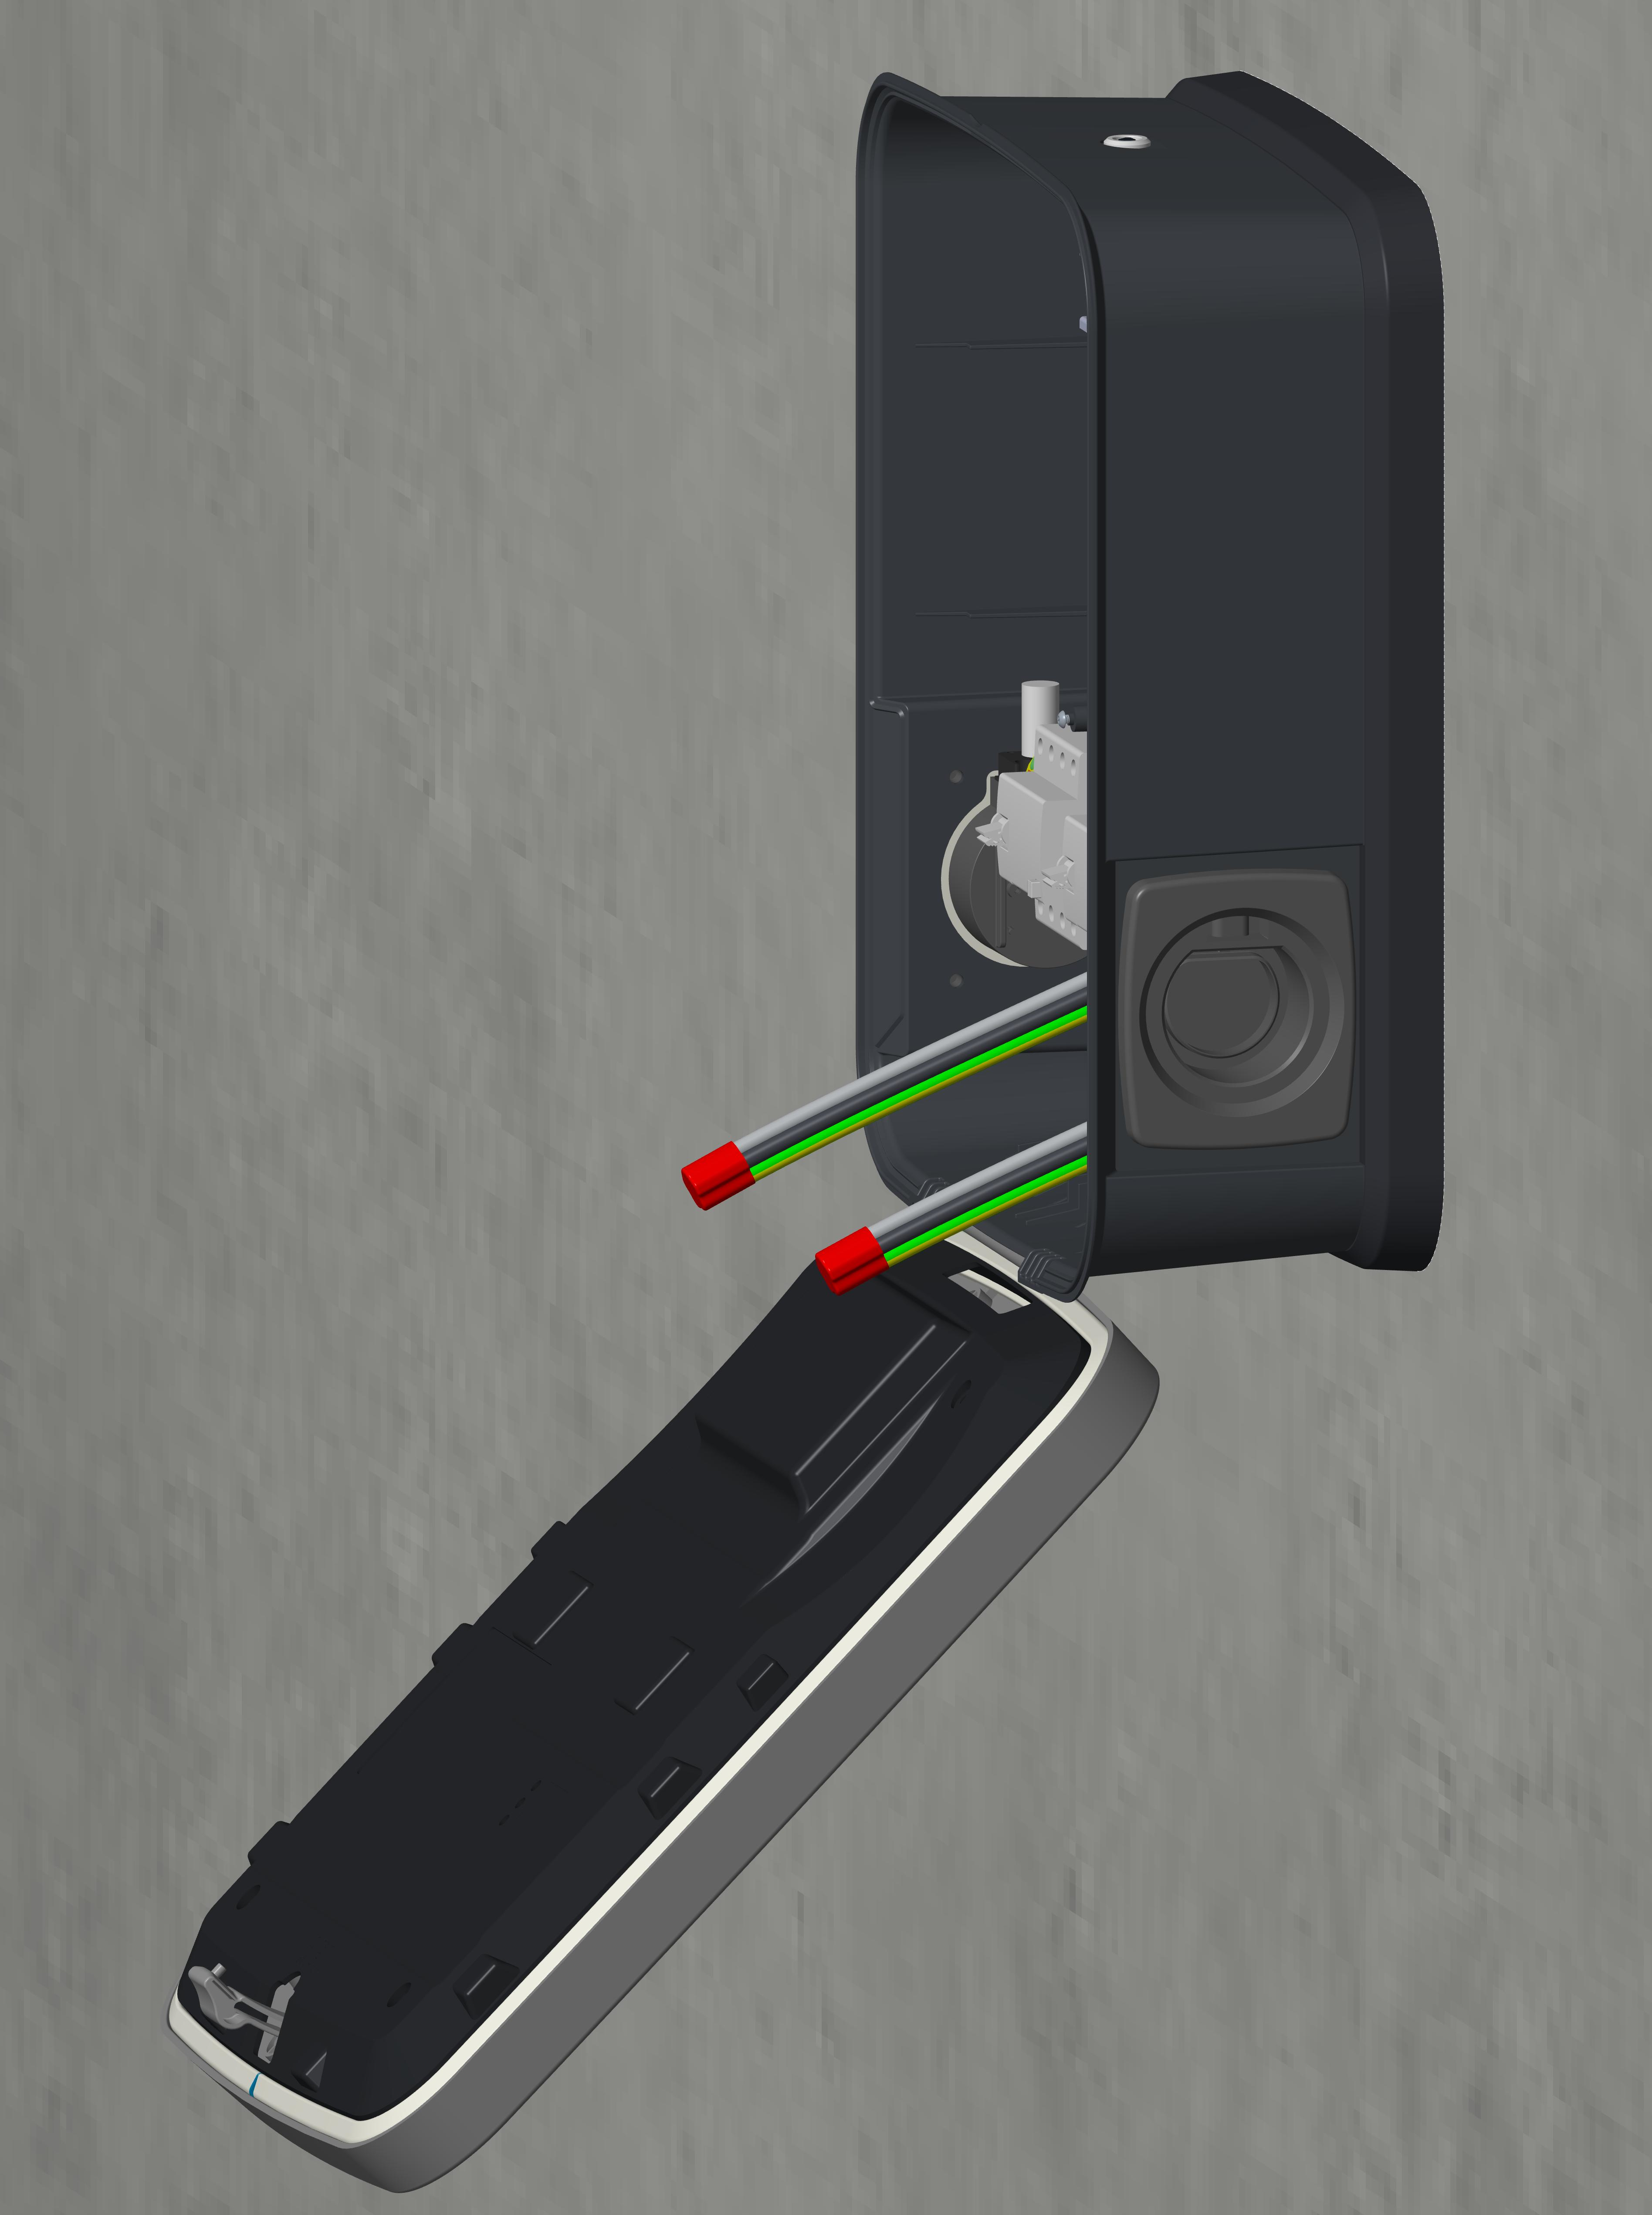
Wrap electrical tape around the end of the cables (a). Taping the cable ends makes it easier to feed the cables into the charging station housing.
-
Bend the cables forward about 90 degrees (b).

-
Gently lay the charging station face up on the padded ground covering.
-
Use the station key to unlock and open the door.
-
Use a screwdriver to remove the screw holding the component cover in place.
-
Remove the component cover and put it in a safe place for later reuse.
-
Gently lay the charging station face down on the padded ground covering, with the top of the station facing away from the wall.
-
Locate the box of rubber grommets. Fit the grommets into the three holes (one larger, two smaller) in the back of the charging station.
-
Lift the station and slowly begin to tilt it towards the upright position, carefully allowing the door to swing open.
If only one installer is working, use a cart to support the weight of the charging station while you feed the power cables through the cable glands. -
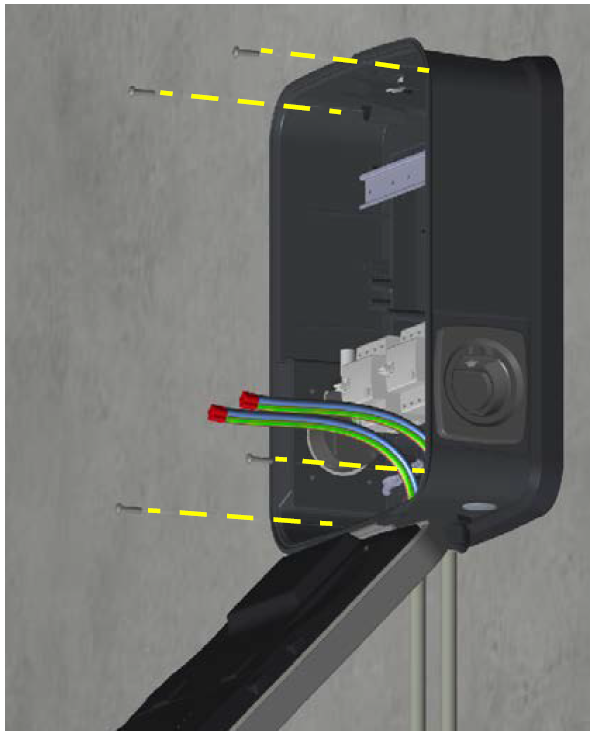
Feed the power cables into the holes on the bottom of the station.

-
As the power cables are fed through, slowly tilt the charging station until it is fully upright.

-
Seat the charging station into the grounding plate.
Continue to support the charging station until it is secured in place with mounting screws. -
Using the four included 25 mm M6 self-tapping Torx screws, secure the charging station onto the grounding plate.
-
Tighten the screws to 6.5 Nm.
-
Using a crescent wrench, tighten the cable glands (c) to fit snugly against the charging station.

