Build the Mounting Bracket
To build the mounting bracket, perform the following:
Check the Box Contents
Before unpacking any shipping boxes, place a floor mat, padded ground covering, or similar material in an area close to the installation site. When unpacking shipping boxes, place all components on the ground covering and ensure that all components are present and undamaged. Unpack shipping boxes only when you need to, as described in this Installation Guidelines.
Open Box #3, the Station Mount Kit and ensure you have all components.
|
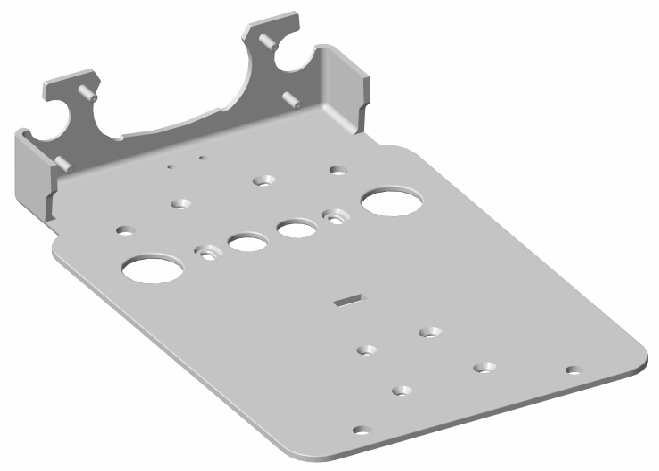
Support bracket (1) |
|
|
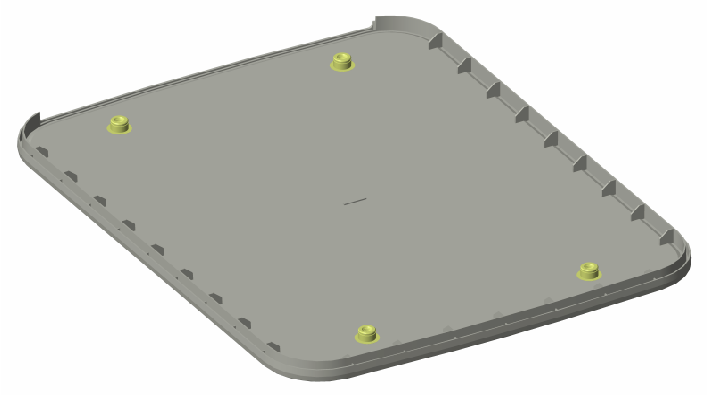
Fascia (1) |
|
|
Trim wall (1) |
|
|
Strain relief hole plug (1) |
|
|
Cable Management Kit (CMK |
|
|
CMK |
|
|
Installation kit (1) |
Includes:
|
|
Grounding kit (1) |
Includes:
|


Build the Station Mounting Bracket
To build the station mounting bracket, perform the following steps:
-
Place the clamp ends with the drilled holes facing up.
-
Use a 6 mm hex driver and two M8 x 25 mm screws (a) to attach the clamp ends (b) to the sides of the CMK
 Cable Management Kit clamp base (c). Install the two clamp ends with drilled holes on the right side of the grounding plate as you face the back of the grounding plate with the holes facing up. Do not fully tighten the screws yet.
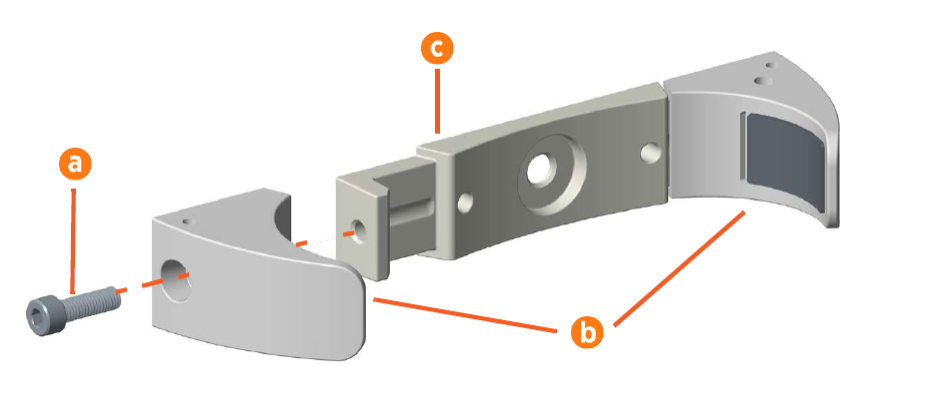
-
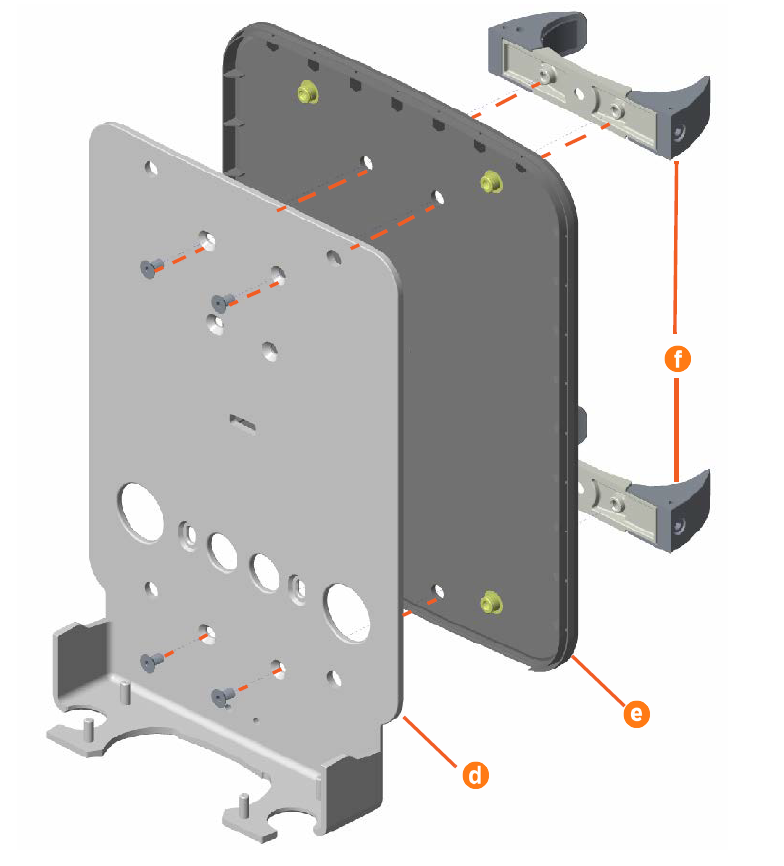
Fit the support bracket (d) into the fascia (e).
-
Use a 5 mm hex driver and two 20 mm M8 flathead socket screws to secure the upper clamp assembly to the support bracket. Tighten the screws to 16 Nm.
-
Use a 5 mm hex driver and two 20 mm M8 flathead socket screws to secure the lower clamp assembly to the support bracket. Tighten the screws to 16 Nm.
-
Use a T40 tamper resistant Torx driver (6 mm hex driver) and two 14 mm M8 socket head cap screws to attach each clamp (f) to the fascia. Tighten the screws to 16 Nm.
-
Place the remaining four lock nuts and the strain relief hole plug in a safe place for later use.
-
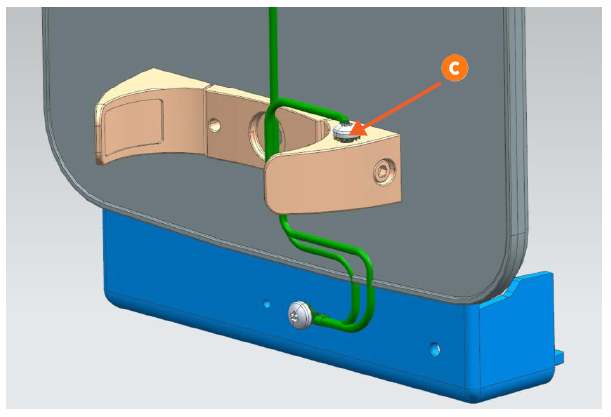
Use the 10 mm M8 button head hex screw and star washer to connect one end of the 635 mm grounding cable and one end of the 241 mm grounding cable to the M8 hole on the right side of the station mounting bracket (a) as you face the back of the bracket. Tighten the screw to 16 Nm.
-
Using the 10 mm M8 screw and star washer, connect the loose end of the 635 mm grounding cable to the upper right CMK
Cable Management Kit clamp end (b). Tighten the screw to 16 Nm.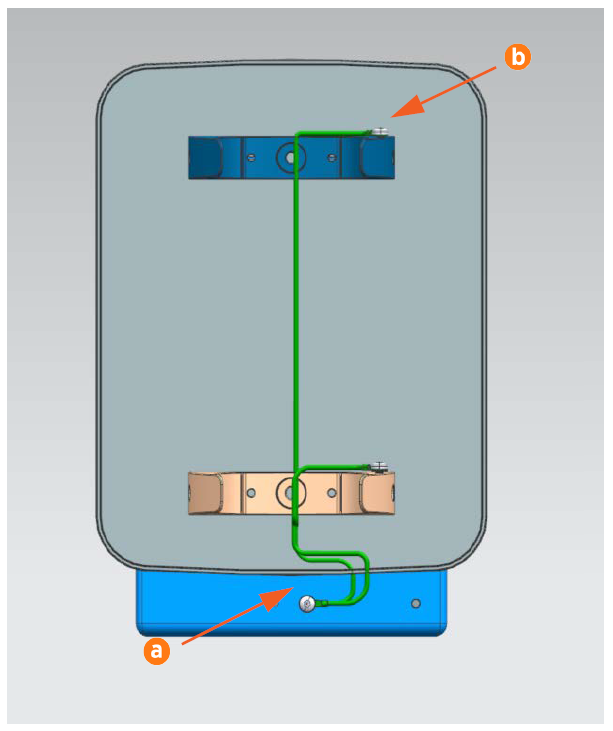 Use a cable tie to make sure that any excess length of cable is tied up in loops so that the cable is taut and is not visible when looking at the station from the front.
 -
Use the 10 mm M8 screw and star washer to connect the end of the 241 mm grounding cable to the lower CMK
Cable Management Kit clamp end (c).