Concrete Pad Preparation
Prepare each Power Hub installation site for cabinet mount by installing four anchor bolts into the concrete surface. The Power Hub can be mounted on either a newly poured concrete pad or an existing concrete surface.
To safely mount a Power Hub, the concrete pad must meet the specifications listed in Pad Stability Specifications.
Parts Required
5/8 inches anchor bolts (x4)
Tools and Consumables Required
The following table lists and describes tools and consumable items that you will need. The quantity listed in the table is based on installation of one Power Hub cabinet.
The consumption rate of these products varies depending on conditions at the installation site.
|
Quantity |
Description |
Purpose |
|---|---|---|
|
1 |
Epoxy adhesive for concrete such as HIT-HY 200 adhesive |
Fill drilled holes |
|
1 |
Electrical cleaning and maintenance aerosol, any angle spray duster, 235 ml (8 oz) (Alternative: Compressed air) |
Clean drilled holes |
|
1 |
Industrial vacuum cleaner |
Clean drilled holes |
|
1 |
Slow spiral round-shank masonry drill bit
|
Drill 19 mm (3/4 in) holes in concrete |
|
1 |
Electric hammer drill with 12 mm (1/2 in) or larger chuck. |
Drive drill bits |
|
1 |
Drill bit for concrete embedded rebar, round
|
Drill 19 mm (3/4 in) holes through rebar |
|
1 |
Nylon loop handle brush
|
Clean drilled holes |
|
1 |
Push-on round cap, fits 16 mm (5/8 in) - 17.5 mm (11/16 in) OD, 12.7 mm (1/2 in) inside height, quantity four required per Power Hub |
Hazard protection |
Installation Instructions
Refer to the following installation instructions:
-
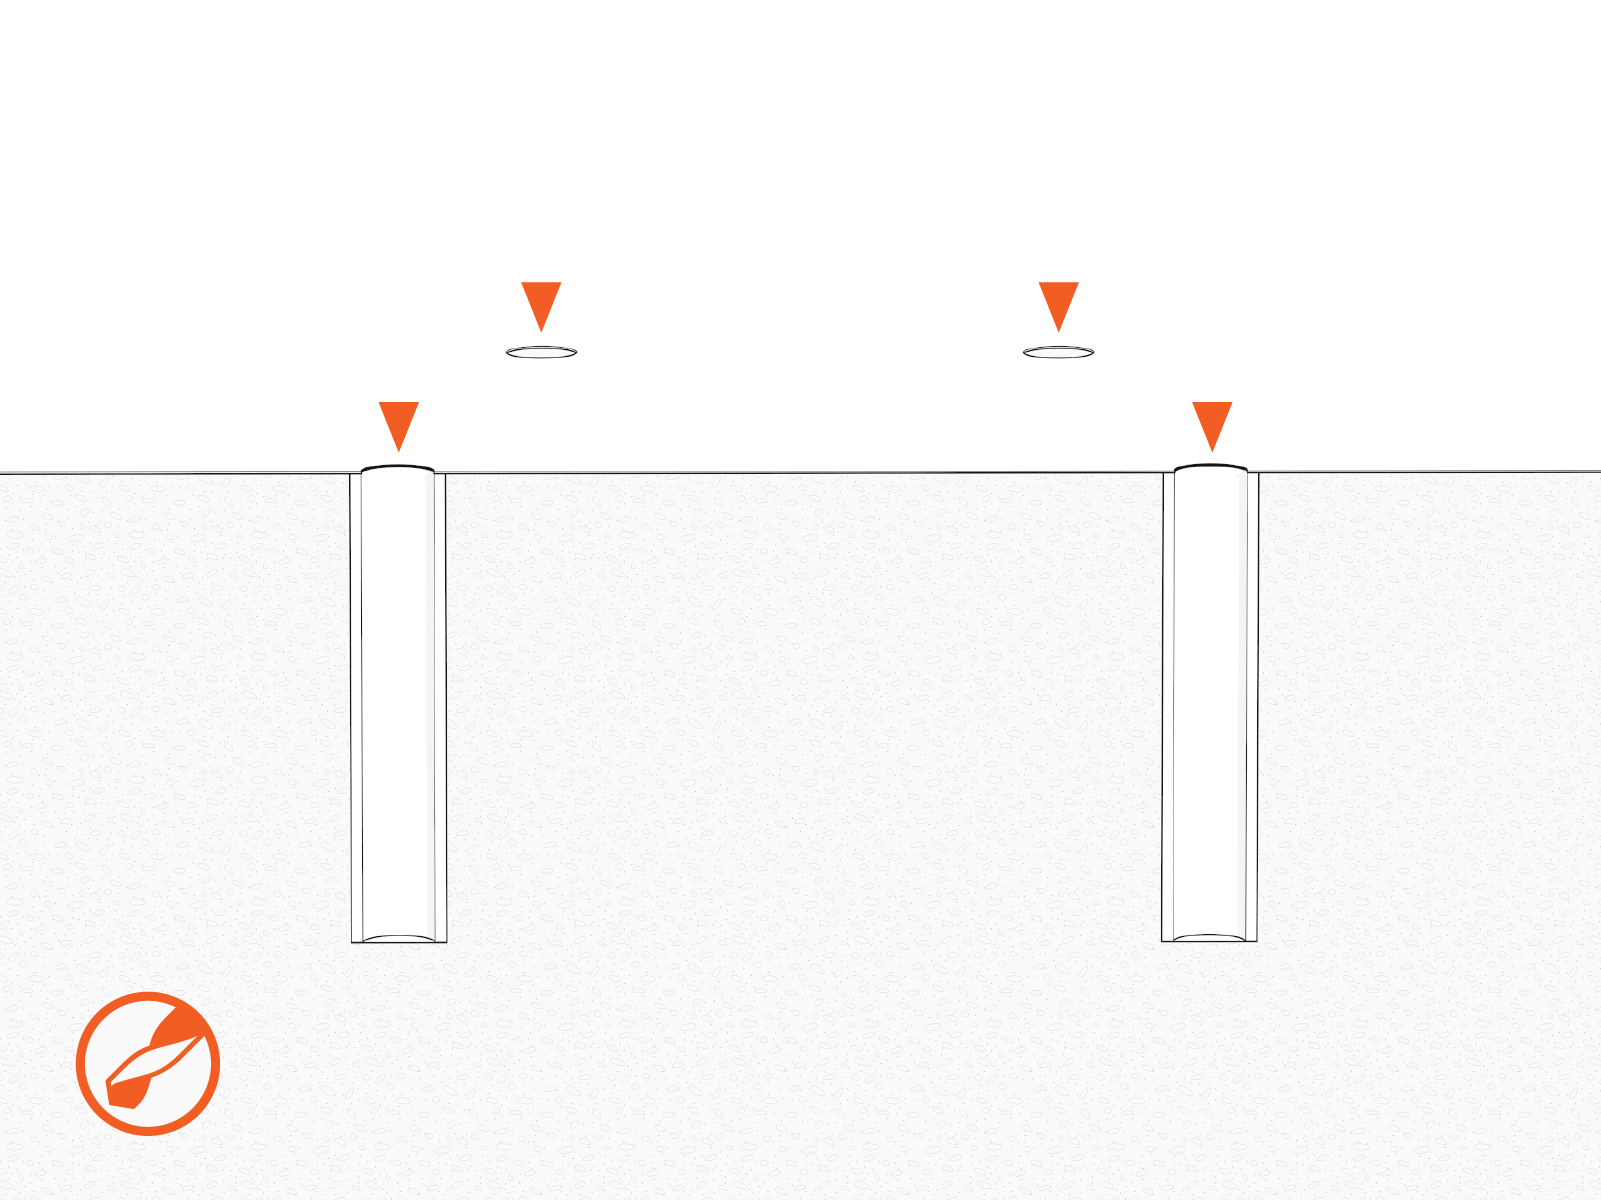
Consult the site plan and mark the locations for the four anchor bolts.
-
Drill four 19 mm (3/4 in) diameter holes to a minimum depth of 102 mm (4 in) at the marked locations.
 You may need two drill bits: one for the concrete (with the pilot) and another for the rebar (without the pilot). Always start the hole using the standard drill bit, and then switch to the rebar drill bit only if drilling through rebar.
 -
Remove all dust from inside the drilled holes using compressed air, a vacuum, or a brush.
-
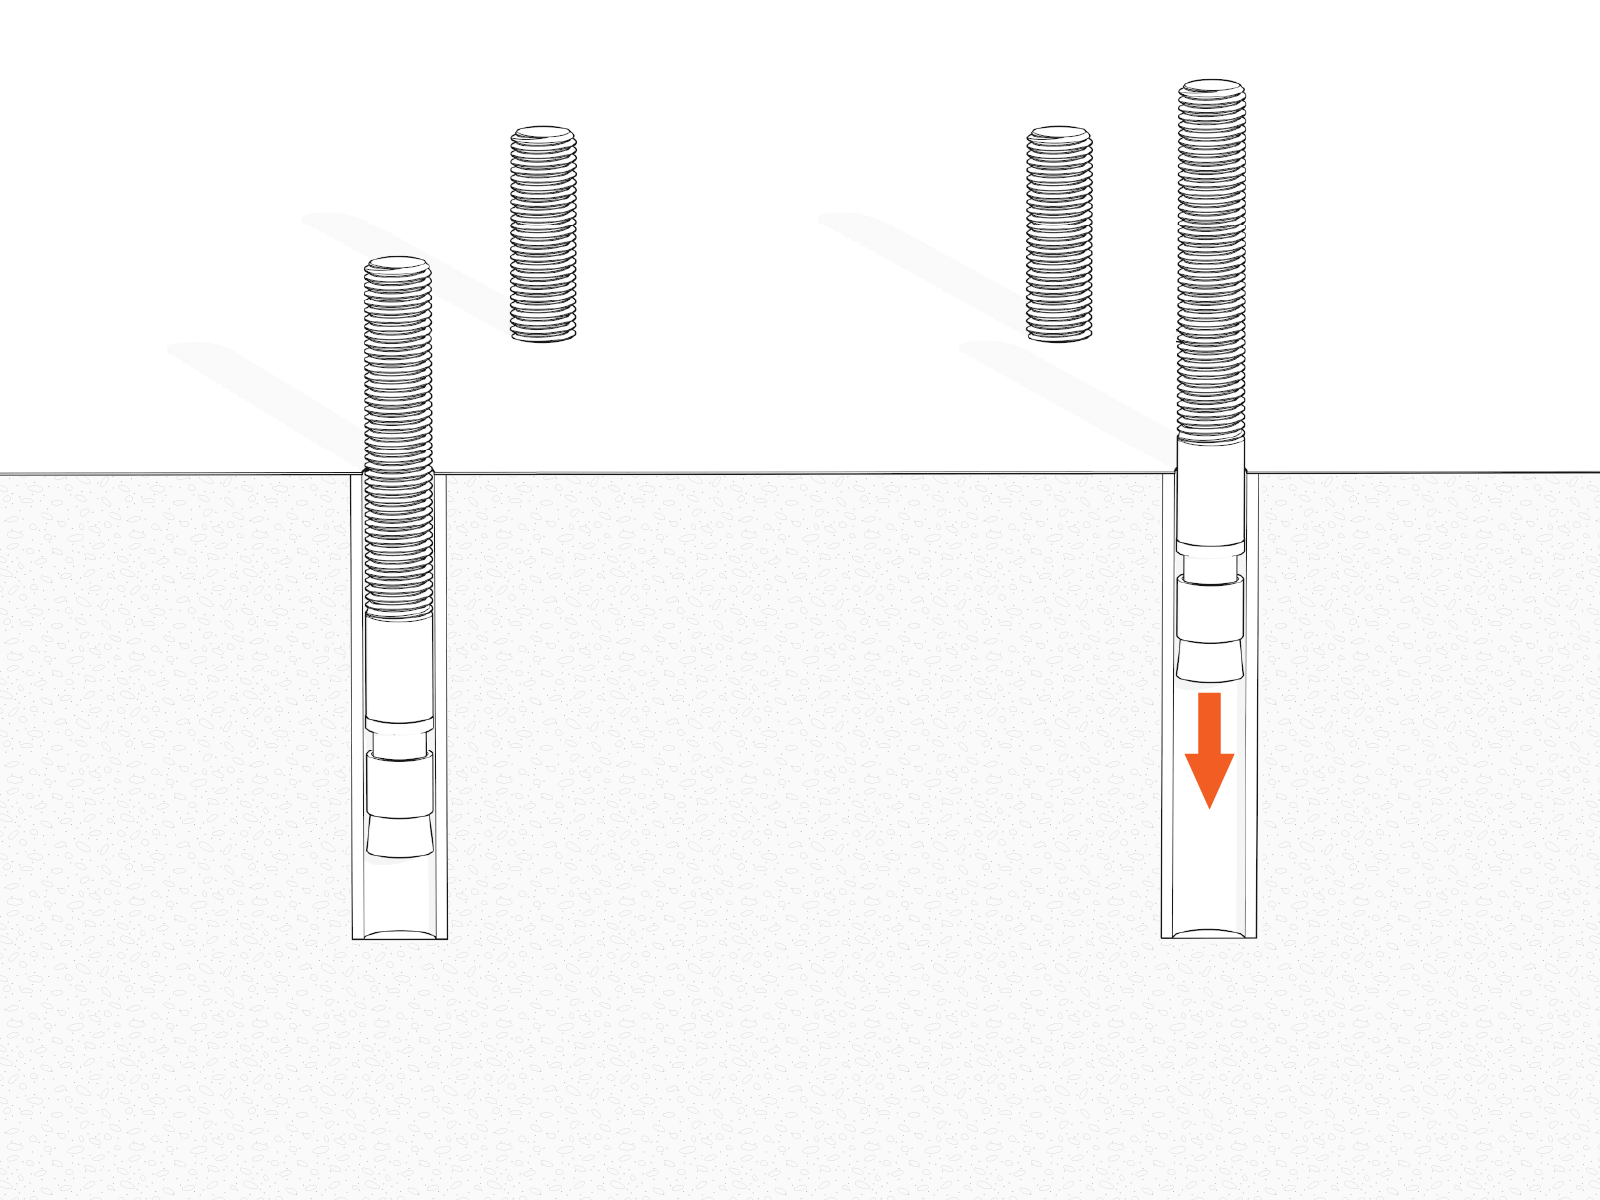
Fill each hole with epoxy to about 50 to 65 mm (2 to 2-1/2 in) below the top of the hole. Continue immediately to the next step because the epoxy sets quickly.
Inserting the threaded bolts displaces the epoxy, causing it to fill the holes to the grade level. If the epoxy is below grade level after the next step, add more epoxy. -
Insert the bolts into the holes, leaving 38 mm (1.5 in) of each bolt exposed above concrete.
-
Use a bubble level to ensure the bolts are plumb.
-
Allow the epoxy to cure (depending on cure times recommended by the epoxy manufacturer).
-
Install caps over the bolts.
