Remove CP4000
Removing the CP4000 charging station and installing the adapter requires one ChargePoint Certified Installer and about 2 to 2.5 hours to complete (not including epoxy cure time) before continuing on to the normal charging station installation described in the CP6000 Installation Guide.
For assistance, go to chargepoint.com/support and contact technical support using the appropriate region-specific number.
Required Tools and Equipment
To replace a CP4000 charging station with a CP6000 station, you need the following items:
-
ChargePoint card or smartphone with ChargePoint app installed
-
ChargePoint installer login credentials
-
ChargePoint triangular key (obtain from station owner)
-
T27 Tamper proof Torx driver
-
T30 Tamper proof Torx driver
-
Phillips screwdriver
-
5 mm hex driver
-
22 mm hex wrench
-
Bent-nose pliers (only stations with Cable Mangement Kits)
Disconnect CP4000
Perform the following steps to disconnect CP4000:
-
Optional: Only stations with Cable Management Kits (CMK
 Cable Management Kit). Use your ChargePoint card or the mobile app to start a charging session. Unlock the charging cables and set them gently down on the ground.
 -
Power off the charging station at the breaker panel before continuing work. Use a multimeter to test that power is off.
Risk of shock
-
Before any procedure, the technician must disconnect the power.
-
Follow local code to de-energize the applicable circuit and lock out/tag out the disconnect before proceeding. Use a multimeter to test that power is off.
-
Keep power off until the top cap is correctly reinstalled and the work is complete.
Failure to follow these instructions can result in serious injury, loss of life, or property damage.
-
-
Optional: Stations with CMKs. Disconnect the charging cables from CMK
Cable Management Kit. Using bent-nose pliers, carefully turn the knot bearing counter clockwise approximately 1/4 turn. You may need to push down on the knot bearing to turn it. .png)
-
Get the station's triangular key from the station owner to unlock the front panel.

-
Swing the panel open and down.

-
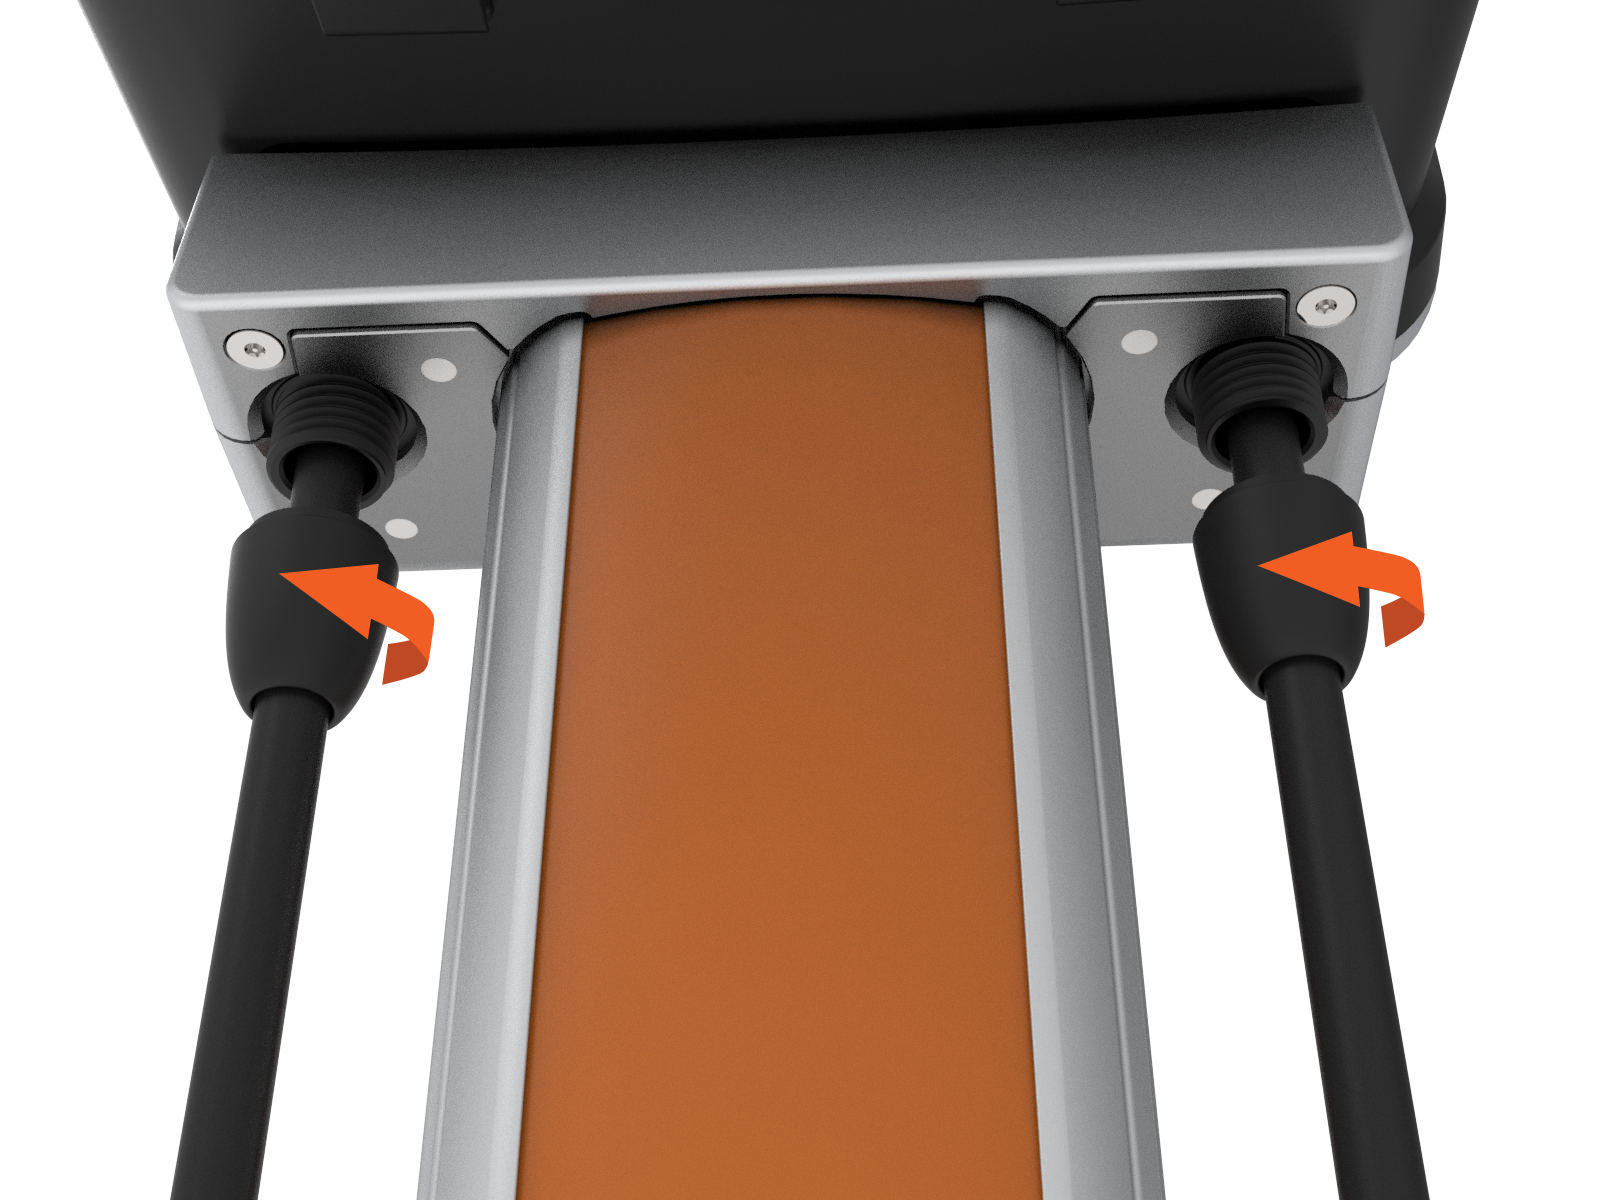
Locate the strain relief connectors and loosen them from the cable glands next to the station mounting bracket.
-
Using a T27 Torx driver, remove two M6 screws.

-
Remove the trim wall.

-
Remove the component cover screw and the cover.
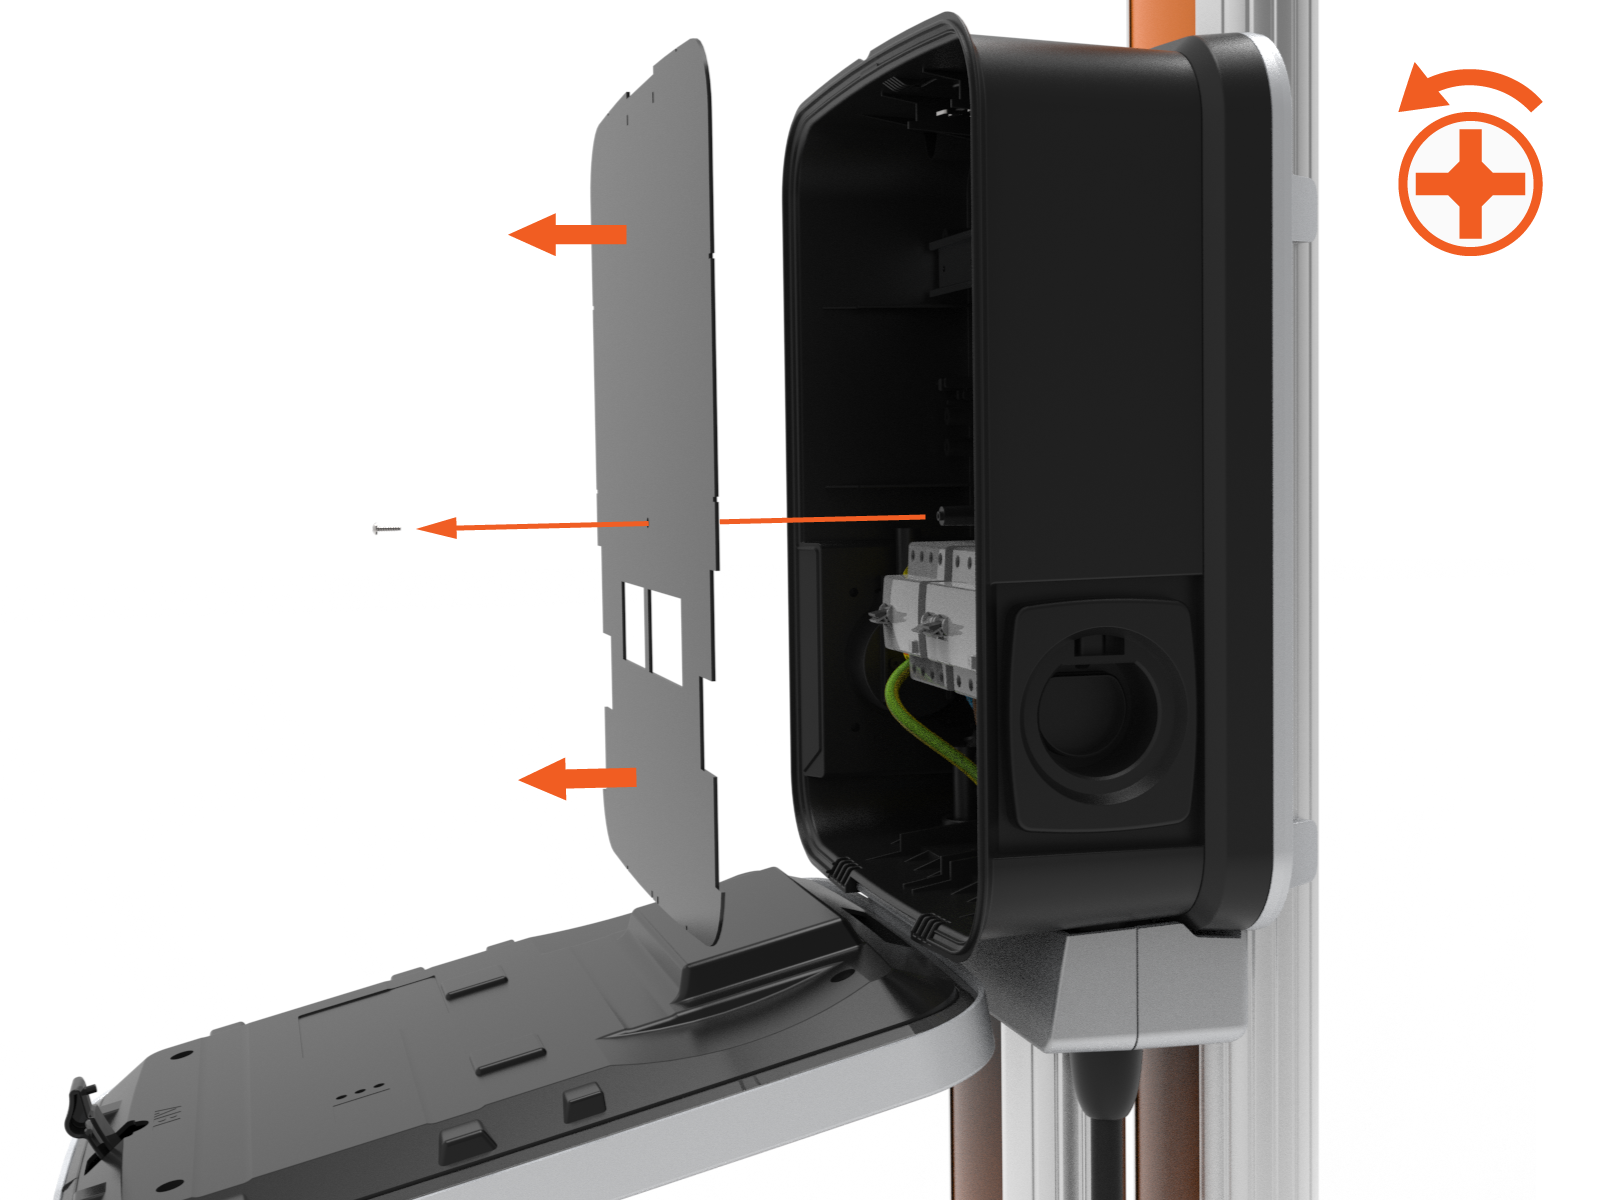
-
Using a Phillips screwdriver, loosen the screws holding the wires in the terminal block.
Disconnect the wires from the terminal block.

-
Loosen the service wire glands.
Remove CP4000
Perform the following steps to remove CP4000:
-
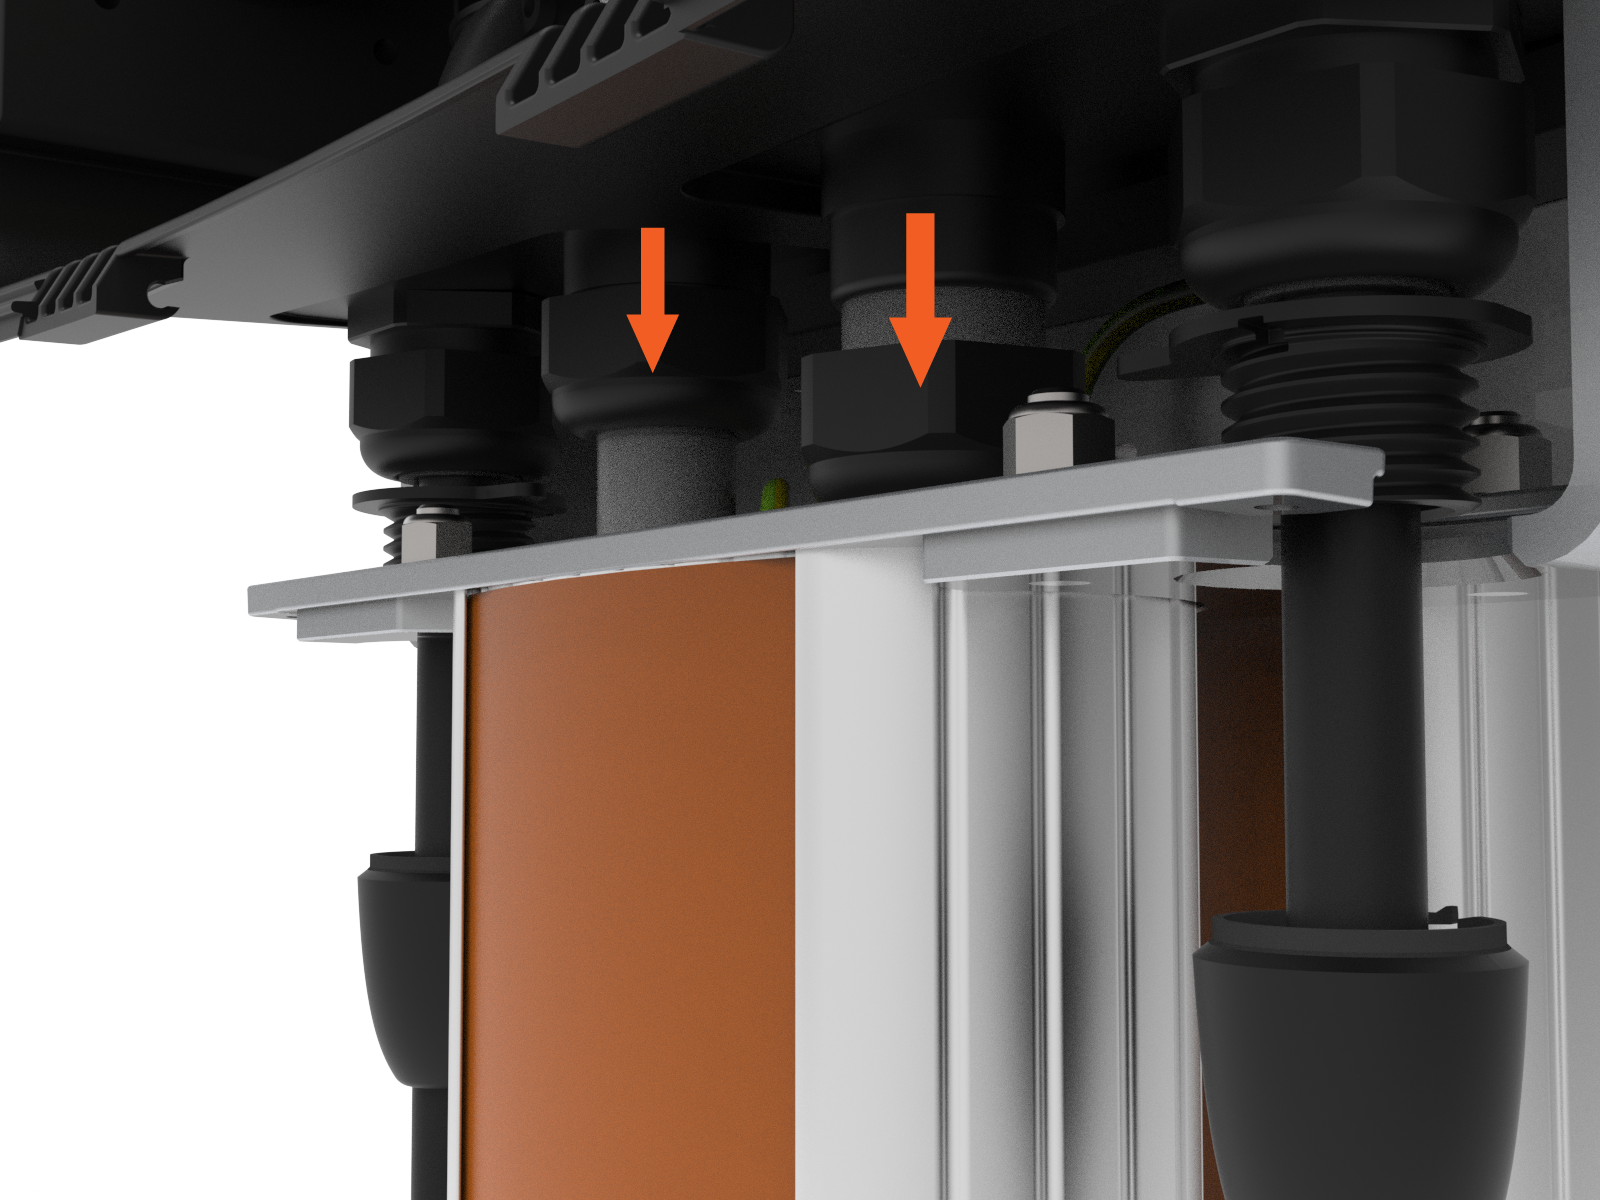
Use a T30 tamper-proof Torx driver to remove the two 16 mm M6 screws securing the bolt covers.

-
Remove the covers.
-
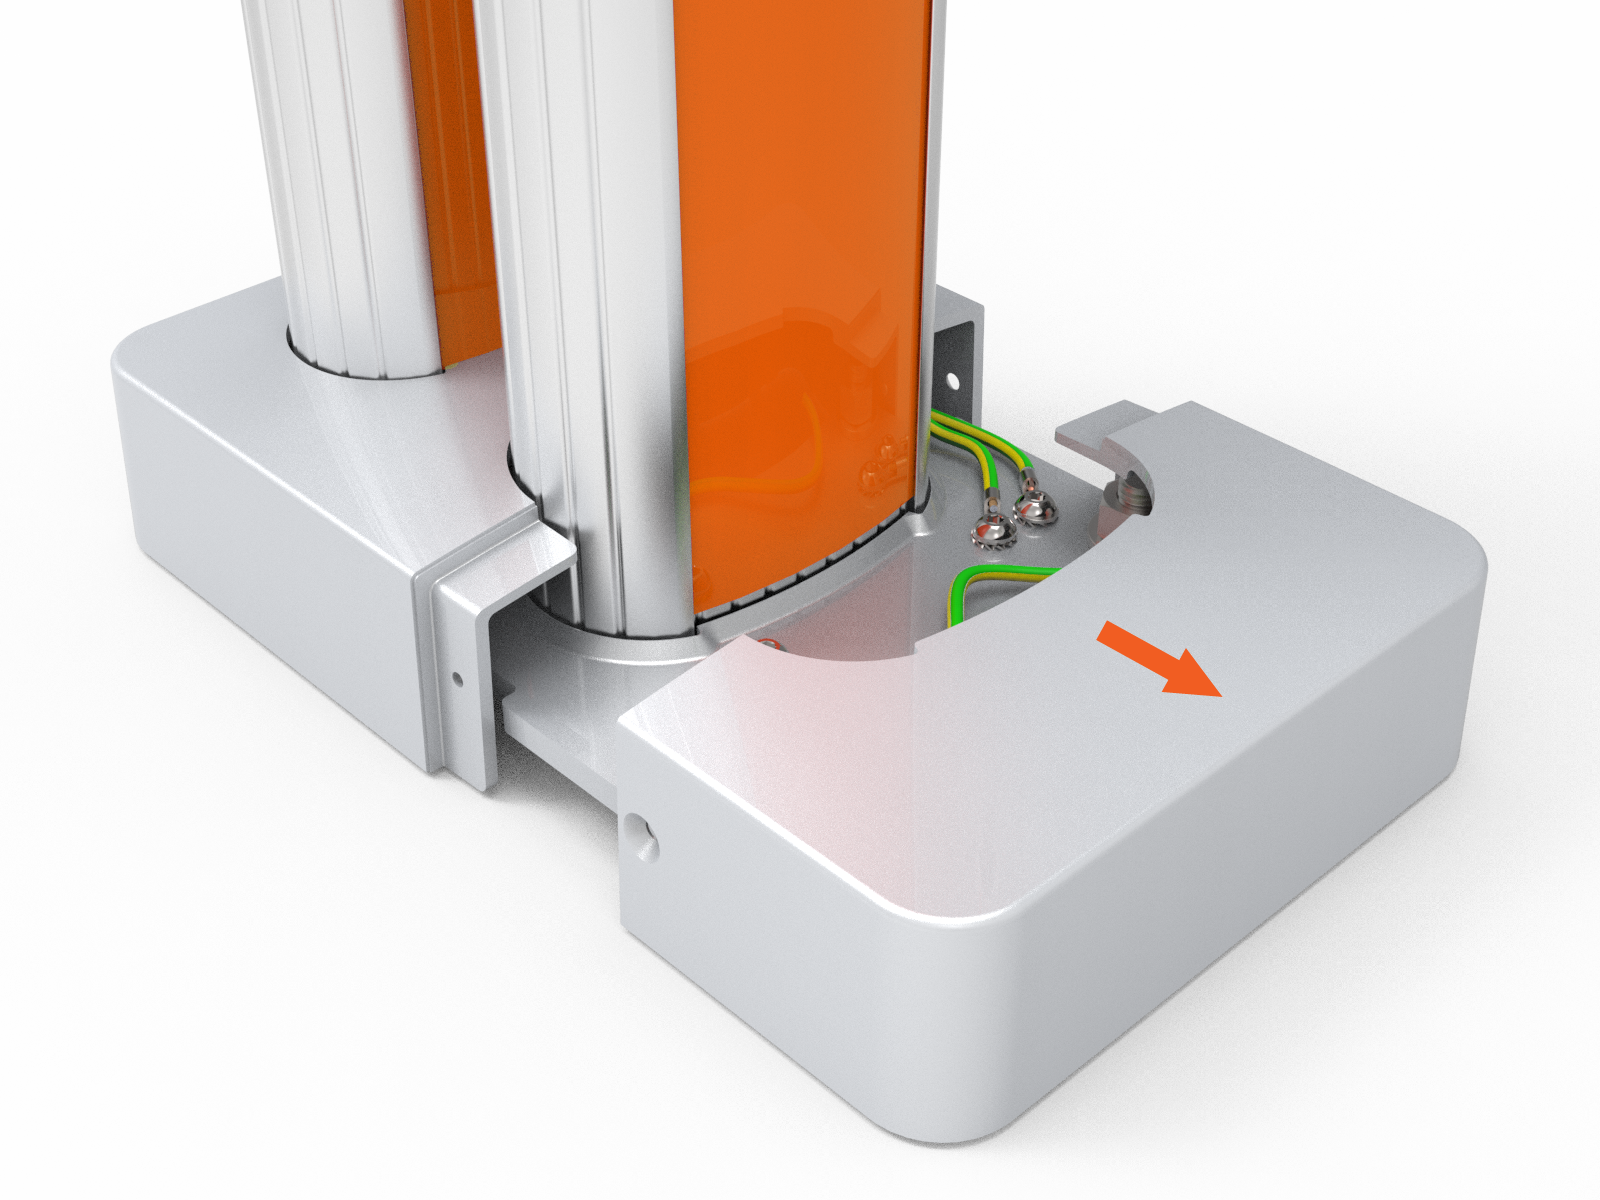
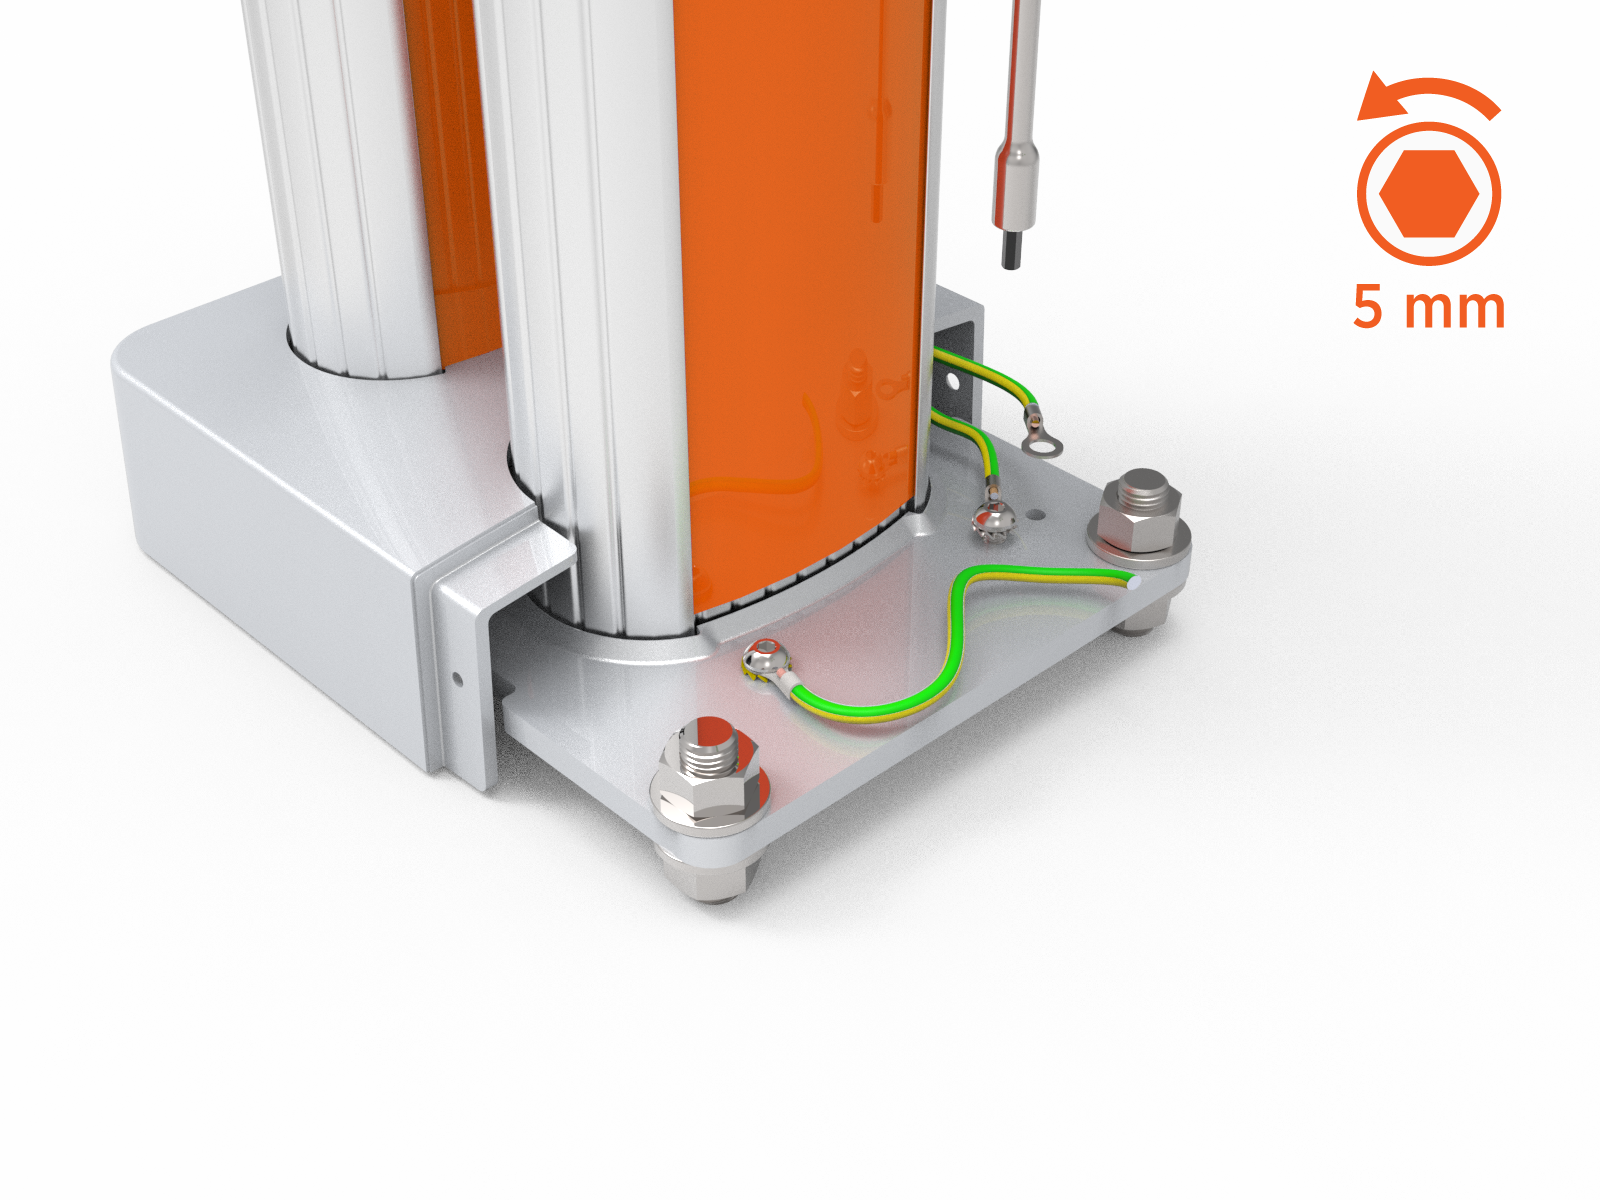
Using a screwdriver with a 5 mm hex driver, remove the screw securing the grounding cables to the pedestal base plate.
-
Using a 24 mm hex wrench, remove the washers and nuts and gently lift the CMK
Cable Management Kit (optional) and set it aside.
-
Refer to the CP4000 Installation Guide and reverse the installation steps to disassemble the CP4000 charging station.
Access ChargePoint documents at ChargePoint Product Reference Documentation.
Follow the installation steps in reverse sequence to remove the CP4000 charging station. -
Go to Install CP6000 Adapter Plate.
