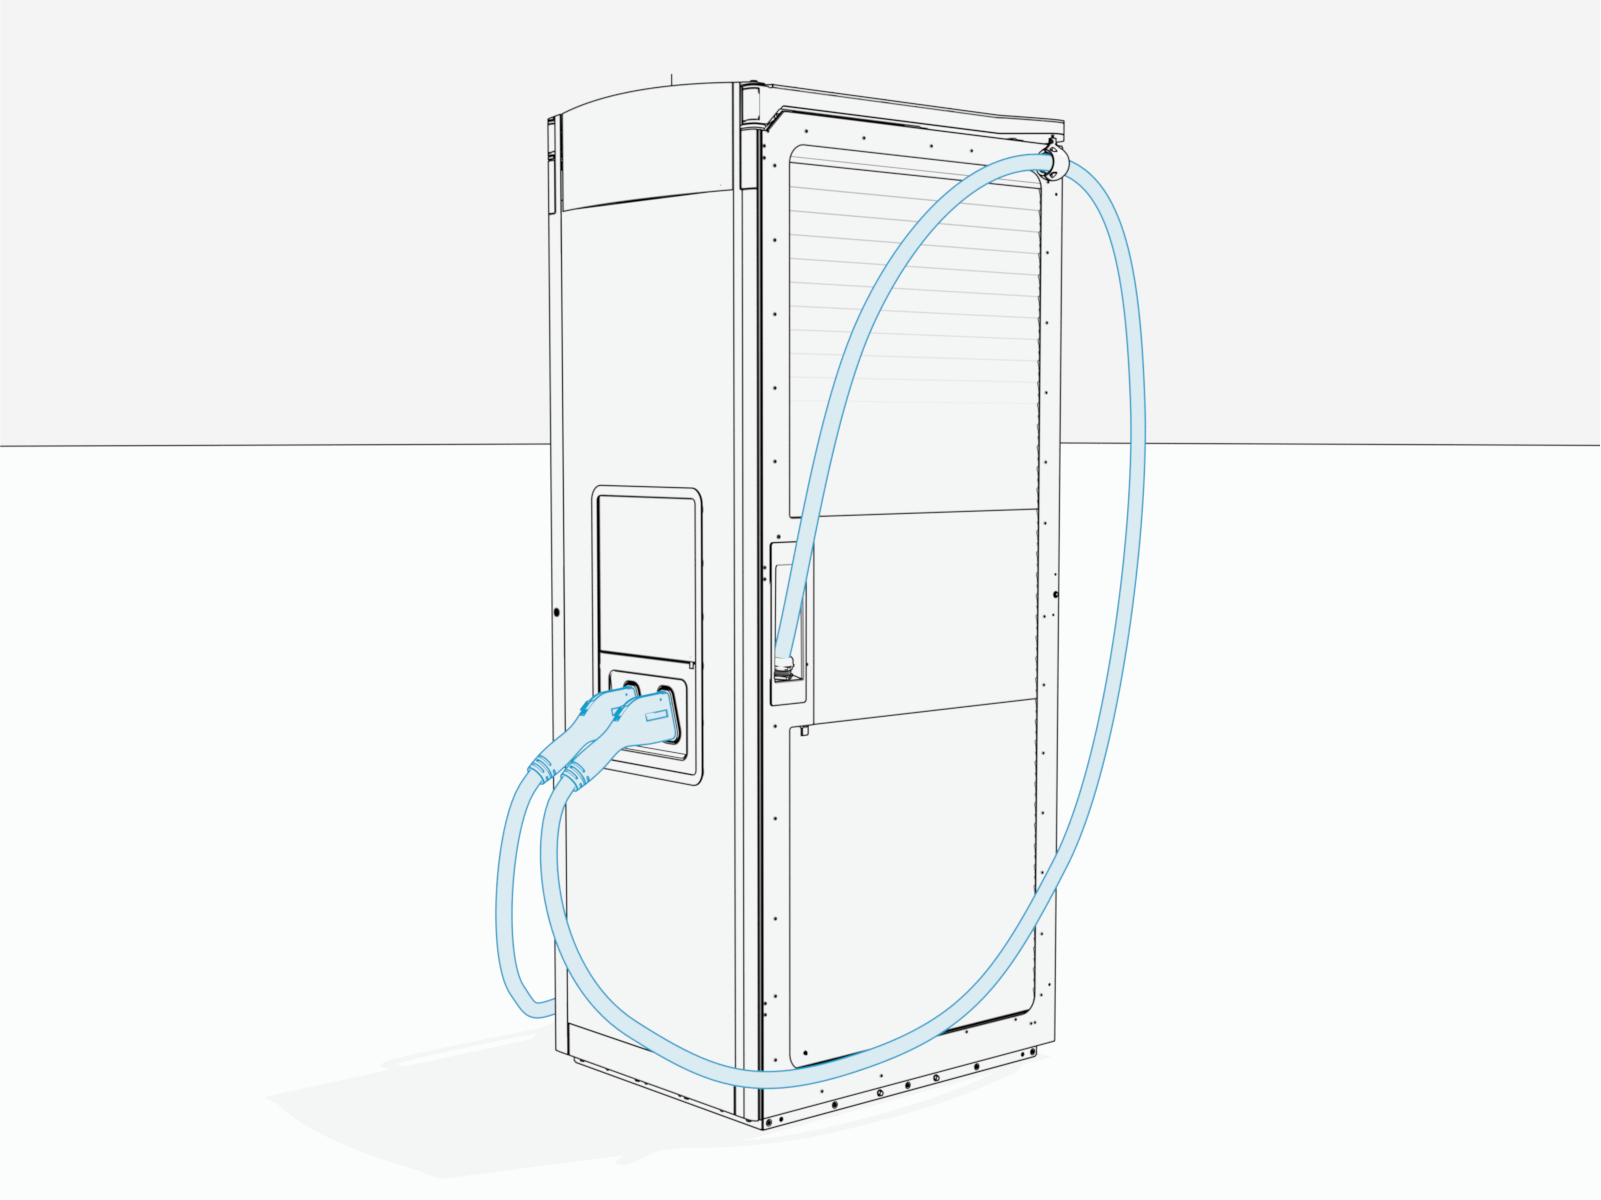
Set Up Charging Cables
Follow all instructions provided in this chapter to set up the charging cables.
Install Overhead CMK (if applicable)
If the site plan calls for the Express Solo to be configured with an overhead CMK Cable Management Kit, follow procedures in this section to install the CMK Cable Management Kit.
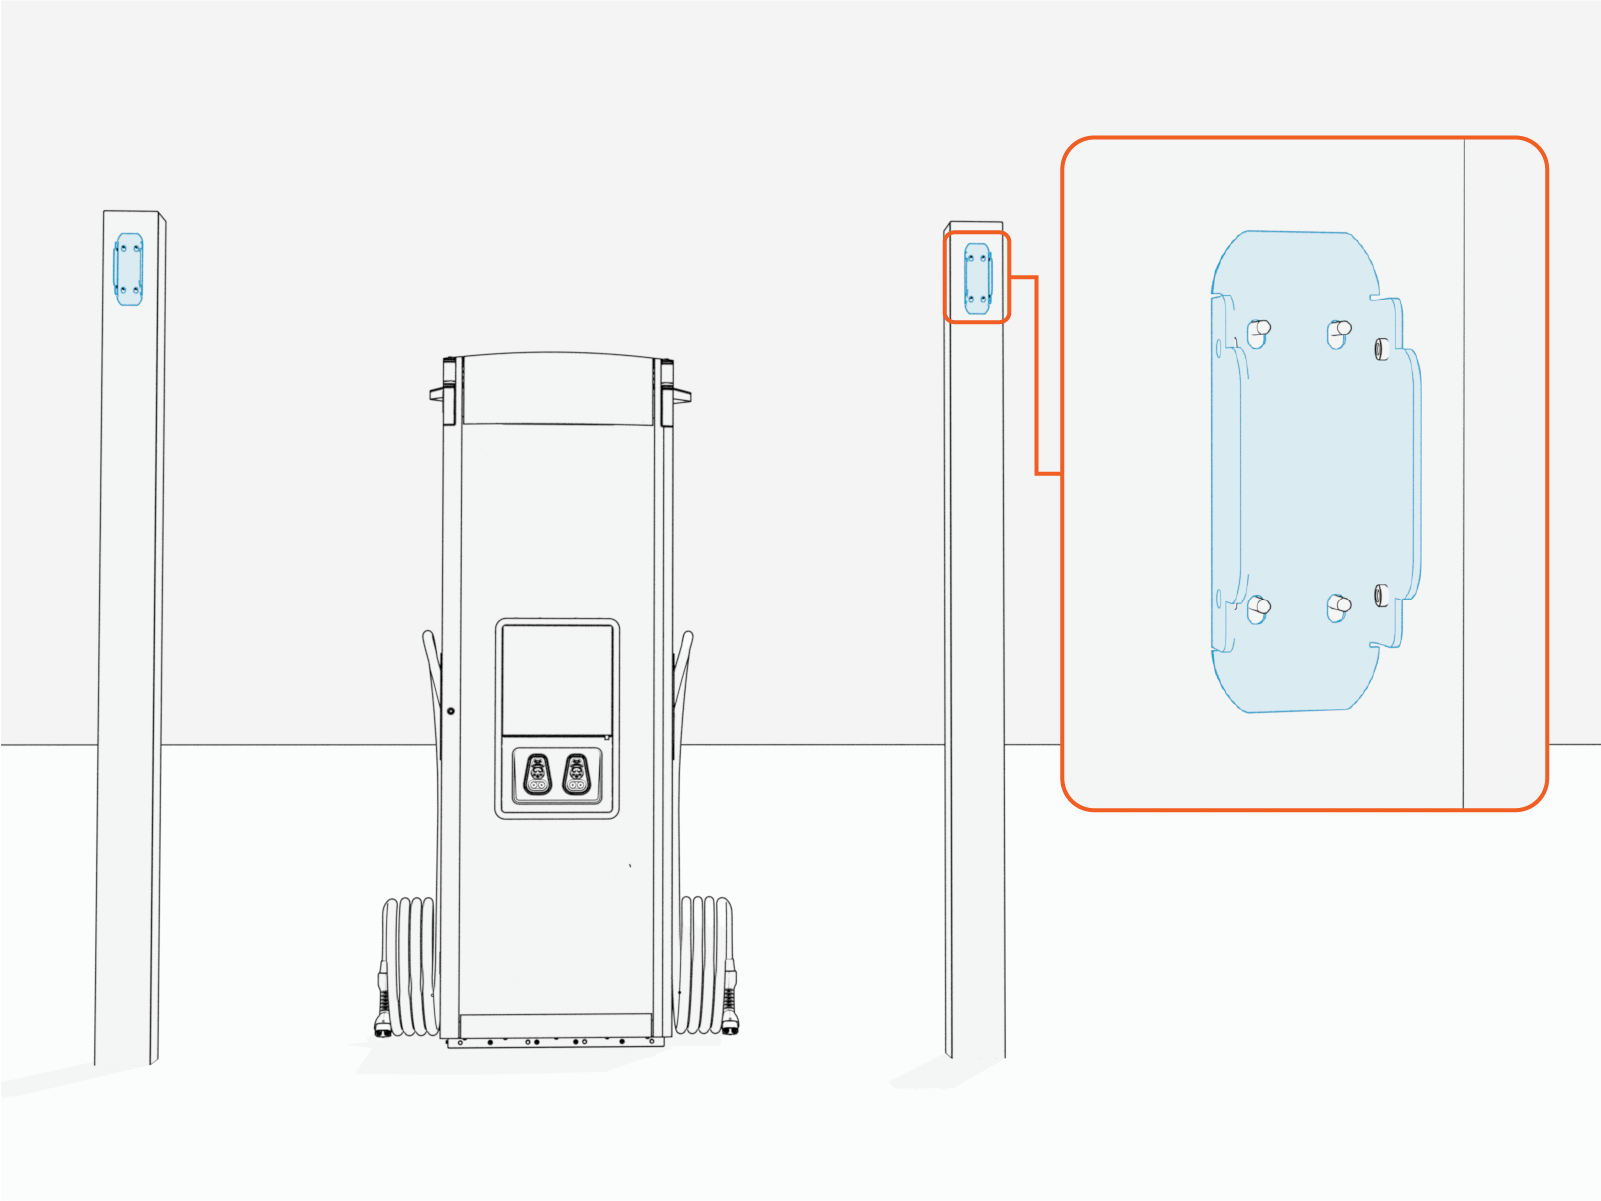
IMPORTANT: The site must be equipped with poles for mounting the overhead CMK Cable Management Kit next to each of the Express Solo charging cables.
The poles must meet the design specifications given in the Express Solo Site Design Guide.
Install Overhead CMK
Follow steps below to install the overhead CMKs.
-
Find the M8 hex nuts (x4) and M6 Torx screws (x4) shipped in the overhead CMK package.
-
Install the bracket onto the pole.
-
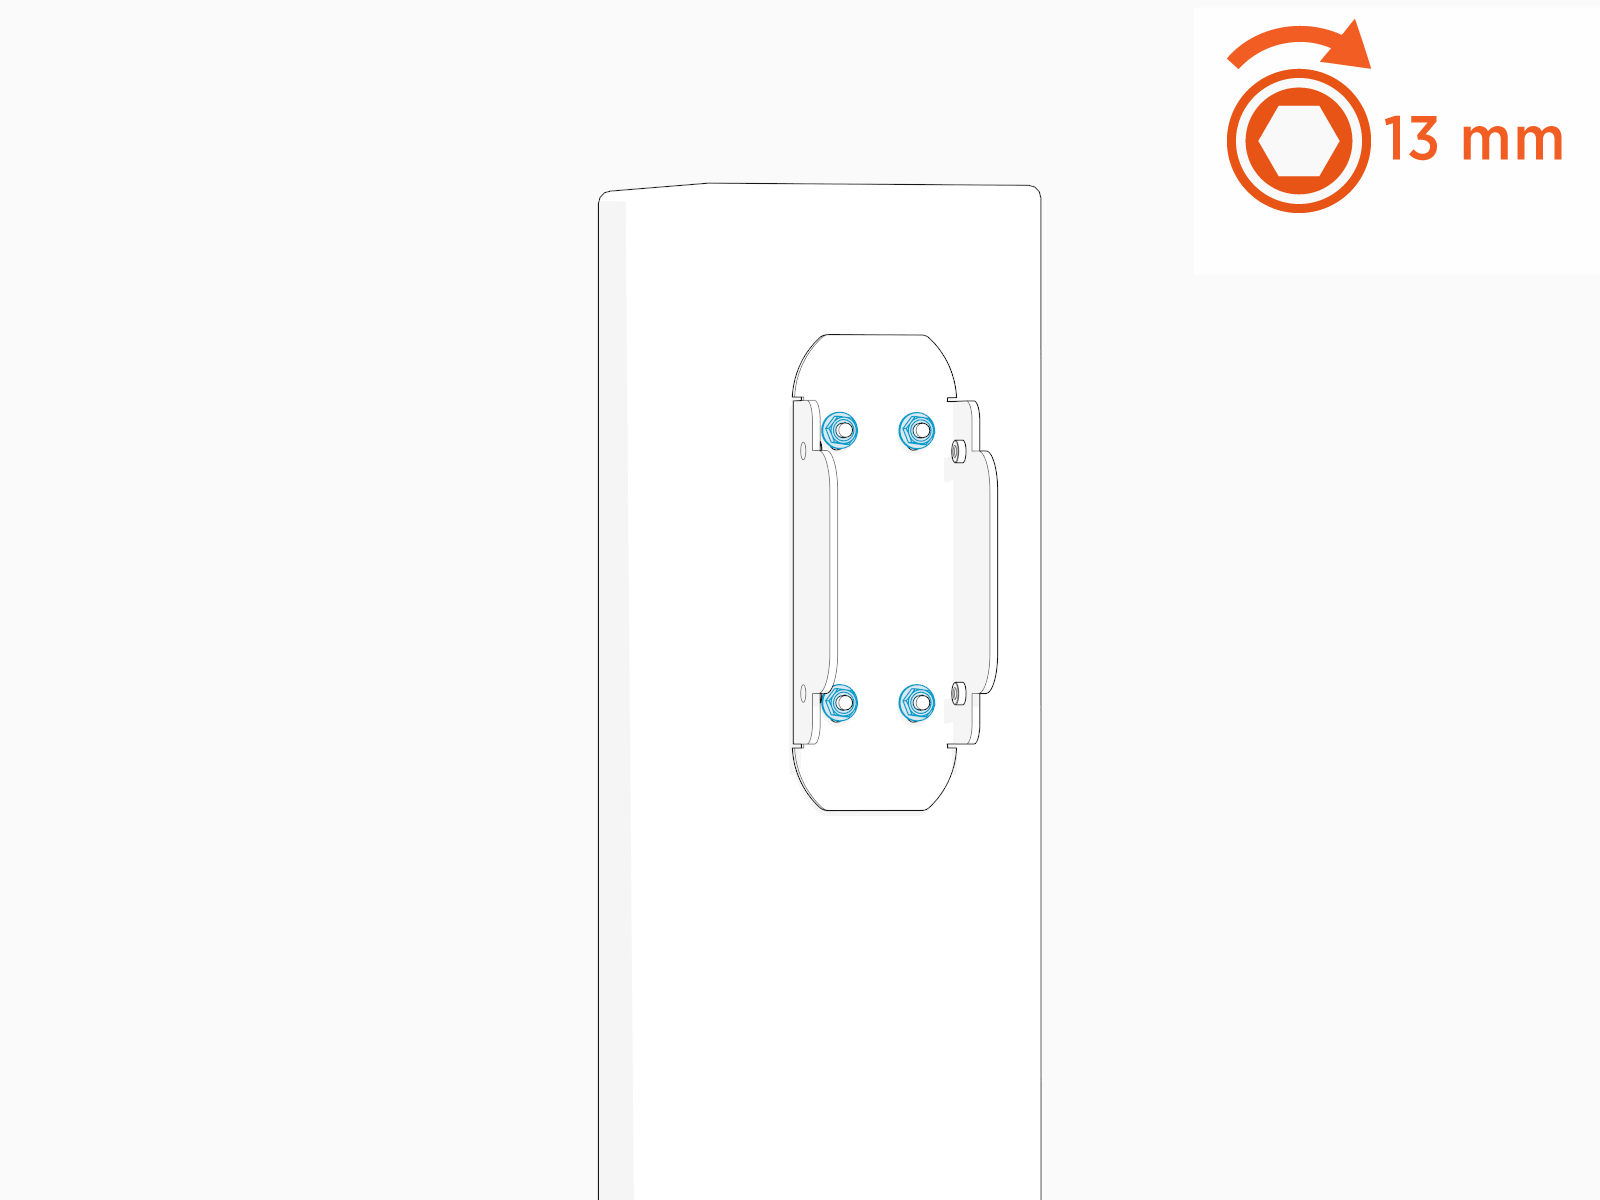
Install and torque the M8 hex nuts (x4) to 12.2 Nm (108 in-lb) to secure the bracket.
-
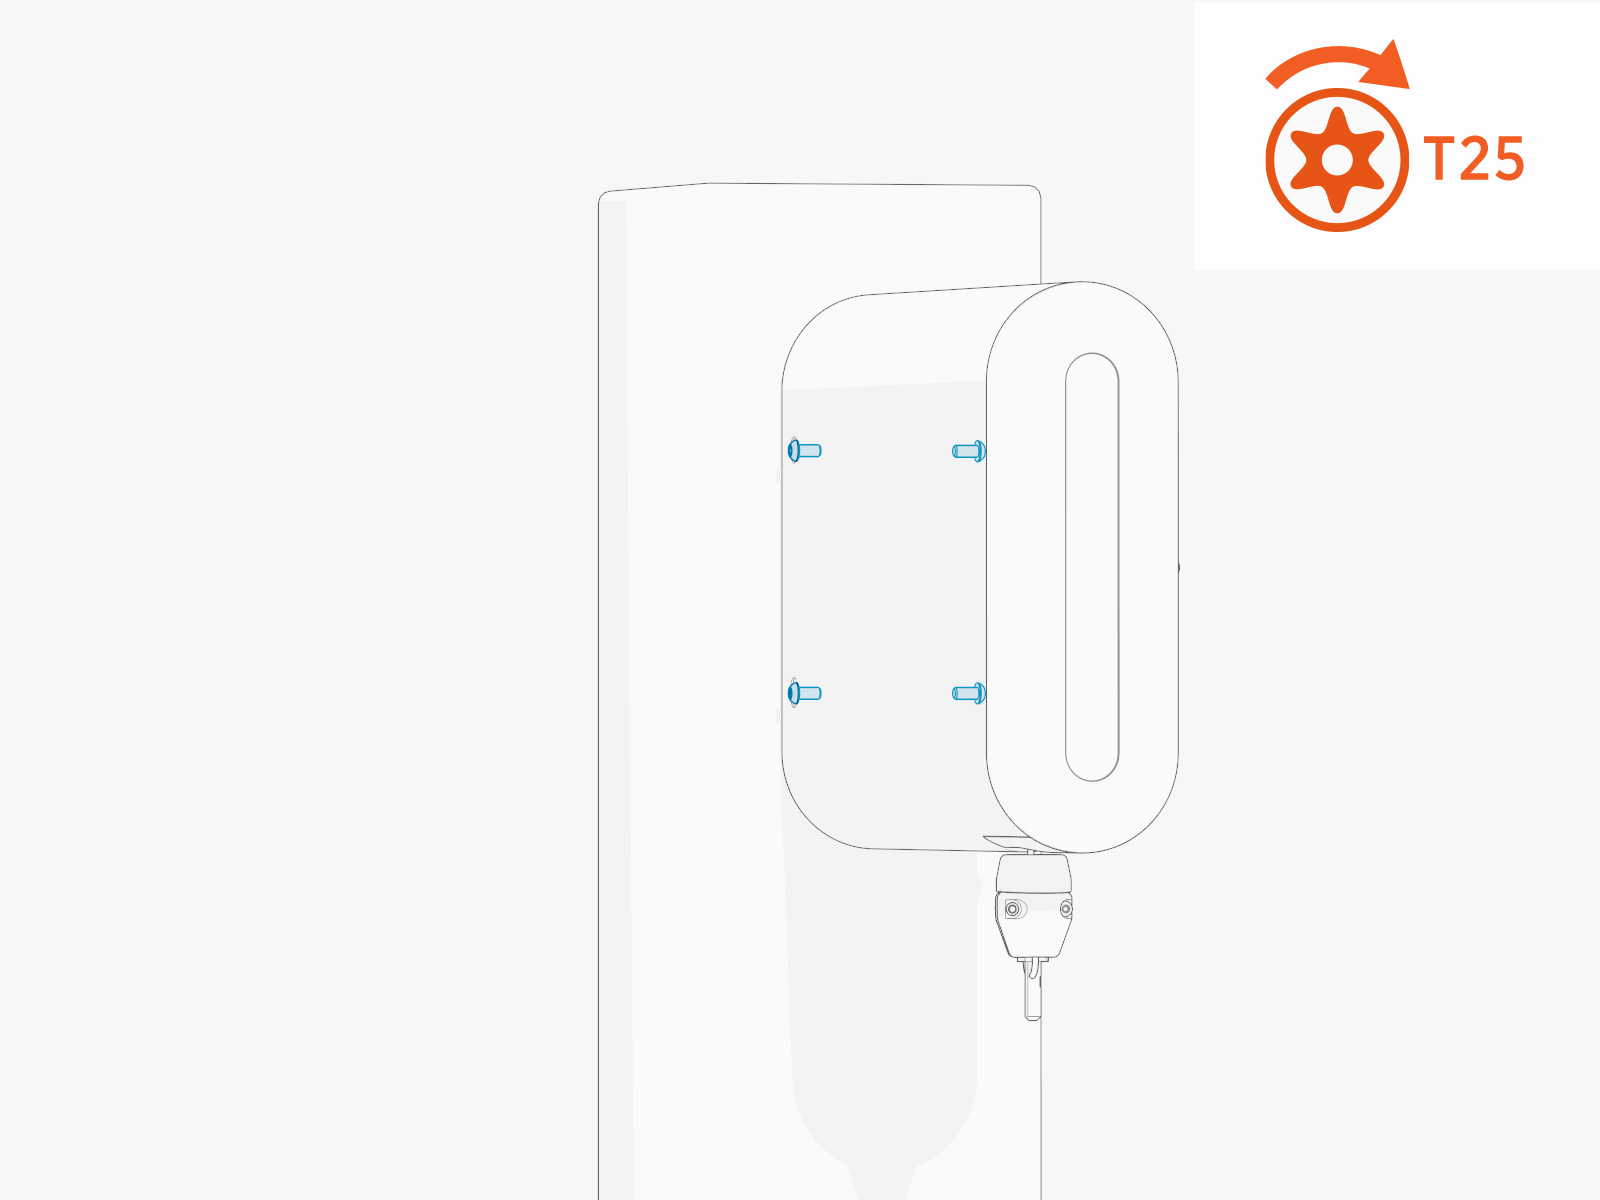
Align the overhead CMK
Cable Management Kit onto the bracket and install M6 Torx screws (x4, x2 on the left side and x2 on the right side).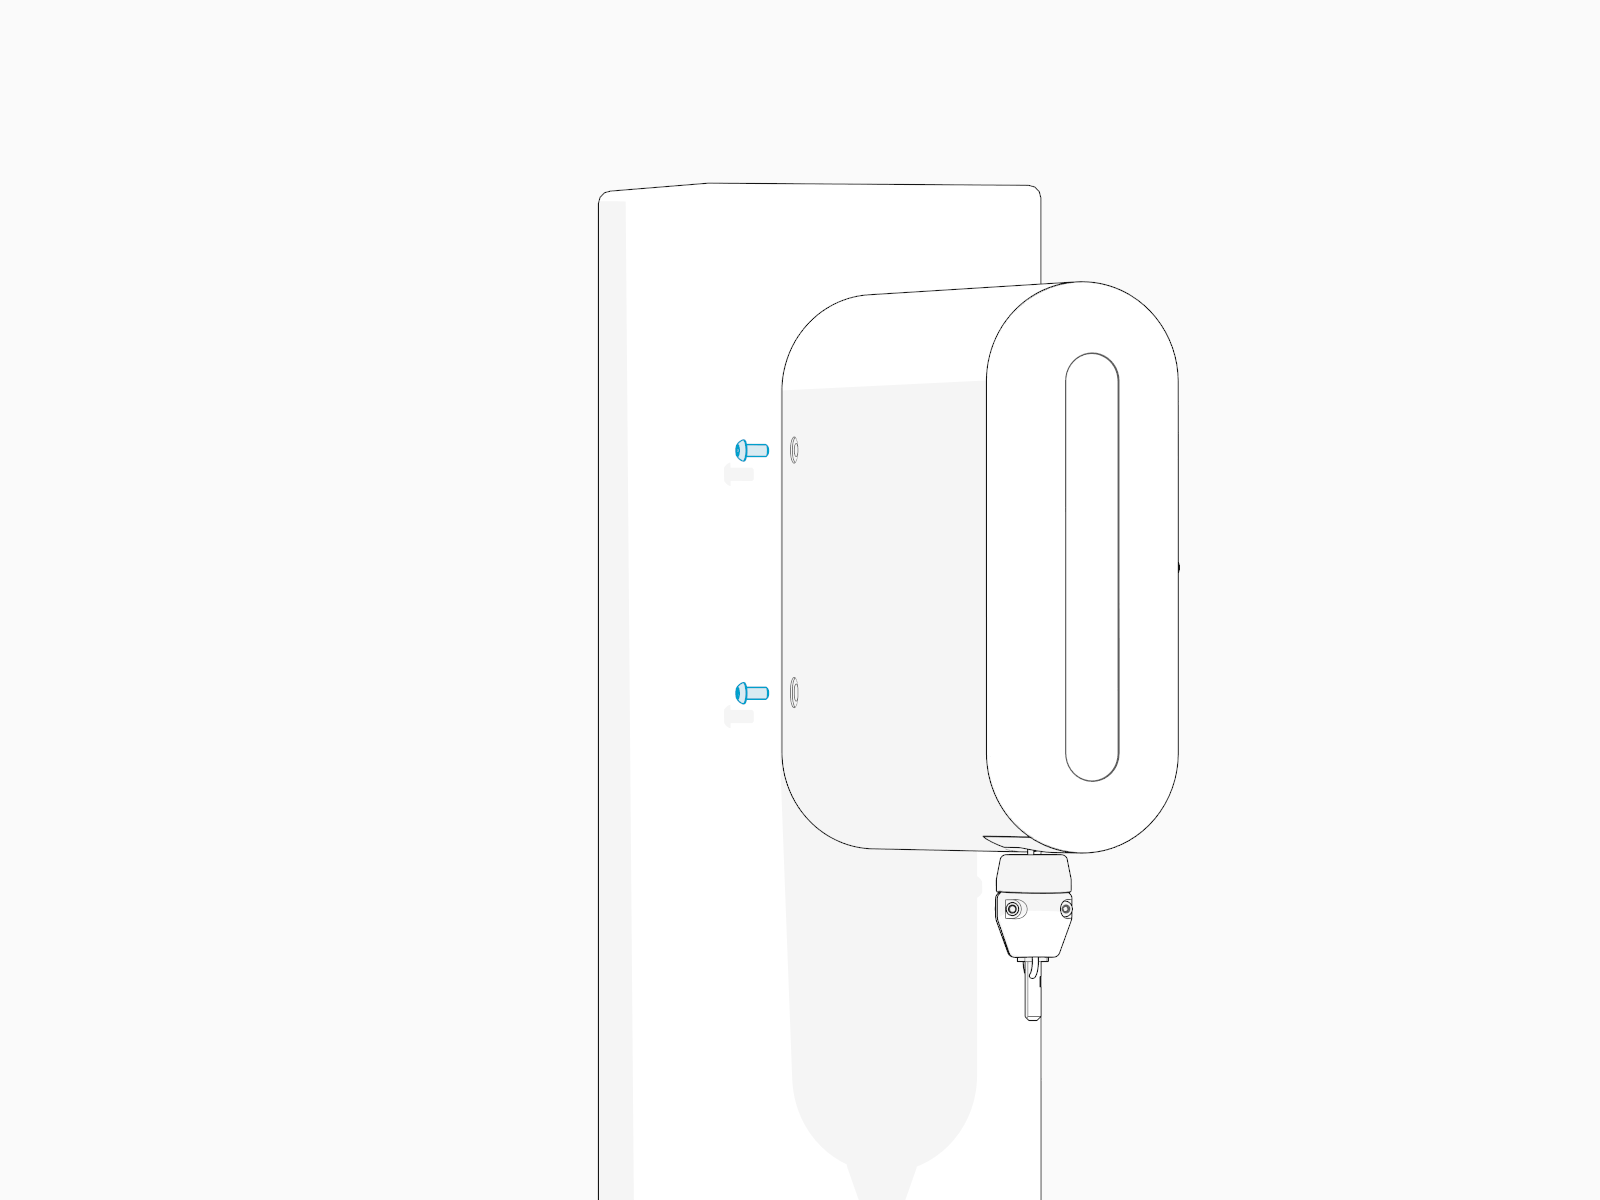
-
Torque the screws to 3.4 Nm (30 in-lb).
Install Charging Cable Tetherballs
Standard length (5.8 m or 19 ft) charging cables come with a tetherball preinstalled onto the cable. For non‑LCC Liquid Cooled Cable medium length (7.6 m or 25 ft) charging cables, a tetherball is not preinstalled onto the cable and you must follow steps below to install tetherballs onto each charging cable (if not already done).
Illustrations given below are based on the swingarm CMK Cable Management Kit, but the concept at each step applies to all cable management options.
-
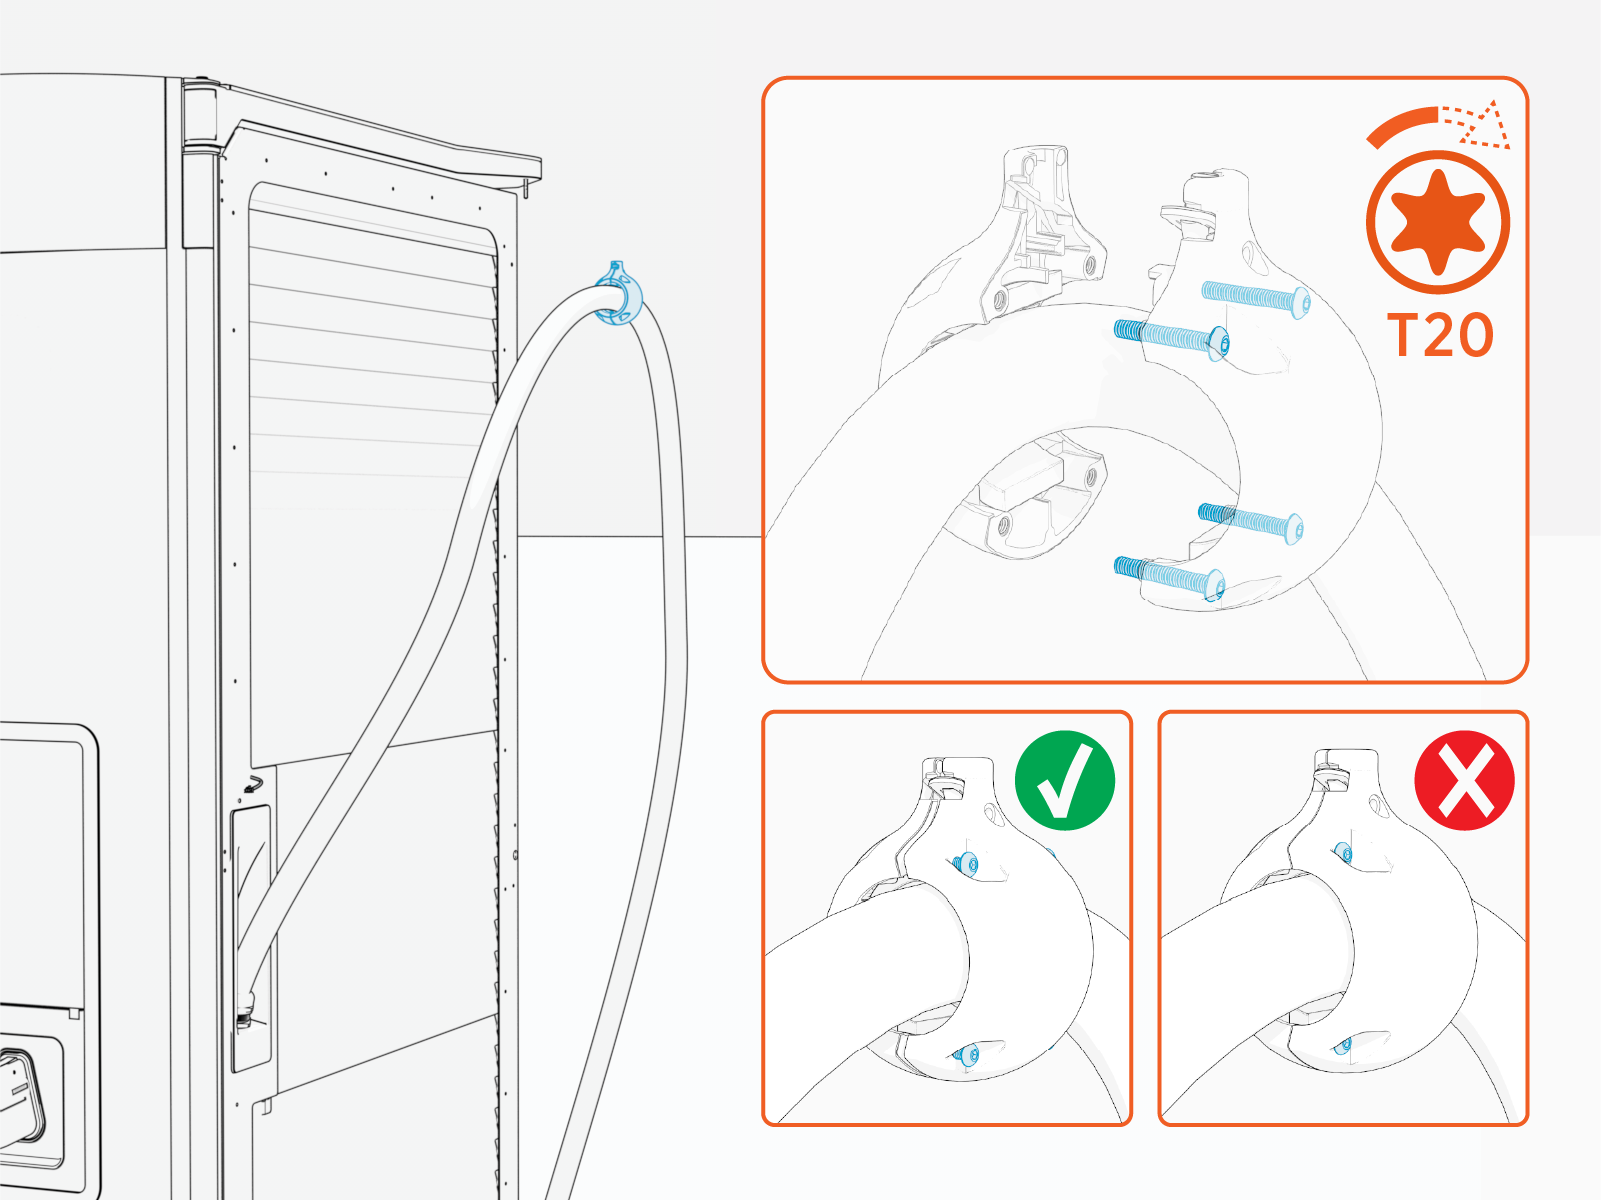
Loosely install the tetherball onto the cable.
-
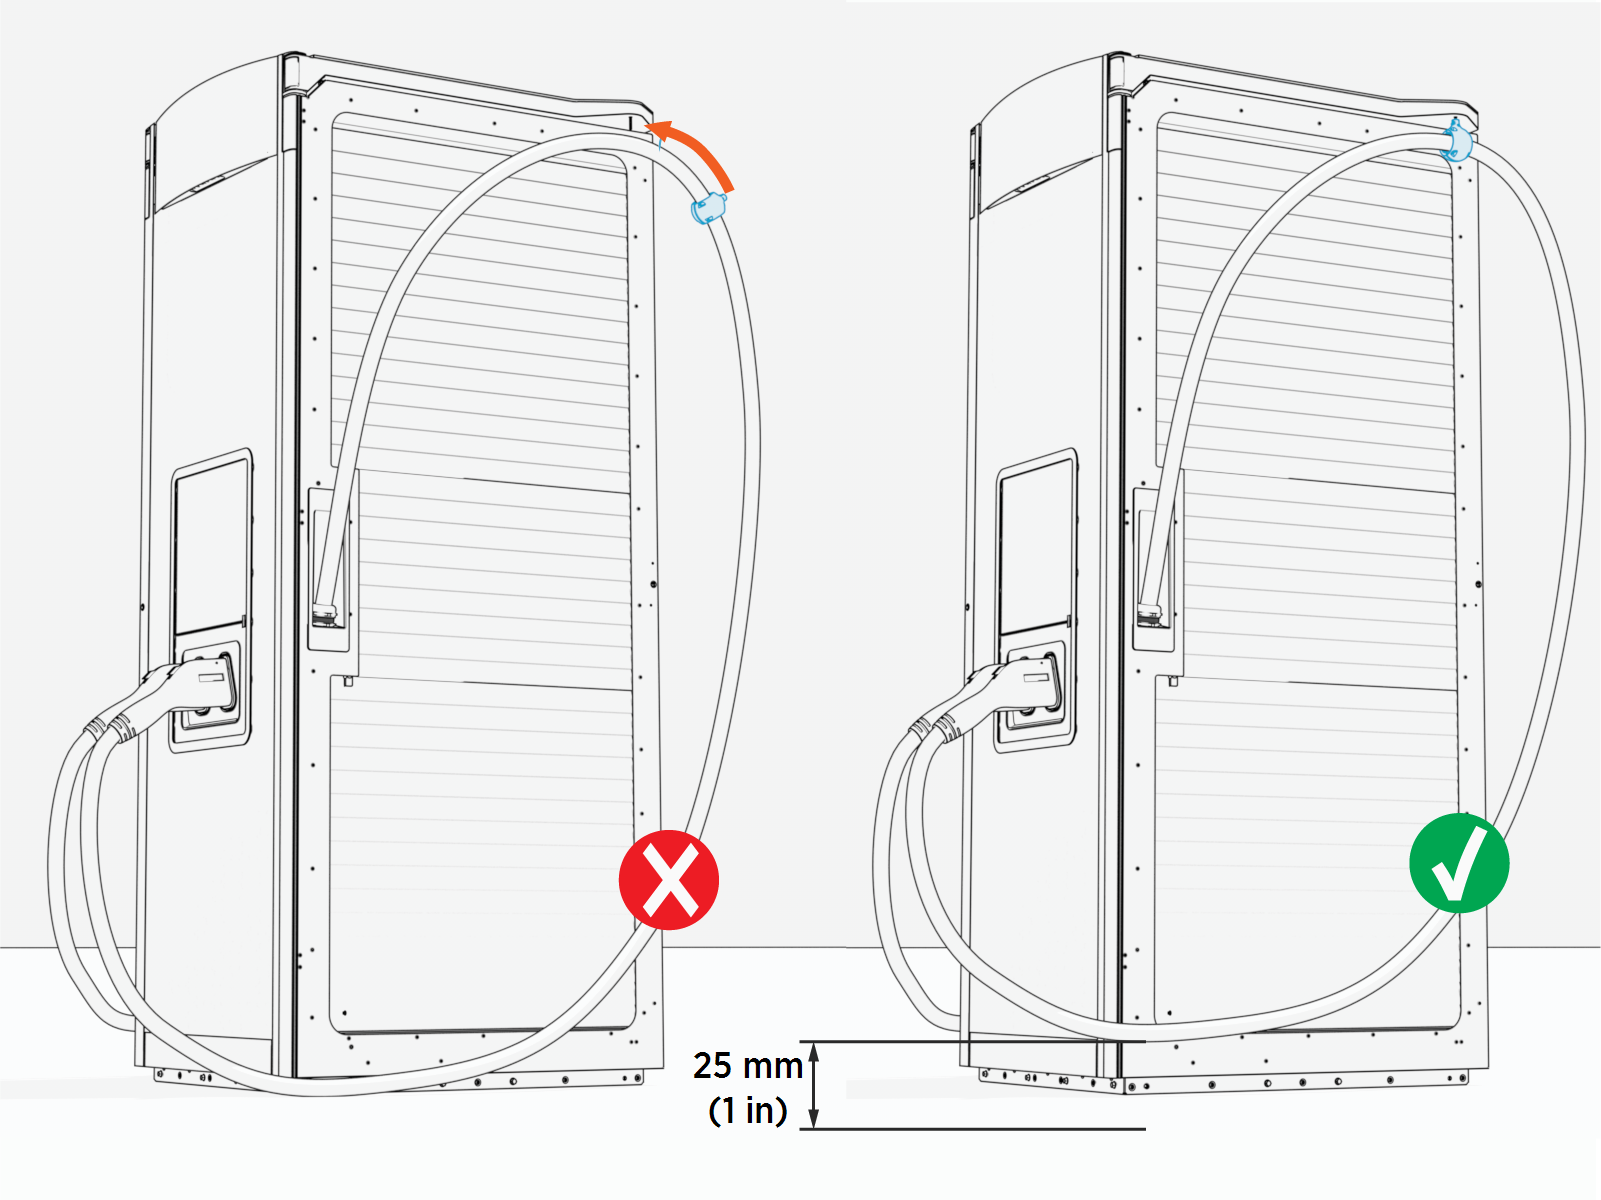
If necessary, slide the tetherball to a position on the cable such that the lowest point of the cable remains 25 mm (1in) off the ground when the cable is in its stored position.
-
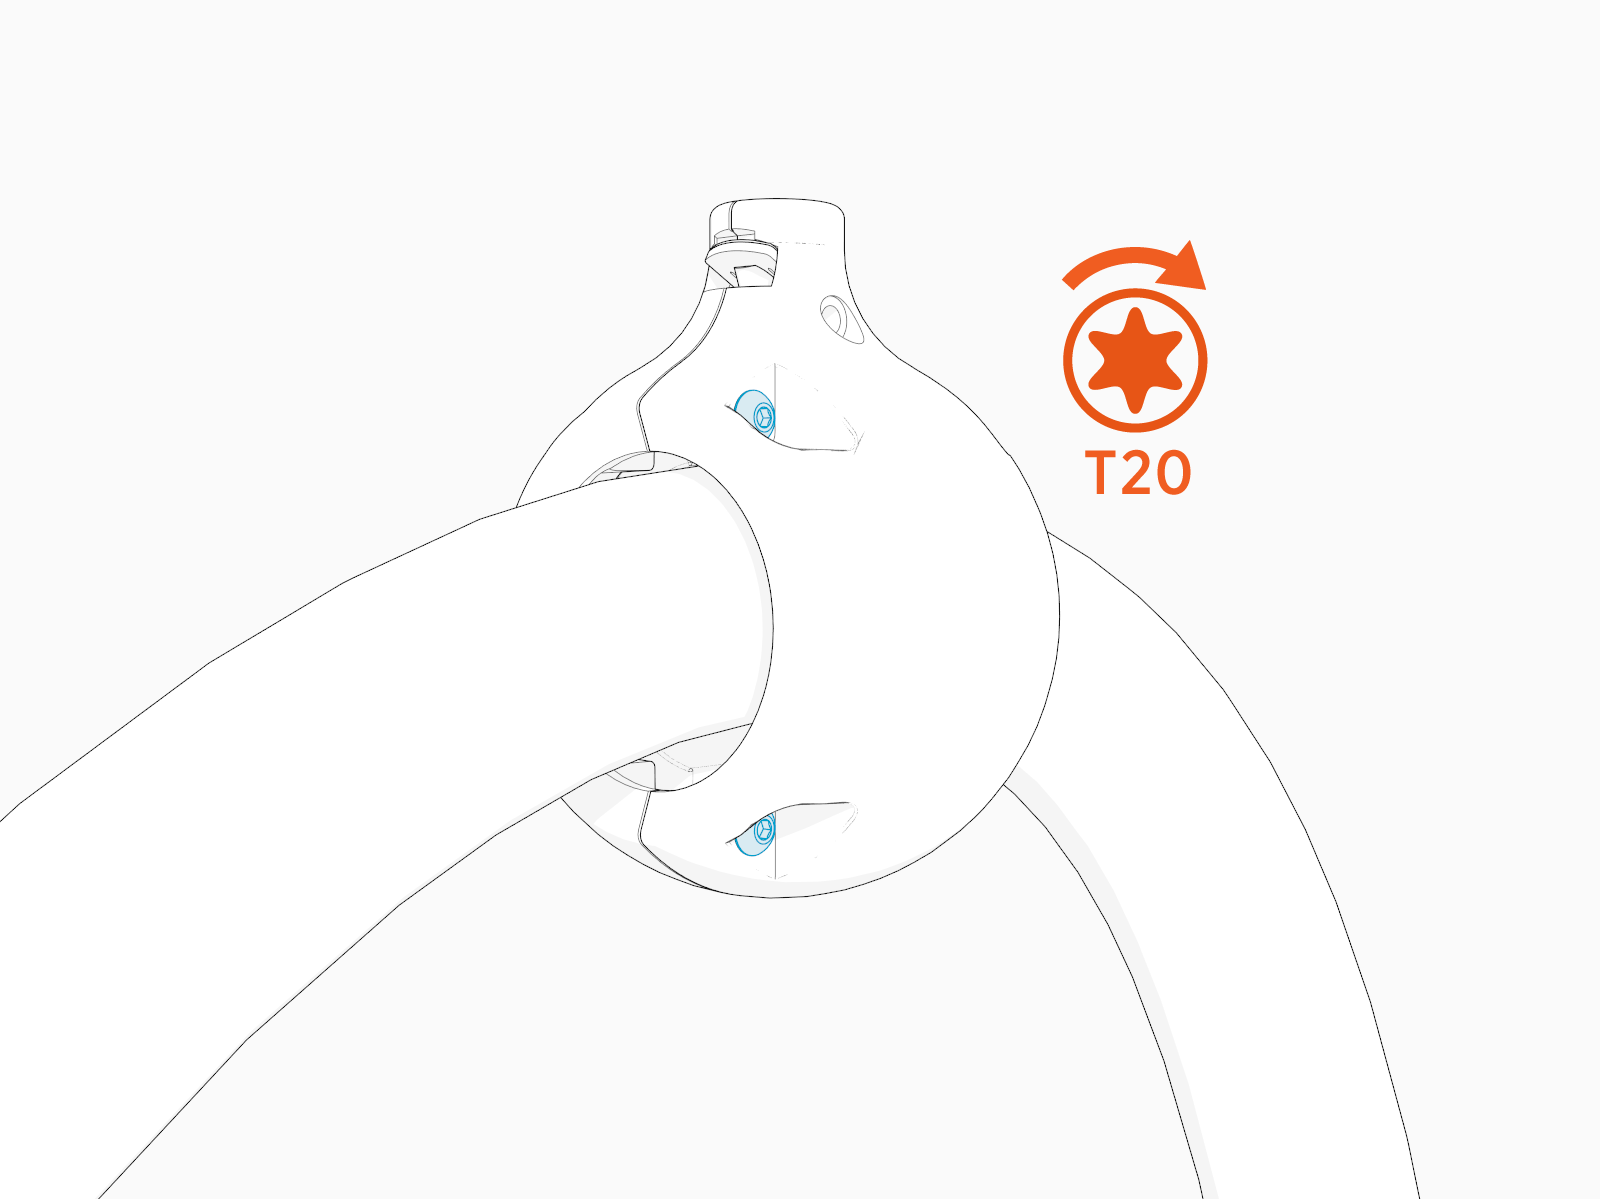
Torque the screws (x4) to 2.8 Nm (25 in-lb).
Suspend Charging Cables
The procedure for suspending charging cables is the same, whether Express Solo is configured with fixed tether point, swingarm CMK Cable Management Kit, or overhead CMK Cable Management Kit. The charging cable tetherball must be affixed to a tetherball anchor pin
on the cable management system.
Follow steps below to suspend the charging cables (if not already done). Illustrations given below are based on the swingarm CMK Cable Management Kit, but the concept at each step applies to all cable management options.
-
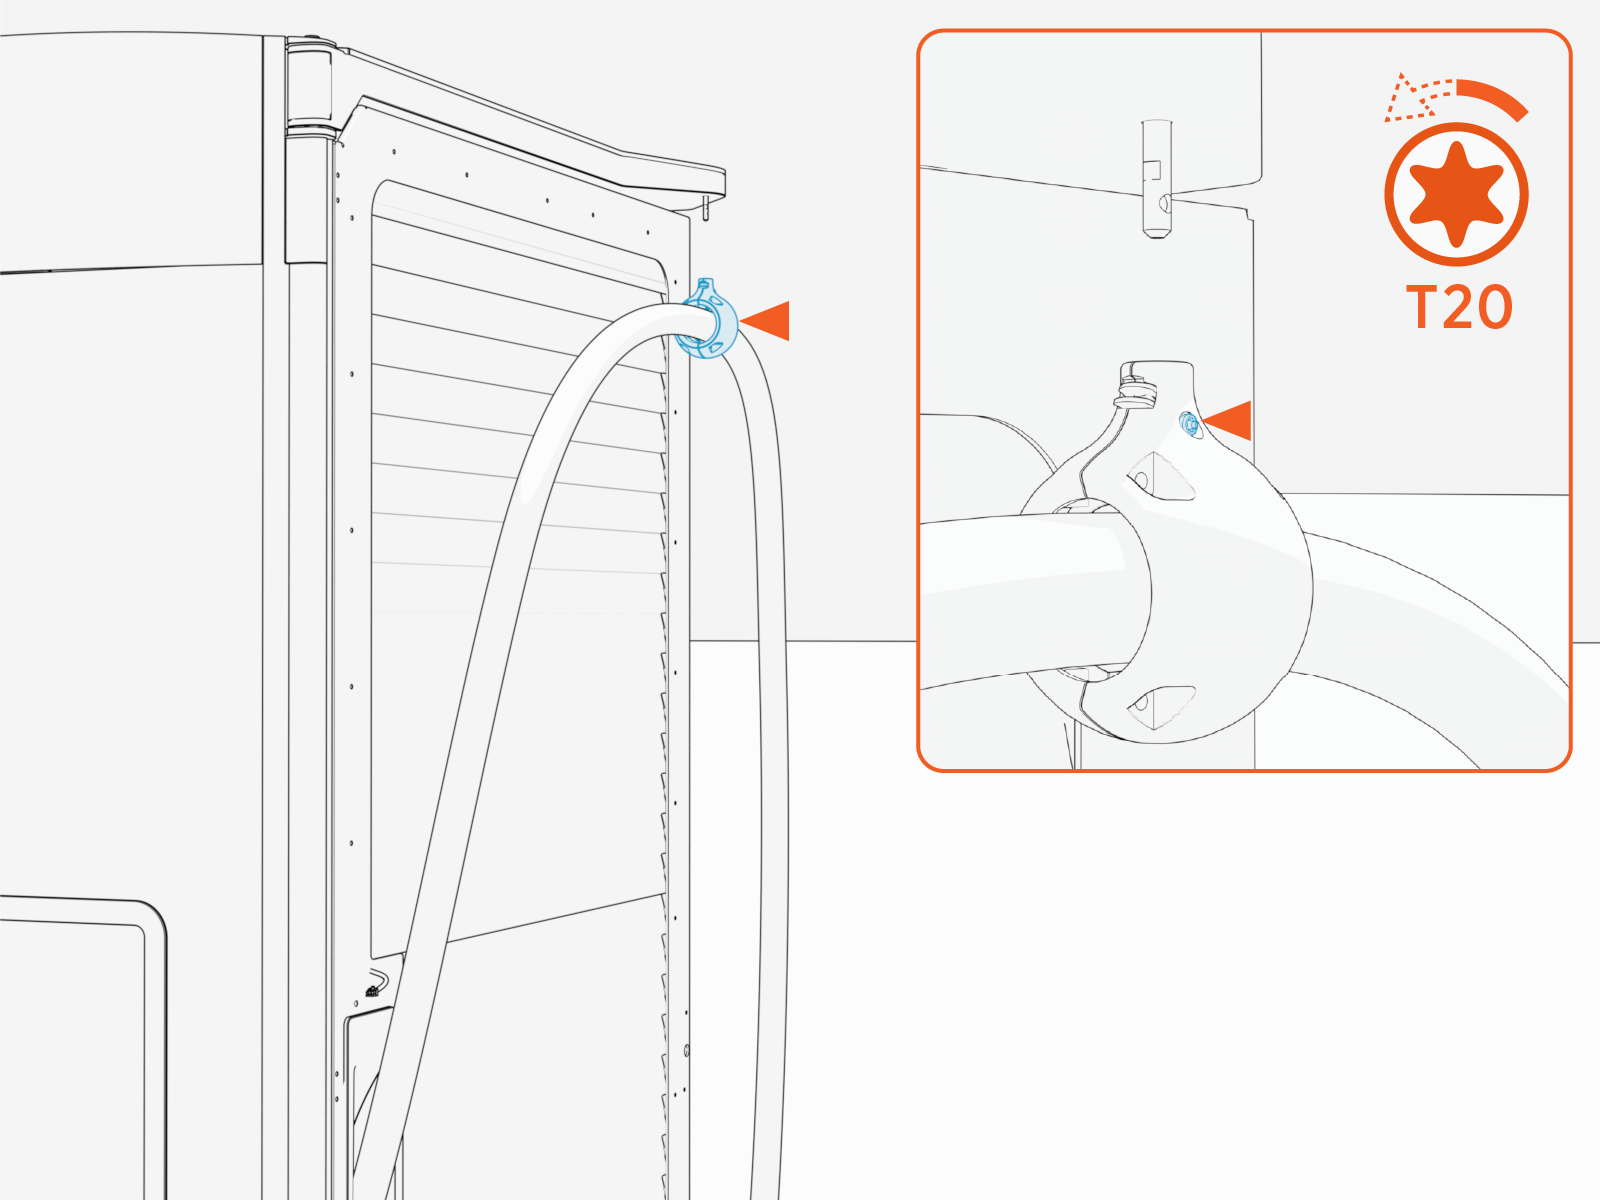
If it is not already loose, loosen (do not remove) the tetherball set screw.
-
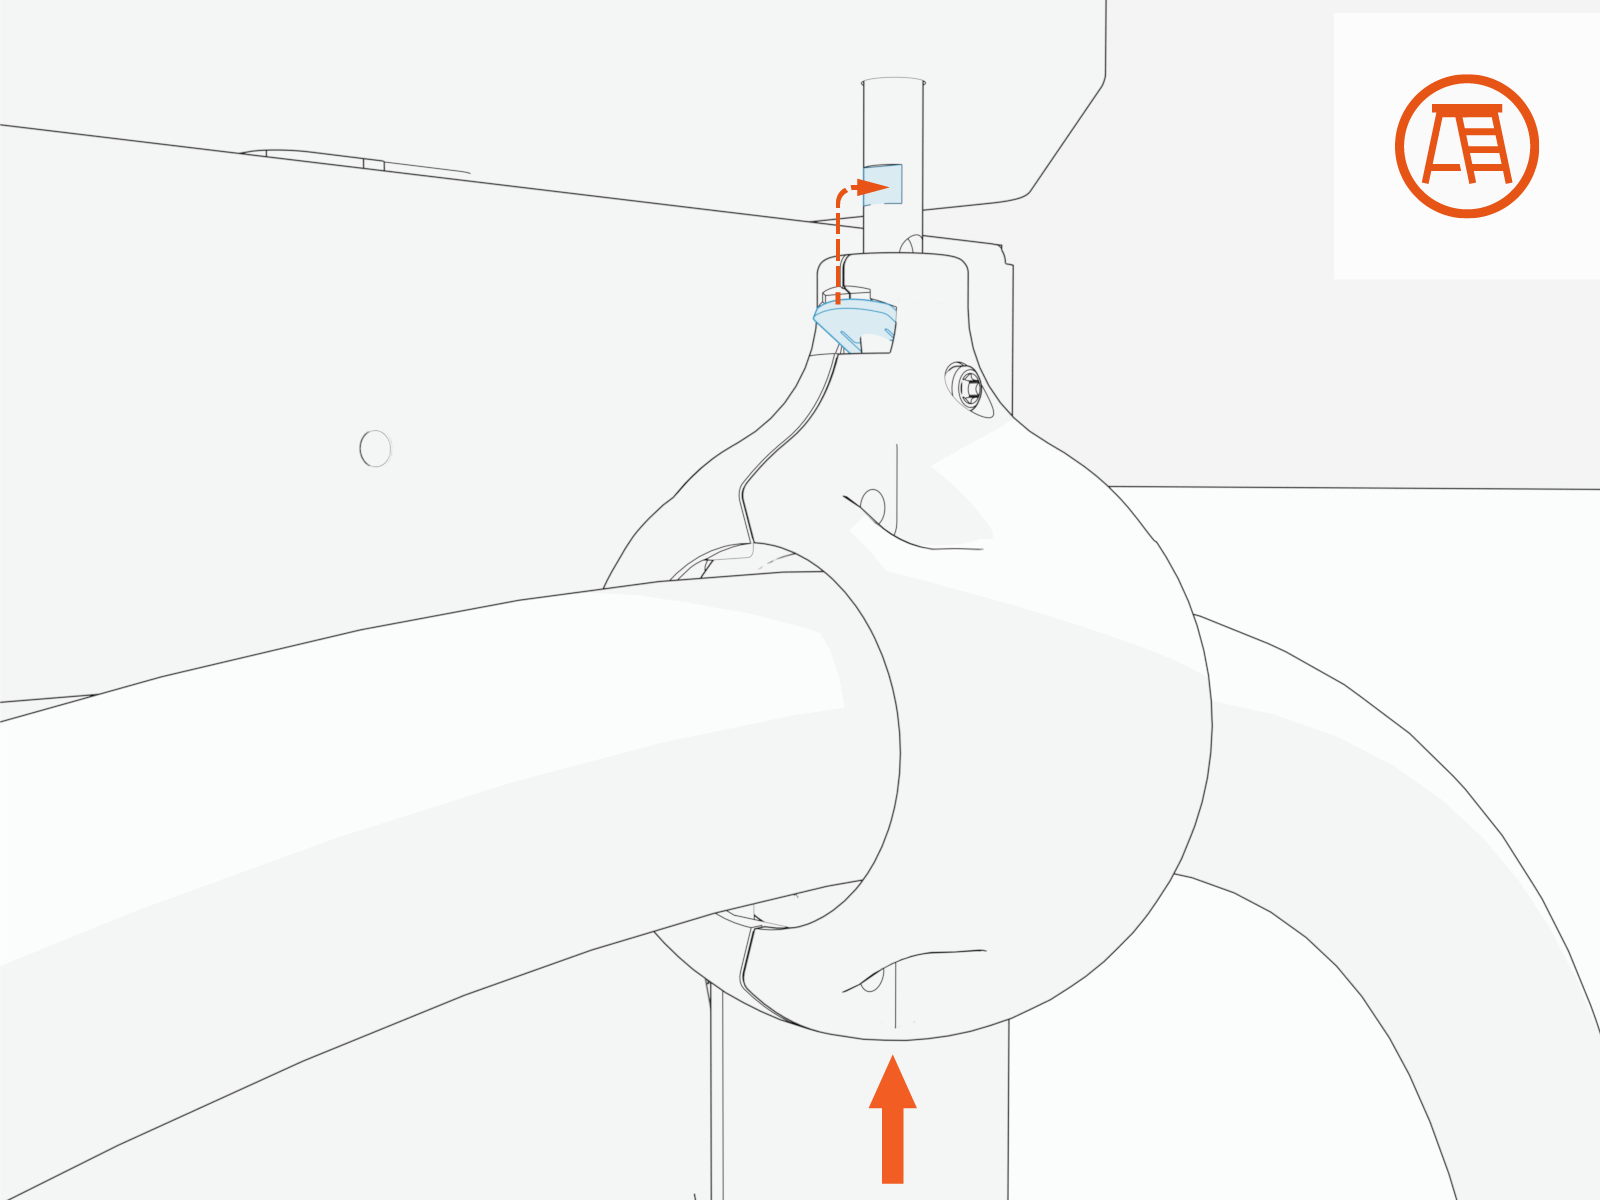
Align the tetherball spring tab with the flat notch on the anchor pin. While aligned, gently push the tetherball onto the anchor pin.
-
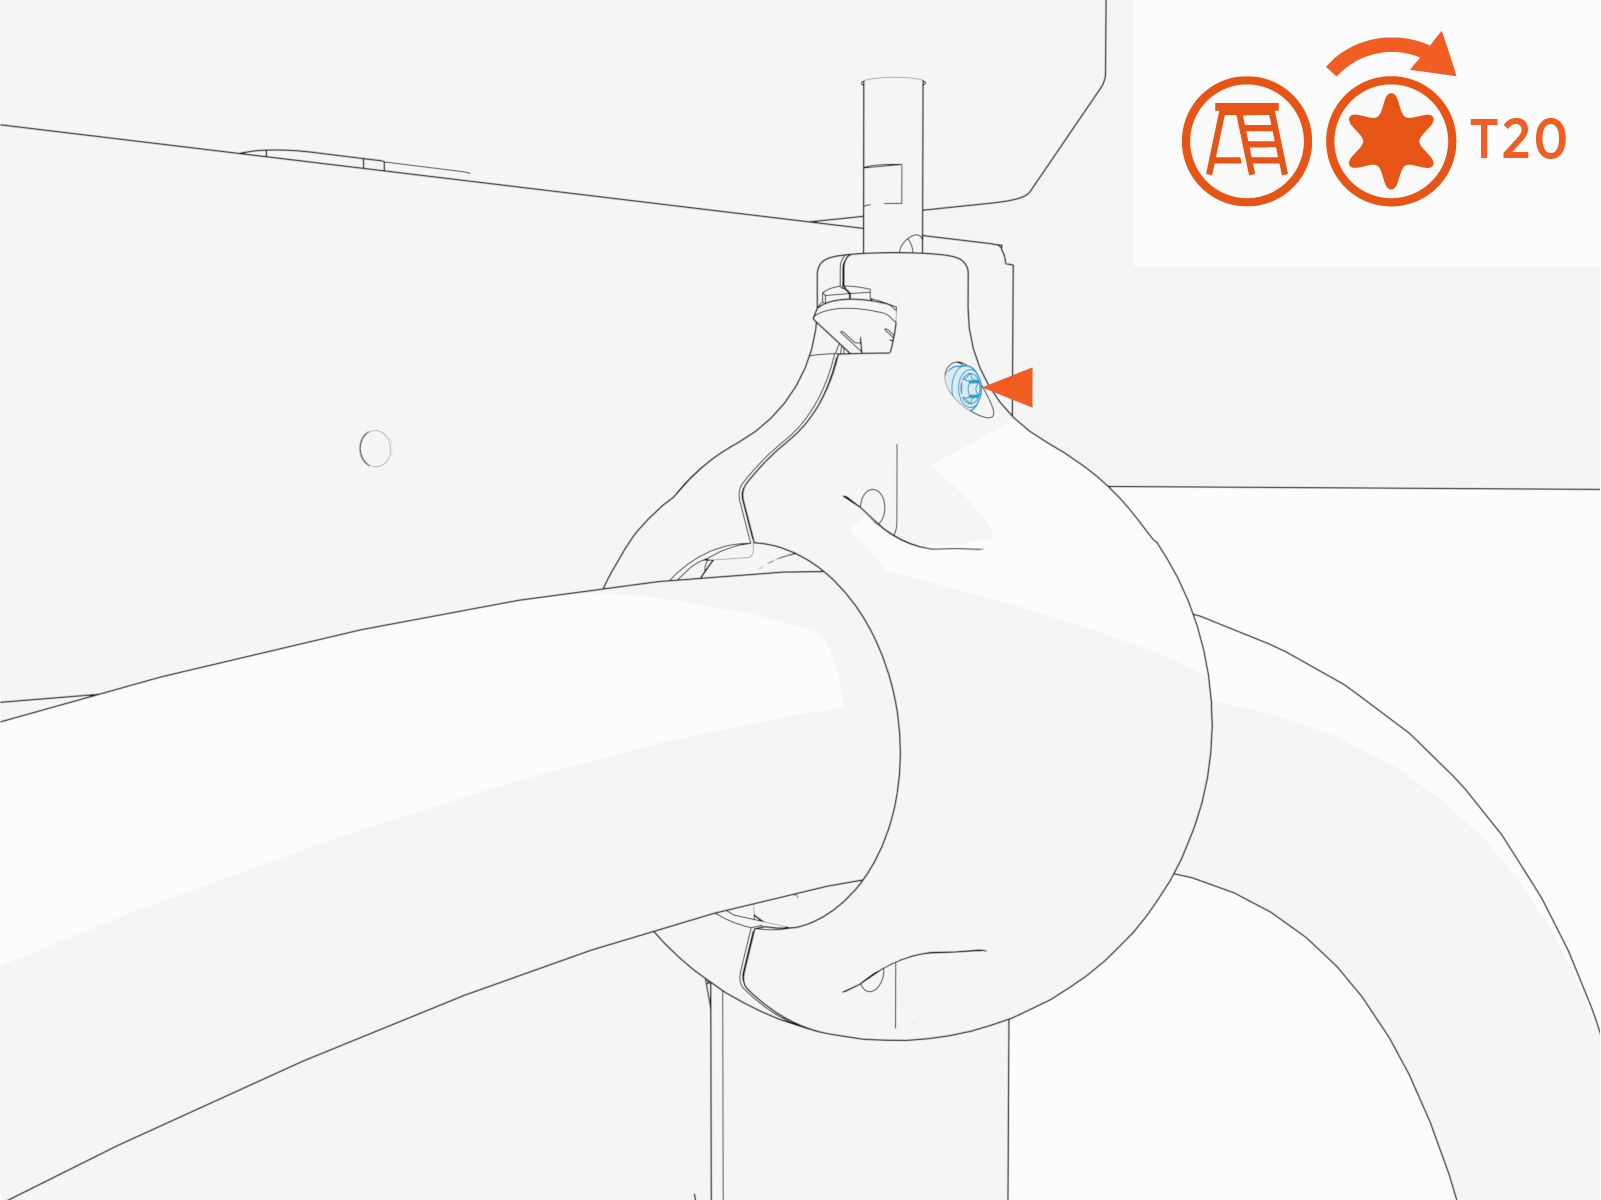
Torque the set screw to 2.8 Nm (25 in-lb).
-
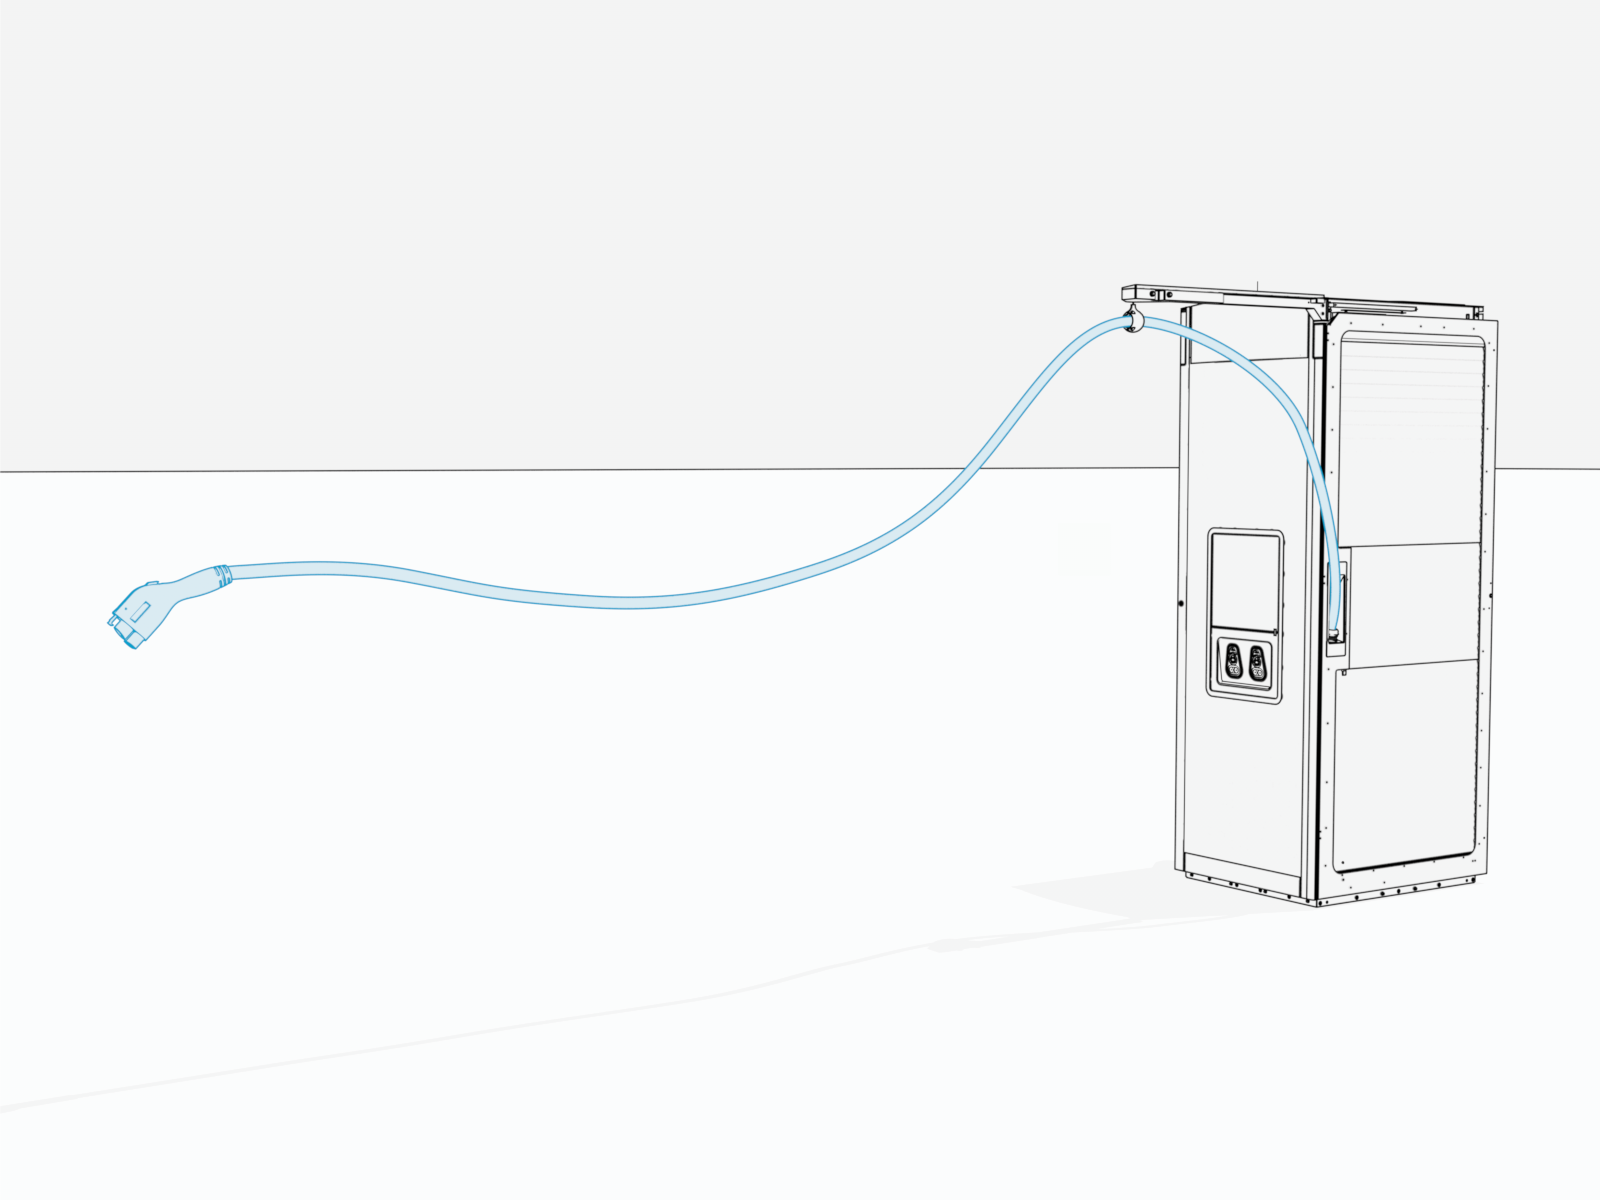
Tug on the cable to check that it is securely attached and the swingarm is functioning. If you find limited motion or retraction, contact ChargePoint.
-
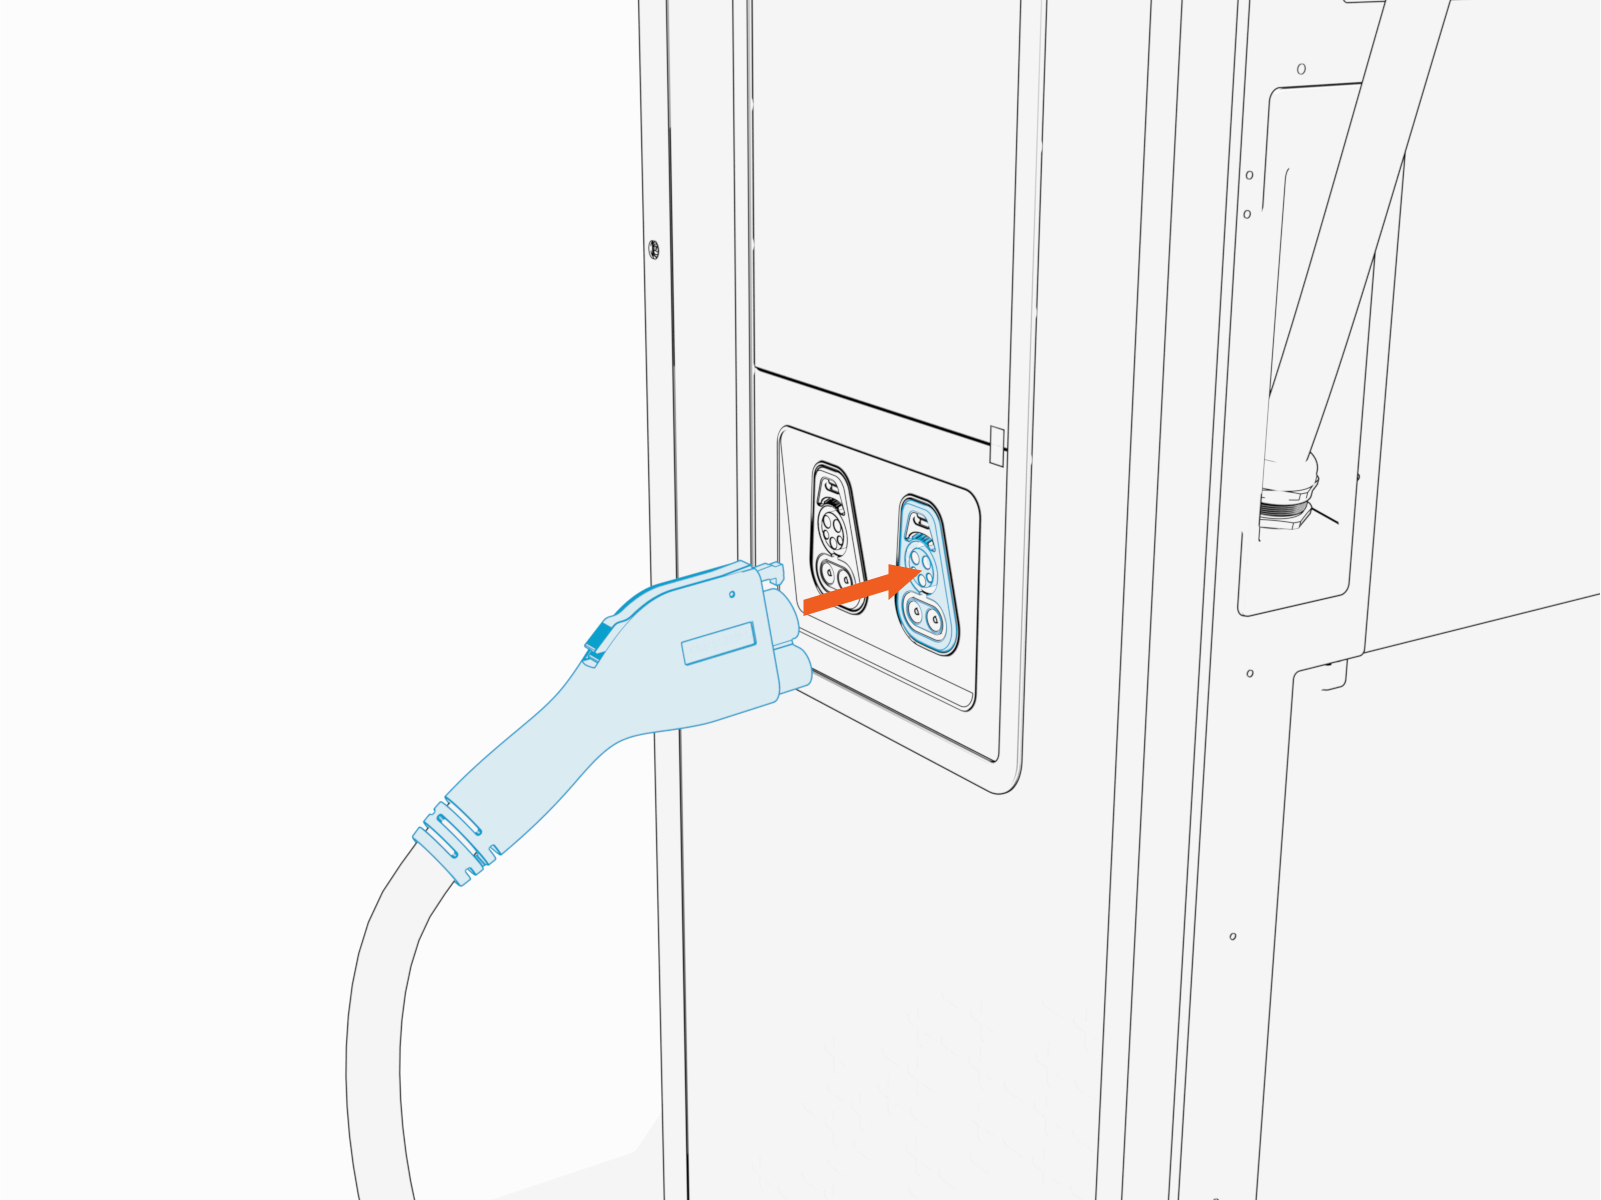
Insert the charging cable connector into the corresponding holster.
-
Repeat the steps above to suspend the other charging cable.