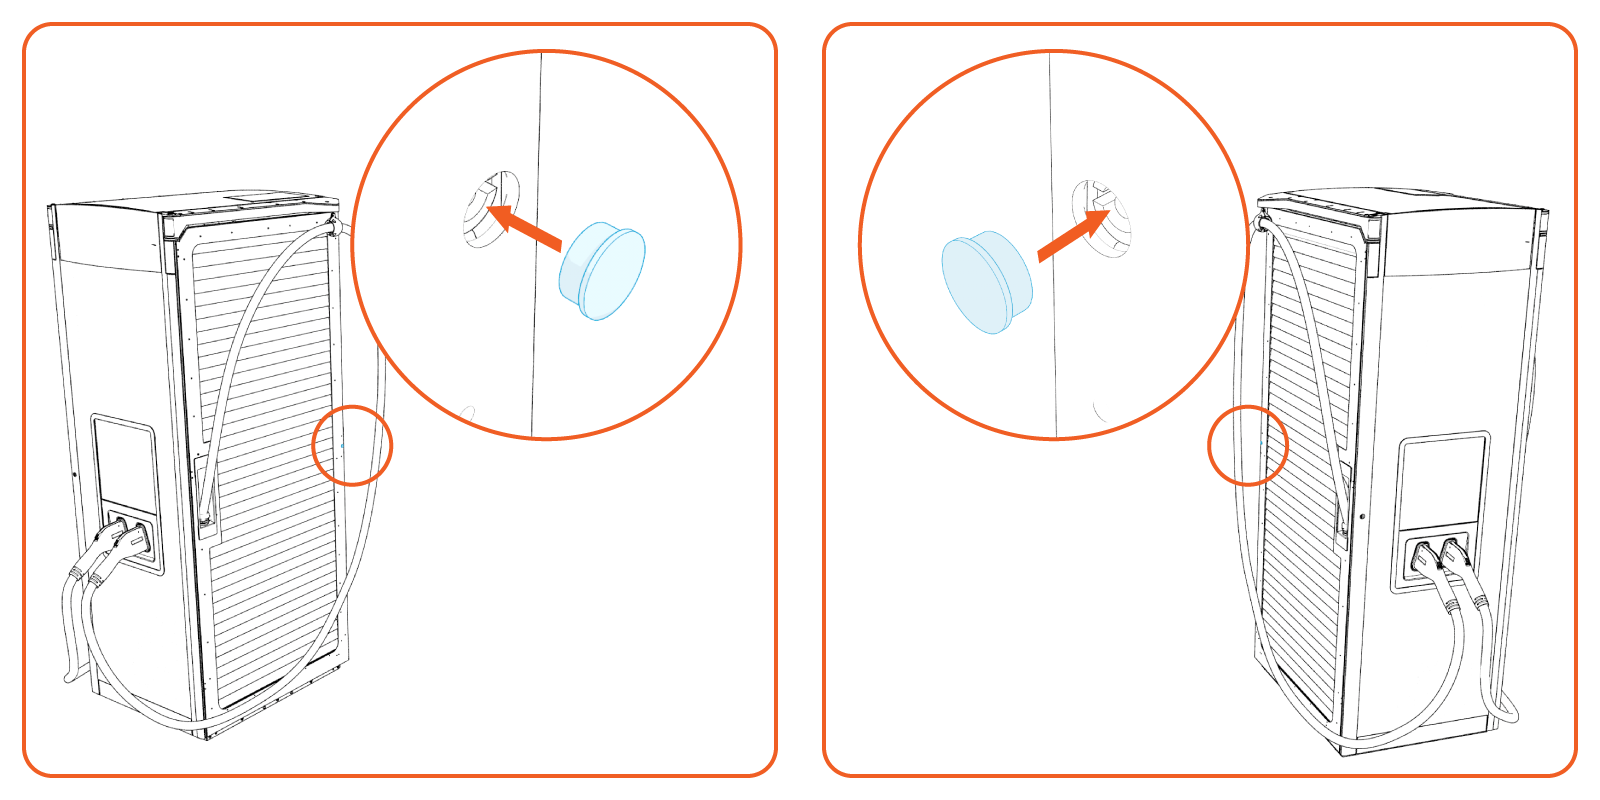
Install Covers and Close
Follow all instructions provided in this chapter to install safety covers and close the station.
Reinstall Safety Shields
Follow procedures below to reinstall all safety shields.
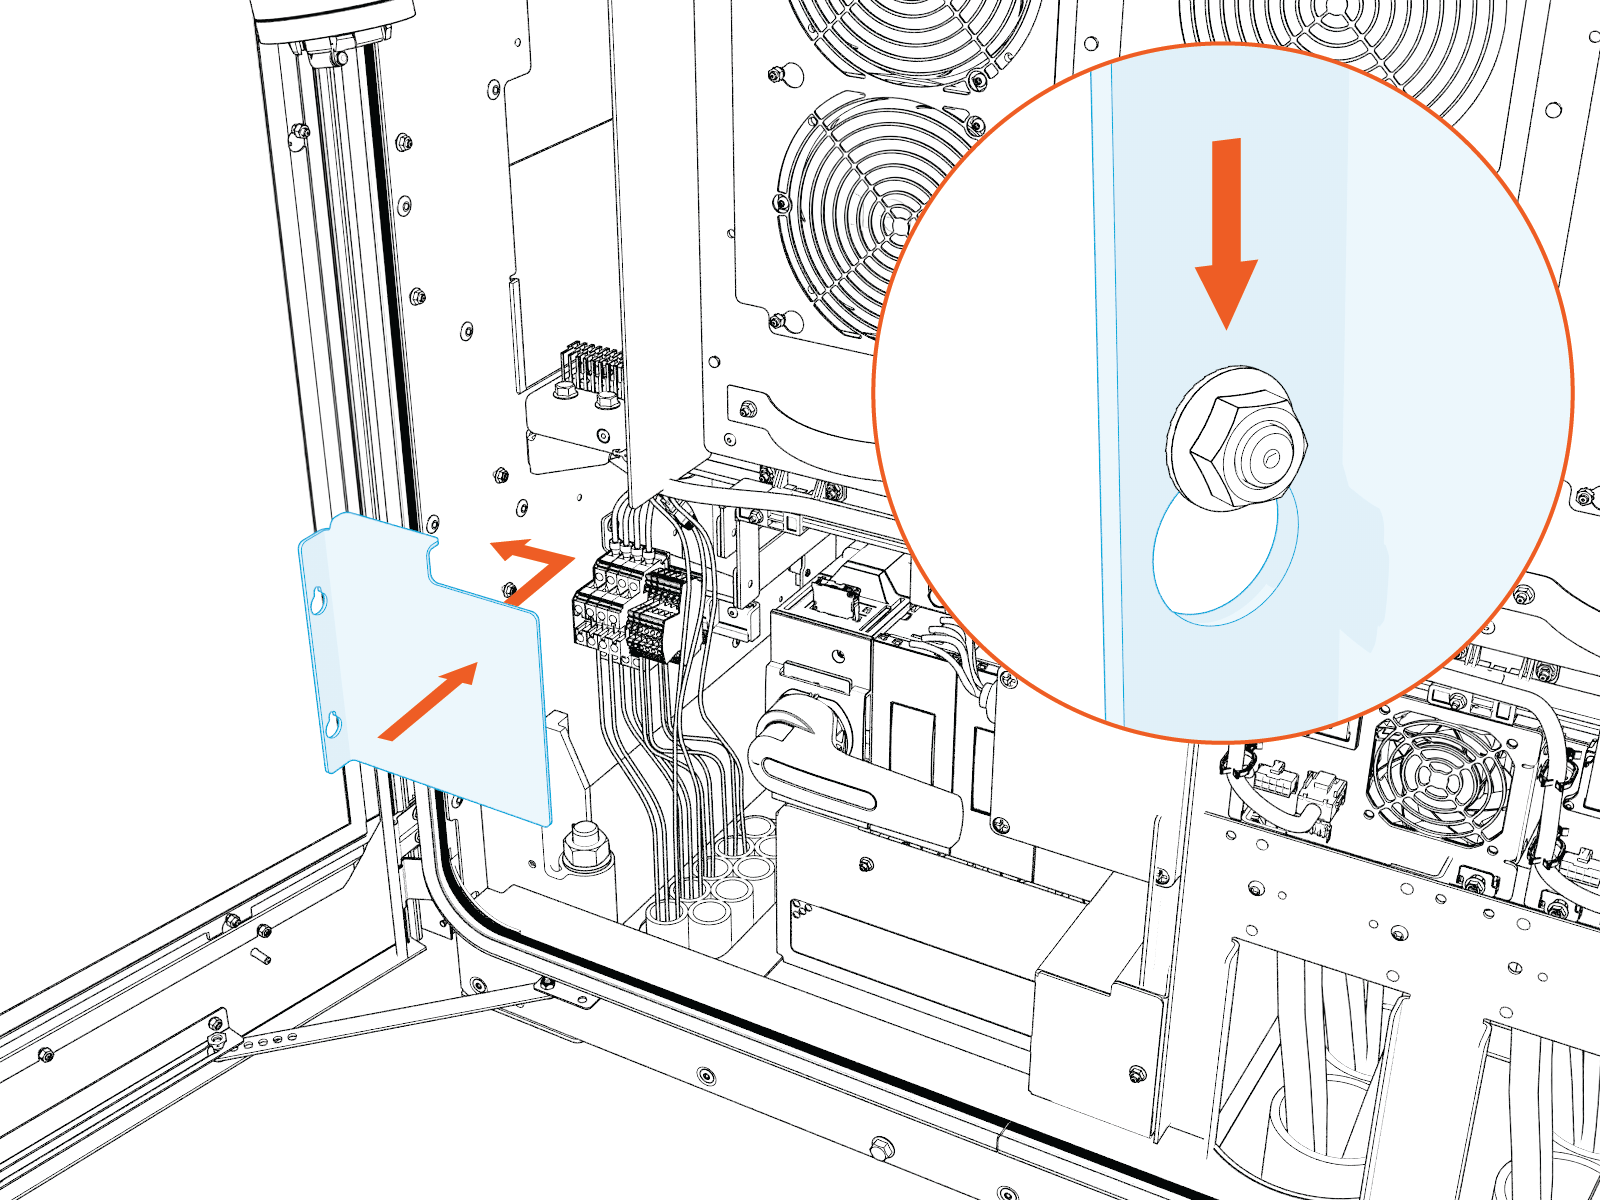
DC Terminals Safety Cover (Intake Side)
-
Seat the cover back into its original place. Slide the cover downward so the keyholes lock behind the retaining nuts.
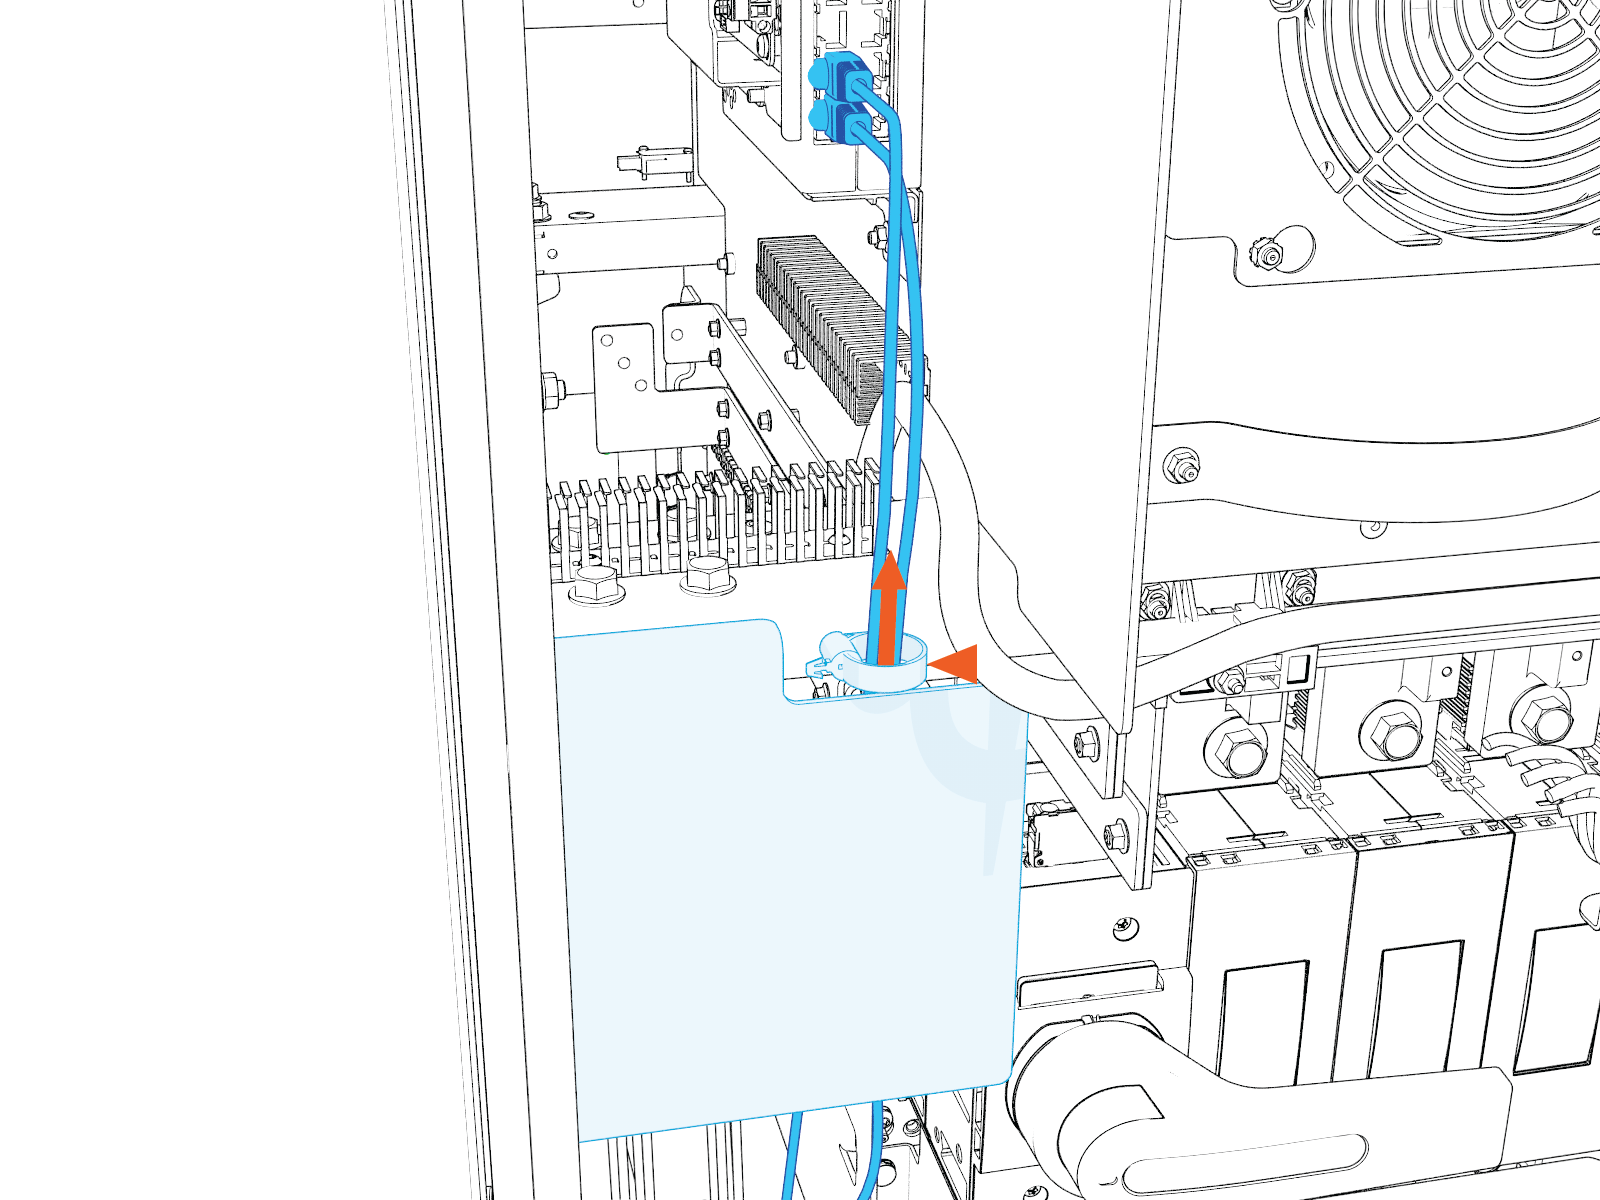
Route the Ethernet cables behind the cover and up through the cutout located in the upper right corner of the cover. See the image below for details. Ensure cables are routed through the cable clip. Make sure the cables are not pinched or excessively bent as they pass through the cutout.
-
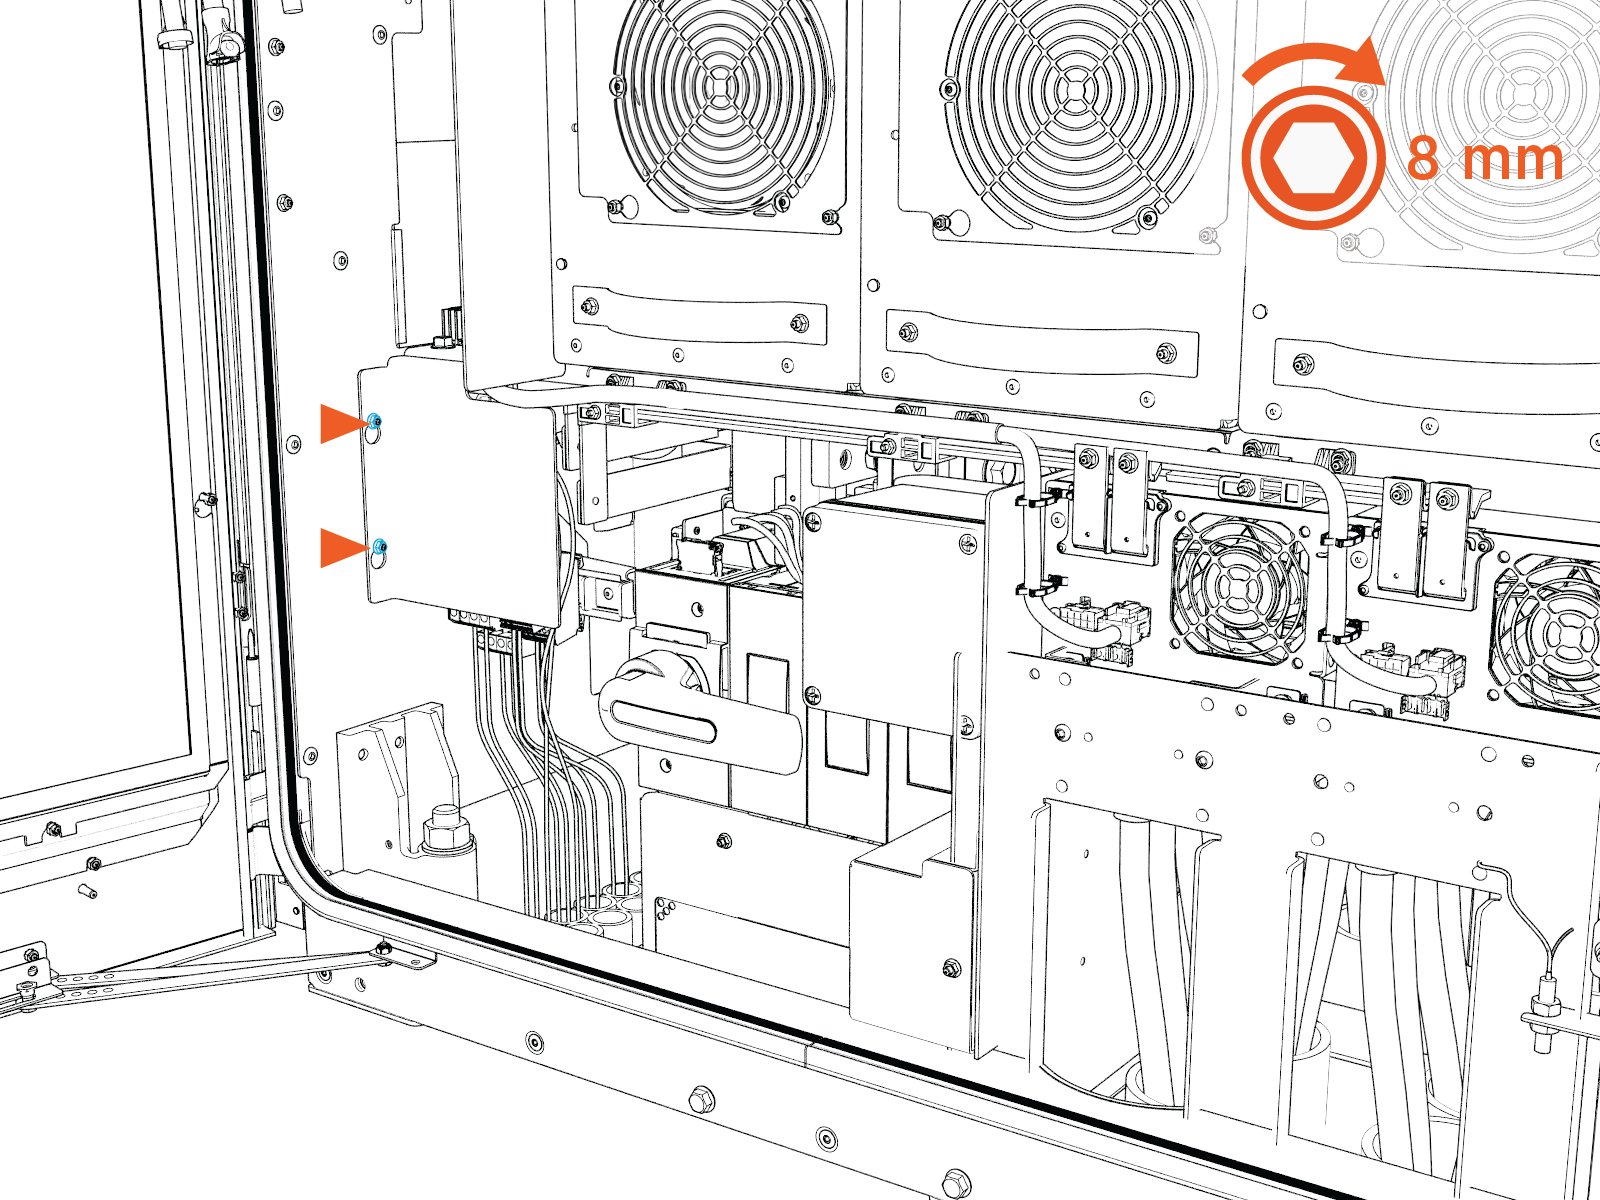
Tighten the nuts (x2) to 4.5 Nm (40 in-lb).
DC Bus Bars Safety Cover (Intake Side)
-
Seat the cover back into its original place. Slide the cover downward so the keyholes lock behind the retaining nuts.
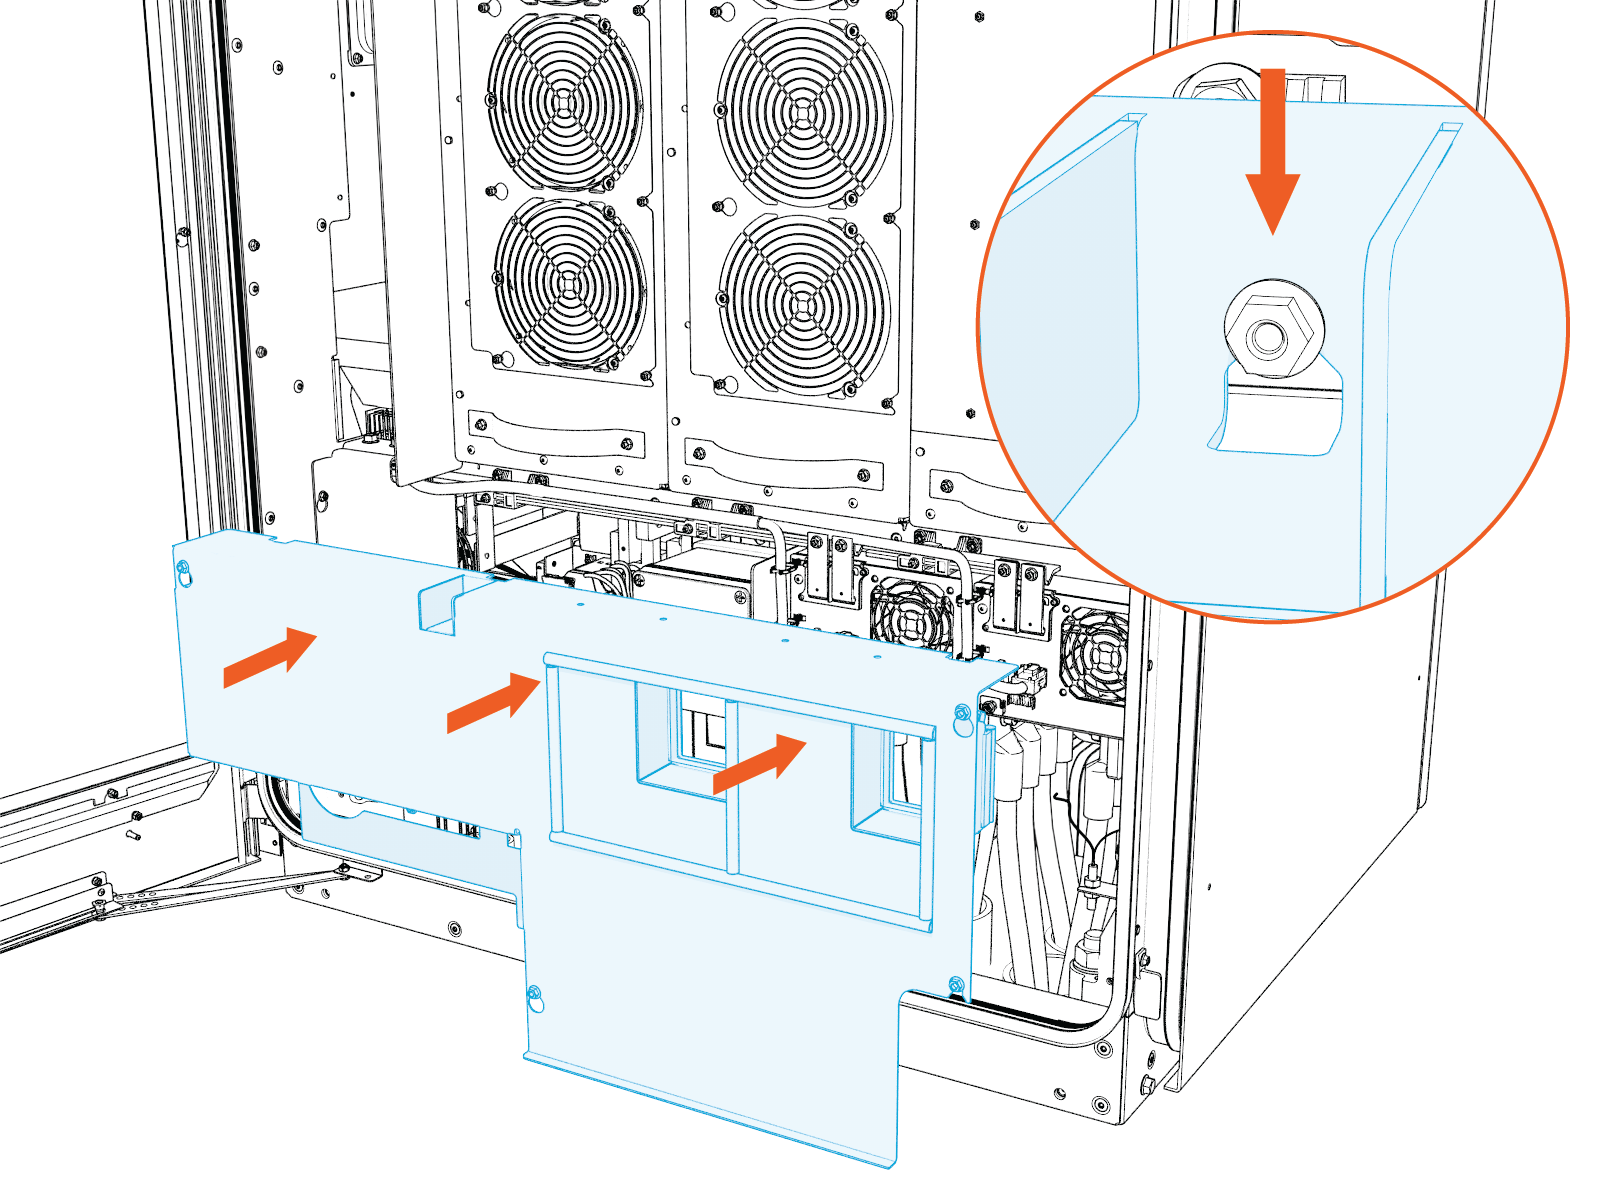
-
Tighten the nuts (x6) to 4.5 Nm (40 in-lb). Use socket extender as needed.
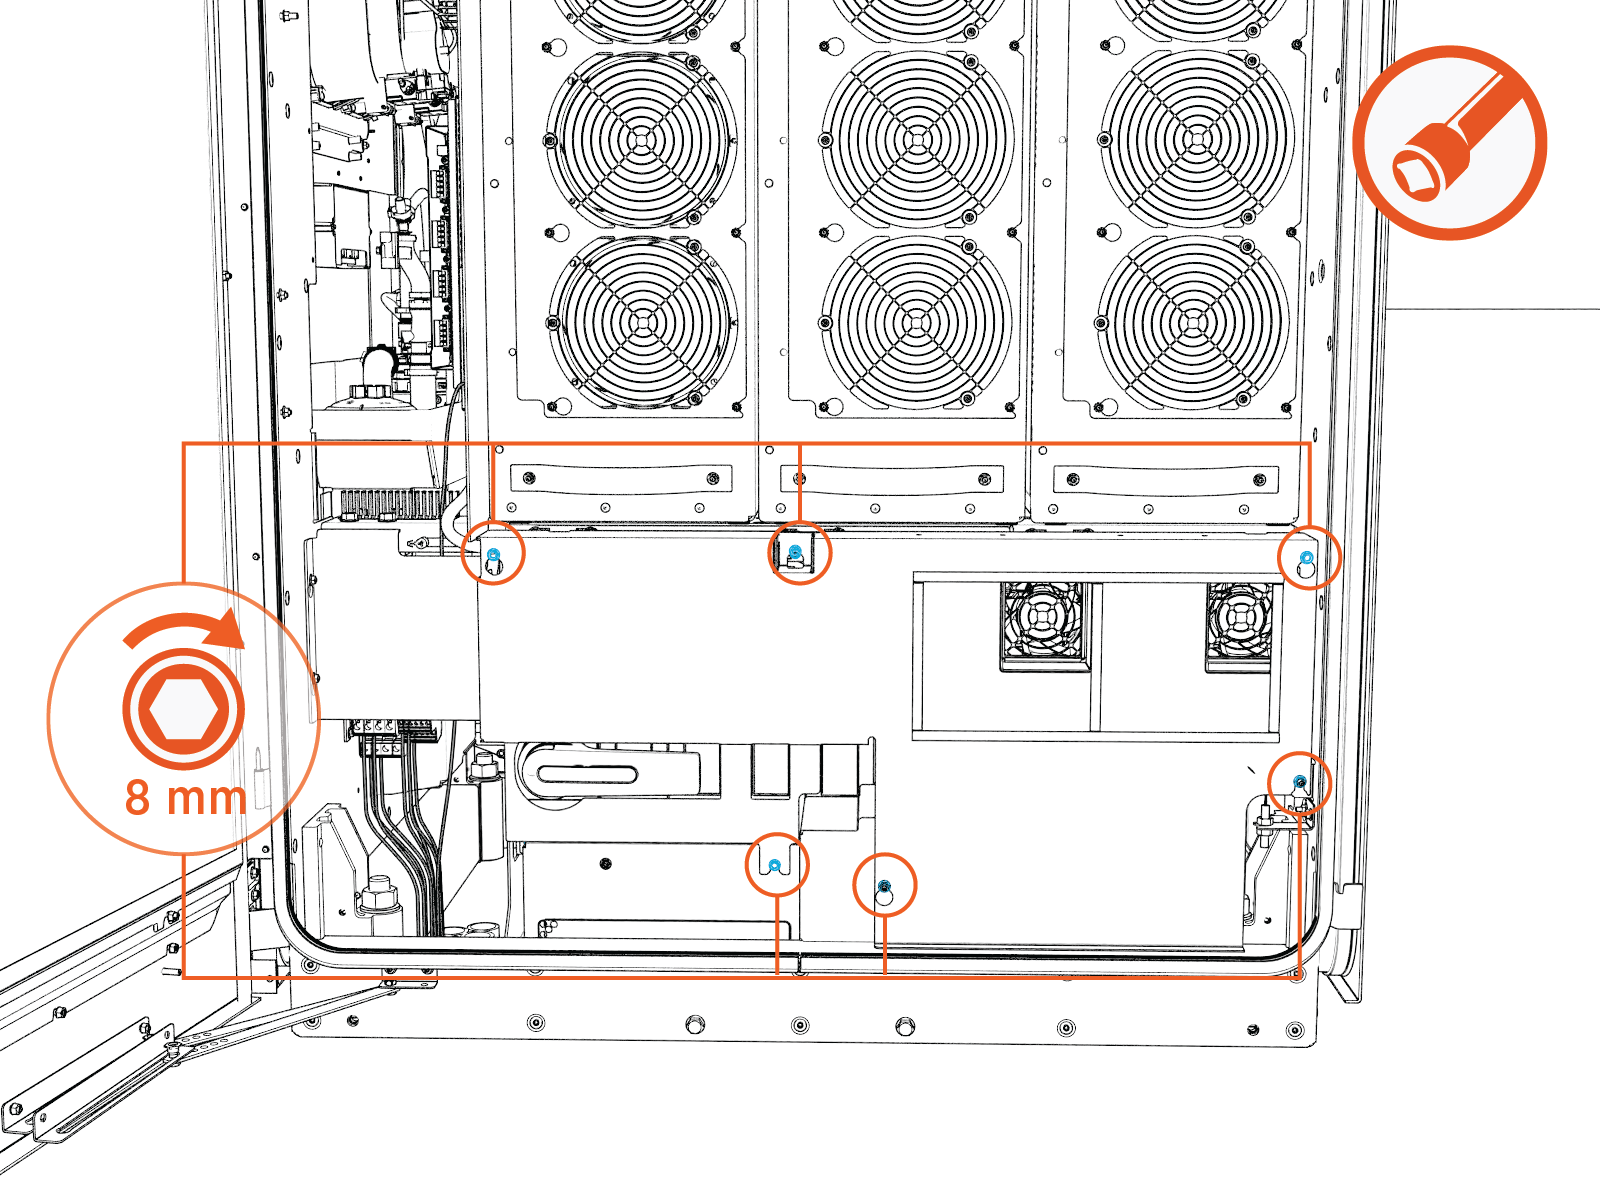
Shunt Trip Terminals Safety Cover (Intake Side)
TBD: Instructions shall be provided in a future release.
DC Fuse Block Safety Cover (Exhaust Side)
-
Seat the cover back into its original place. Slide the cover downward so the keyholes lock behind the retaining nuts.
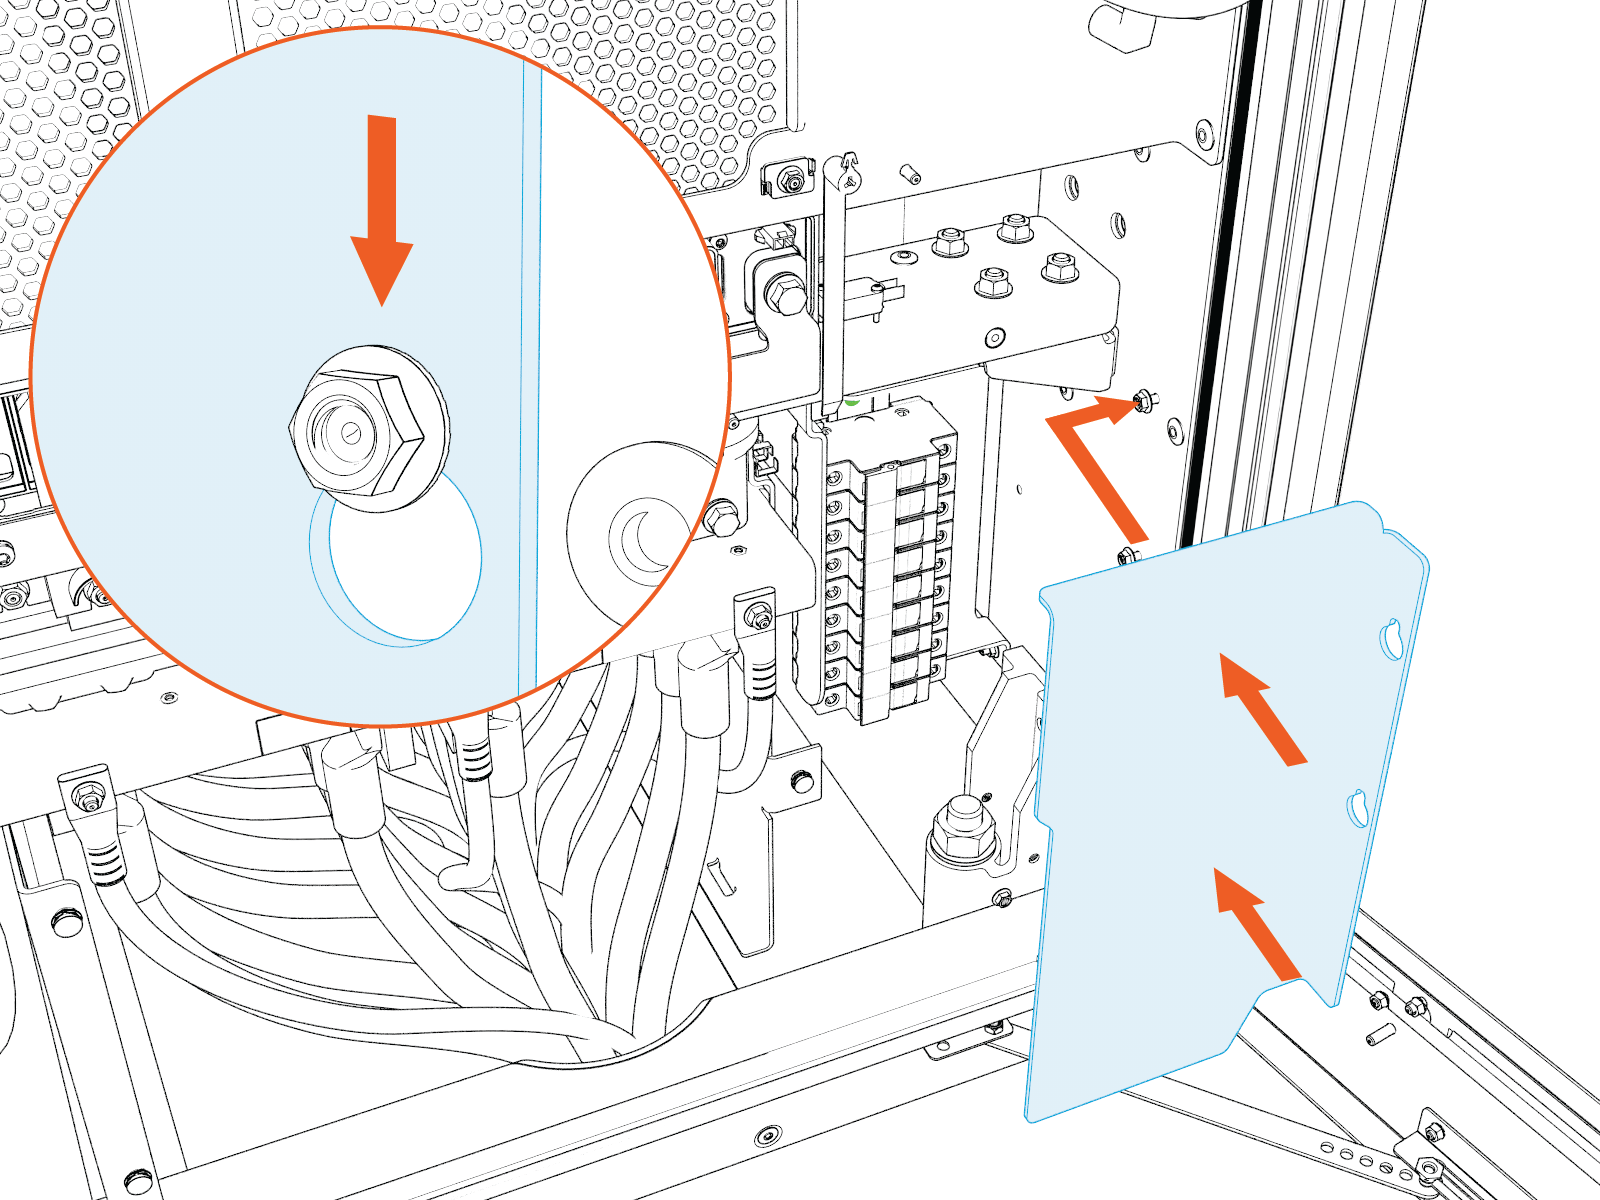
-
Tighten the nuts (x2) to 2.8 Nm (25 in-lb) .
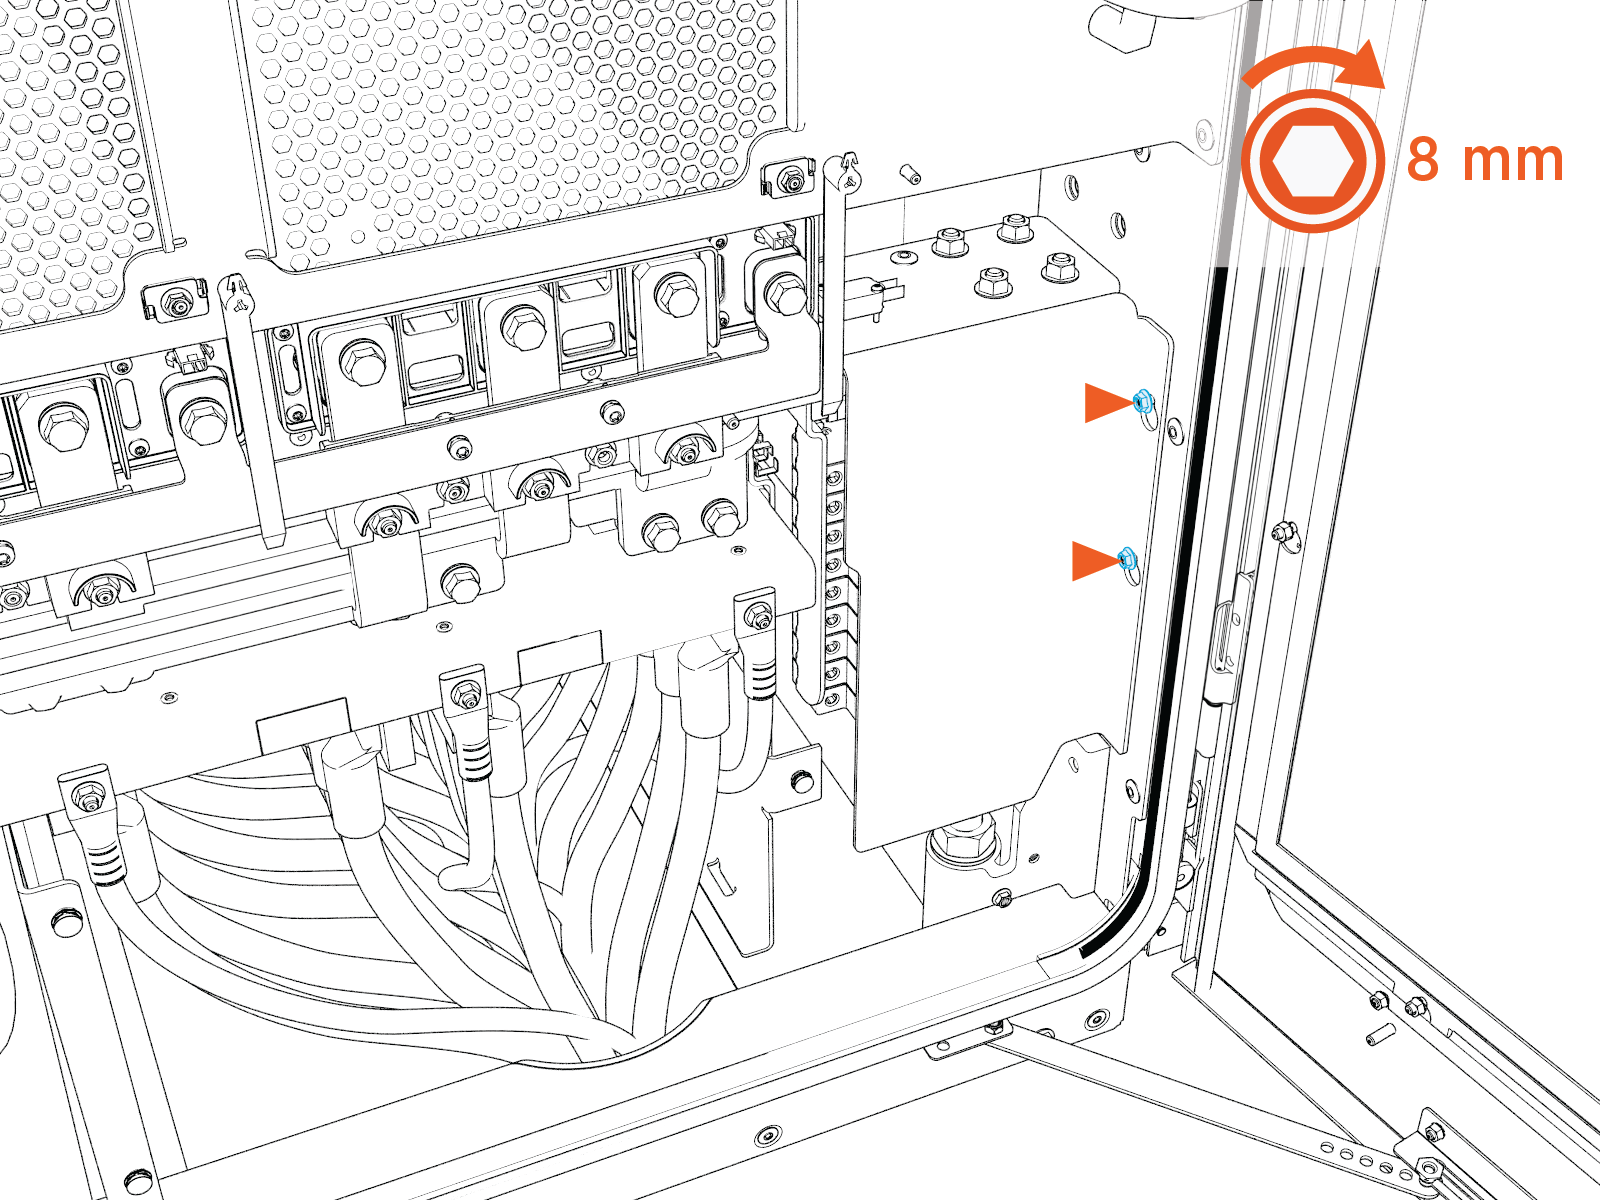
AC Bus Bars Safety Cover (Exhaust Side)
-
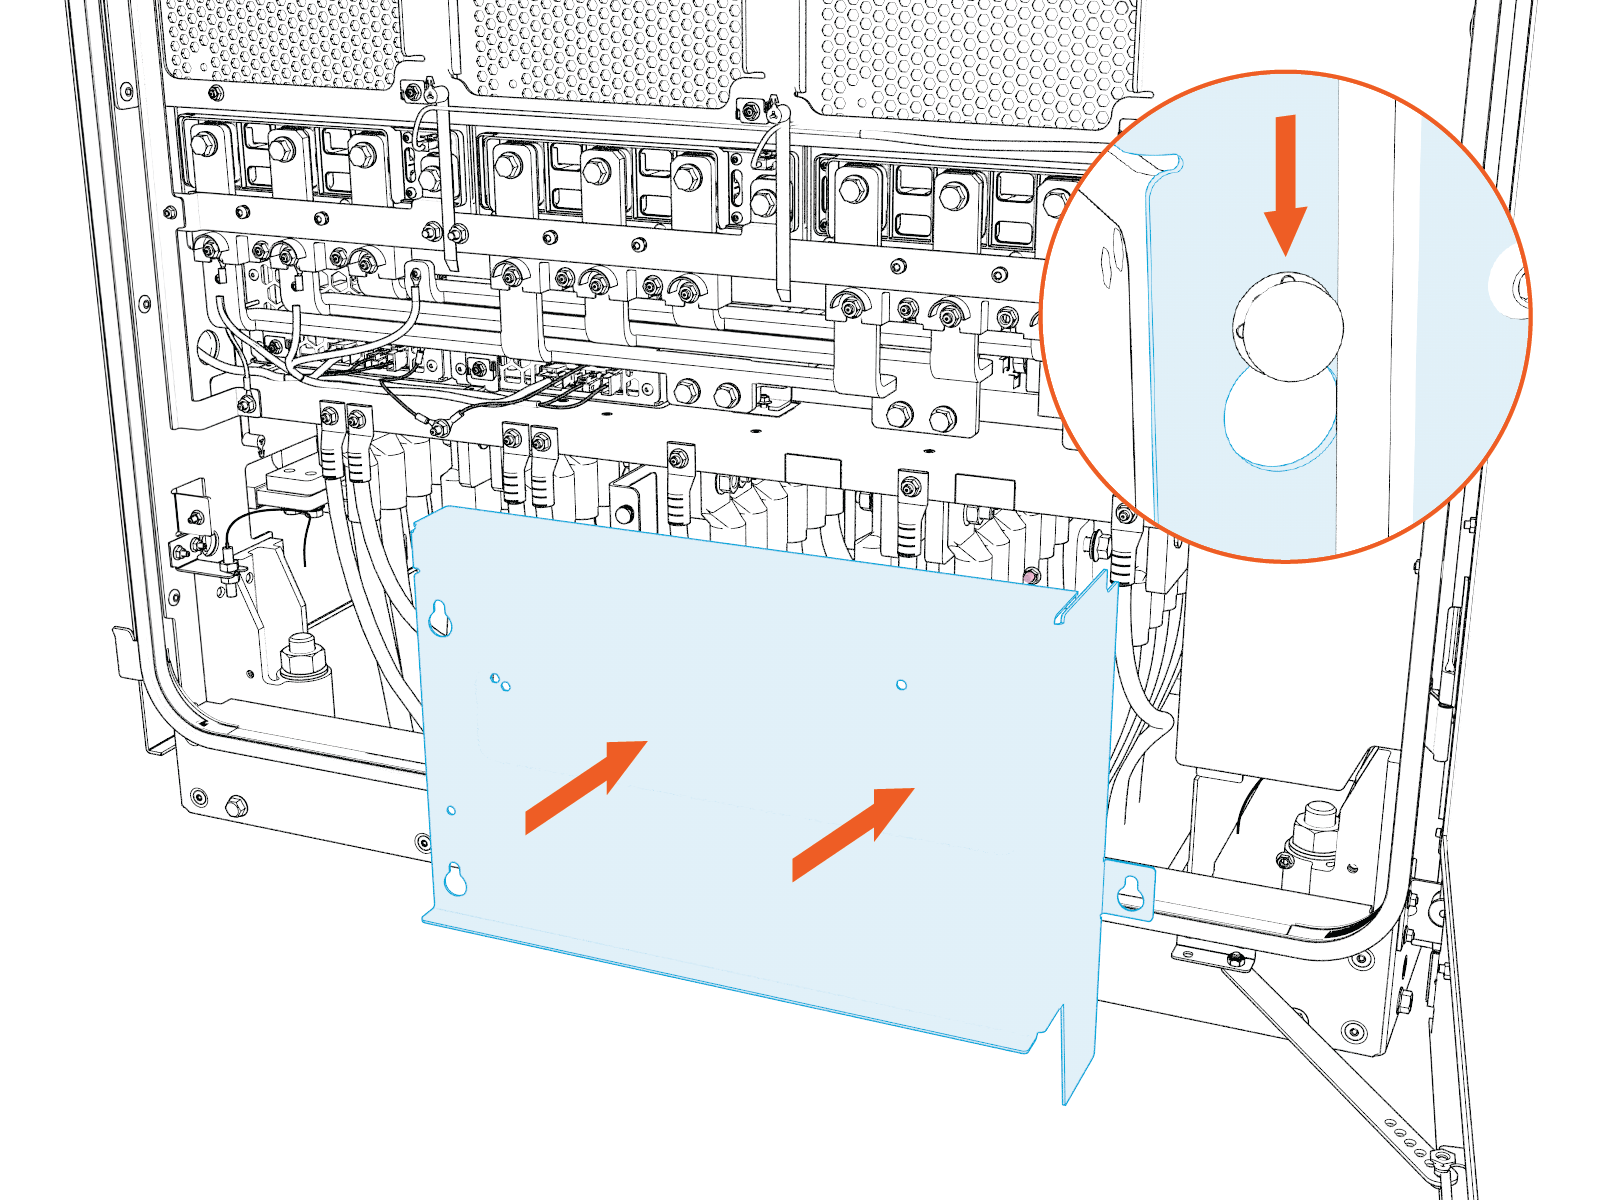
Seat the cover back into its original place. Slide the cover downward so the keyholes lock behind the retaining screws.
-
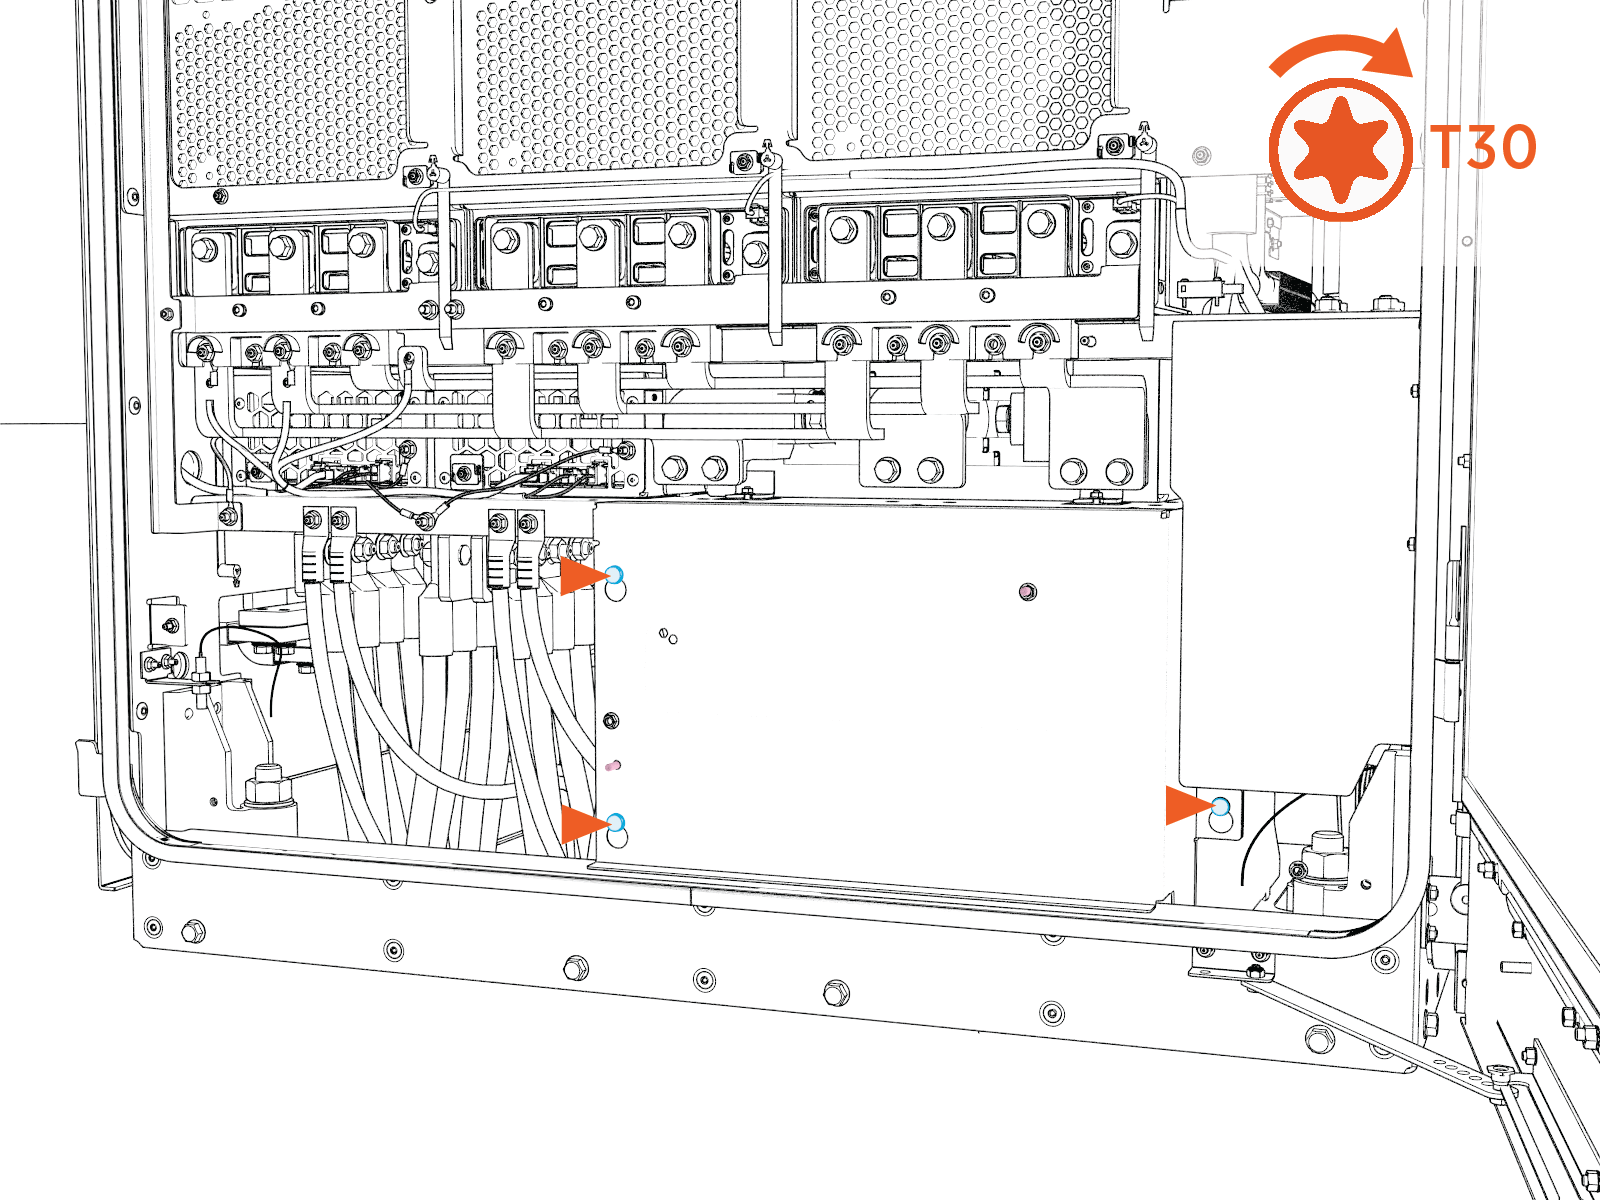
Tighten the screws (x3) to 5.6 Nm (50 in-lb).
DC Bus Bars Safety Cover (Exhaust Side)
-
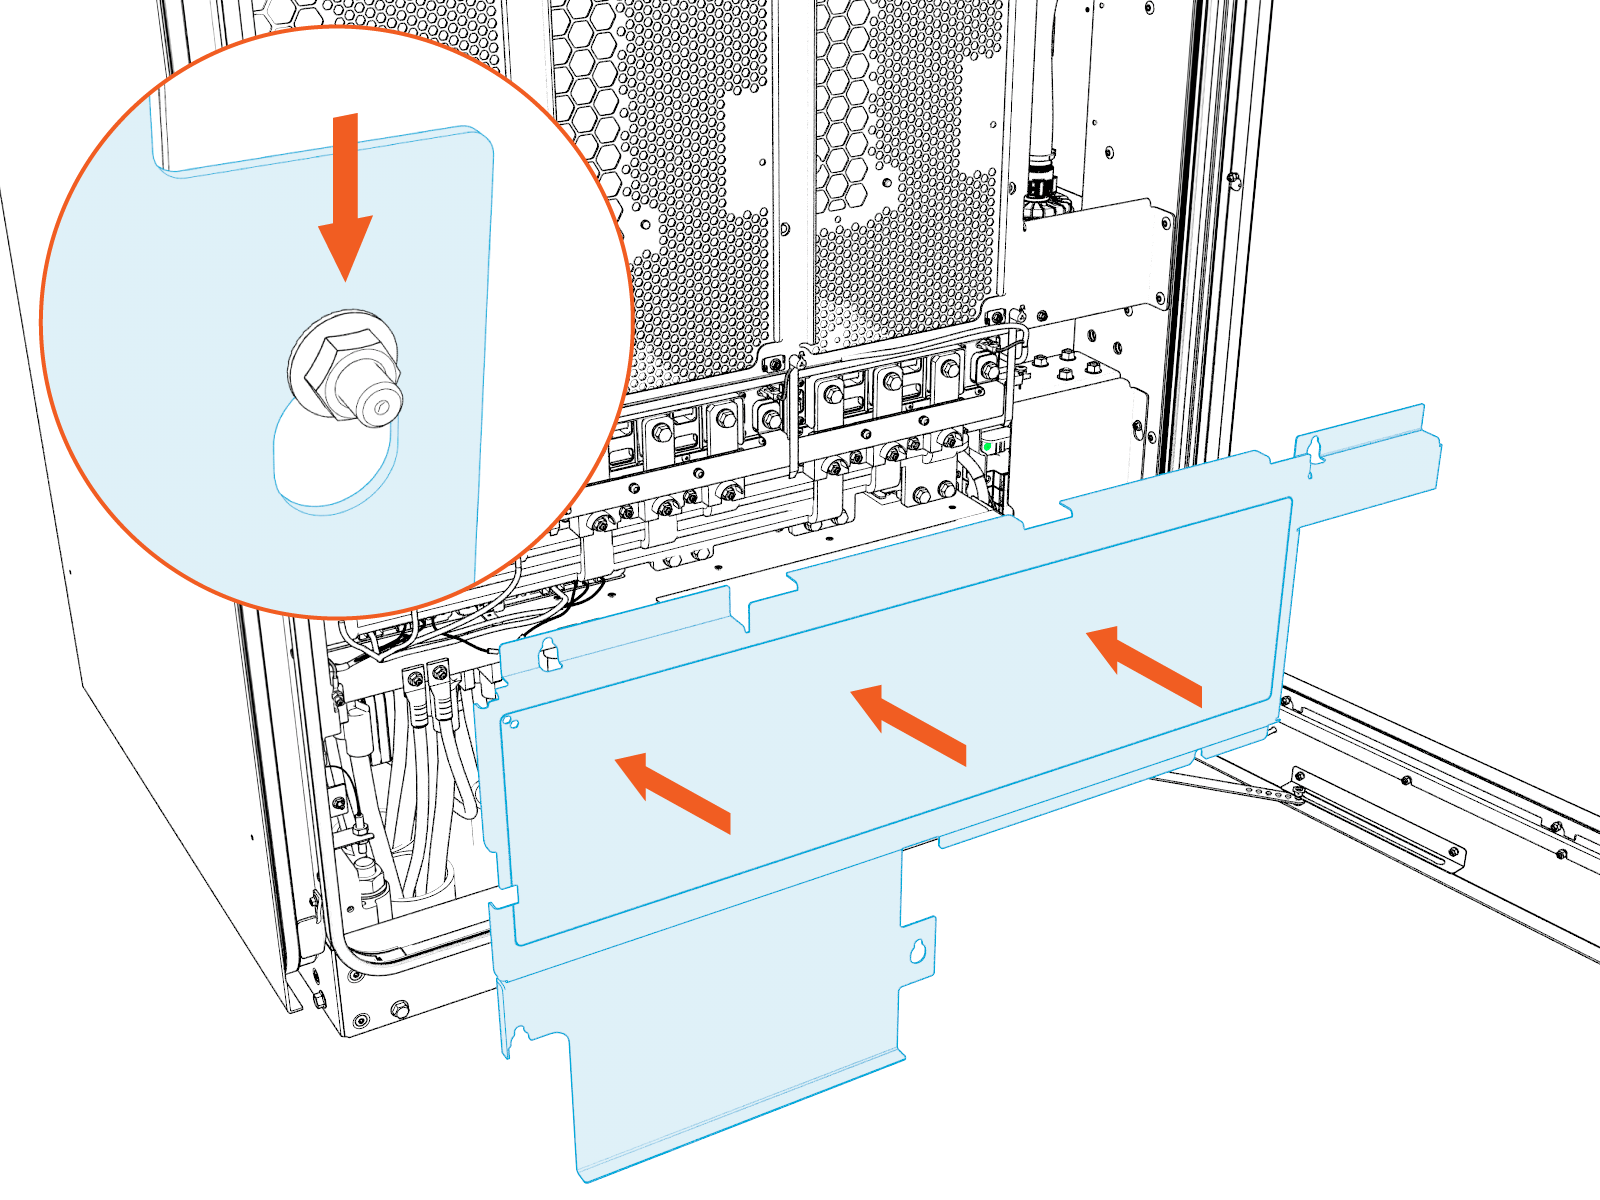
Seat the cover back into its original place. Slide the cover downward so the keyholes lock behind the retaining nuts.
-
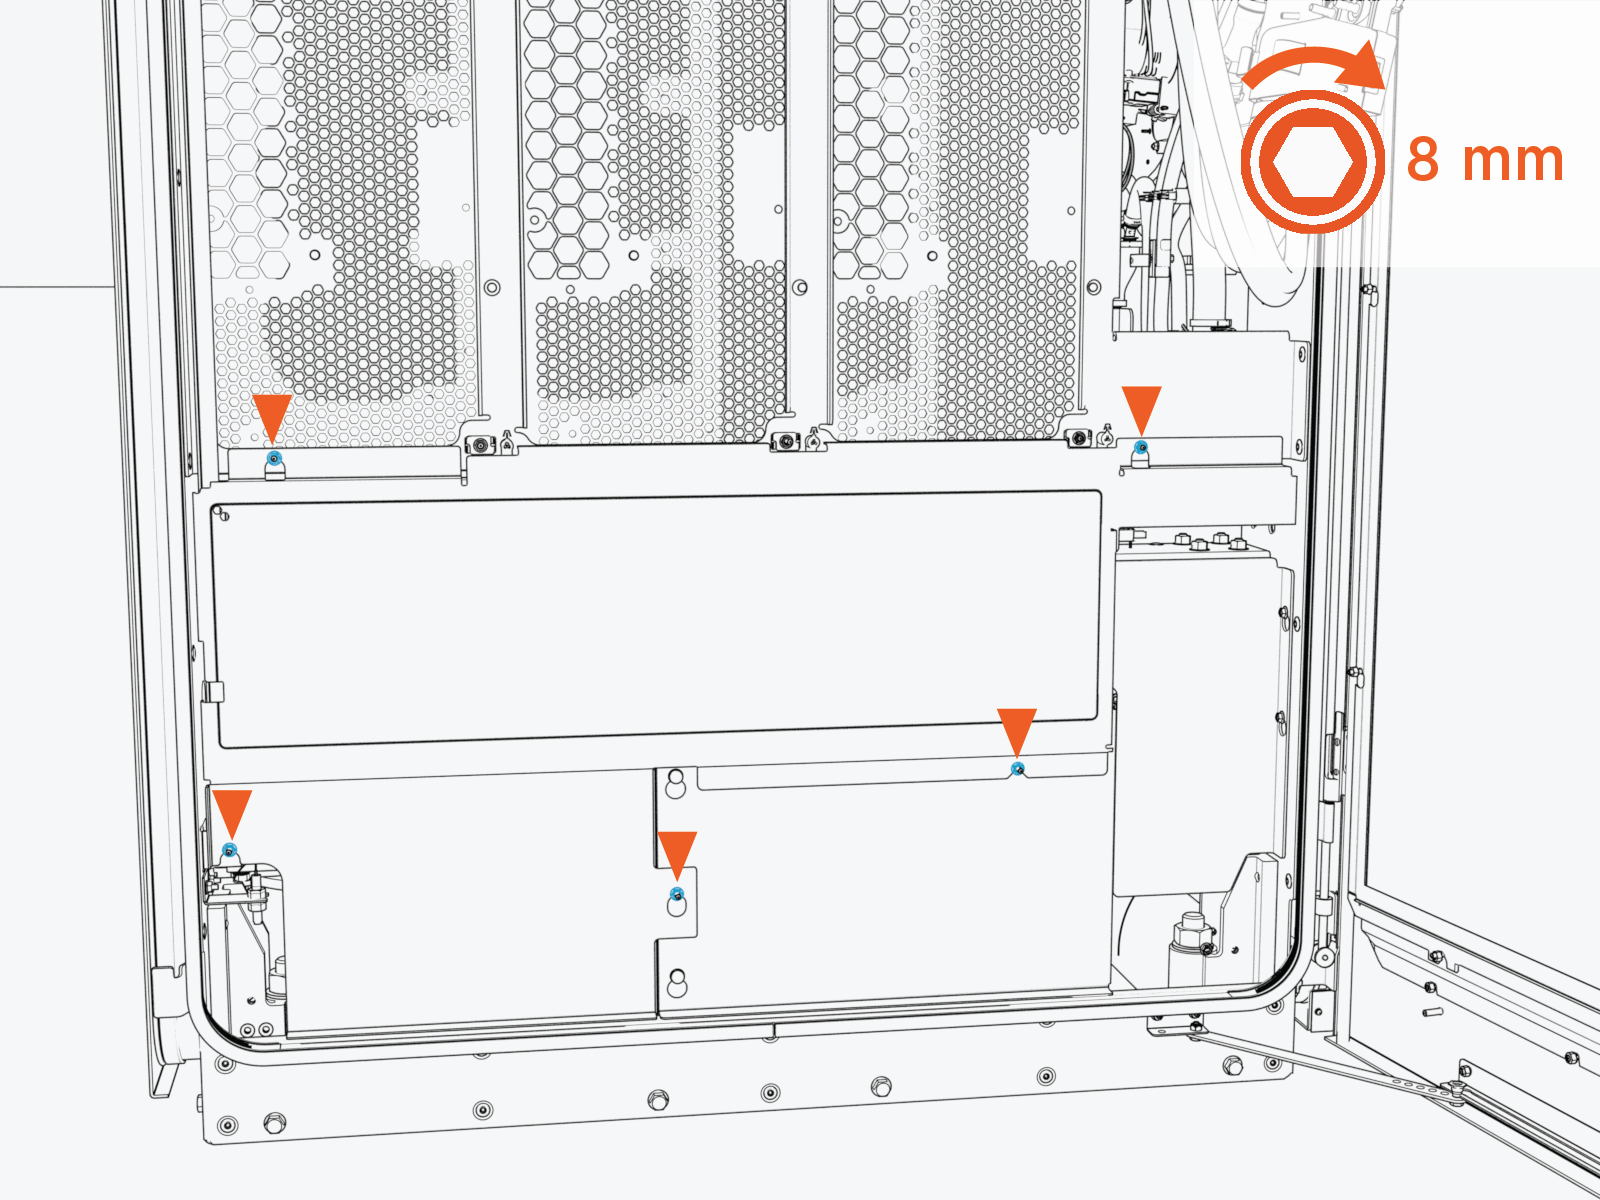
Tighten the nuts (x5) to 4.5 Nm (40 in-lb). Use an 8 mm socket.
Close Up Express Solo
-
Disengage the door stopper and close the cabinet doors.
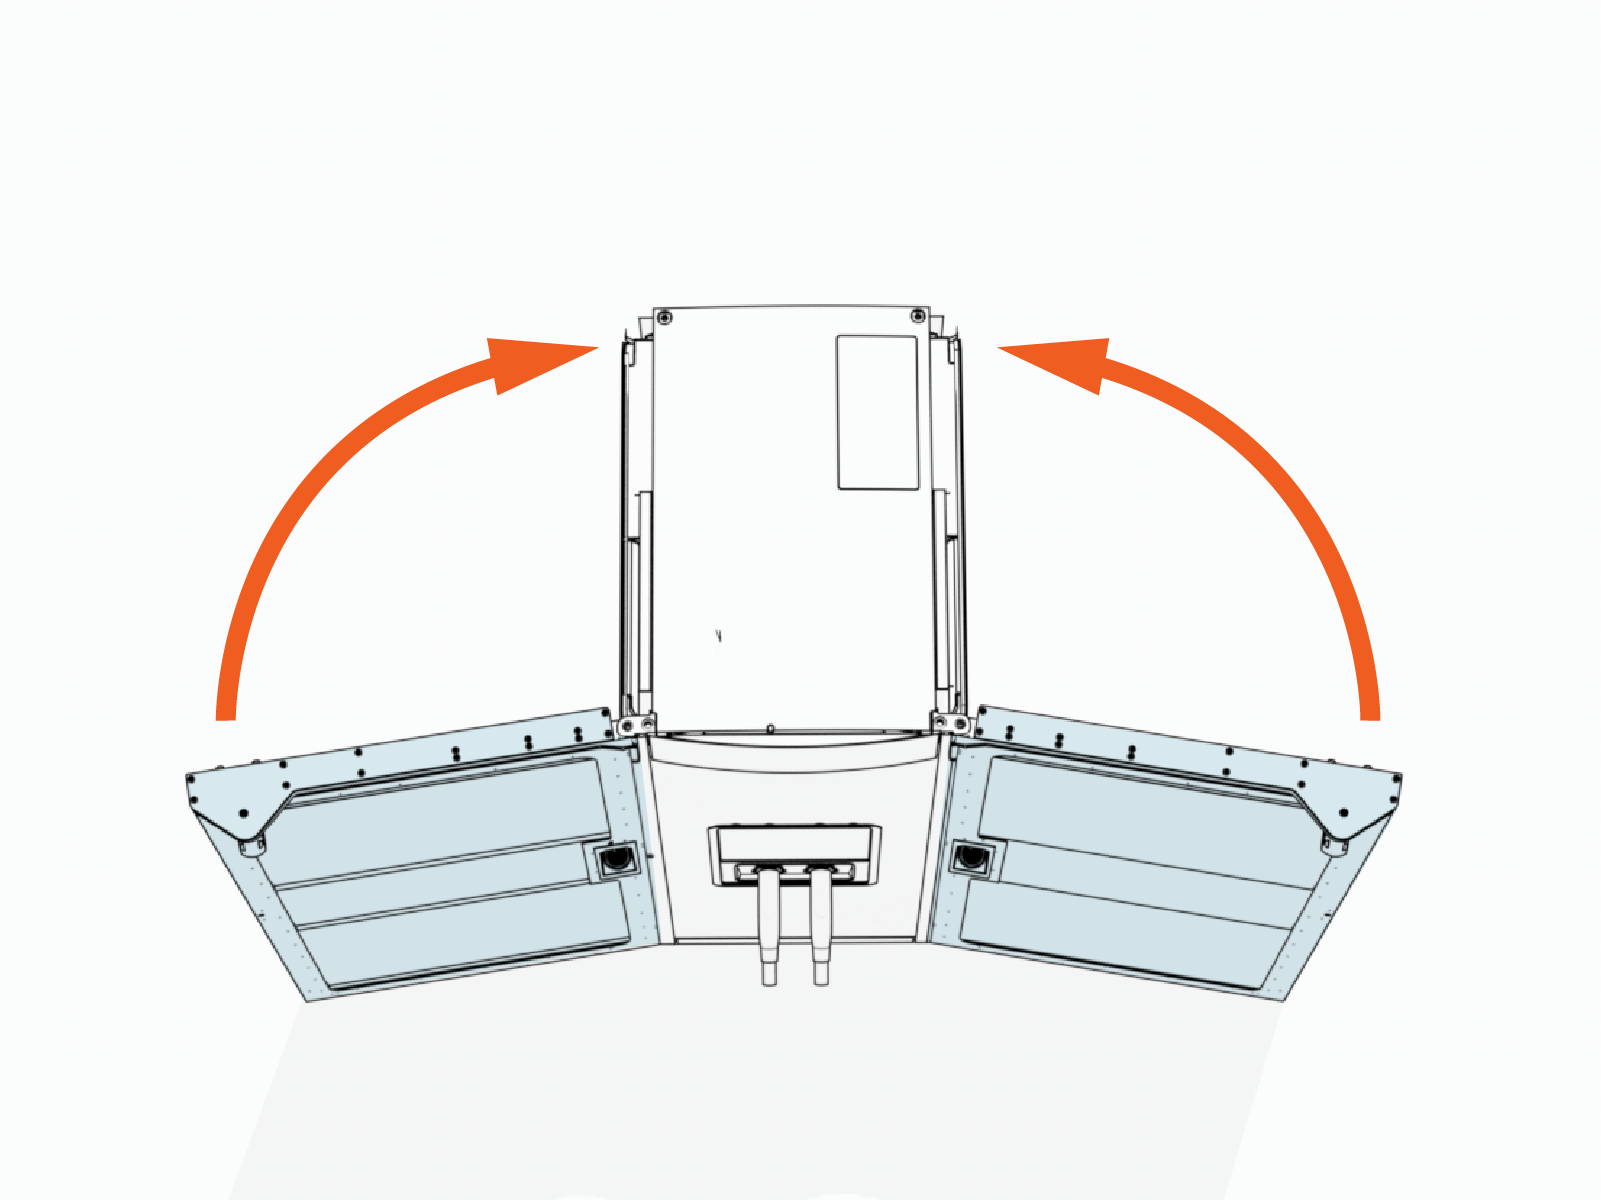
-
Lock the cabinet doors.
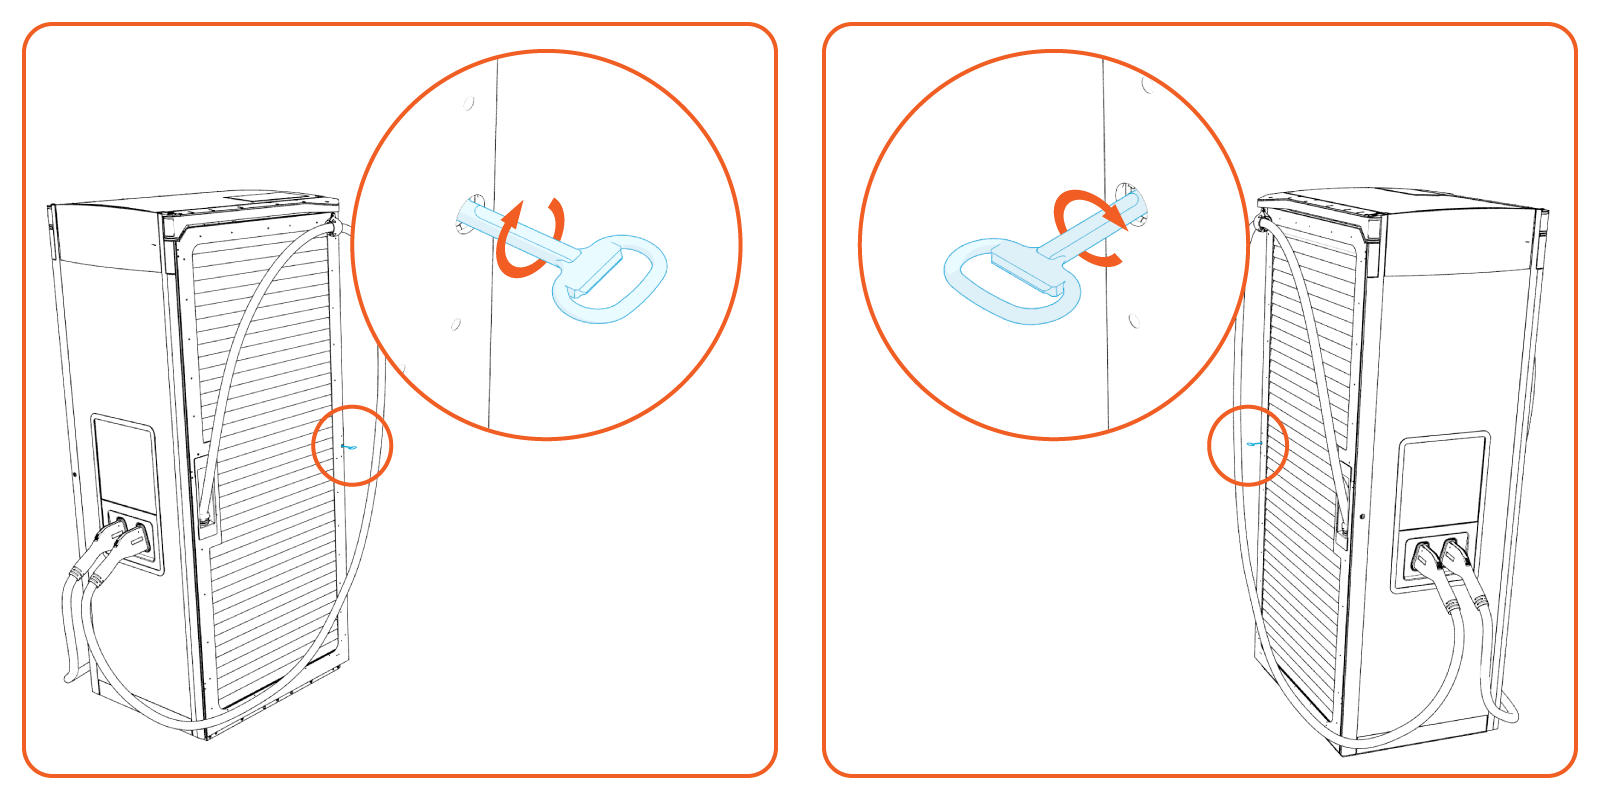
-
Plug the locks on the side doors.