Appendix: Install Riser Kit
The Power Hub can be installed on a riser if additional space beneath the Power Hub is needed to accommodate conduit fittings or cable glands. The riser raises the Power Hub cabinet off the ground by 100 mm (4 in). The Power Hub Riser Kit is ordered and shipped separately from the Power Hub.
Follow instructions in this appendix to unpack and install the Riser Kit.
Required Tools and Materials
|
|
Hard hat |
|
Cut-resistant gloves |
|
|
Safety glasses |
|
Box cutter |
|
|
T30 Torx screwdriver |
|
Hex socket (15/16 in, deep socket) |
|
|
Torque wrench driver |
|
Rubber mallet |
Unpack and Inspect Parts
The Riser Kit ships in its own box, separate from the Power Hub. Unpack the box and check to make sure the following parts are present:
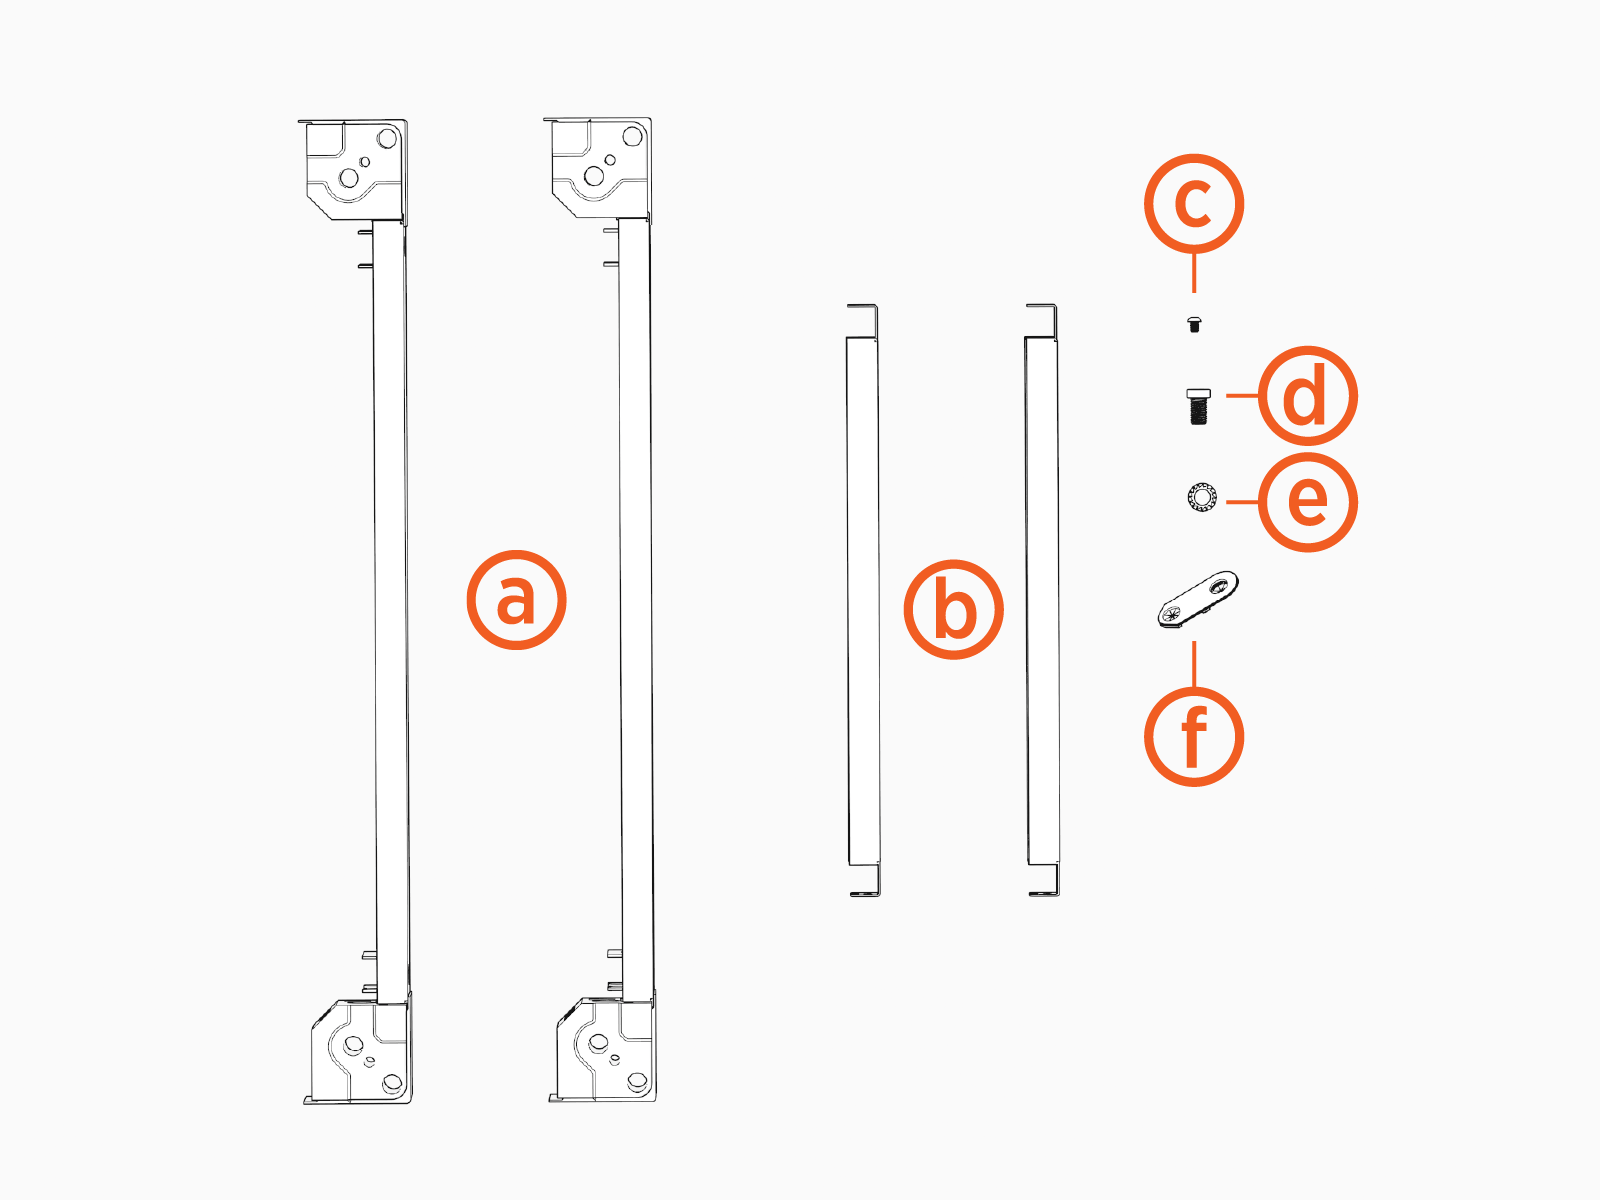
-
Base assemblies with corner covers attached (1 pair)
-
Trim panels (1 pair)
-
M5 x 12 mm self tapping screws (x16)
-
M12 x 25 mm bolts (x4)
-
13 mm toothed washer (x4)
-
Mounting aids (x4)
Assemble Riser
To assemble the riser, complete the following steps:
ChargePoint recommends assembling the riser on a workbench or table top.
-
Remove the covers (x2) from each base assembly.
-
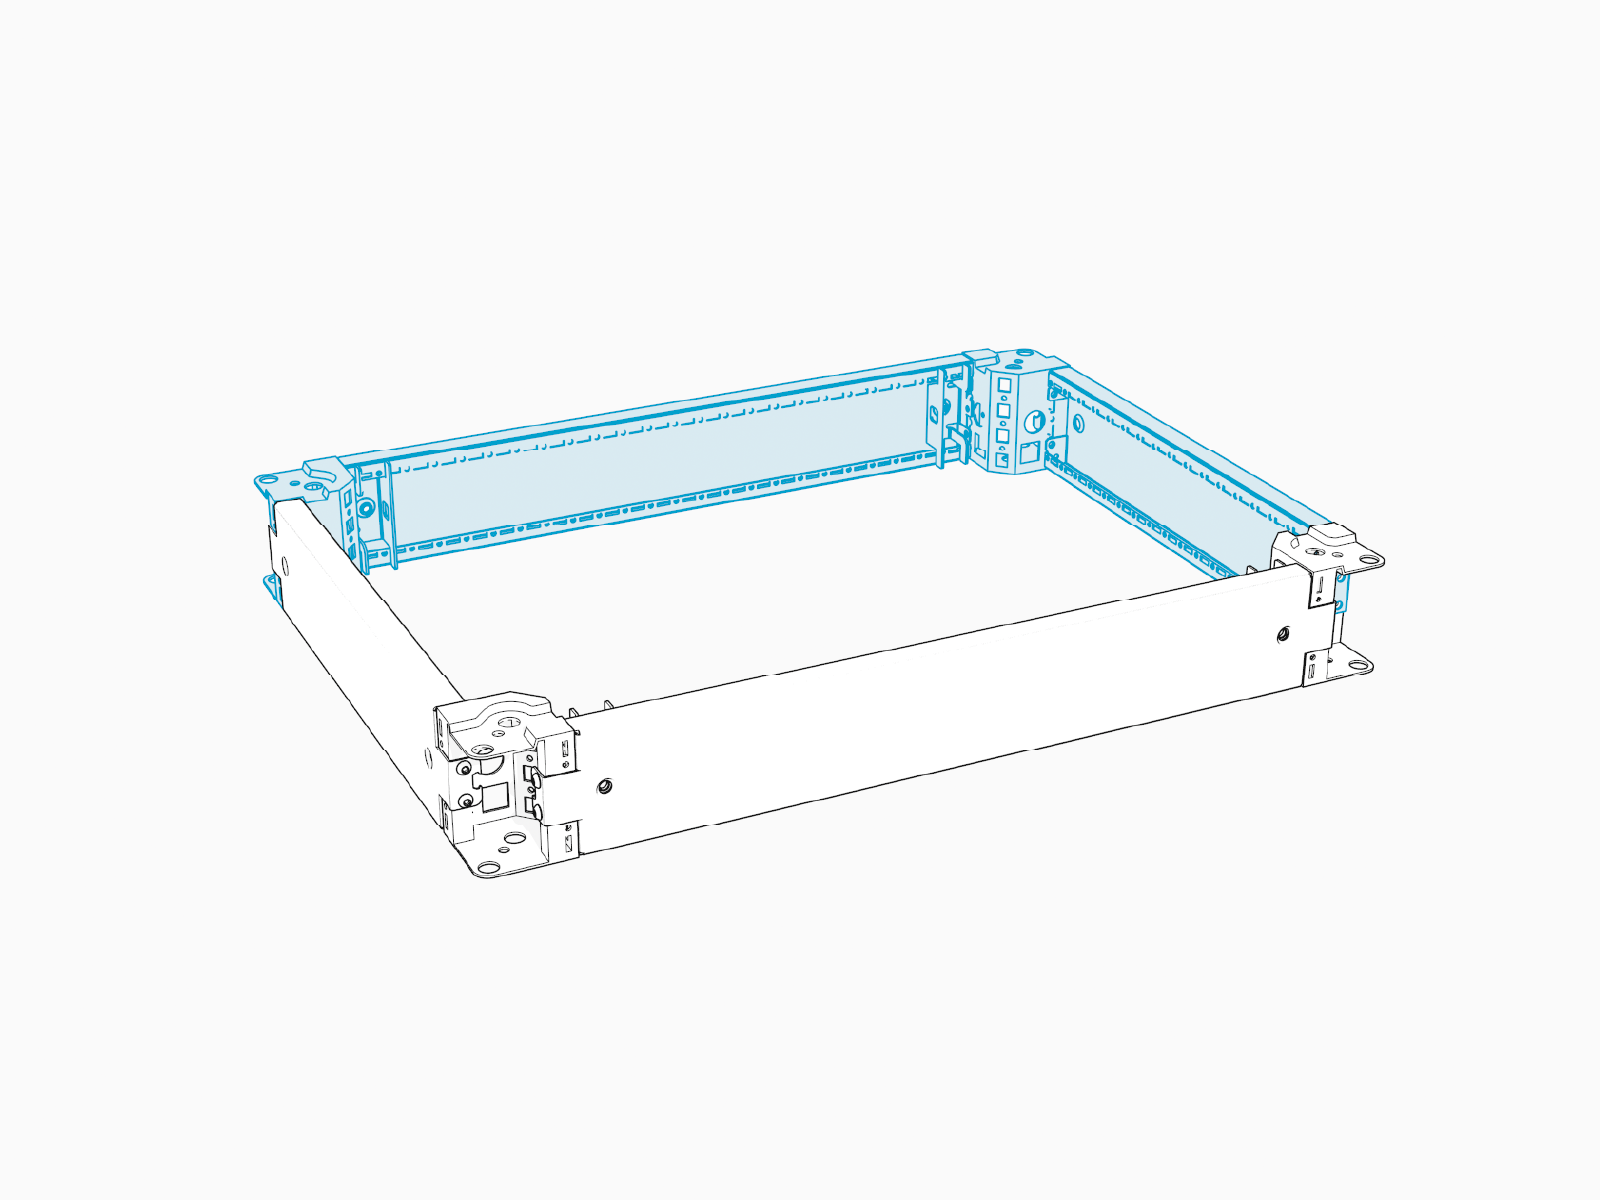
Arrange base assemblies and trim panels as shown below.
Make sure the internally threaded nuts on the base assemblies face upwards.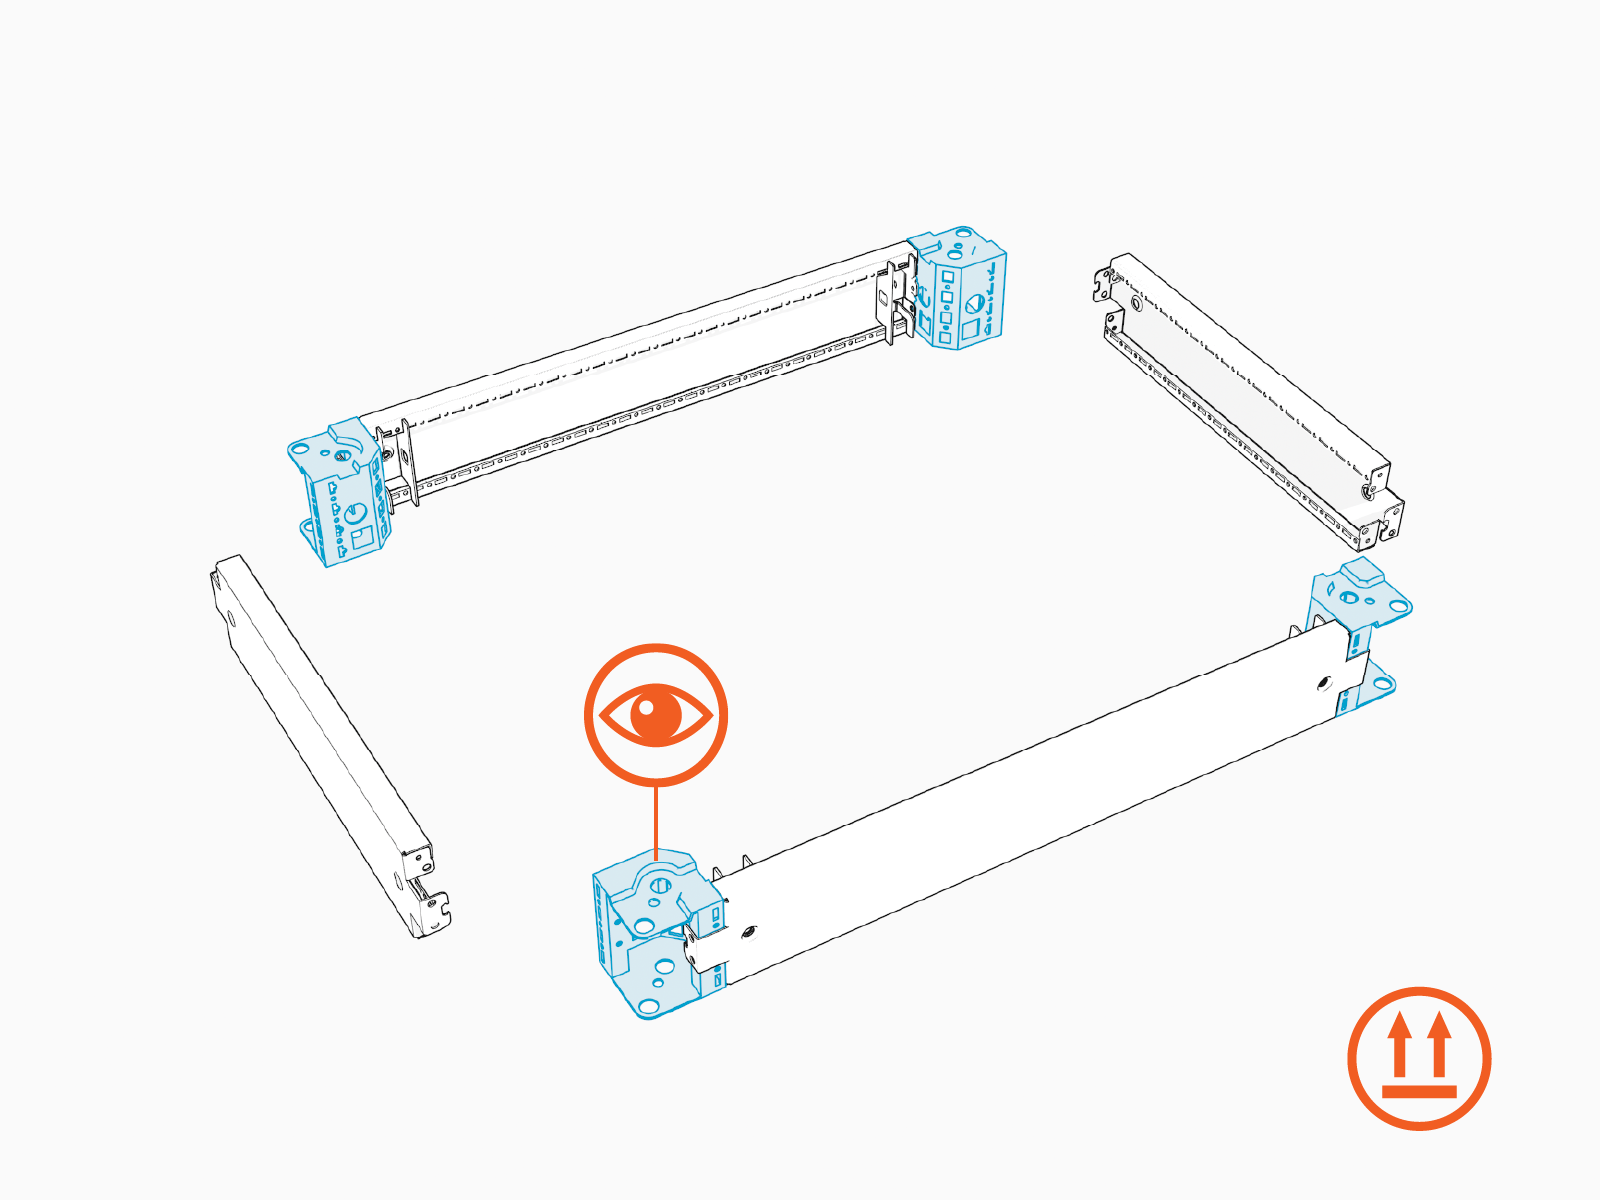
-
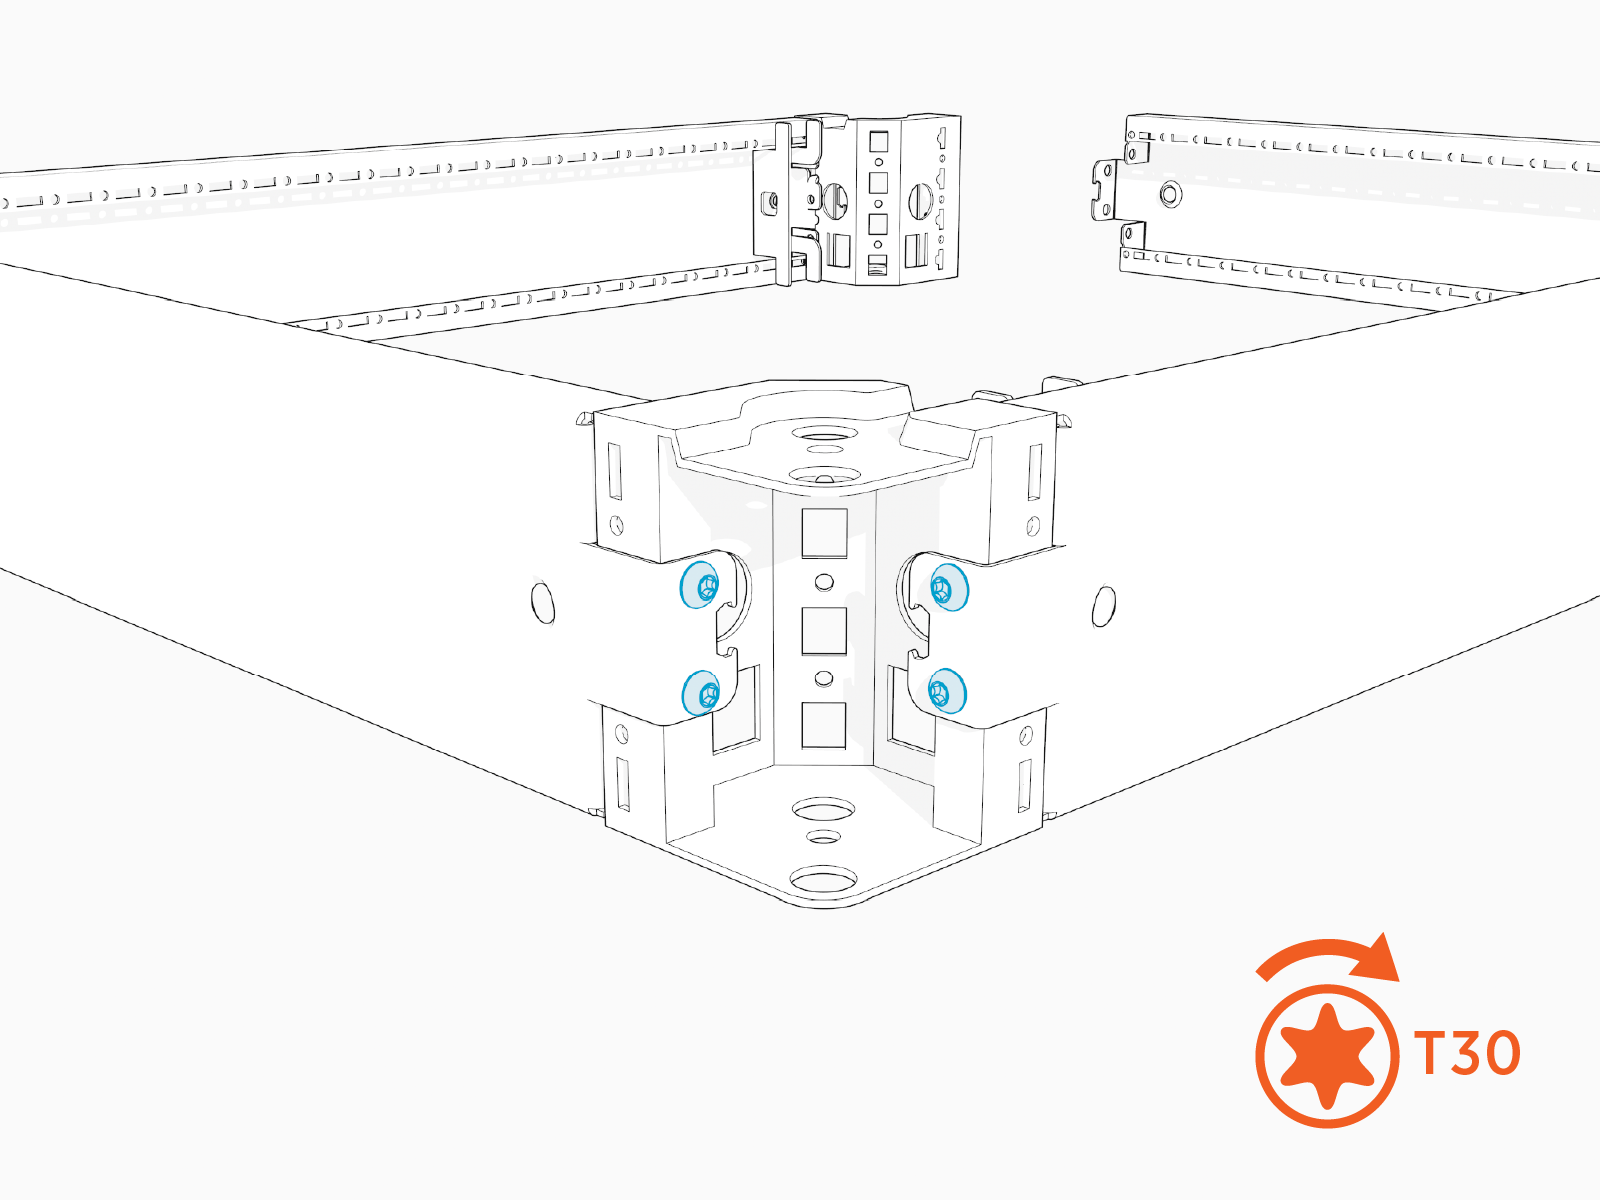
Starting at one corner of the layout, connect the end of one trim panel to its adjacent base assembly.
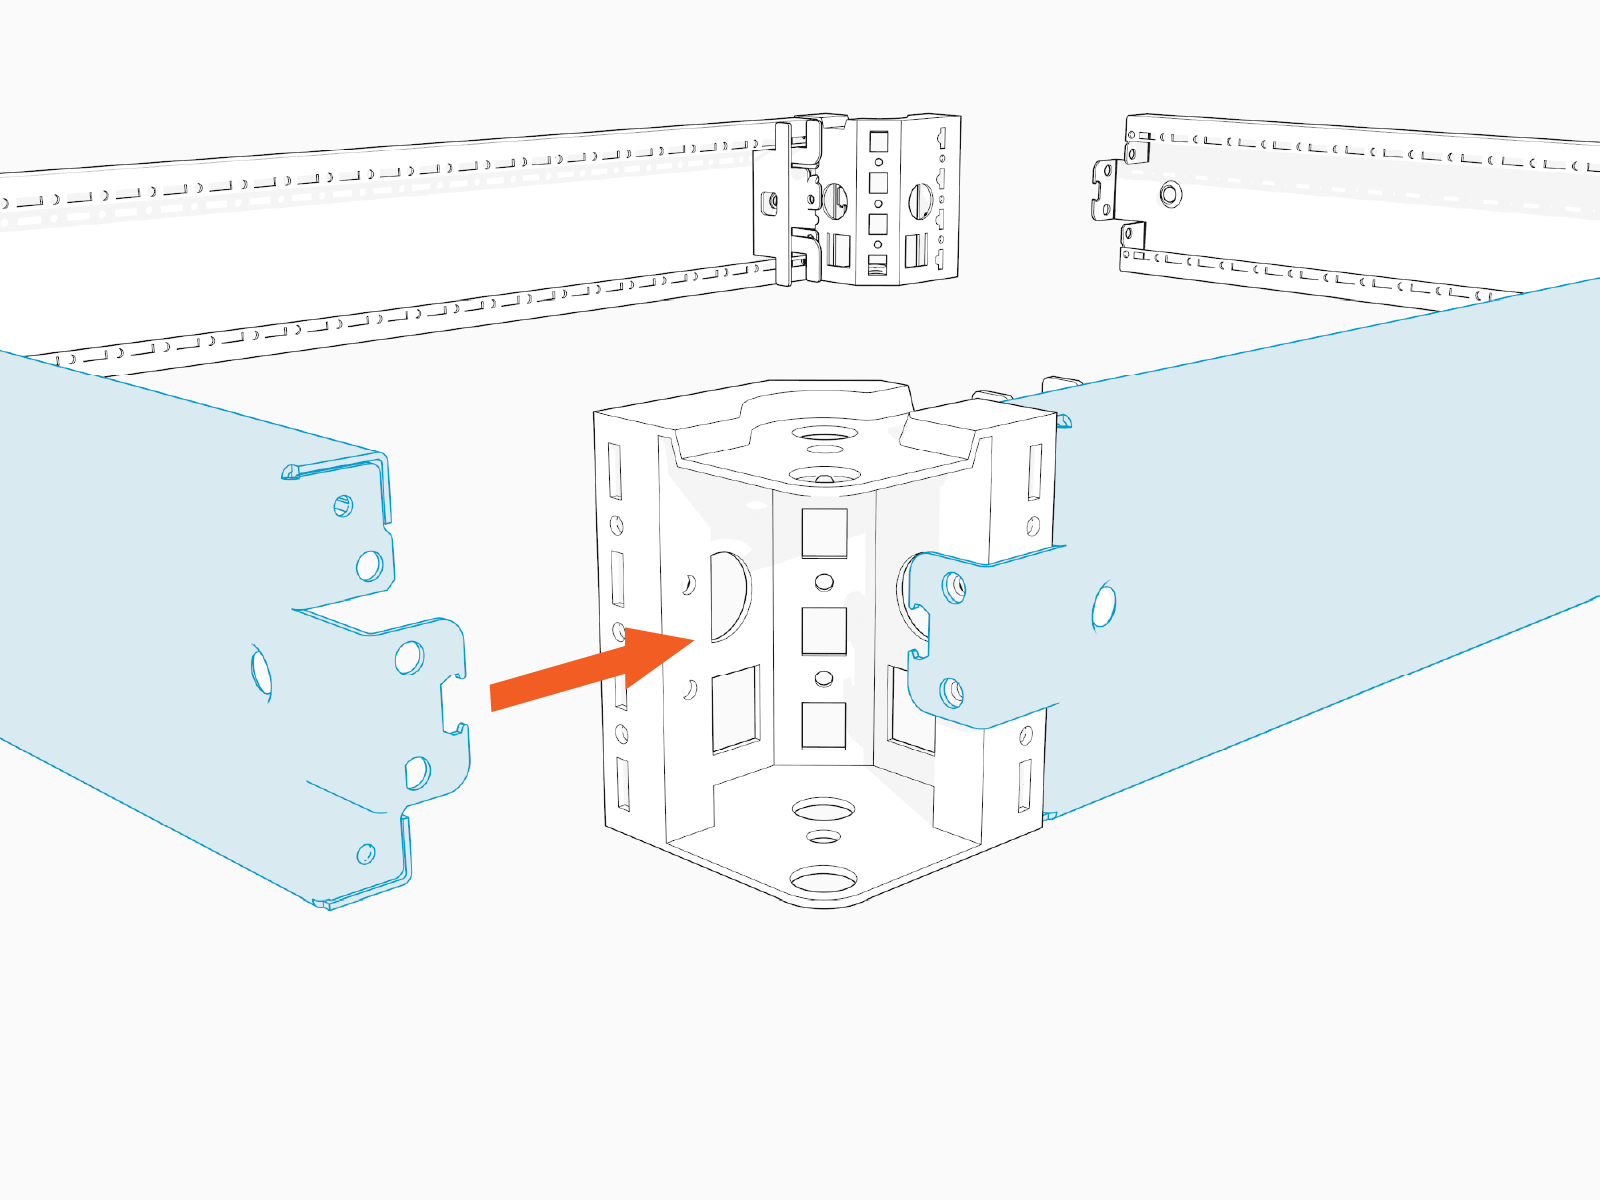
-
Install T30 screws (x4) to secure the all panels attached to the corner base piece.
-
Connect and secure the side trims at the remaining corners of the riser.
-
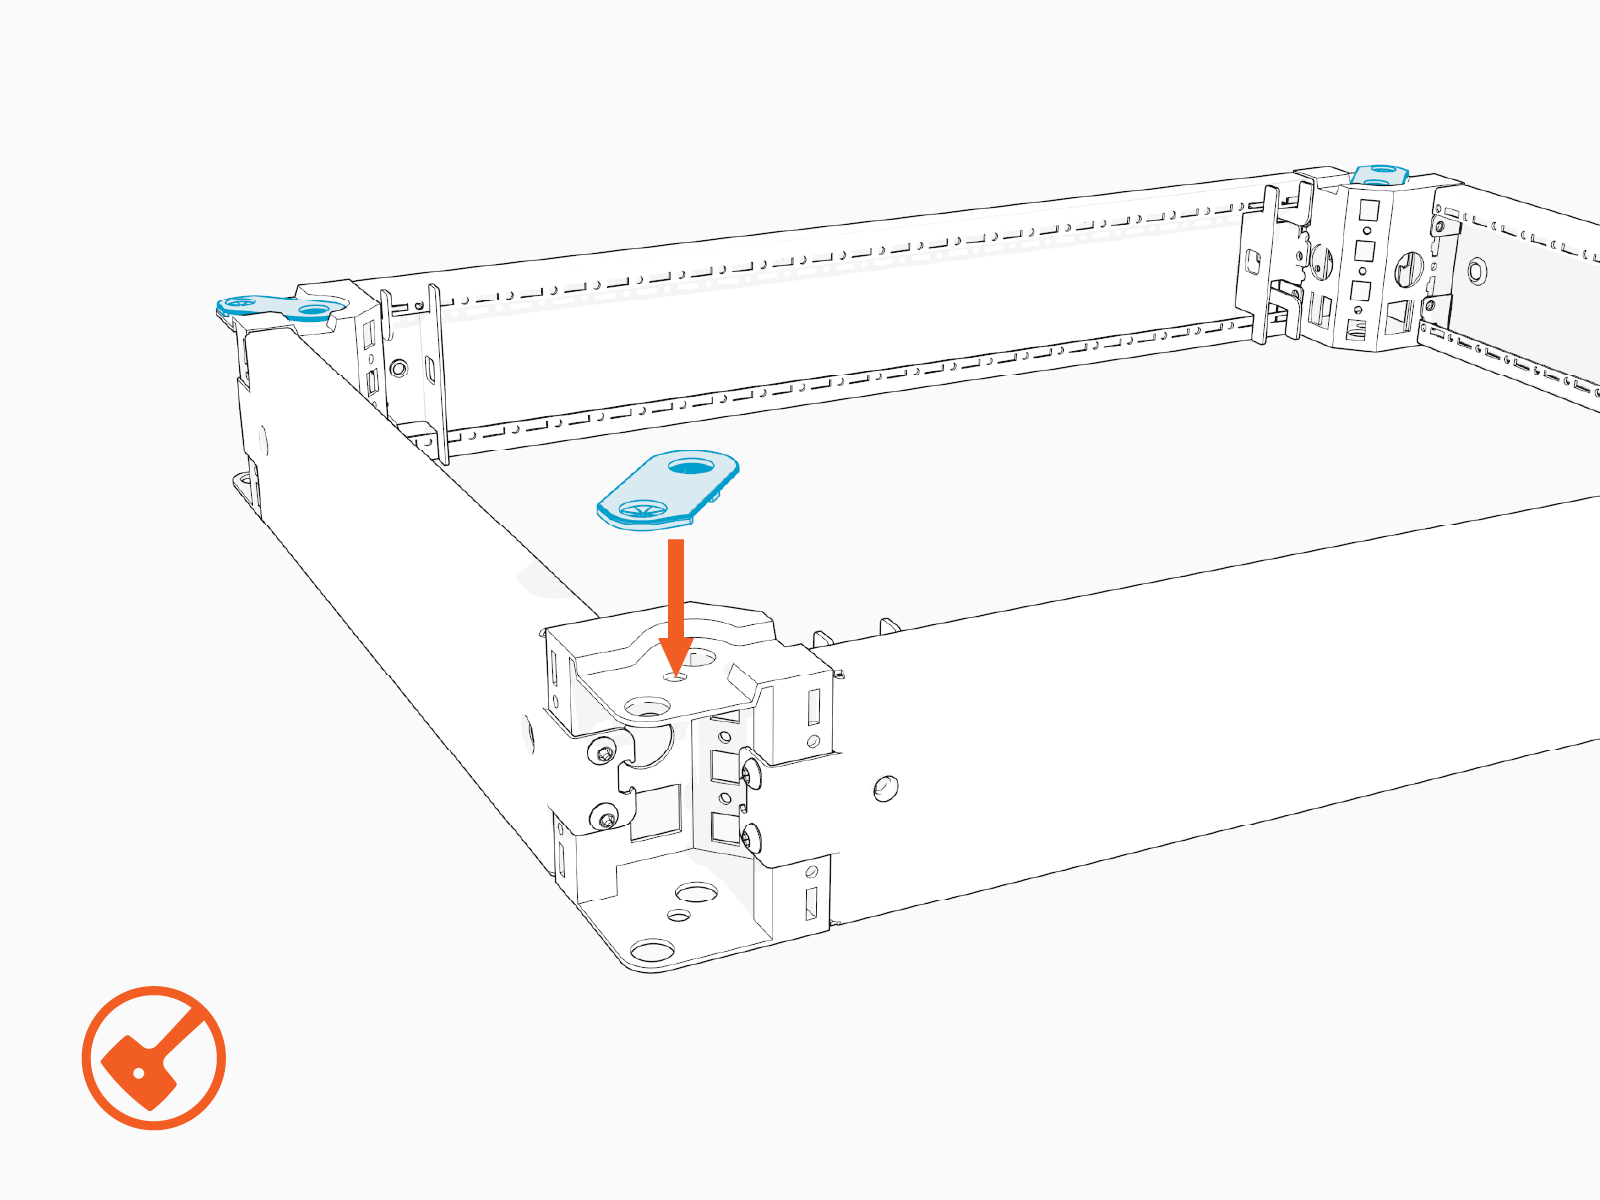
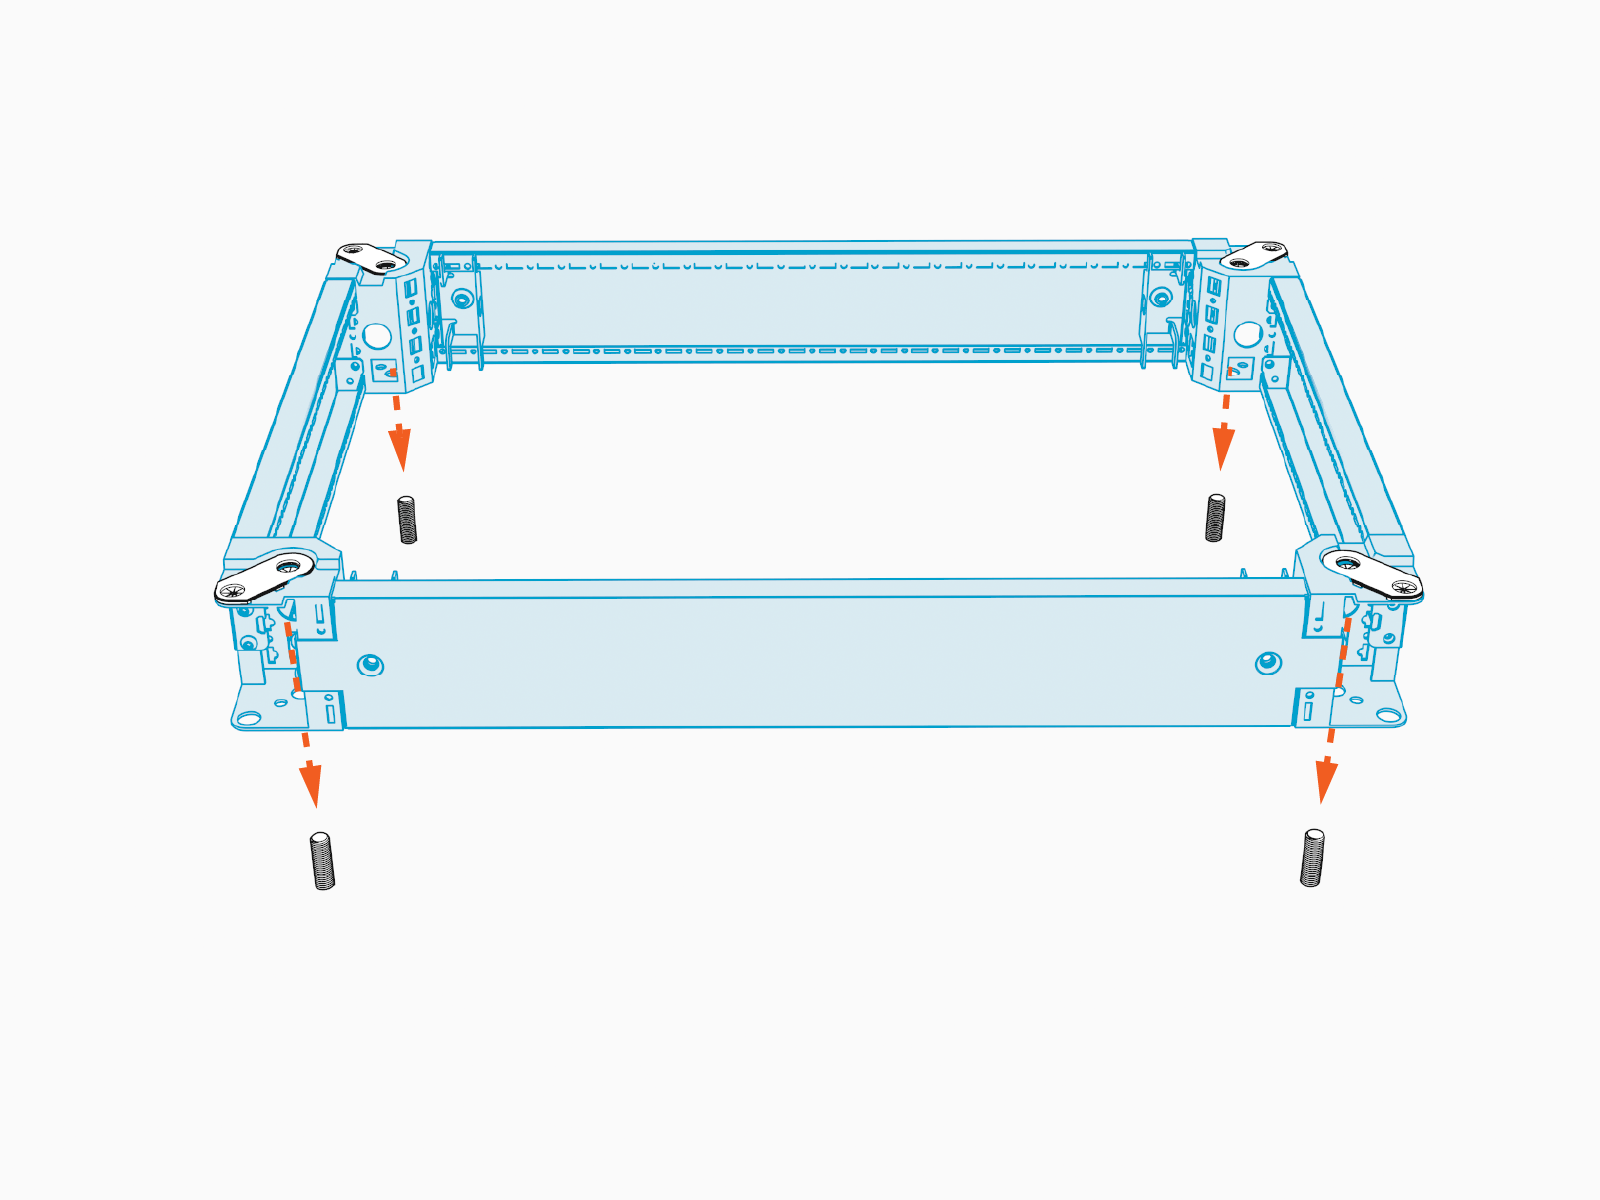
Install a mounting aid at each corner of the riser. Use a rubber mallet to tap the aid into place.
Install the Riser
To install the riser, complete the following steps:
-
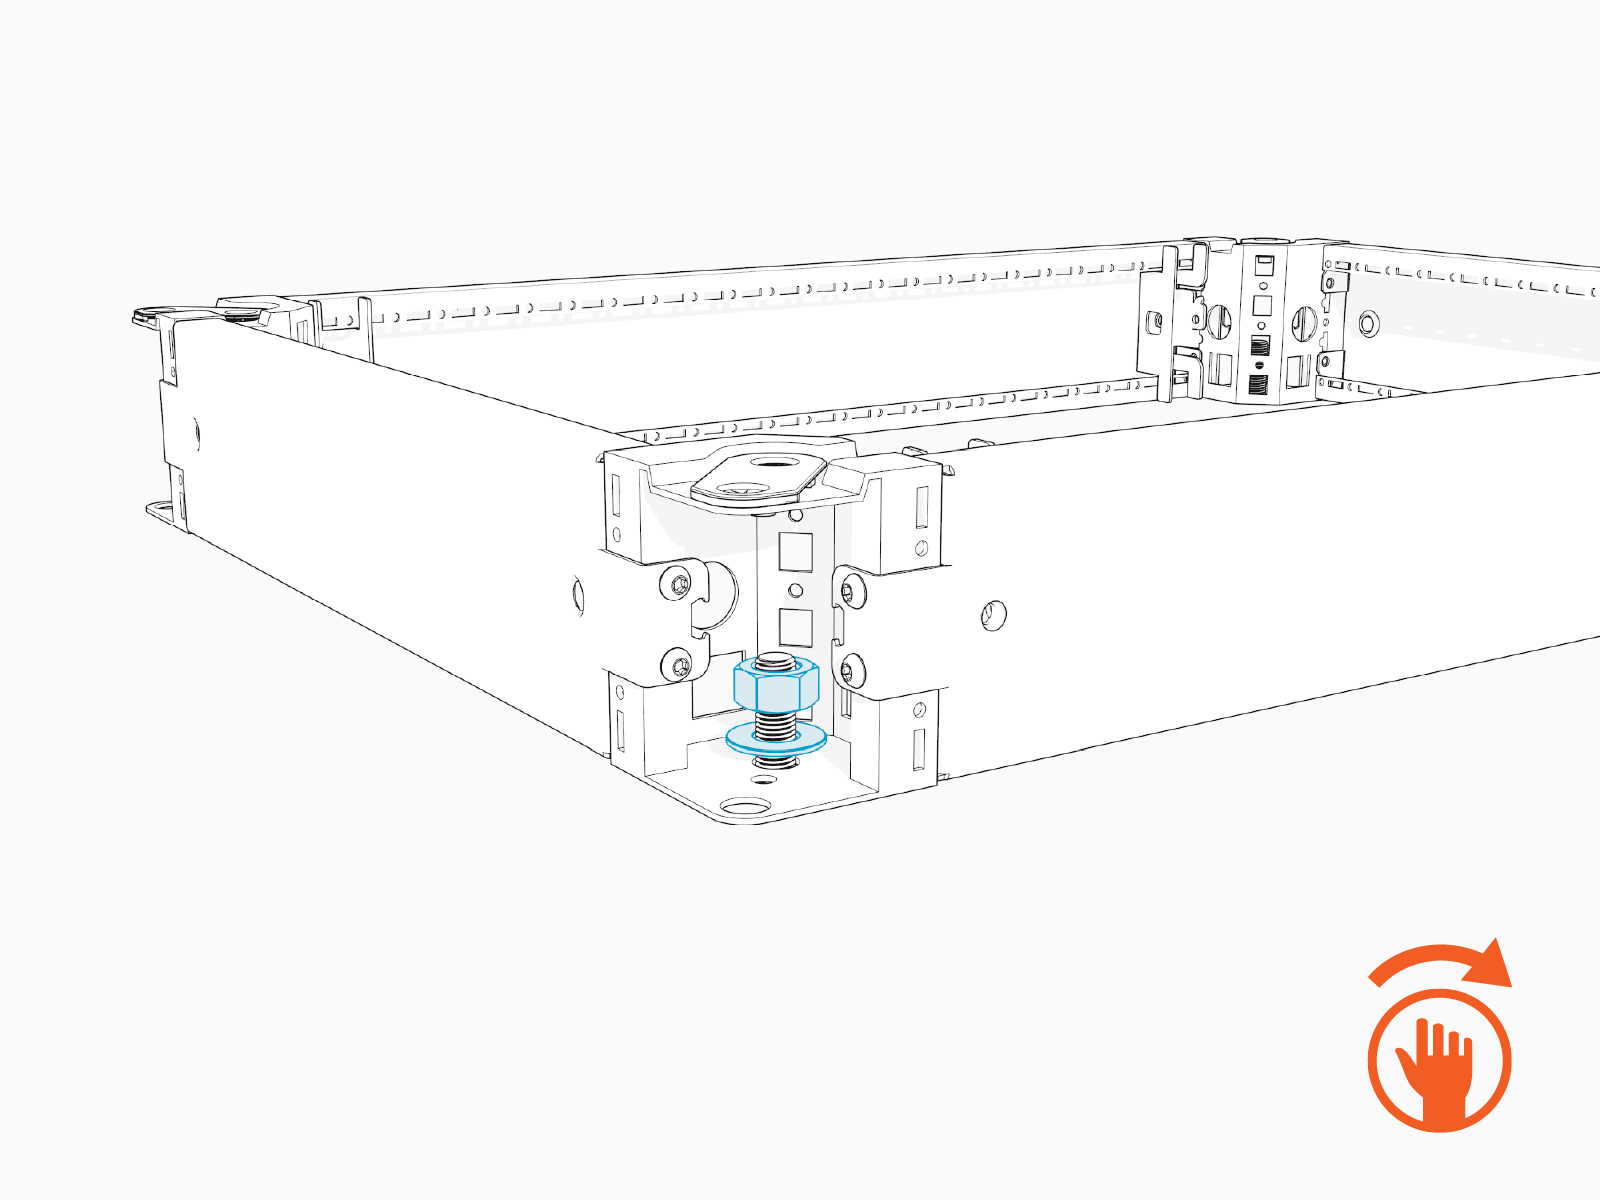
Bring the assembled riser to the Power Hub installation location. Place the riser down, aligning the riser anchor holes with the anchor bolts.
-
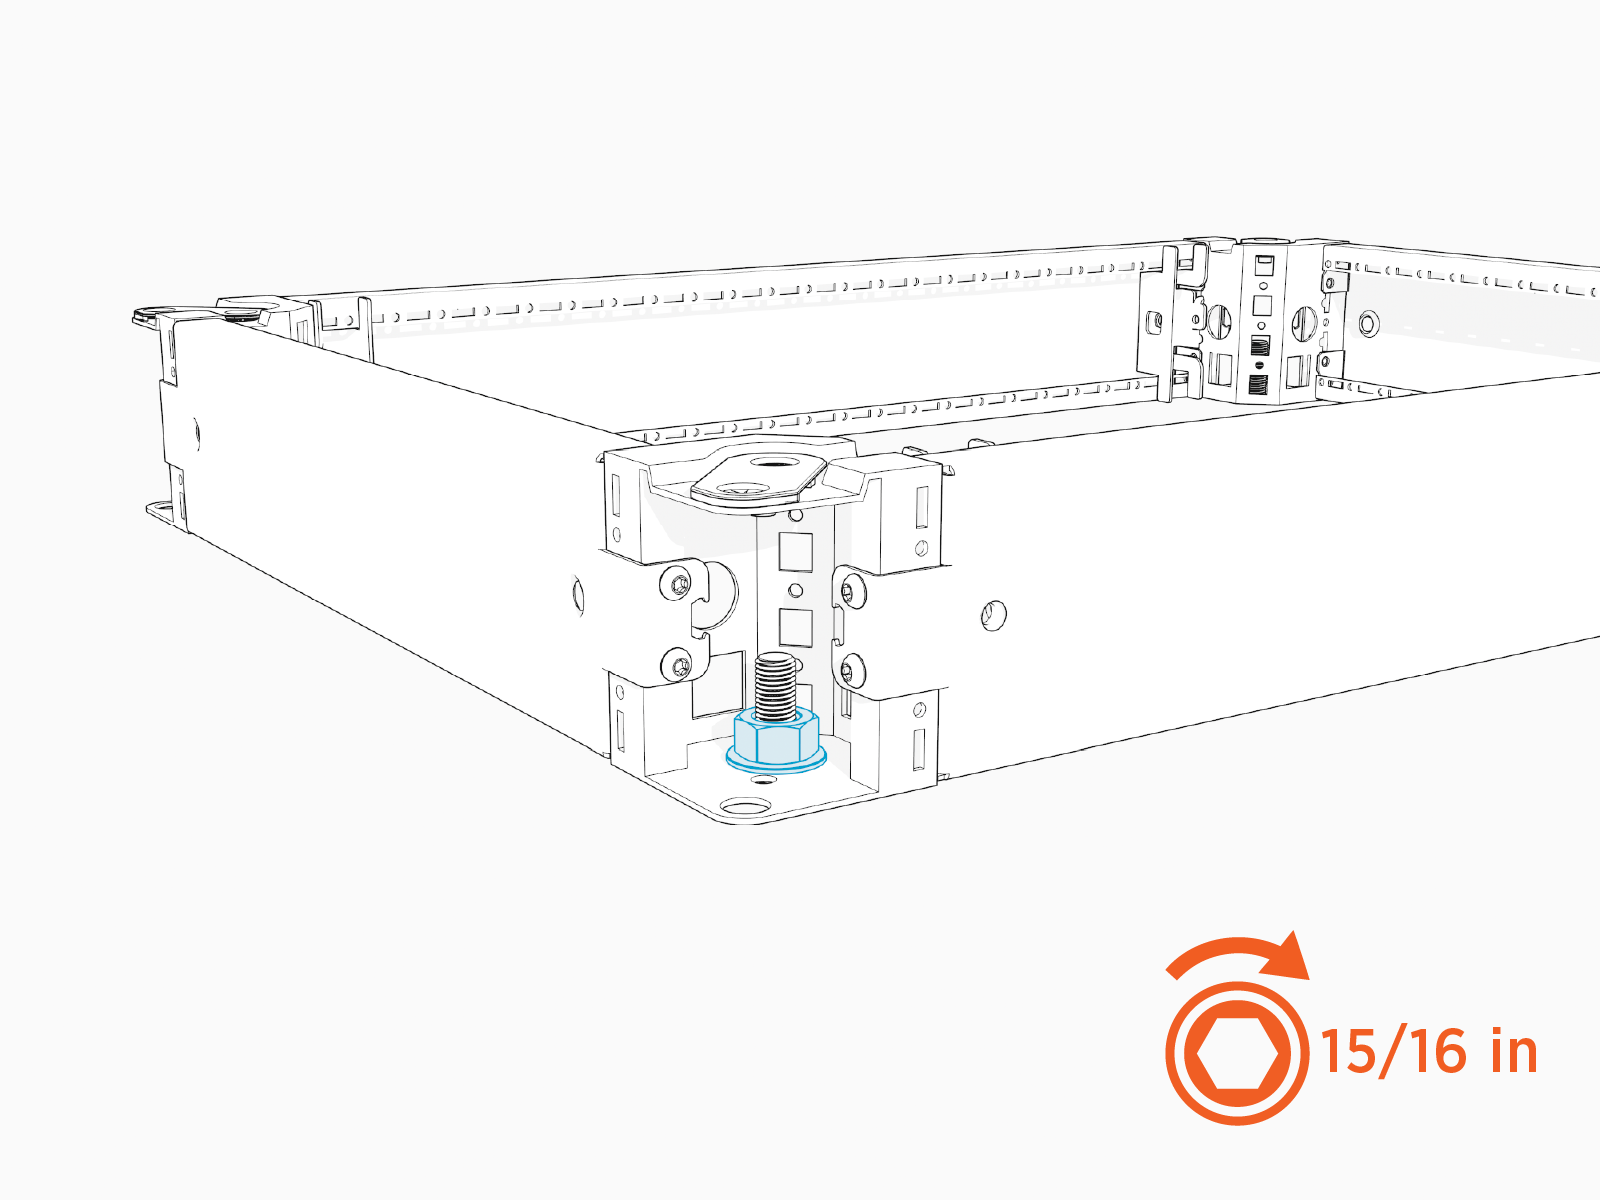
Install a washer and a top nut onto each of the anchor bolts and hand-tighten.
-
Torque all top nuts to 94.9 Nm (70 ft-lb).
-
This concludes the Riser Kit assembly and installation. Proceed to Mount Cabinet on a Riser.
