Replace the Holster Ball Assembly
This topic contains important instructions for the Home Flex that shall be used to replace the holster ball assembly. Do not replace the holster ball until you have read the instructions in this topic.
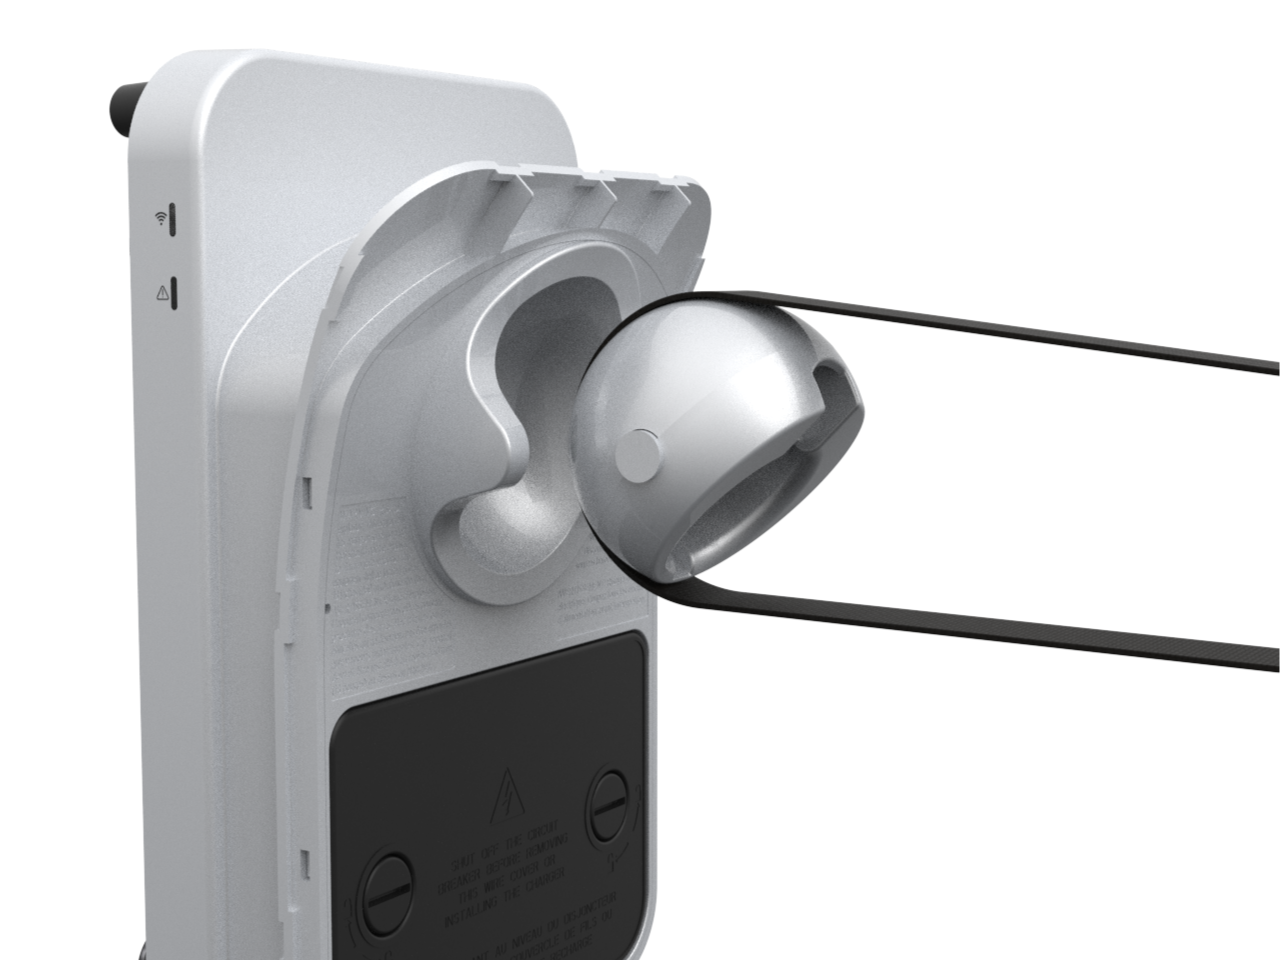
Remove the Existing Holster Ball
To remove the existing holster ball, complete the following steps:
-
Turn off power to the station at the circuit breaker.
-
Insert the strap around the holster ball. Push it through so it comes out and around the opposite side of the ball. If necessary, rotate the ball to make it easier to insert the strap.

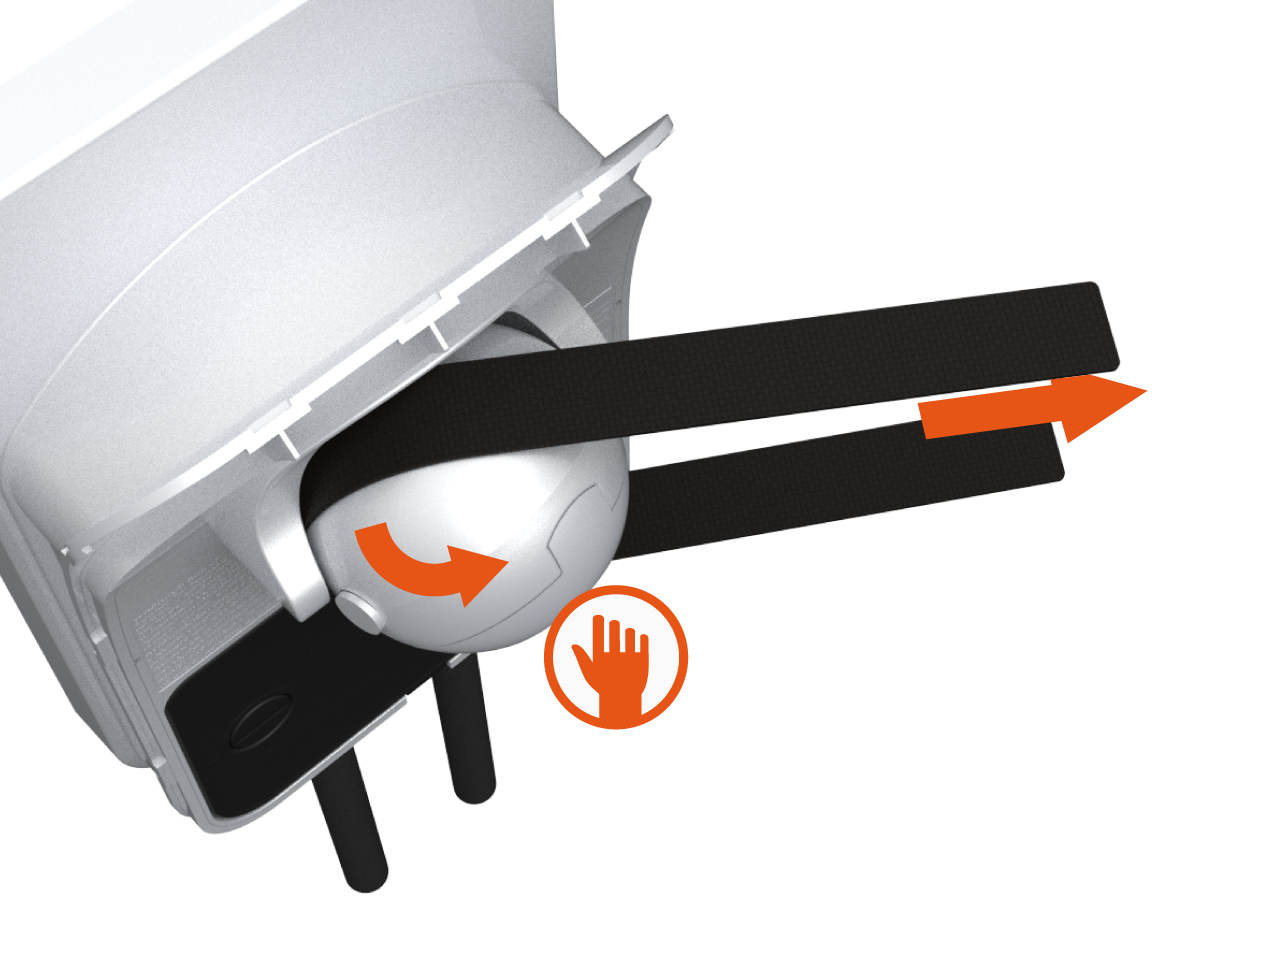
-
Move the strap sideways and then pull both ends of the strap slowly and firmly until the holster ball is removed. If washers are present, they can be re-used or disposed of; the kit includes two new adhesive washers.
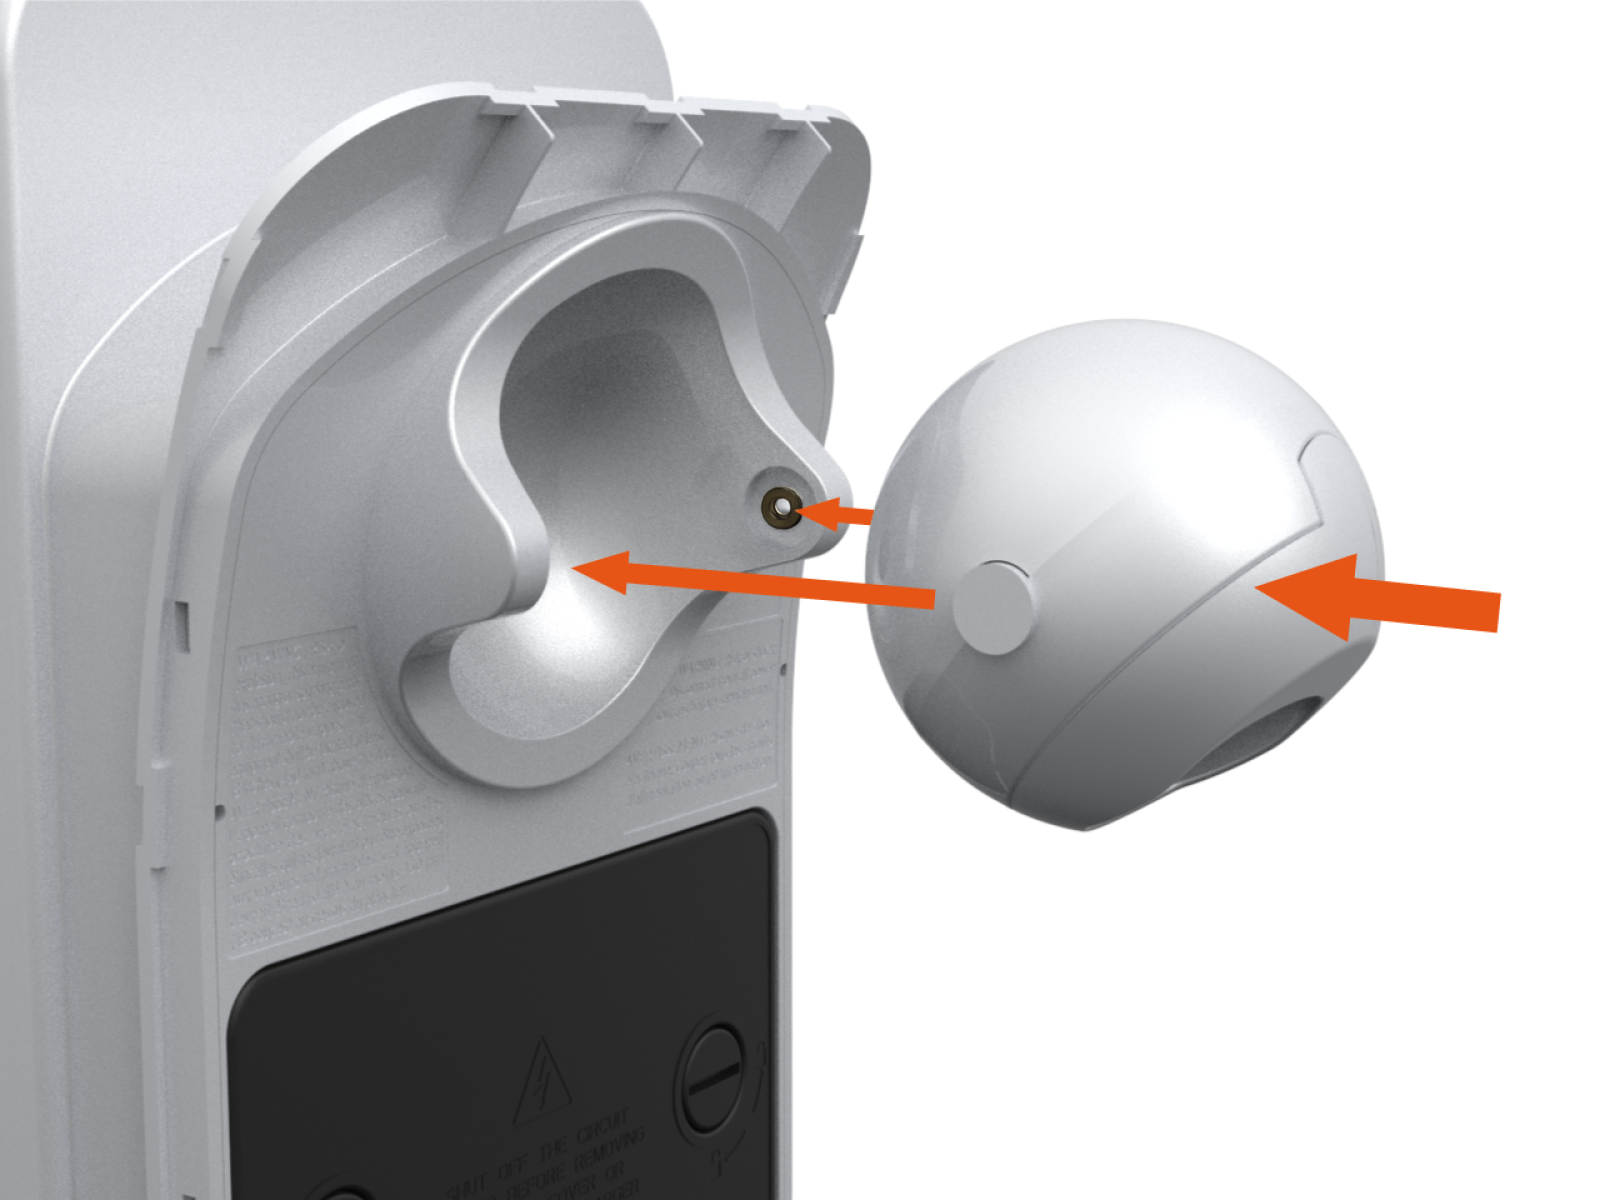
Install the New Holster Ball
To install the new holster ball, complete the following steps:
-
Apply the two adhesive washers to the inside of the housing assembly, taking care to center the adhesive black washers on the protrusions. Align the protrusions on the new holster ball with the indent on the charger.
-
Push the new holster ball until it snaps firmly into place.


Restore Power
To restore power, complete the following steps:
-
Restore power to the station at the circuit breaker.
-
Verify that the charging cable now functions by starting a test session.
-
Initiate a charging session.
-
Plug the handle into a vehicle.
-
Verify that the vehicle is charging.
-
Insert the connector in its holster.
-
