Faulty Door Sensor Setup Leading to Charging Disruptions
Bulletin Published: December, 2025
Affected Model: Some ChargePoint Power Link 1000
Failure: Improper installation of door sensors and magnets may prevent DC charging stations from detecting proper door closure. This can lead to charging interruptions, system faults, and delayed deployment.
Required Action: Before replacing the sensor, check the magnet orientation, the spacing between the magnet and the reed sensor, and inspect the reed sensor Molex connector. If the problem continues, follow the instructions to replace the door sensor.
- If the charging station is not installed, commissioned, or serviced by a ChargePoint certified technician using a ChargePoint-approved method, it is excluded from all ChargePoint and other warranties and ChargePoint is not responsible.
- You must be a licensed electrician and complete training at https://www.chargepoint.com/partners/training-certification to become ChargePoint certified and to access ChargePoint's web-based installer tools or ChargePoint Installer app.
For assistance, go to chargepoint.com/support and contact technical support using the appropriate region-specific number.
Introduction
Some DC charging stations may not detect door closure correctly. This can stop charging, cause system faults, and delay deployment.
The following image shows the location of the door sensors in the Power Link 1000.
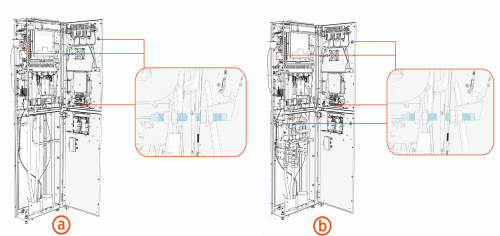
-
Without Disconnect Kit
-
With Disconnect Kit
Possible Causes
-
The magnet is oriented backwards, where potting side is facing the sensor.
-
The magnet is too far from the reed sensor
-
The reed sensor Molex connector is loose or damaged
Troubleshooting
Check these conditions before replacing the sensor. If the problem continues after these checks, replace the sensor as described in this bulletin.
-
Make sure the magnet and sensor are aligned in the correct orientation, refer to the following image.
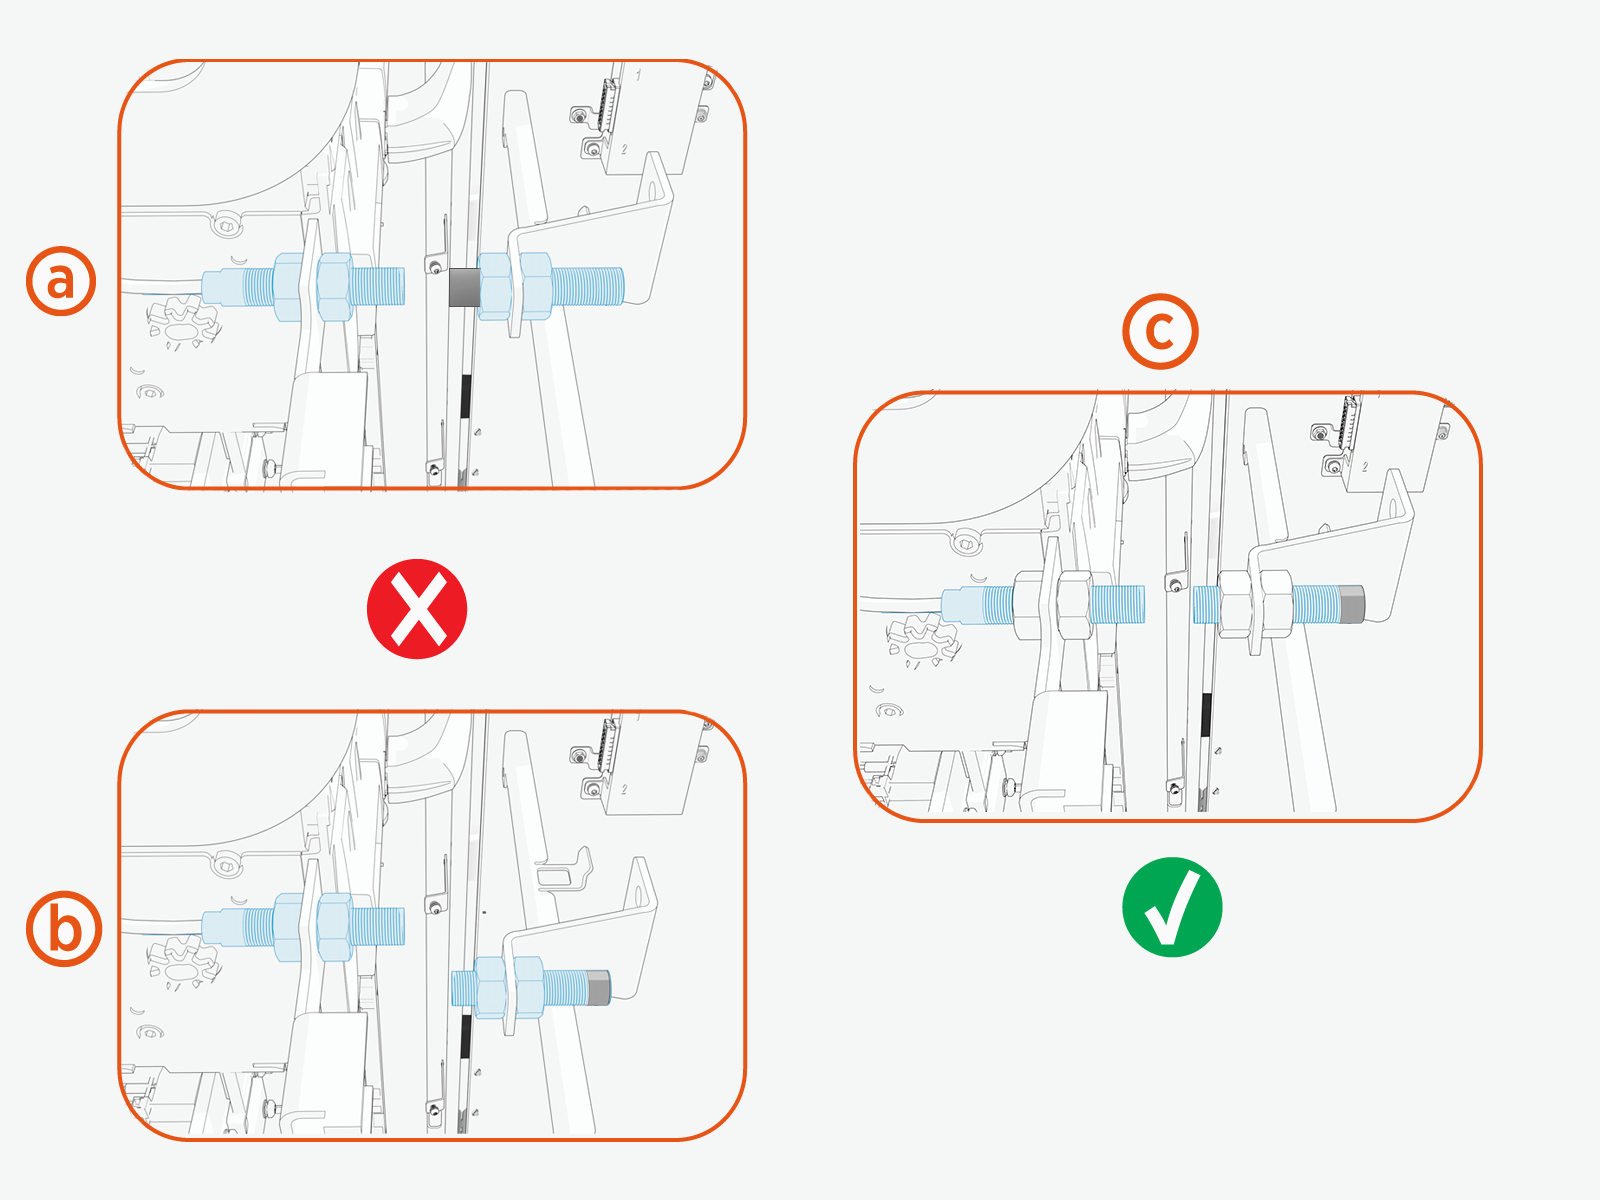
-
Incorrect: The potting side of the magnet faces the threaded side of the sensor.
-
Incorrect: The magnet and sensor are misaligned, their threaded ends do not face each other.
-
Correct: The threaded side of the magnet and the threaded side of the sensor face each other and are properly aligned.
-
-
Inspect the Molex connector for bent pins, corrosion, or loose fit.

-
Measure the gap (a) between the threaded sides of the sensor and magnet, and ensure the gap is less than 10 mm and as close as possible.
 If needed, replace standard M8 nuts (x2) with the thin M8 nuts (x2) on both sides of the magnet to reduce the gap (a).
Replace the Door Sensor
To replace a door sensor, do the following steps:
Required Tools and Materials
| Icon | Description | Icon | Description |
|---|---|---|---|
|
|
13 mm hex socket |
|
13 mm hex wrench |
|
|
Stepladder |
|
|
Before you Begin
-
To power off the station, refer to the Power Off chapter in Power Link 1000 Service Guide.
-
To remove the upper or lower covers and open the upper or lower door, refer to the Covers chapter in Power Link 1000 Service Guide.
AFTER REPLACING THE DOOR SENSOR, REVERSE THE ABOVE STEPS TO COMPLETE THE SERVICE.
Remove the Door Sensor and Magnet
The following procedure includes images that show a typical door sensor and magnet configuration. Mounting brackets may vary by location.
-
Disconnect the reed sensor cable.

-
Loosen and remove the M8 nuts (x2) securing the magnet.
Removing the M8 nut on the threaded side of the magnet allows the magnet to slide out, while the nut on the potting side remain attached.
-
Carefully remove the magnet from the bracket.
-
Loosen and remove the M8 nuts (x2) securing the sensor.
Removing the M8 nut on the threaded side of the sensor allows the sensor to slide out, while the nut on the connector side remain attached.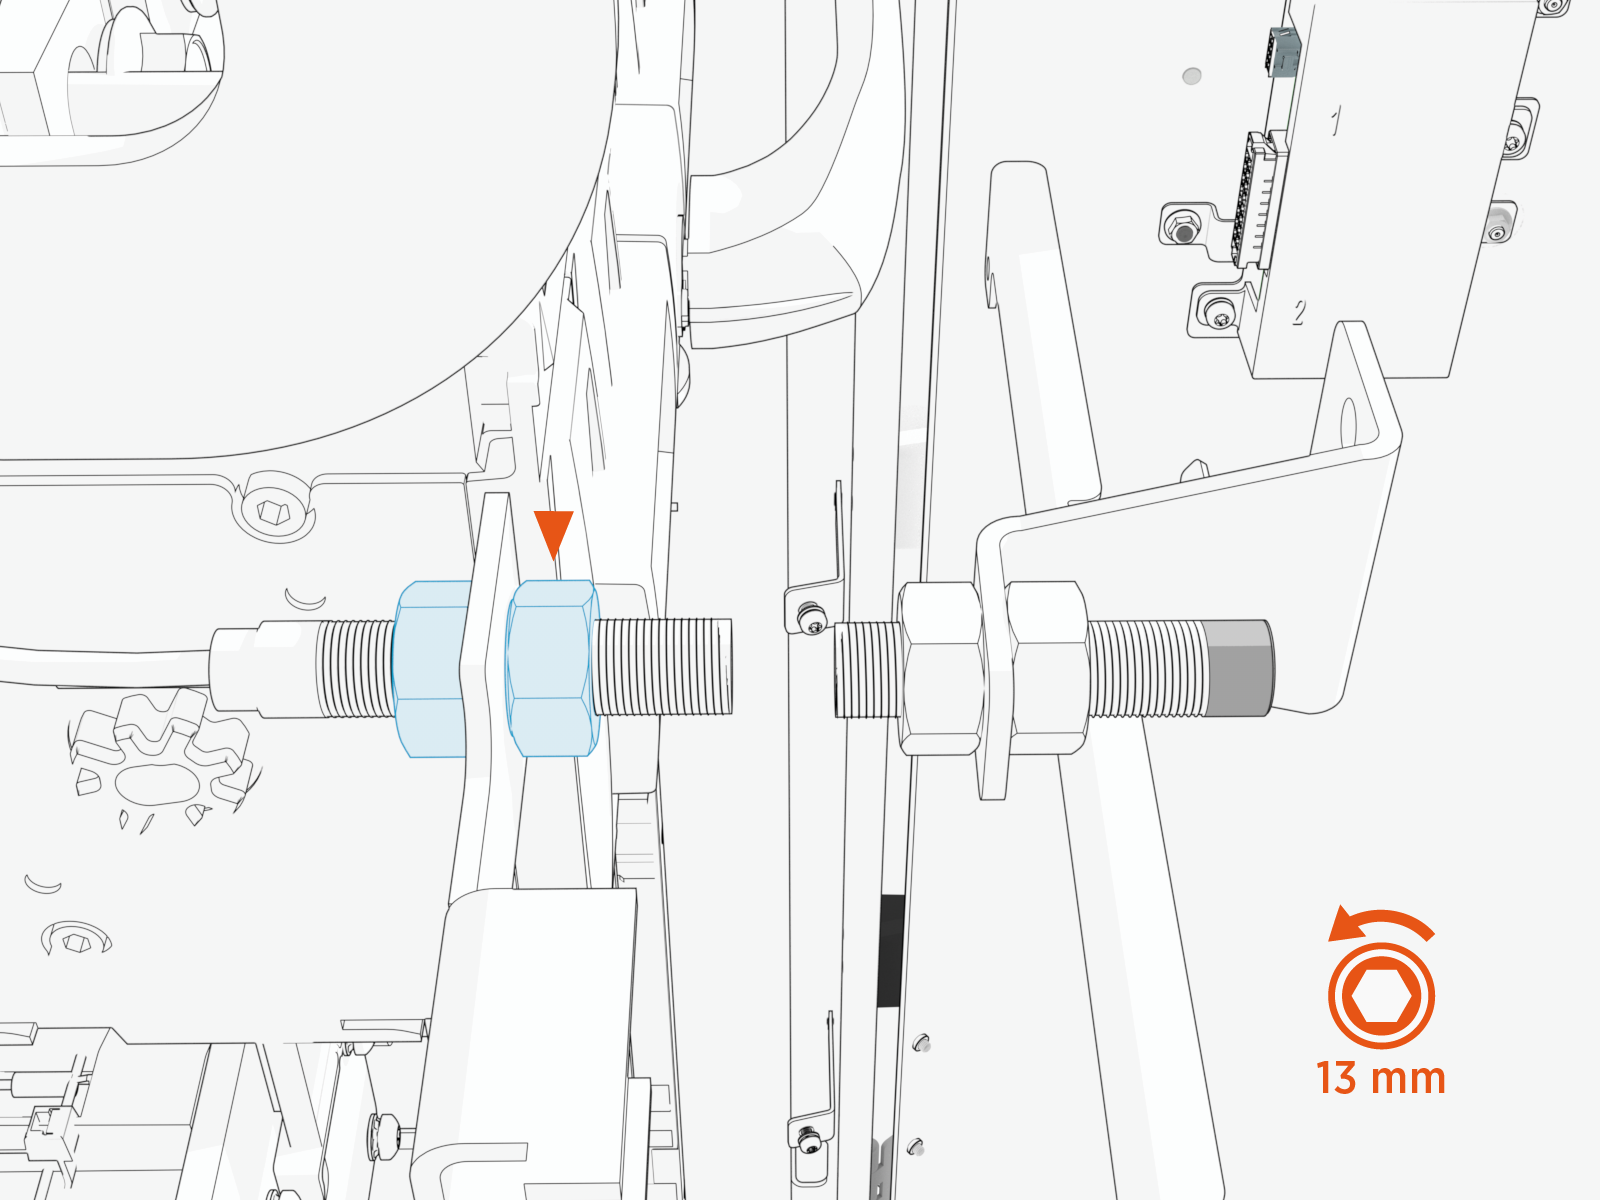
-
Carefully remove the sensor from the bracket.
Reinstall the Door Sensor and Magnet
-
Place the magnet in its position.
-
Secure with M8 nuts (x2) and hand-tighten.

-
Place the sensor in its position.
-
Secure with M8 nuts (x2) and hand-tighten.

-
Check that all conditions listed in the Troubleshooting section are met before proceeding to torque the nuts.
-
Use the 13 mm socket, torque the nuts to 1.13 Nm (10 in-lb).

Report Completion to ChargePoint
Contact ChargePoint Support at chargepoint.com/support to report completion of the repair procedures, and any negative findings during the station inspection.
