Introduction
ChargePoint Flex Plus stations, also referred to as CP800, are AC charging units that can supply up to 22 kW (three-phase) or 7.4 kW (single-phase) of power to electric vehicles, depending on the specific model. These stations feature metering compliant with calibration law and backend connectivity via OCPP![]() Open Charge Point Protocol 2.0.1. They can be used in private areas as home chargers and in semi-public areas with billing based on energy consumption.
Open Charge Point Protocol 2.0.1. They can be used in private areas as home chargers and in semi-public areas with billing based on energy consumption.
This manual includes the following:
-
Detailed explanations and technical specifications of ChargePoint Flex Plus stations
-
Instructions for setting up charging stations for home use
-
Information about how to use Flex Plus charging stations and the online ChargePoint Driver Dashboard
-
Guidance for the maintenance of the charging station
-
Explanations for how to view monthly statements and verify the accuracy of the recorded measurements for charging activity.
-
Insights on some regional requirements (such as in the United Kingdom and Germany)
Installation instructions are included in a separate document called Installation Guide. All public ChargePoint documents, including this manual, are available at ChargePoint Product Reference Documentation.
ChargePoint Flex Plus Charging Stations

-
Display
-
Touch buttons
-
Status LEDs
-
RFID
 Radio Frequency IDentification - card reader
 -
Type 2 socket
-
Type 2 holster
Connectors and Cables
ChargePoint Flex Plus stations are available with Type 2 socket and shuttered socket outlets.
Power the System On and Off
The charging station does not have a separate power switch. Use the upstream breaker in the consumer unit to power the charging station on or off.
When the breaker is powered on after the station is first installed, or when powered up after servicing or a power outage, the station runs a self-diagnostic to ensure safe and correct operation. This includes:
-
Electrical safety checks
-
Component operation checks
-
Network connectivity checks
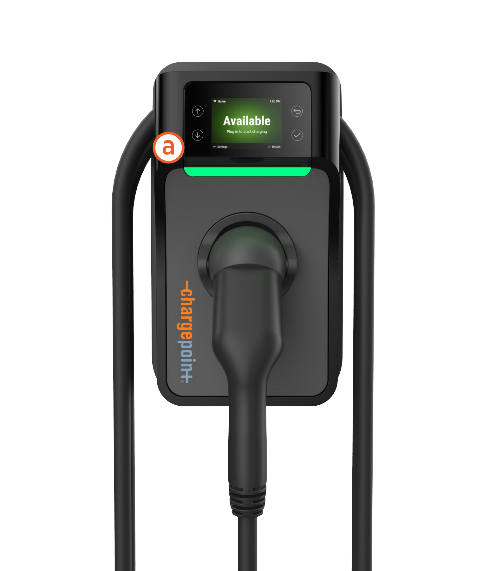
Check Station Status
When the station is powered on and activated, the status light (a) on the front of the station displays status via light color and pulsing.
|
Status Light Color |
Operating Definitions |
|
|---|---|---|
|
|
Light blue |
Vehicle plugged in, waiting for power release (for example, due to energy management) |
|
|
Blue, pulsing |
Charging a vehicle |
|
|
Blue, solid |
Charging complete, charging stopped, or charging suspended |
|
|
Green, pulsing |
Card authorization |
|
|
Green |
Available and ready to charge |
|
|
Orange, solid |
Online, waiting for a reservation |
|
|
Orange, pulsing |
Station ready for Installation/Activation |
|
|
Red |
Out-of-service or disabled |
|
|
Yellow, pulsing |
Installing software or rejecting the card (flashes yellow for 3 seconds). It also occurs during first boot-up when the station is not activated. |
|
|
White, pulsing |
Installing software or running a self-test |
|
|
White |
Bluetooth connected |
|
|
Purple |
Account has not been authenticated, return holster to station |


For assistance, go to chargepoint.com/support and contact technical support using the appropriate region-specific number.
Charge a Vehicle
Complete the following steps to charge a vehicle at a public ChargePoint station:
-
Authenticate at the charging station.
-
With RFID
Radio Frequency IDentification card: hold your RFID Radio Frequency IDentification card or mobile phone with a virtual RFID Radio Frequency IDentification card (Tap-to-Charge) next to the RFID Radio Frequency IDentification card reader symbol on the charging station. -
Without a card, using your smartphone app: Tap on the Flex Plus charging station you want to activate, just like with other charging points on the map.
-
The availability of the charging station appears at the bottom of the display. Tap the name of the charging station, then tap Start Charging on the next screen.
-
Press Start to confirm.
-
-
The Flex Plus display indicates that charging has been authorized. Connect your electric vehicle.
-
At a station with fixed cables: Take any available cable from the holder and plug it into your vehicle’s Type 2 socket.
-
At a station with a Type 2 socket: Use a standard Type 2 cable to connect the station to your vehicle. You can plug the cable ends into the station and the vehicle in either order.
To prevent overheating when using Flex Plus charging stations, make sure the charging cable is fully uncoiled. -
-
Check your vehicle’s display (often found on the dashboard) to make sure it is charging.
-
End the charging session.
-
At the station: After charging, hold the identification method you used at the beginning (RFID
Radio Frequency IDentification card or smartphone) up to the RFID Radio Frequency IDentification symbol on the station. -
Via the app: Tap on the charging point your vehicle is connected to, then tap the Stop Charging button.
-
From the vehicle: Depending on the vehicle, you may also be able to stop the charging session directly from the vehicle.
-
-
Return the cable to the holder or remove your own cable. If either end of the socket is not released, try ending the session again, or contact ChargePoint Support at chargepoint.com/support.
Reset, Remove, or Deactivate a Station
Complete the following steps to reset the station and remove it from the driver's ChargePoint account.
-
Log in to the ChargePoint app and click Home.
-
Select Settings.
-
Click Remove from Account.
To install or activate the station, contact a certified installation expert. They will use the ChargePoint Installer app to configure the station or complete the activation.
