Replace Lens
Listed below are the instructions for replacing lens.
Required Tools and Materials
|
|
L-wrench (T25 security) |
|
#2 Philips screwdriver |
|
|
Needle nose pliers |
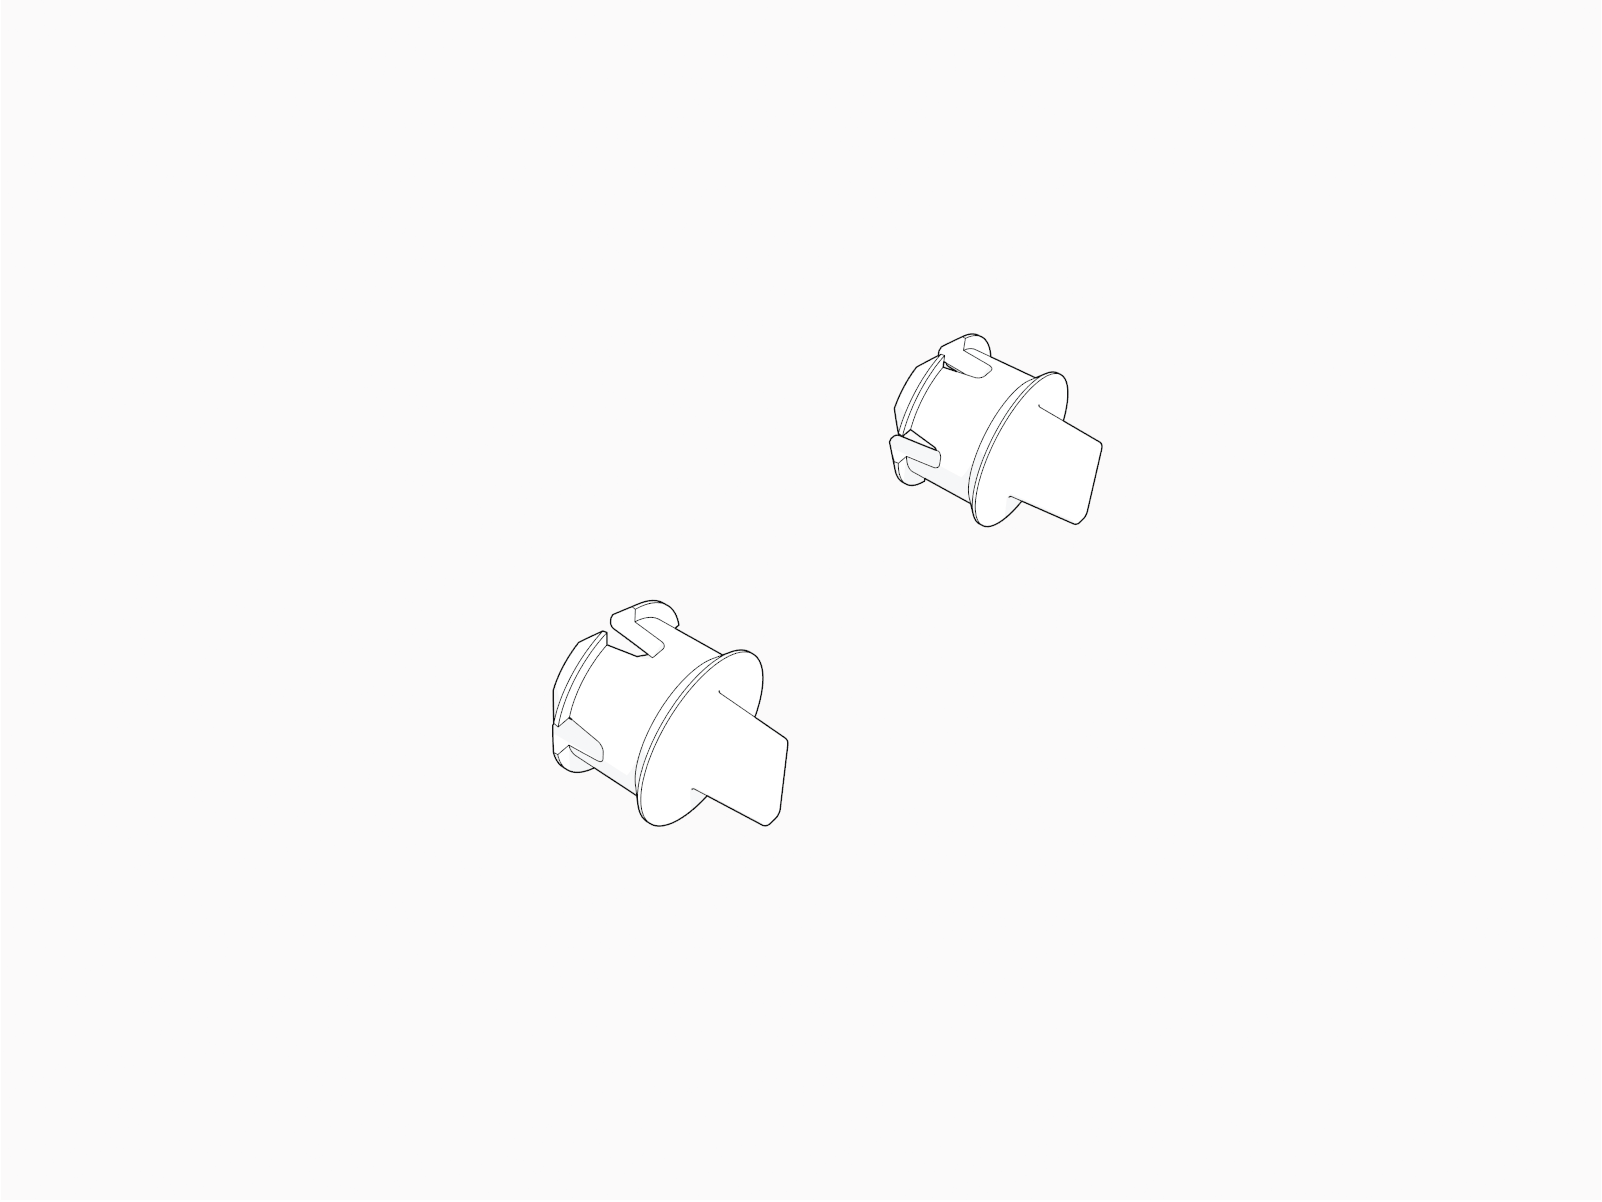
Hardware Kit Includes
|
|
CT4000 Lens |
|
Holster screw plugs (x2) |
Before You Begin
After replacing parts, reverse the above steps to complete the service.
Unlock the Holsters and Power Off
To unlock the holsters and power off, follow the steps below:
-
With the station still ON, do one of the following:
-
Use your ChargePoint card or the mobile app to start a charging session, then remove the charging plug(s) from the holster(s).
-
Go into the service menu and start a test session using the service code that is unique to the station .
-
Call ChargePoint Support to start a test session, which unlocks charging plug(s).
-
-
Remove the charging plugs and set them gently down.
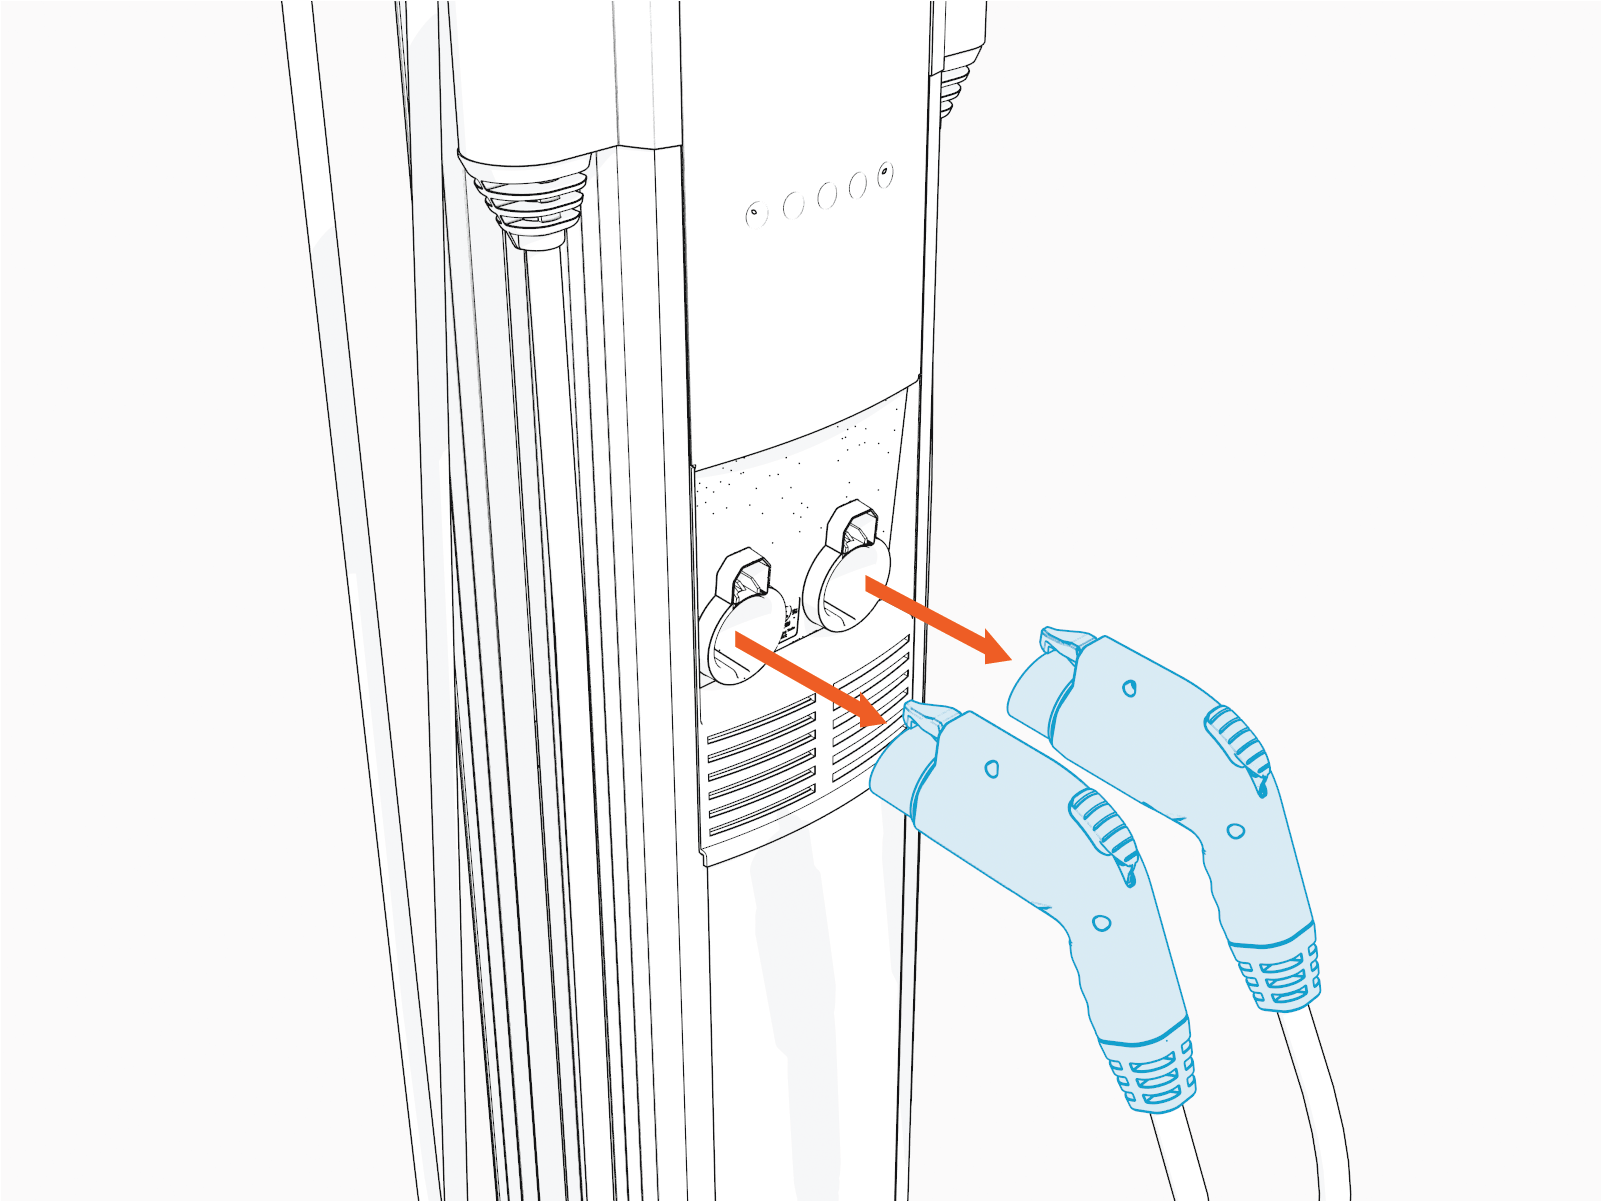 Reinsert the charging pugs into their holsters.
 -
Disconnect the station’s power at the electrical panel.
Risk of shock
-
Before any procedure, the technician must disconnect the power.
-
Follow local code to de-energize the applicable circuit and lock out/tag out the disconnect before proceeding. Use a multimeter to test that power is off.
-
Keep power off until the top cap is correctly reinstalled and the work is complete.
Failure to follow these instructions can result in serious injury, loss of life, or property damage.
-
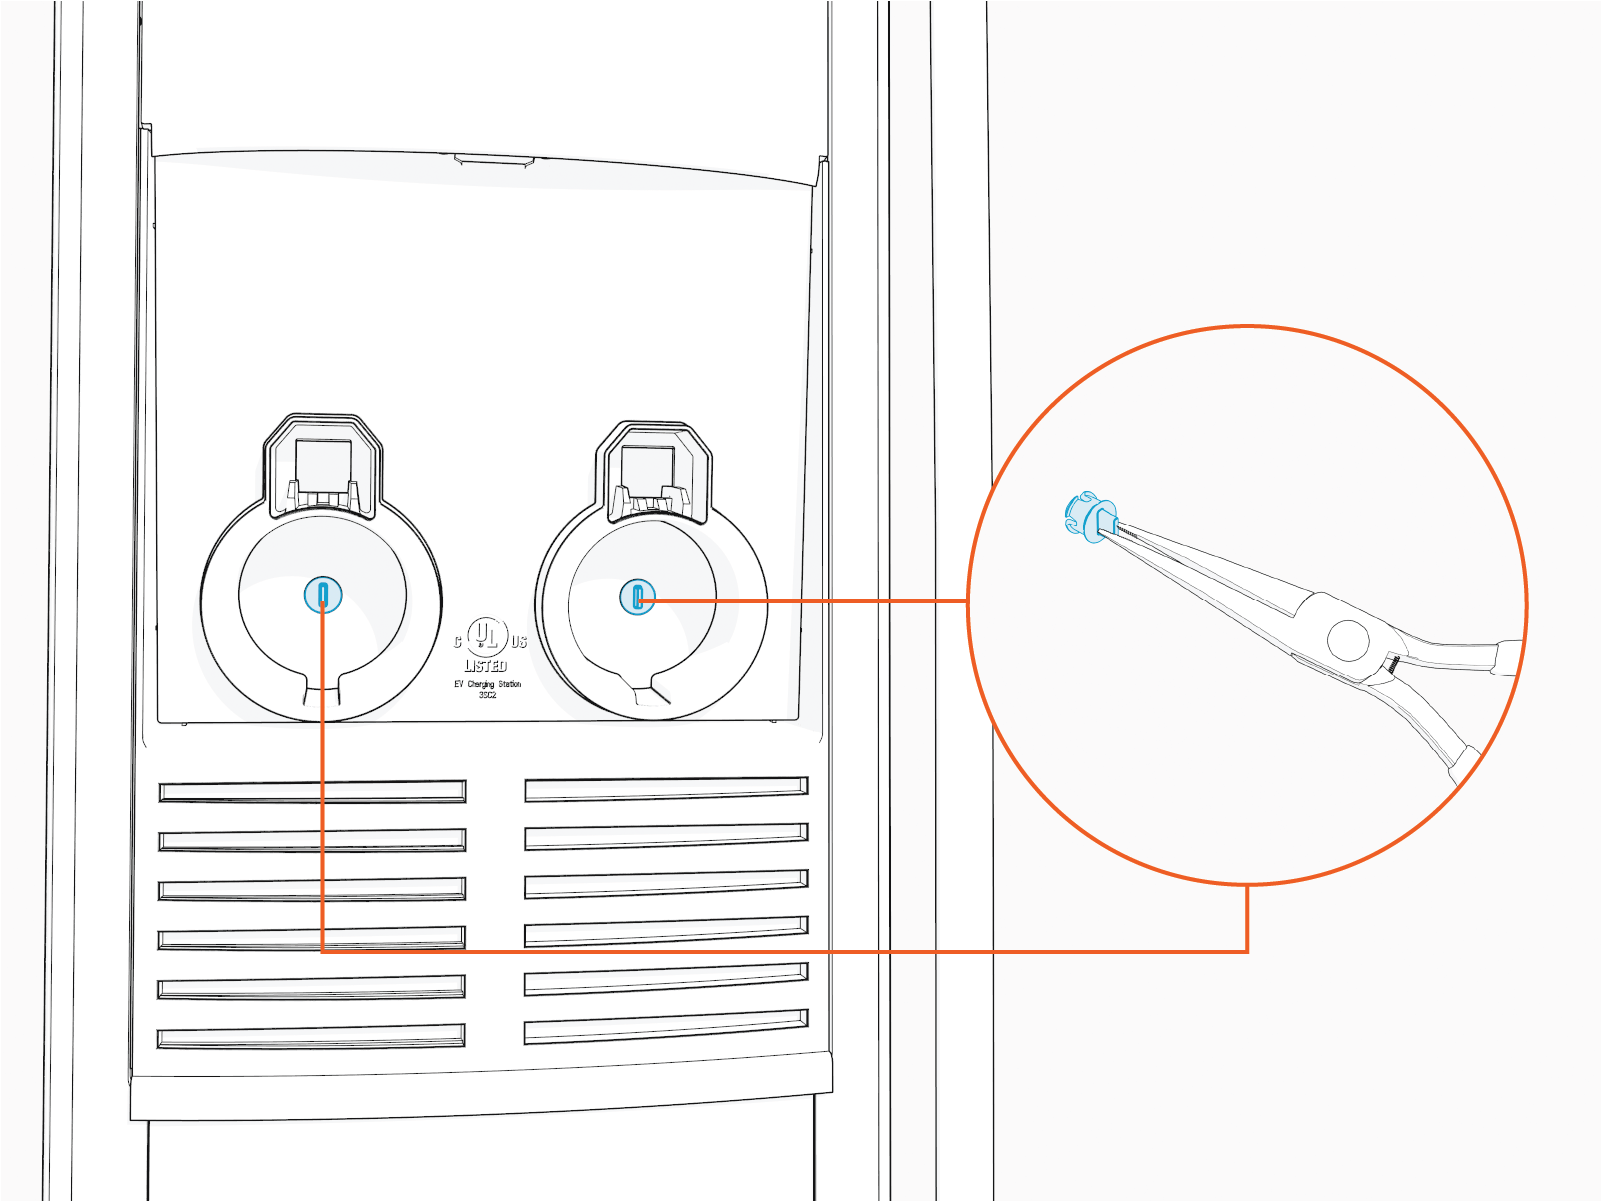
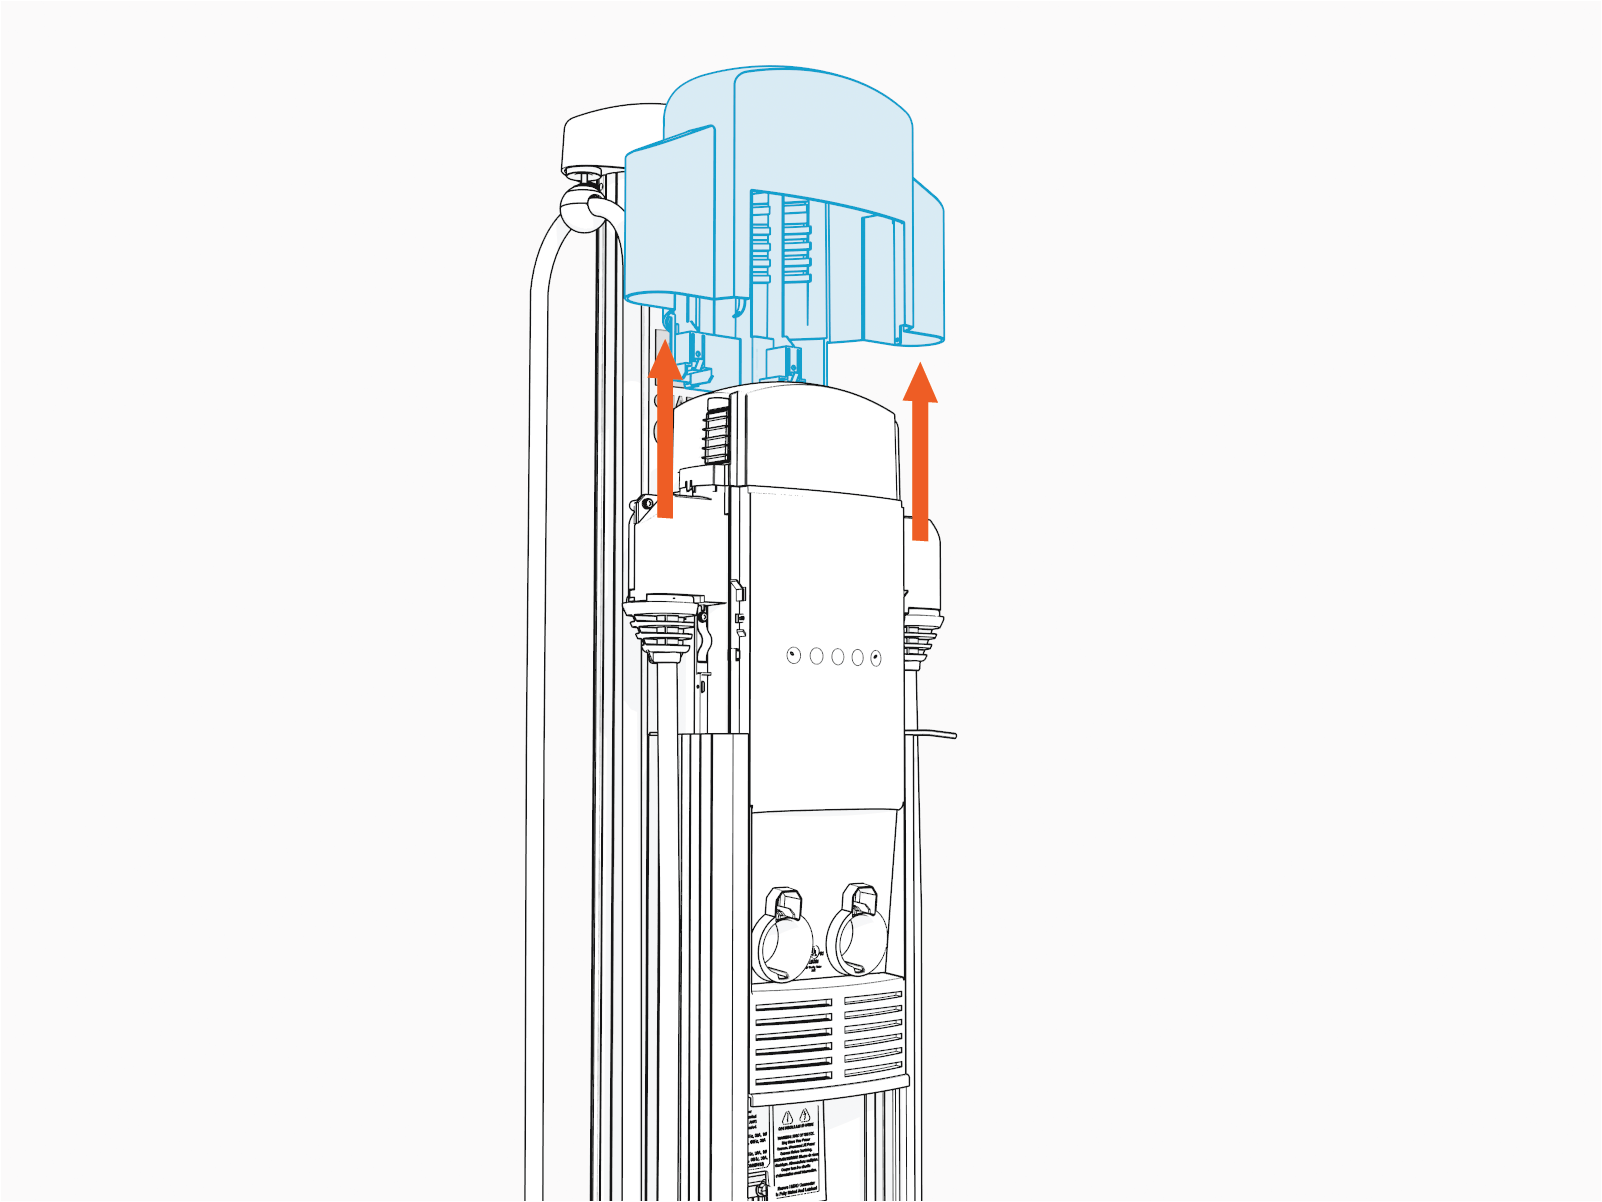
Raise the Head Assembly
To raise the head assembly, follow the steps below:
-
Use needle nose pliers to remove the holster screw plugs.
 Cover the screws using the two new plugs supplied with the kit.
 -
Use the L-wrench to loosen, but not remove, the security Torx screws.
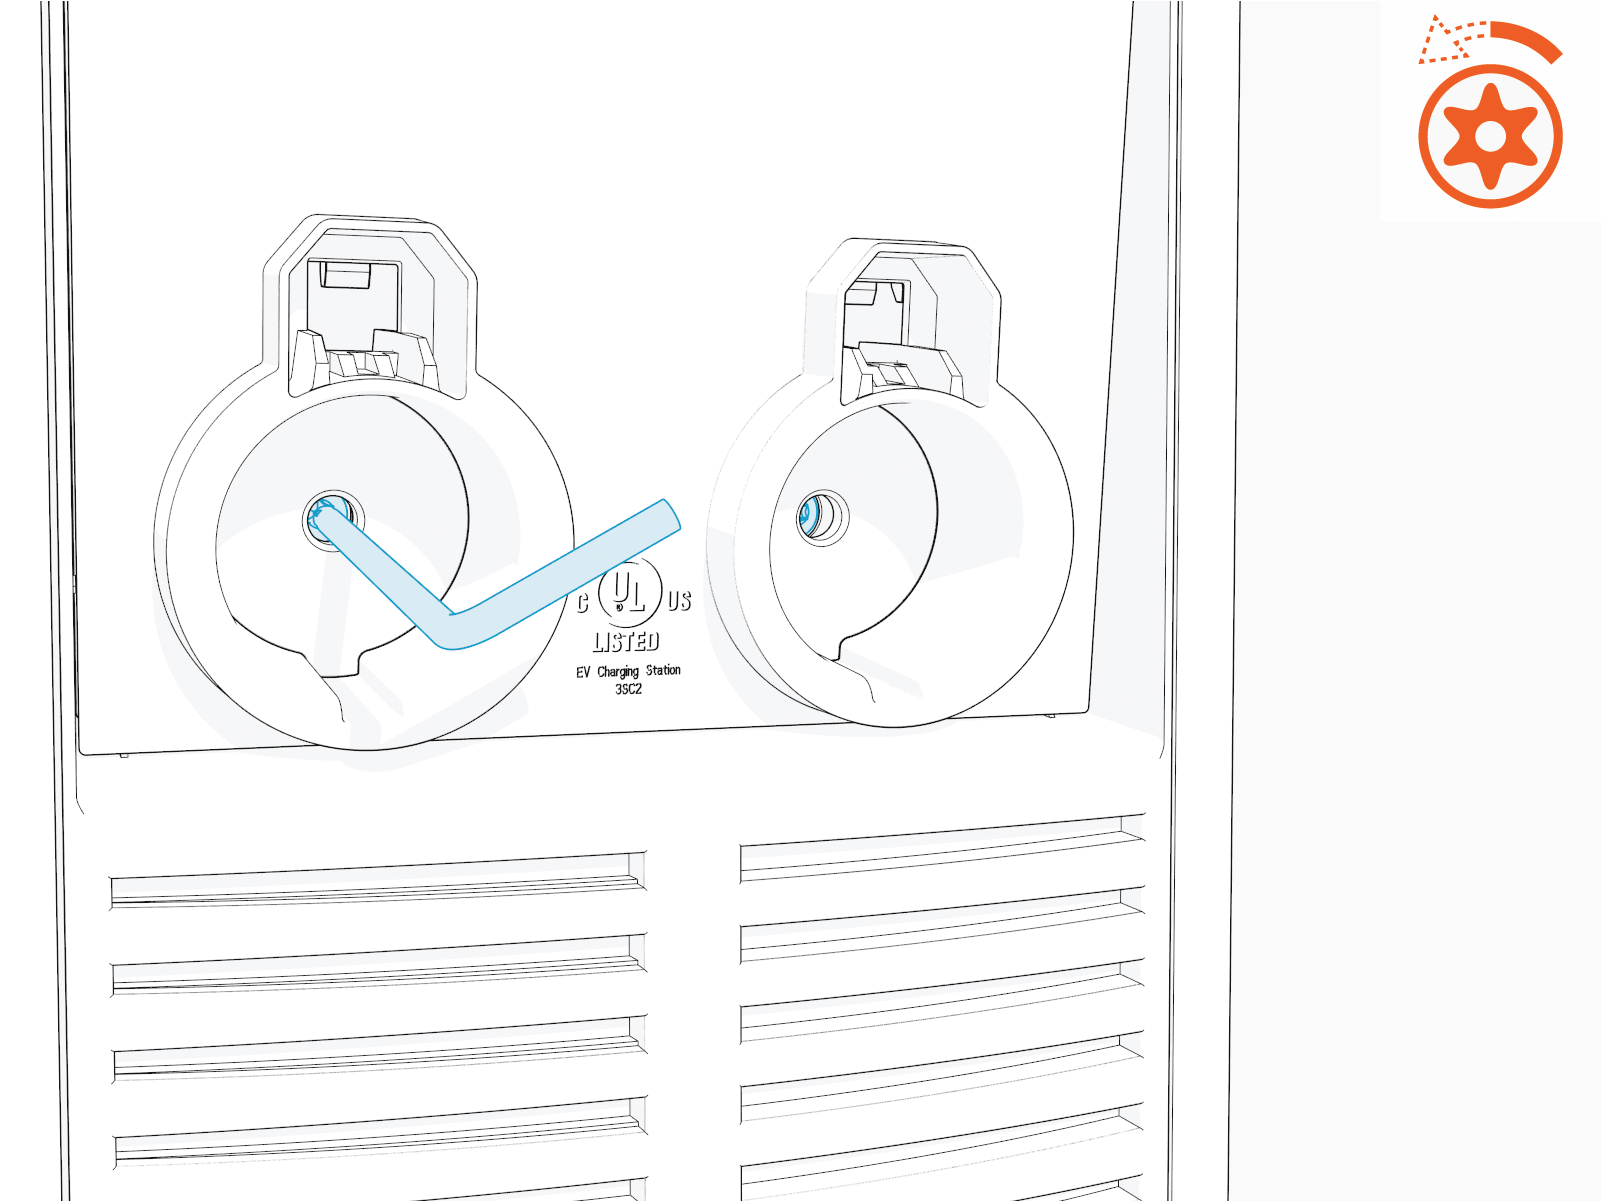 Torque the screws to approximately 25 to 30 in-lbs.
 -

-
Insert the L-wrench into the lower of two holes on the right side (as you face the station).
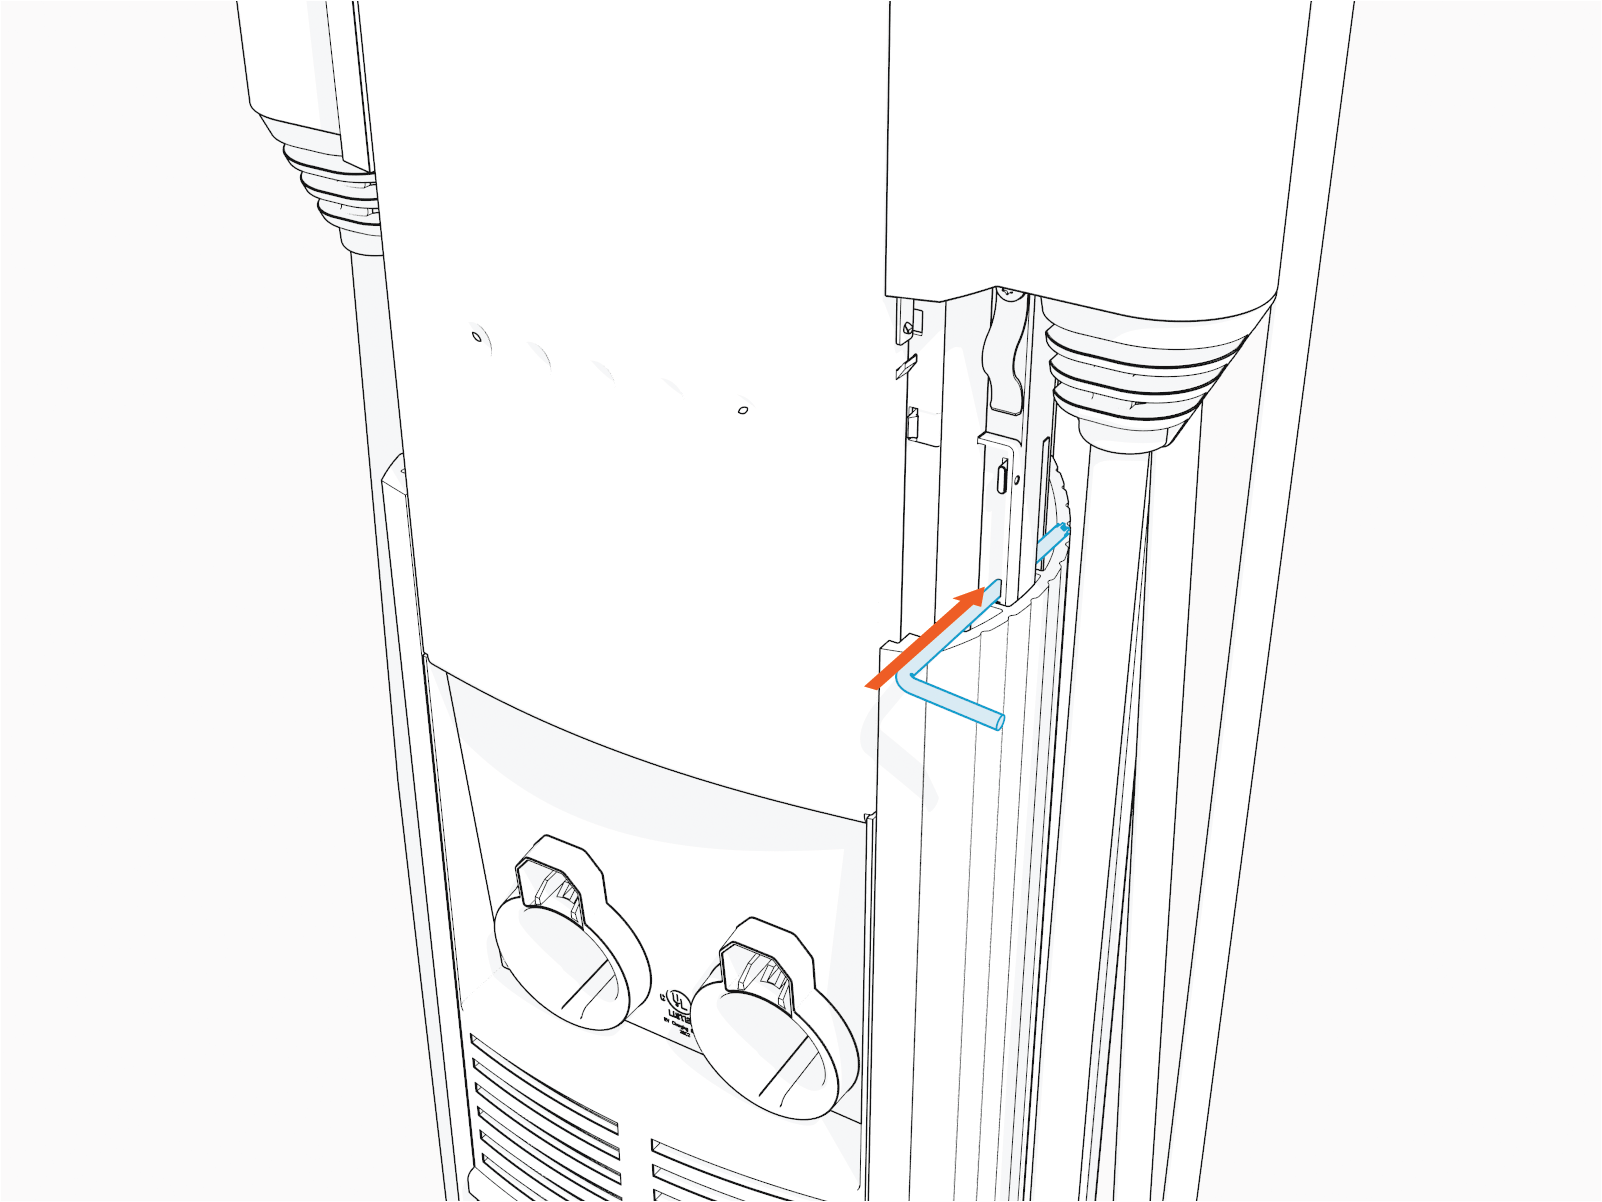 Remove the L-wrench and slide the head assembly into the station body. Ensure the head assembly is fully seated. It may require some downward force to ensure it is fully seated.
Reverse the above steps to reinstall.
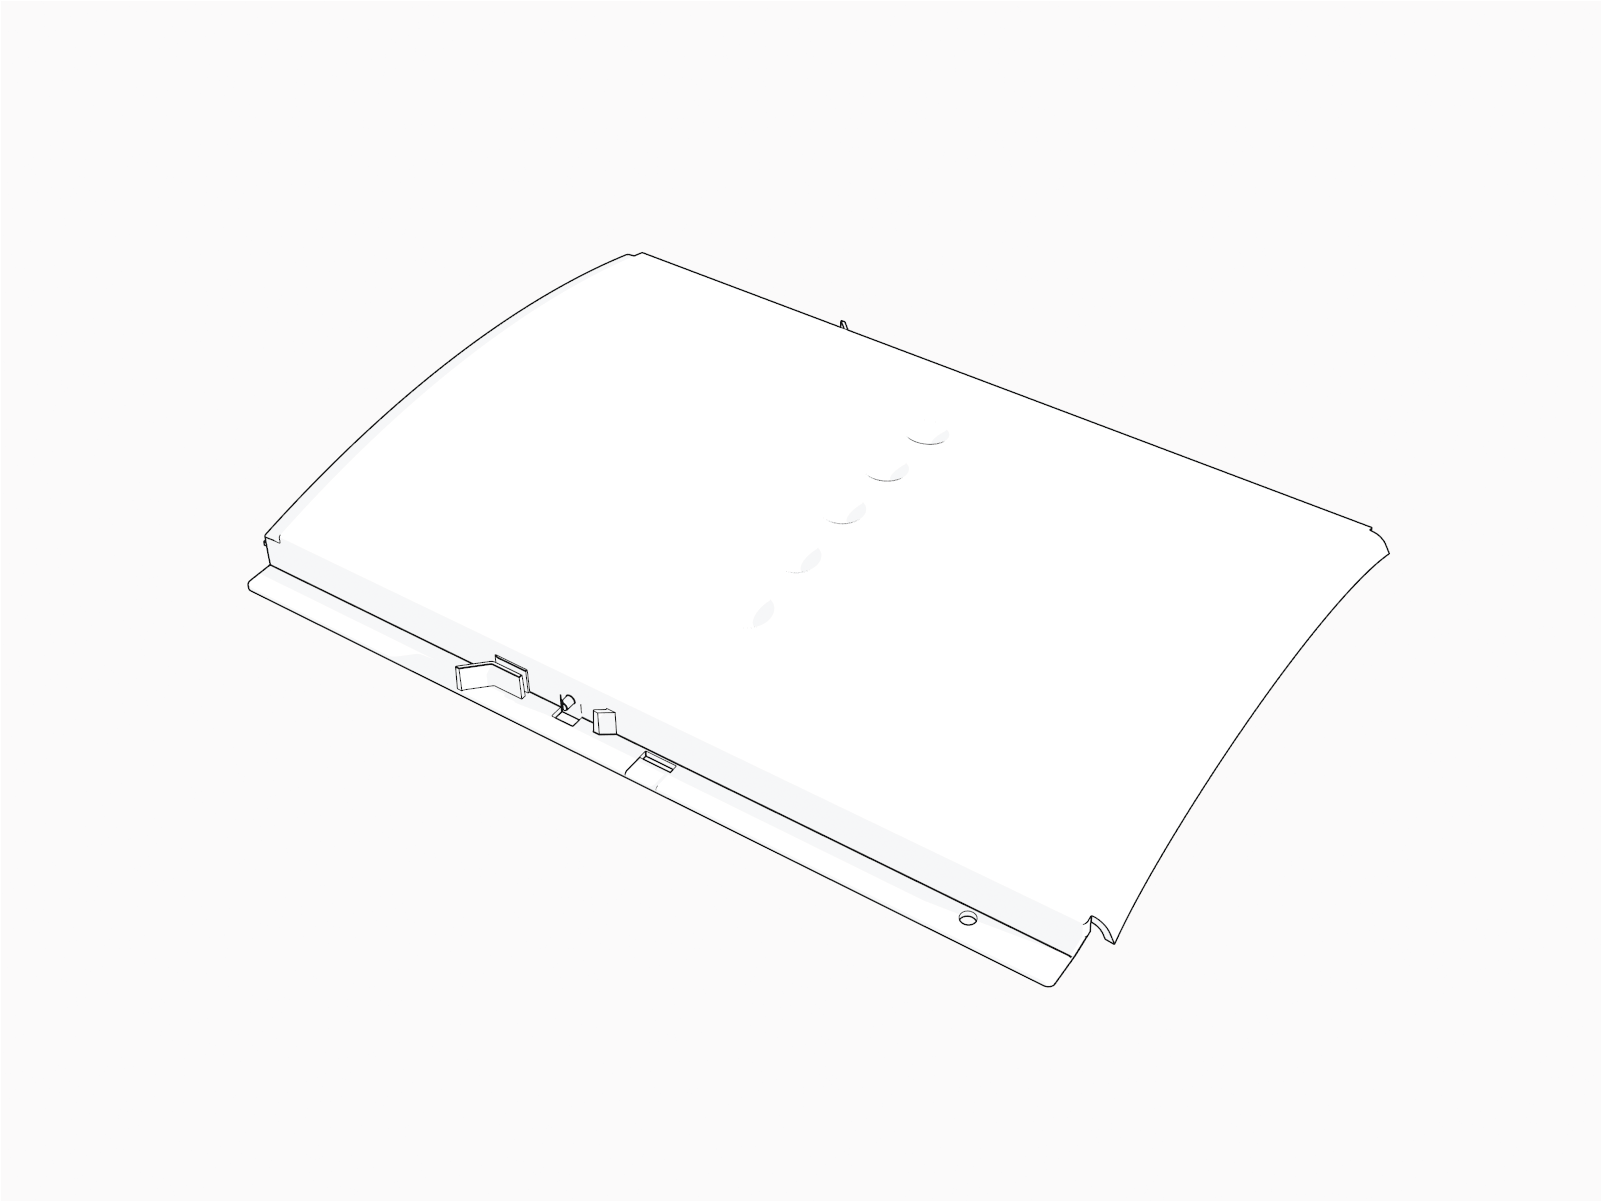
Remove the Top Cap
To remove the top cap, follow the steps below:
-
If screws are present, use the #2 Phillips screwdriver to remove (from back of the top cap).
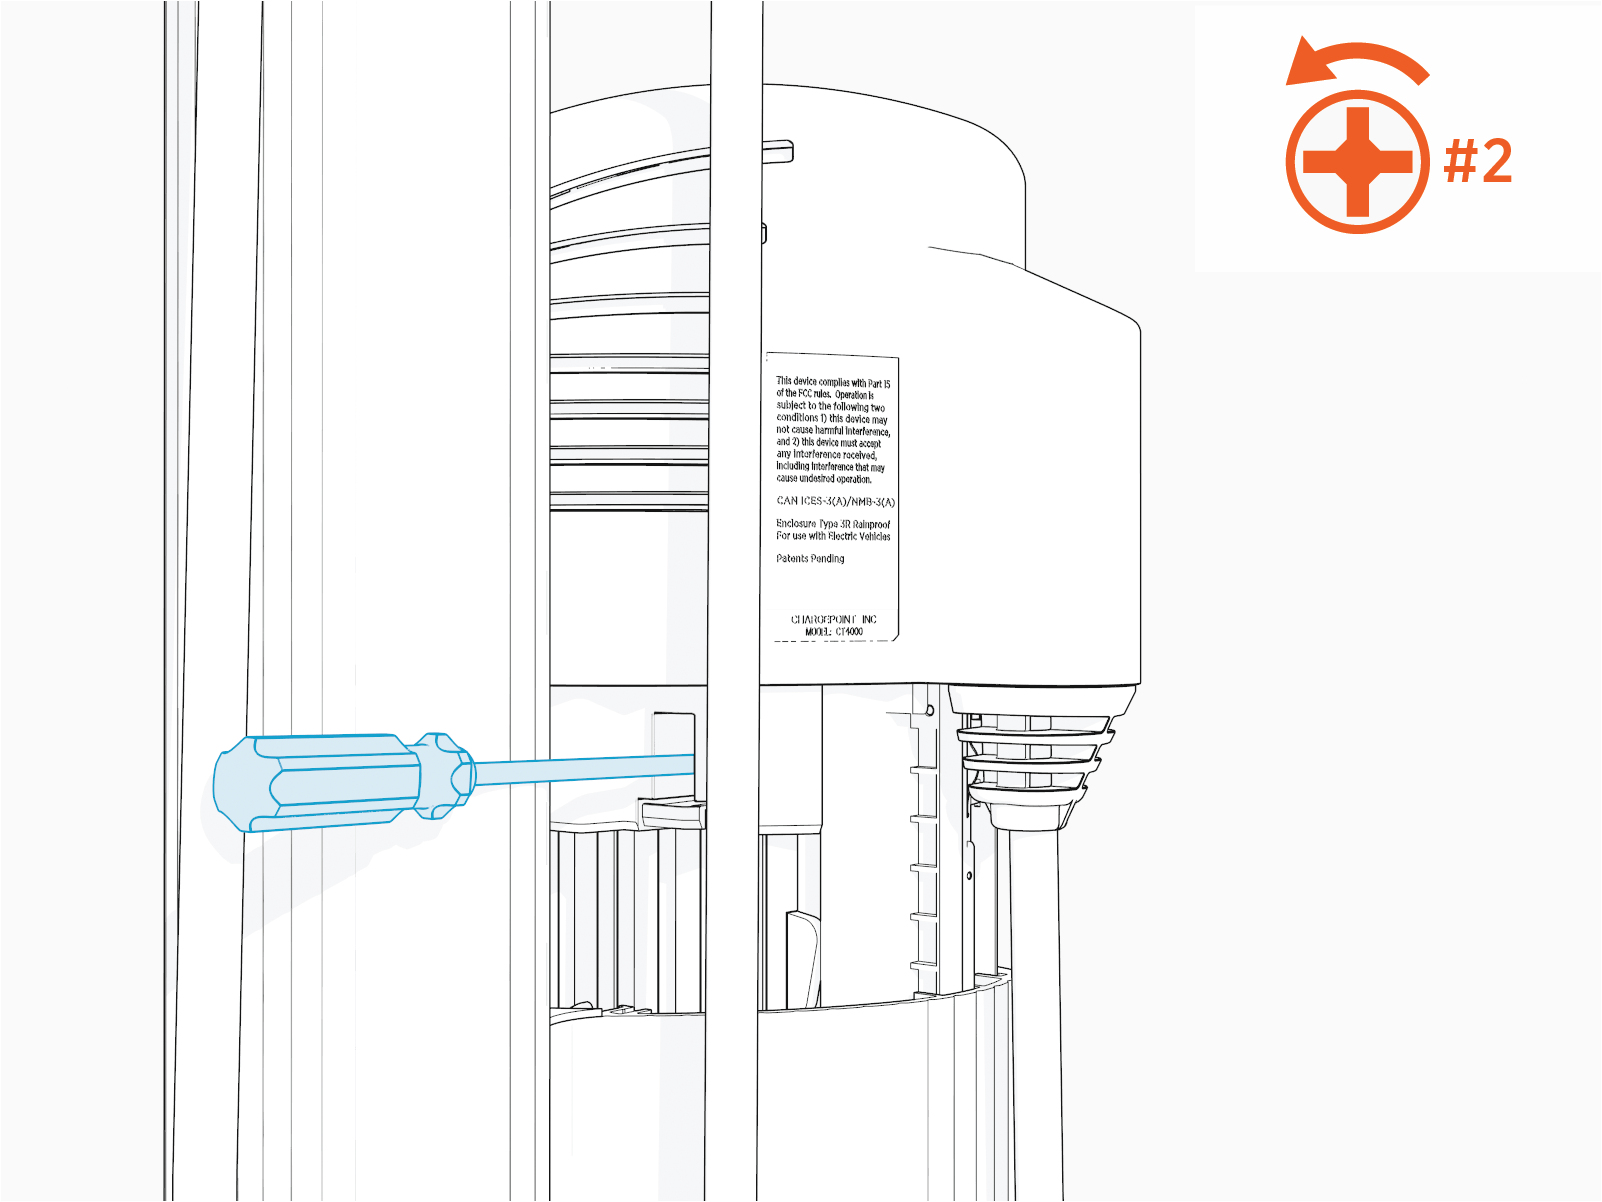
-
Pull the front retention tabs outward from their corresponding pins. Simultaneously, gently pull on the rear tabs to release.
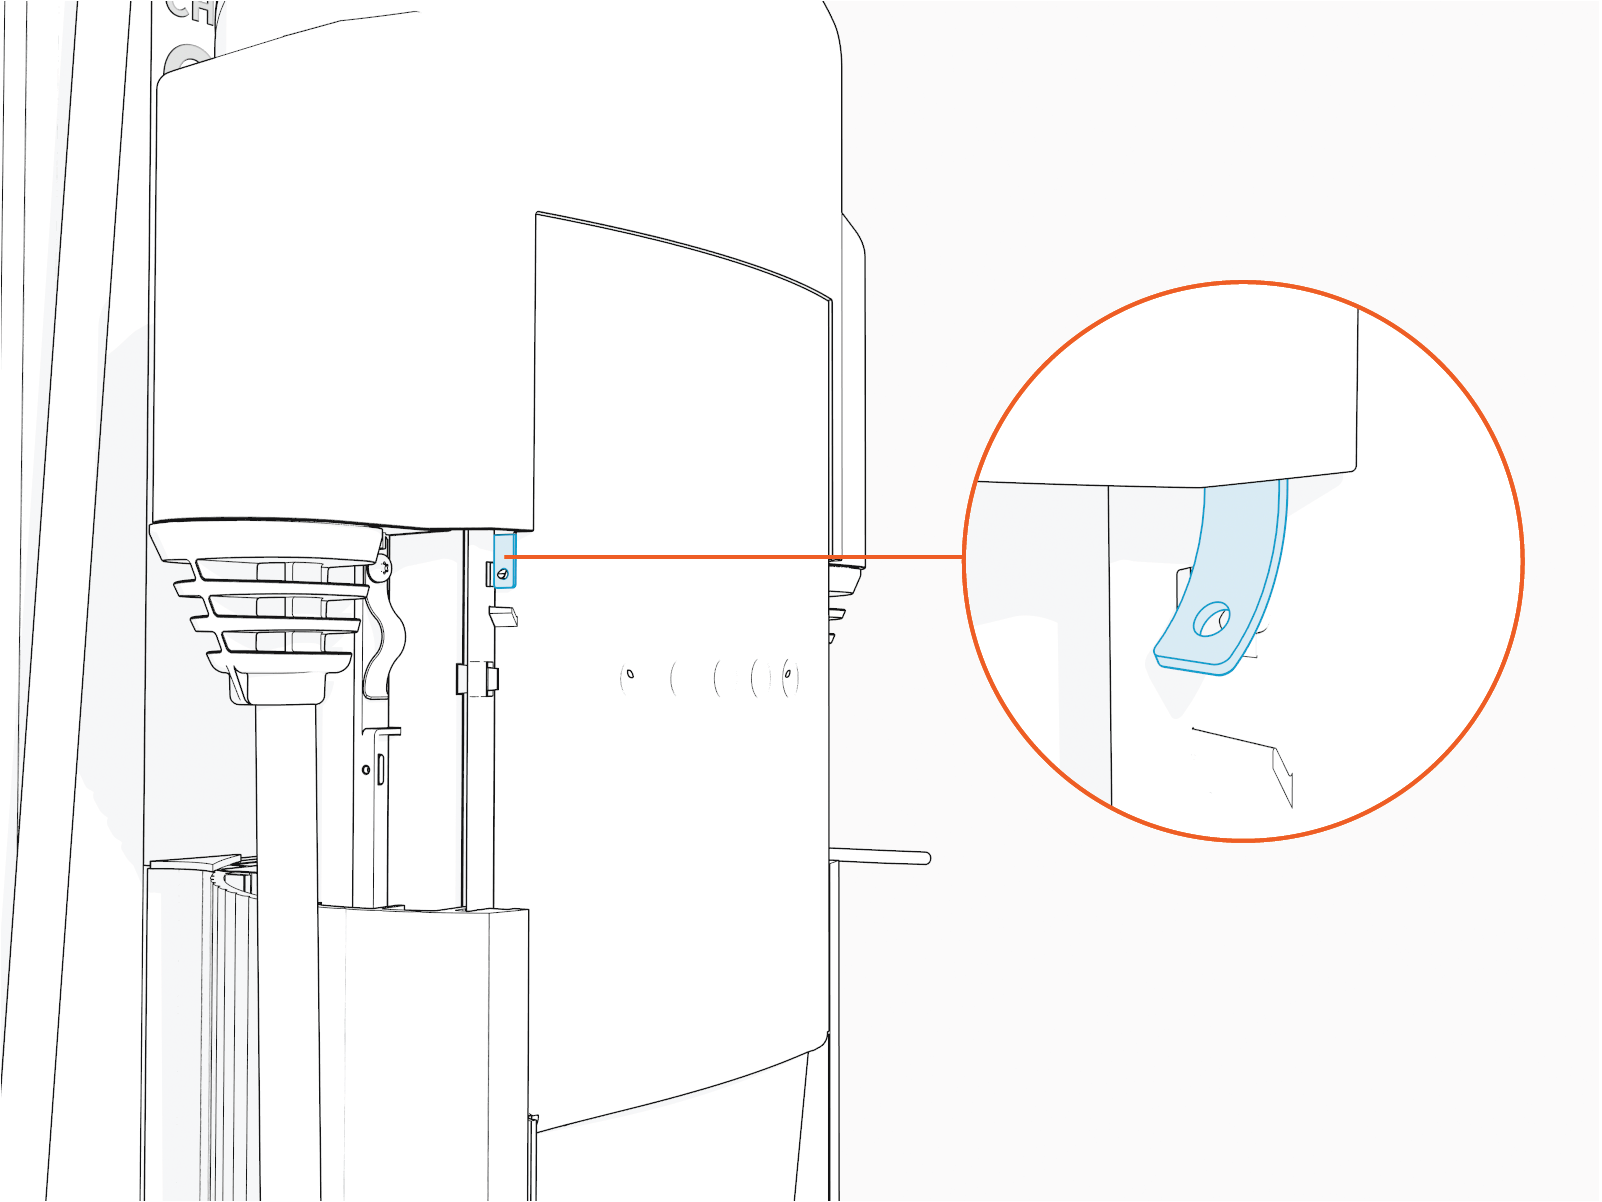 The retention tabs will snap back into place upon reinstall. Ensure that they are fully engaged with their pins.
 -
Remove the top cap.
Reverse the steps above to reinstall.
Replace the Lens
To replace the lens, follow the steps below:
-
Life the head assembly upwards.
-
Press the snap on each side of the lens to rotate it up and out.
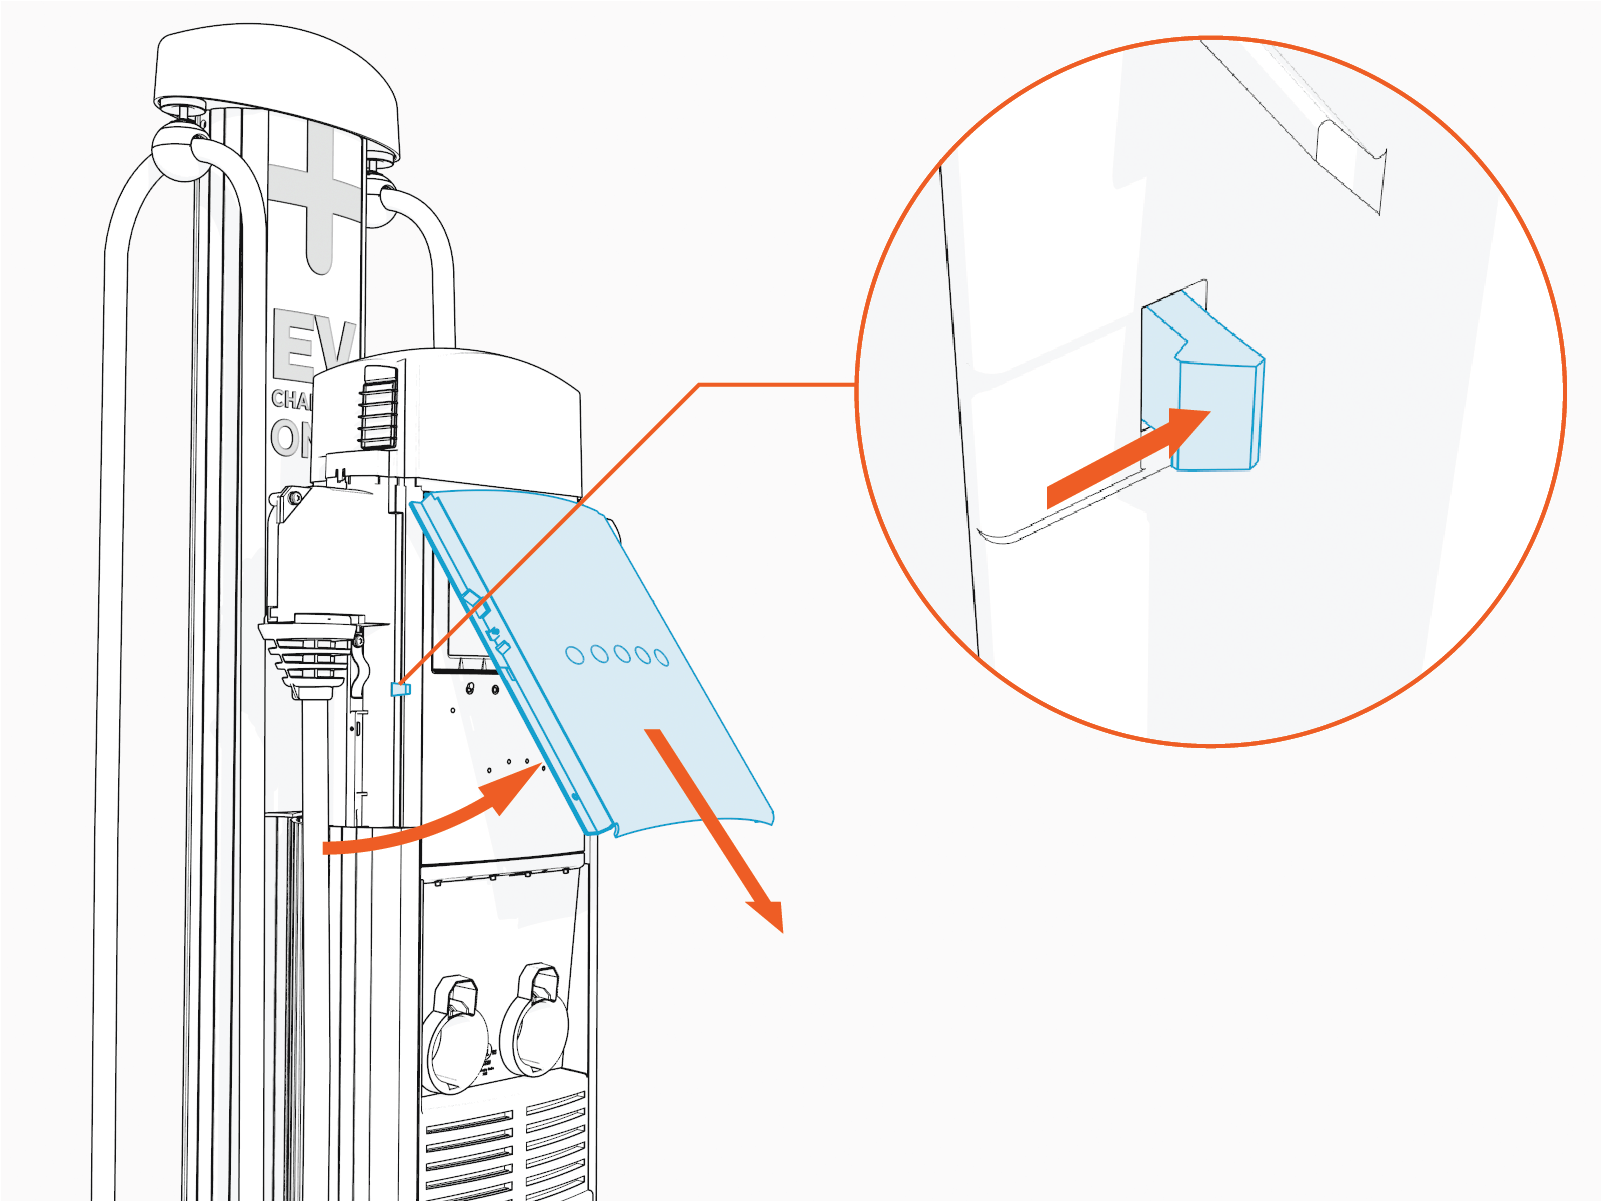
Reverse the above steps to reinstall.
