Introduction
This document describes how to install an Express 250 DC fast charging station ins situations where the site cannot pour a new concrete pad or run conductors underground. The Surface Conduit Entry (SCE![]() Surface Conduit Entry) kit allows surface drilling and epoxy installation of anchor bolts, as well as a rear conduit entry box for conductors to enter the station through surface wireways. The SCE
Surface Conduit Entry) kit allows surface drilling and epoxy installation of anchor bolts, as well as a rear conduit entry box for conductors to enter the station through surface wireways. The SCE![]() Surface Conduit Entry kit supports both Standalone and Paired installations. The SCE
Surface Conduit Entry kit supports both Standalone and Paired installations. The SCE![]() Surface Conduit Entry kit also supports adding above-ground conduit to pair an already-installed Standalone station with another Express 250 for shared DC output.
Surface Conduit Entry kit also supports adding above-ground conduit to pair an already-installed Standalone station with another Express 250 for shared DC output.
Installing an Express 250 using the SCE![]() Surface Conduit Entry kit requires one ChargePoint Certified Installer and about 2.5 to 3 hours to complete (not including epoxy cure time). This time estimate includes the full charging station installation, including the applicable steps described in the Express 250 Installation Guide. If this is a Paired installation, allow an additional hour. This time estimate does not include the time needed to pull cables.
Surface Conduit Entry kit requires one ChargePoint Certified Installer and about 2.5 to 3 hours to complete (not including epoxy cure time). This time estimate includes the full charging station installation, including the applicable steps described in the Express 250 Installation Guide. If this is a Paired installation, allow an additional hour. This time estimate does not include the time needed to pull cables.
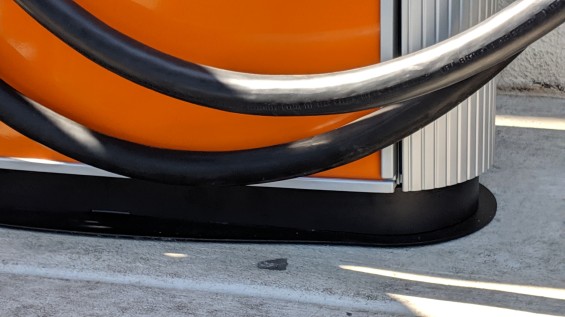
Shunt trip wiring is normally a feature of the Express 250, but is not required for operation. If shunt trip wiring will be used, run a wireway for the low voltage shunt trip wires that is separate from the AC conductor wireway.
Before You Begin
RISK OF SHOCK. Before performing this procedure, follow standard practice and local code to de-energize the circuit designated for each station at the service panel and lock out/tag out the disconnect before proceeding. Use a multimeter to test that power is off. Keep power off for this circuit until all cover panels are correctly reinstalled and the work scope is completed. FAILURE TO FOLLOW THESE INSTRUCTIONS CAN RESULT IN SERIOUS INJURY OR LOSS OF LIFE.
- If the charging station is not installed, commissioned, or serviced by a ChargePoint certified technician using a ChargePoint-approved method, it is excluded from all ChargePoint and other warranties and ChargePoint is not responsible.
- You must be a licensed electrician and complete training at https://www.chargepoint.com/partners/training-certification to become ChargePoint certified and to access ChargePoint's web-based installer tools or ChargePoint Installer app.
Required Tools and Materials
For an SCE![]() Surface Conduit Entry installation, the install must bring:
Surface Conduit Entry installation, the install must bring:
-
All tools and materials mentioned in the Express 250 Charging Station Installation Guide (if installing a new station). Online copies of both are available at ChargePoint Product Reference Documentation.
-
Surface wireways:
-
2 in trade size for AC cable
-
3 in trade size for DC cable (if Paired)
-
3/4 in trade size for Ethernet Cat5 (if Paired)
-
3/4 in trade size for shunt trip (if used)
-
-
Conduit elbows sized to each size wireway
-
Tools for cutting, assembling, and securing wireways
-
Sheet metal drill with drill bits for wireway sizes listed above, as needed (pilot holes provided)
-
Concrete drill, level feature recommended
-
25 mm (1 in) and 6 mm (1/4 in) concrete bits
-
25 mm (1 in) rebar bit if needed
-
24 mm (15/16 in) open ended wrench
-
Flathead screwdriver
-
750 ml of epoxy with bonding strength of 11.7 MPa minimum, compressive strength of 82.7 MPa minimum, and tensile strength of 49.3 MPa minimum, such as Hilti HIT-RE 500 V3 (normal cure time), Hilti HY-200 (fast curing), or similar
Different epoxy types have different cure times at various temperatures. Check local temperatures for the site in advance to help choose an appropriate epoxy. -
Cable puller or fish tape
-
Vacuum and/or brush
-
Marker
-
Isopropyl wipes
-
Paper towels
SCE![]() Surface Conduit Entry installations require a larger rear clearance than a normal installation, to allow room for the SCE
Surface Conduit Entry installations require a larger rear clearance than a normal installation, to allow room for the SCE![]() Surface Conduit Entry and wireways. Wireways must enter the SCE
Surface Conduit Entry and wireways. Wireways must enter the SCE![]() Surface Conduit Entry on its rear face. Conductor bend radius does not allow wireways to enter the SCE
Surface Conduit Entry on its rear face. Conductor bend radius does not allow wireways to enter the SCE![]() Surface Conduit Entry from its sides.
Surface Conduit Entry from its sides.
