Install Surface Mount Anchor Bolts
This section describes how to install surface mount anchor bolts for a new Express 250 installation. If you are adding above-ground conduit to pair a Standalone station with another Express 250 for shared DC output, skip to Install the SCE Box Base and Box Cover.
Install Surface Mount Anchor Bolts
-
Follow standard practice and local code to de-energize the applicable circuit and lock out/tag out the disconnect before proceeding. Use a multimeter to test that power is off.
-
Place the surface mount plate at the proposed location. Align the large left hole with AC conduit if present (for example, when replacing an older station). Check that the station placement on the pad meets site requirements.

Ensure the rear clearance leaves room for the conduit runs and for service clearance.
-
Use a marker to mark the locations for the Express 250 anchor bolts. Remove the surface mount plate.
-
Use the 6 mm (1/4 in) concrete drill bit to drill each pilot hole about 51 mm (2 in) deep. The holes must be parallel to each other and perpendicular to grade.

-
Use a vacuum or brush to clean the dust from the holes.
-
Use the 25 mm (1 in) concrete drill bit to drill each anchor hole a minimum of 229 mm (9 in) deep. Anchor bolts must have 127 mm +/- 12.7 mm (5 in +/- 1/2 in) above grade.
-
Place the surface mount plate on the ground again. Verify that the new holes for the Express 250 align with the holes in the surface mount plate.
-
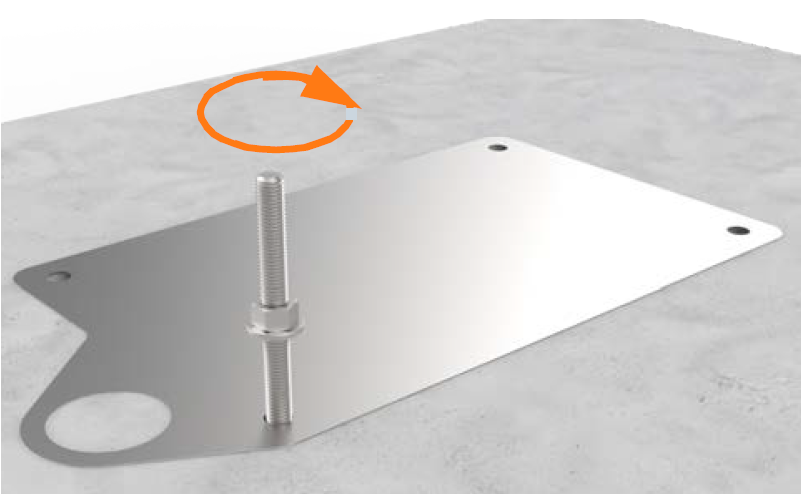
Thread a washer and a nut onto each anchor bolt, so that the measurement from the top of the nut to the top of the bolt is 76 mm (3 in).

-
Put a piece of tape above each nut to prevent it from floating upward when rotating the bolt into the epoxy later.
-
Prepare the epoxy. Ensure the applicator is dispensing correctly mixed epoxy before beginning work (for example, the Hilti epoxy is white when unmixed and grey when mixed).
-
Fill the first anchor bolt hole with epoxy until the epoxy is about 44.5 mm (1.75 in) from the top of the hole.
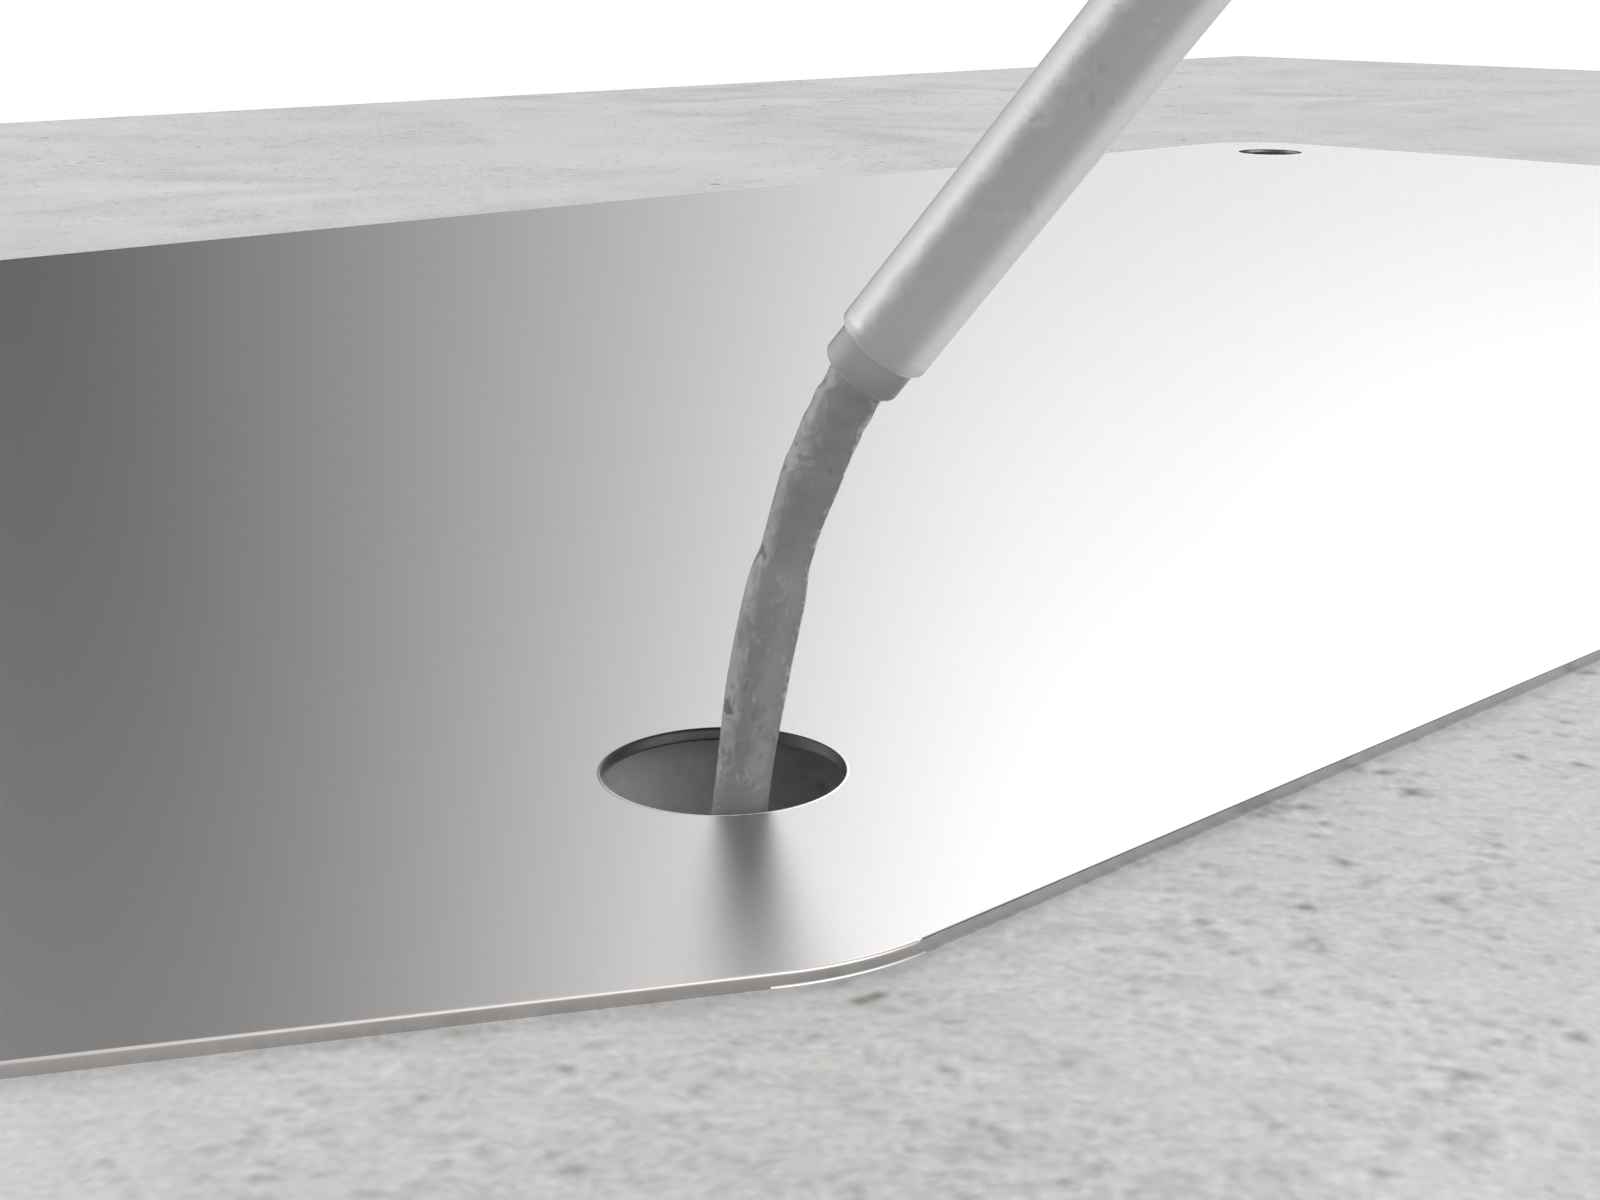 Continue immediately to the next step because the epoxy sets within about eight minutes.
 -
Insert the mounting bolt into the hole. Rotate the mounting bolt as you insert it to draw epoxy into the threads. Lift the anchor bolt again to see how close to the surface the epoxy has filled. If the epoxy is below grade level, add enough to fill the hole to grade level. Use paper towels to wipe up any excess.
-
Measure the nut distance from the top of each bolt again and adjust if needed. These nuts help secure the surface mounting plate to the concrete and should be flush against the base when installed.
-
If the Express 250 station will not be immediately installed, insert a protective plastic cap over the bolt.

-
Use a level to check that each anchor bolt is plumb. If needed, adjust while the epoxy is still setting.
-
Repeat the above epoxy steps for each of the other three anchor bolts.
-
STOP. Allow the epoxy to cure for the initial cure time listed on the epoxy, before beginning to install the Express 250.
 If desired, use this time for measuring, cutting, and fastening wireways to run conductors to the rear of the station.
Anchor and Label the Station
-
Check that the epoxy has set completely.
-
Torque all four nuts to 94.9 Nm (70 ft-lbs).
-
Follow the instructions in the Express 250 Installation Guide from the beginning of the guide to the end of the section “Mount and Secure the Express 250”. The station should now be mounted on the anchor bolts, leveled, and secured with the anchor washers and nuts.
The station should rest on the leveling nuts, not on the surface mount plate. -
Stop before connecting the AC wiring.
-
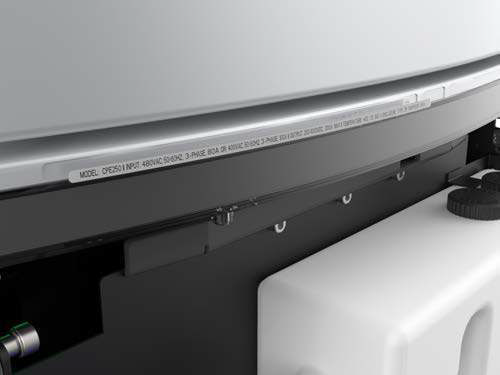
If required, adjust the ratings with a new label over the existing ratings line, just below the swing arms in the back:
-
If the Express 250 is being connected to wiring and a breaker of 80 A, affix the 50 kW ratings label to the station.
-
If the Express 250 is being paired, affix the 125 kW label to the station.
-
