Status LED
Required Tools and Materials
|
|
8 mm hex socket |
|
Mobile elevating work platform (scissor lift), as needed |
|
|
Cutter to cut the zip tie |
|
|
Before You Begin
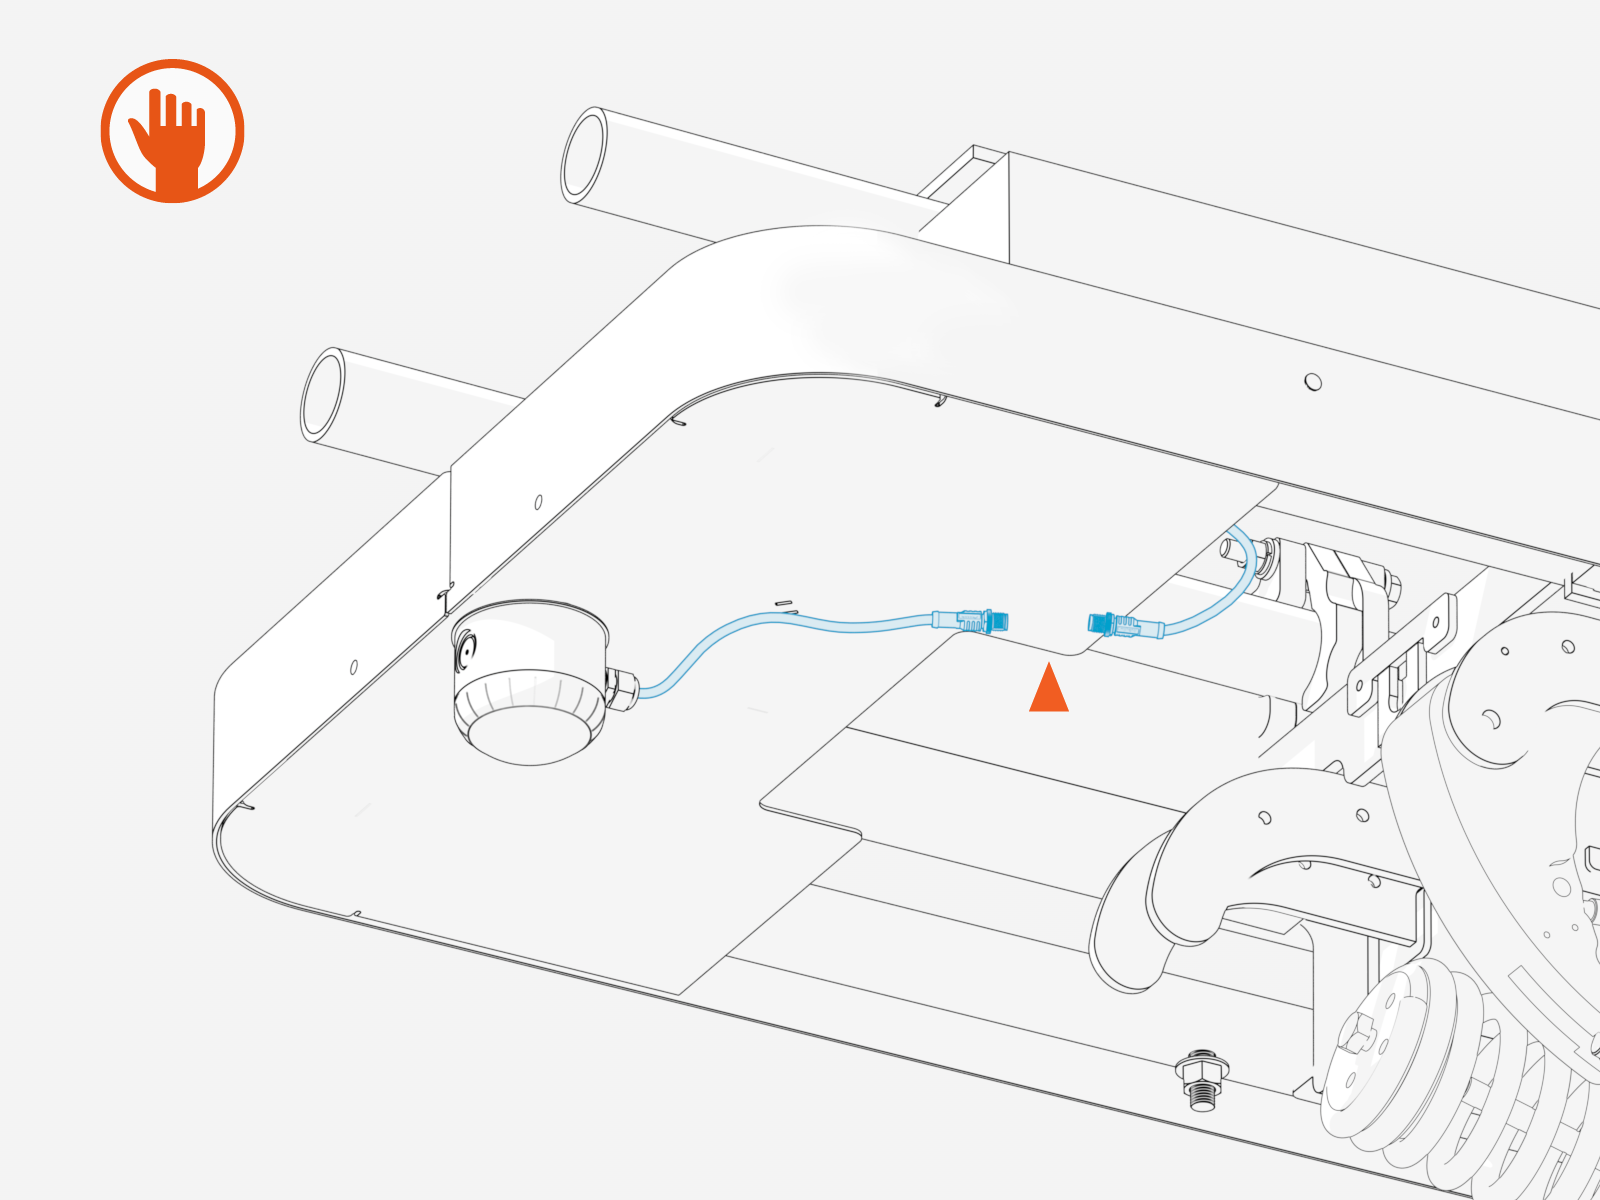
Replace the Status LED
To replace the status LED, perform the following steps:
-
Cut or remove the zip tie securing the status LED cable to the front cover.

-
Disconnect the status LED cable from the short cable attached to the LED.
Hand-tighten the connector.
-
Loosen the M5 nuts (x3) from the back of the status LED.

Torque these nuts to 4.5 Nm (40 in-lb).
-
Slide the status LED back through the keyhole slots to disengage the mounting studs from the front cover.
-
Remove the status LED from the front cover.

-
Reverse the above steps to reinstall with replacement status LED.
- To adhere to ChargePoint best practices, complete the post-service checklist before you leave the site.
-
For assistance or to return a faulty part to ChargePoint, go to chargepoint.com/support and contact technical support using the appropriate region-specific number.
