Wi-Fi Access Point
Required Tools and Materials
|
|
Flat head screwdriver |
|
Mobile elevating work platform (scissor lift), as needed |
|
|
5/16 in wrench |
|
|
Before You Begin
Replace the Wi-Fi Access Point
To replace the Wi-Fi![]() Wireless Fidelity access point, perform the following steps:
Wireless Fidelity access point, perform the following steps:
-
Disconnect the two power wires and the two Ethernet cables.
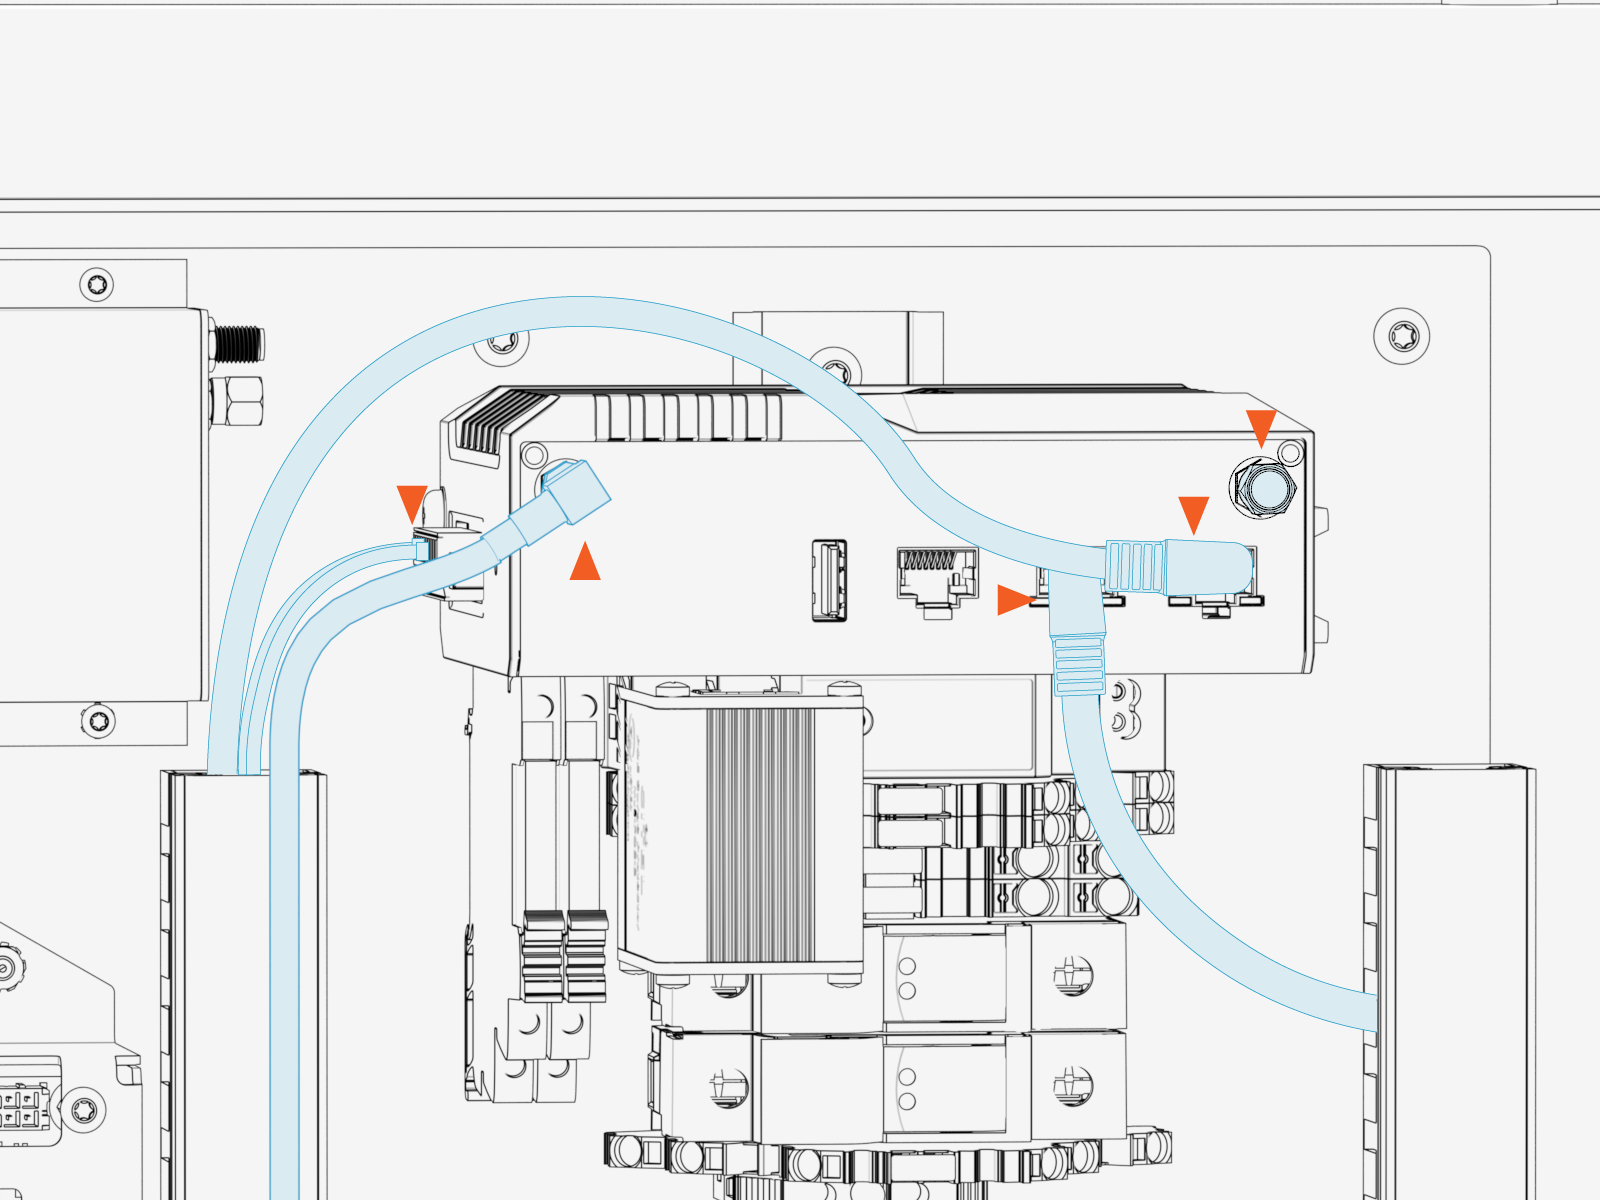
Reinstall the Ethernet cables into the same ports from which they were removed. Make sure that the red Ethernet cable is connected to the right port on LAN1, and the gray cable is connected to the left port on LAN2. The system will not function correctly if the cables are swapped.
-
Disconnect the right-angle adapter and cap from both SMA connections on the Wi-Fi
 Wireless Fidelity access point. Set these aside for reinstallation.
Store the right-angle adapter and the cap for reuse during Wi-Fi
Wireless Fidelity access point replacement.
-
Torque coax connections from the cable to the right-angle adapter and from the right-angle adapter to the access point to 0.45 Nm (4 in-lb).
-
Hand-tighten the cap.
The coax cable must be reinstalled on the same port it was removed from (left port #2). The system will not function if the cable is connected to the wrong antenna port.
-
-
Use a screwdriver to pull out the latch on the DIN rail kit.

-
With the latch fully disengaged, tilt and lift up to remove it from the mounting rail.
-
Reverse the above steps to reinstall with replacement Wi-Fi
Wireless Fidelity access point.
- To adhere to ChargePoint best practices, complete the post-service checklist before you leave the site.
-
For assistance or to return a faulty part to ChargePoint, go to chargepoint.com/support and contact technical support using the appropriate region-specific number.
