Controller Board
This section provides information on replacing the controller board.
Required Tools and Materials
|
|
7/16 in hex socket |
|
Torque wrench |
|
|
Phillips head screwdriver set |
|
Stepladder |
Before You Begin
-
End charging sessions at downstream Power Link 1000s.
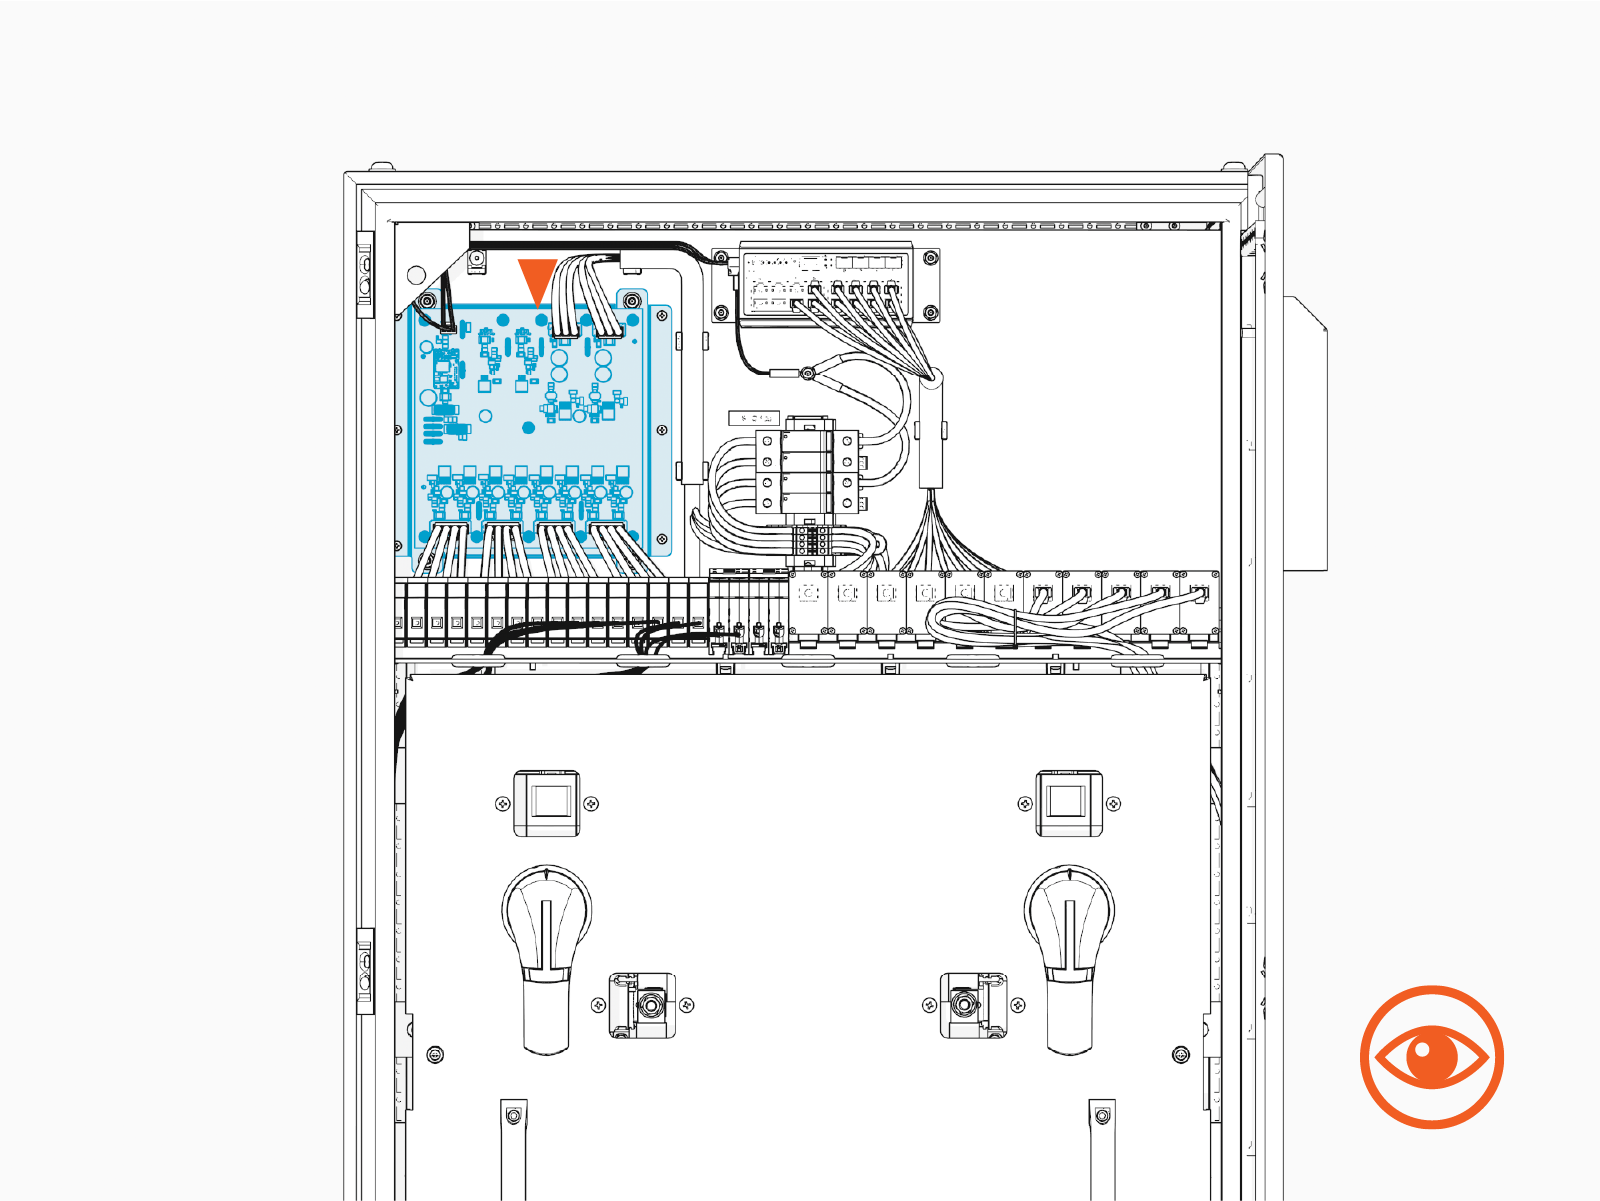
Replace Controller Board
-
Locate the controller board within the low voltage cabinet.
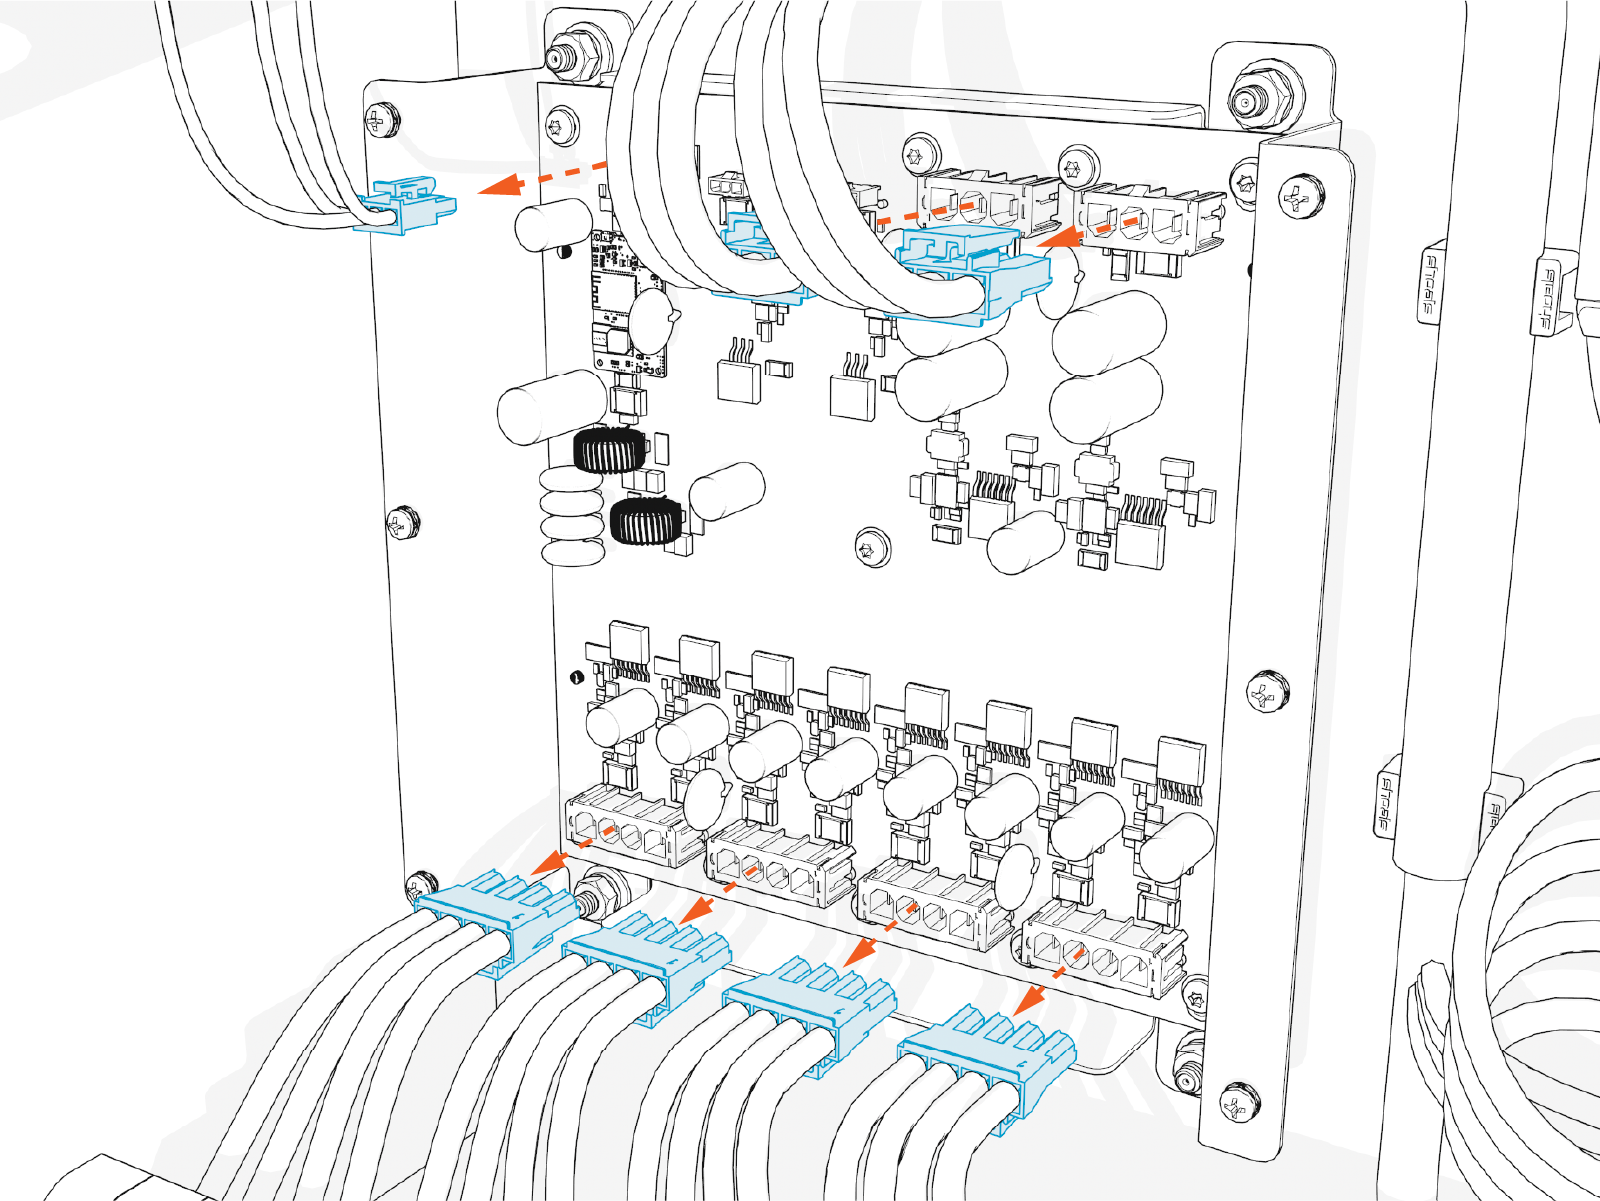
-
Disconnect cables (x7) from the front side of the board.
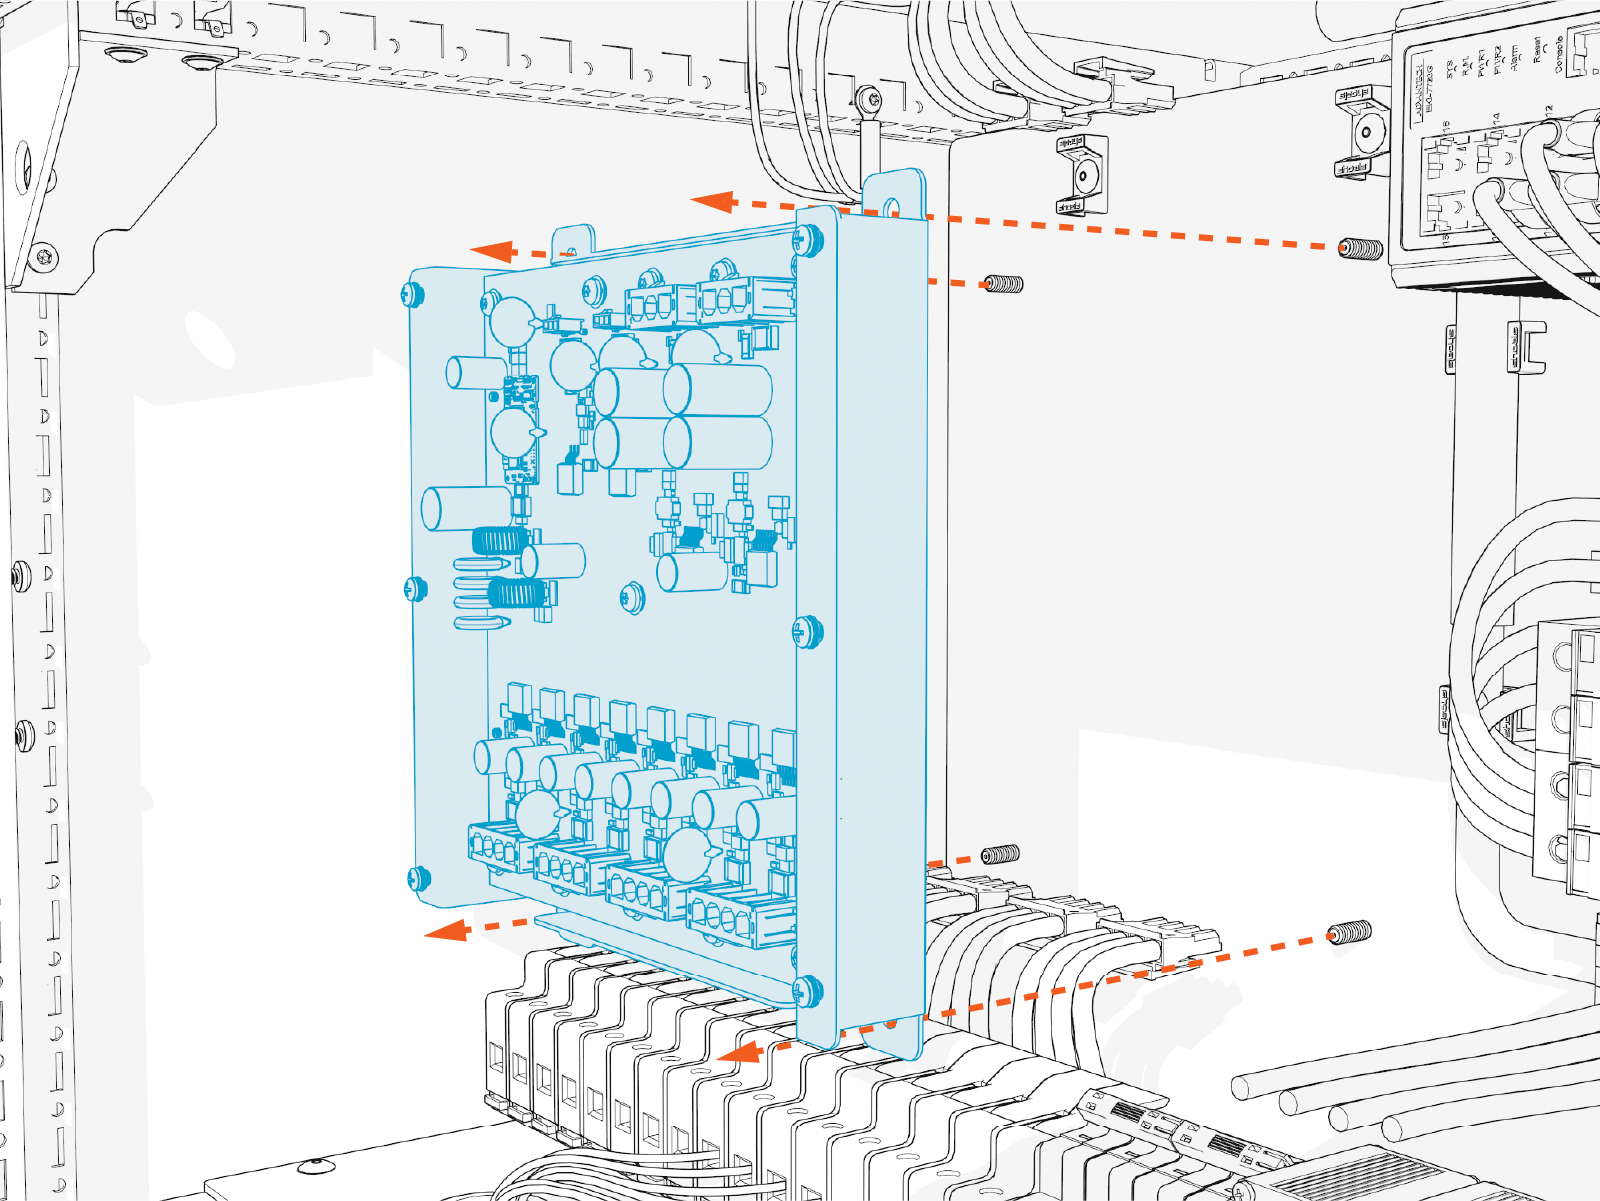
-
Using a 7/16 inch hex socket, remove nuts and washer (x4) securing the controller board.
 When installing the replacement controller board, torque the fasteners to 6.8 Nm (60 in-lb).
 -
Remove the controller board from the Power Hub.
Reverse the above steps to install the replacement controller board.
To complete the service, power on the Power Hub.
- To adhere to ChargePoint best practices, complete the post-service checklist before you leave the site.
-
For assistance or to return a faulty part to ChargePoint, go to chargepoint.com/support and contact technical support using the appropriate region-specific number.
