Ethernet Switch
This section provides information on replacing the Ethernet switch.
Required Tools and Materials
|
|
3/8 in hex socket |
|
Torque wrench |
|
|
Phillips head screwdriver set (#1, #2) |
|
Flathead screwdriver (3 mm) |
|
|
Stepladder |
|
Before You Begin
-
End charging sessions at downstream Power Link 1000s.
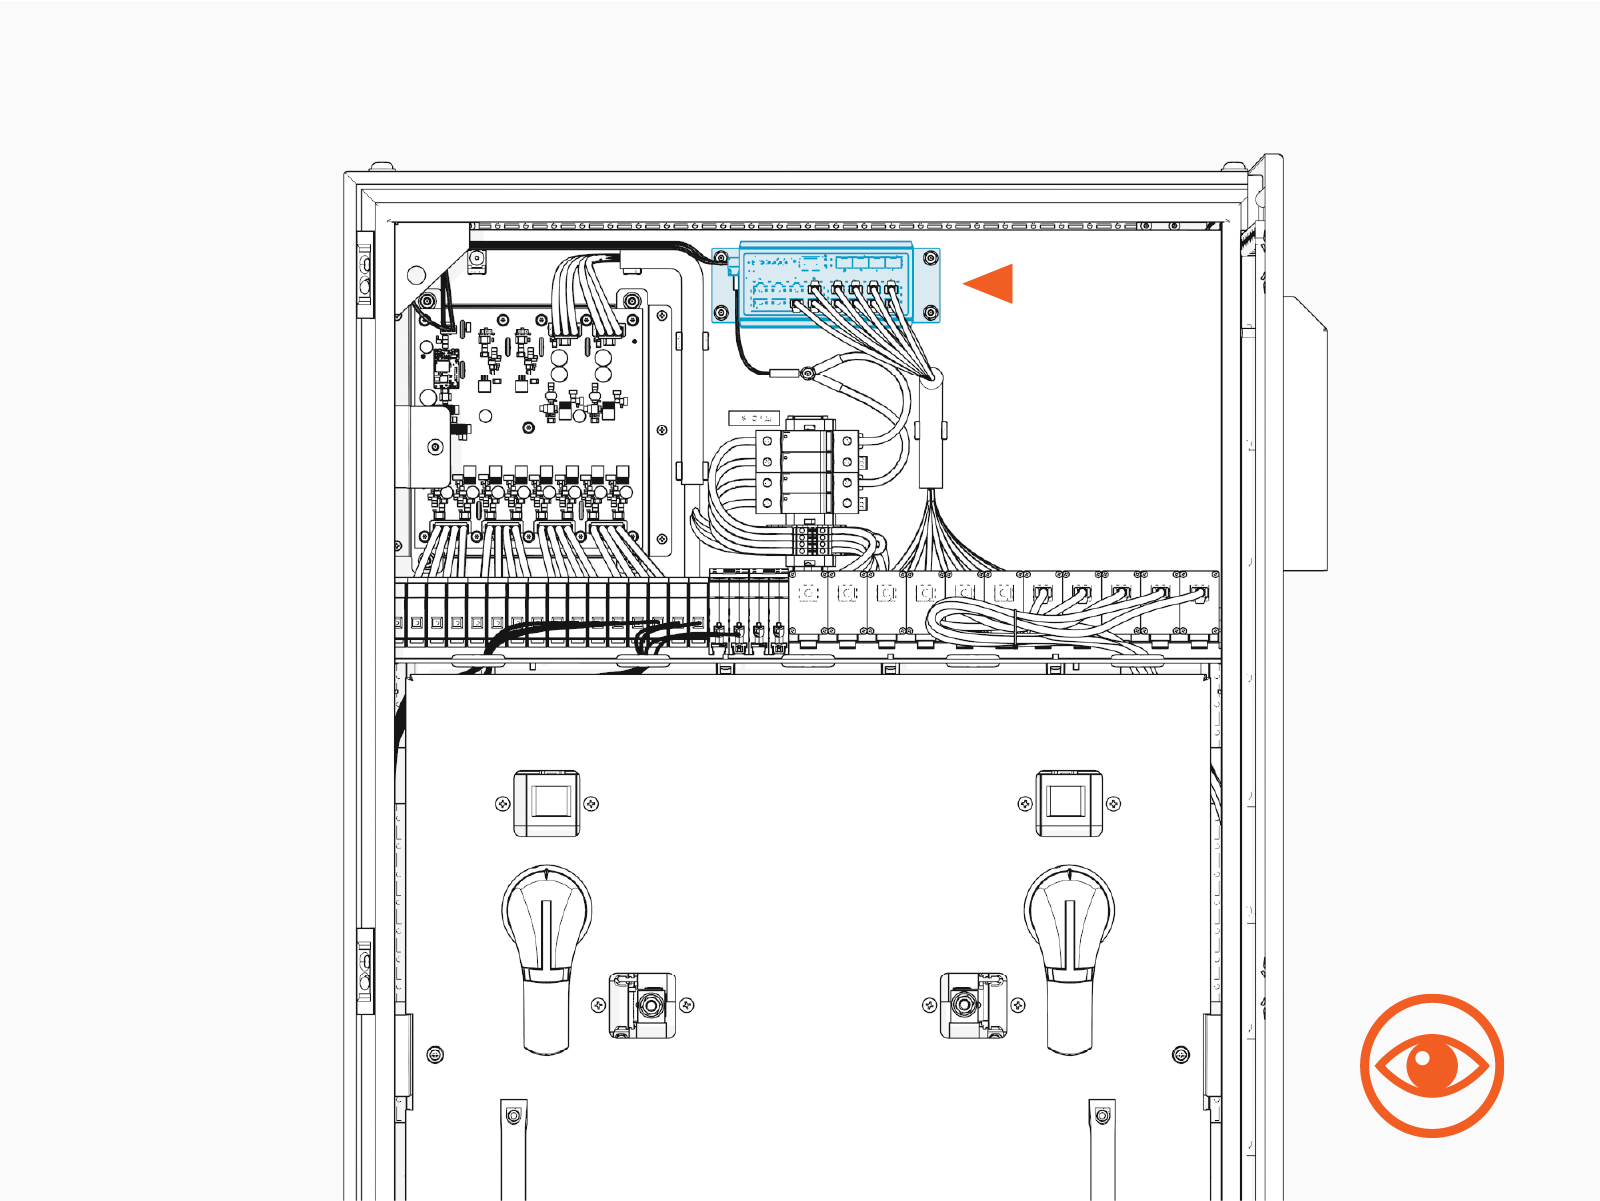
Replace Ethernet Switch
-
Locate the Ethernet Switch in the low voltage cabinet.
-
Disconnect all Ethernet wires from the switch.
Pinch the Ethernet connector latch to disengage the connector.
 When reconnecting Ethernet wires to the replacement Ethernet switch, all ports are equivalent.
 -
Using a 3/8 inch hex socket, remove nuts and washers (x4) to free the Ethernet switch.
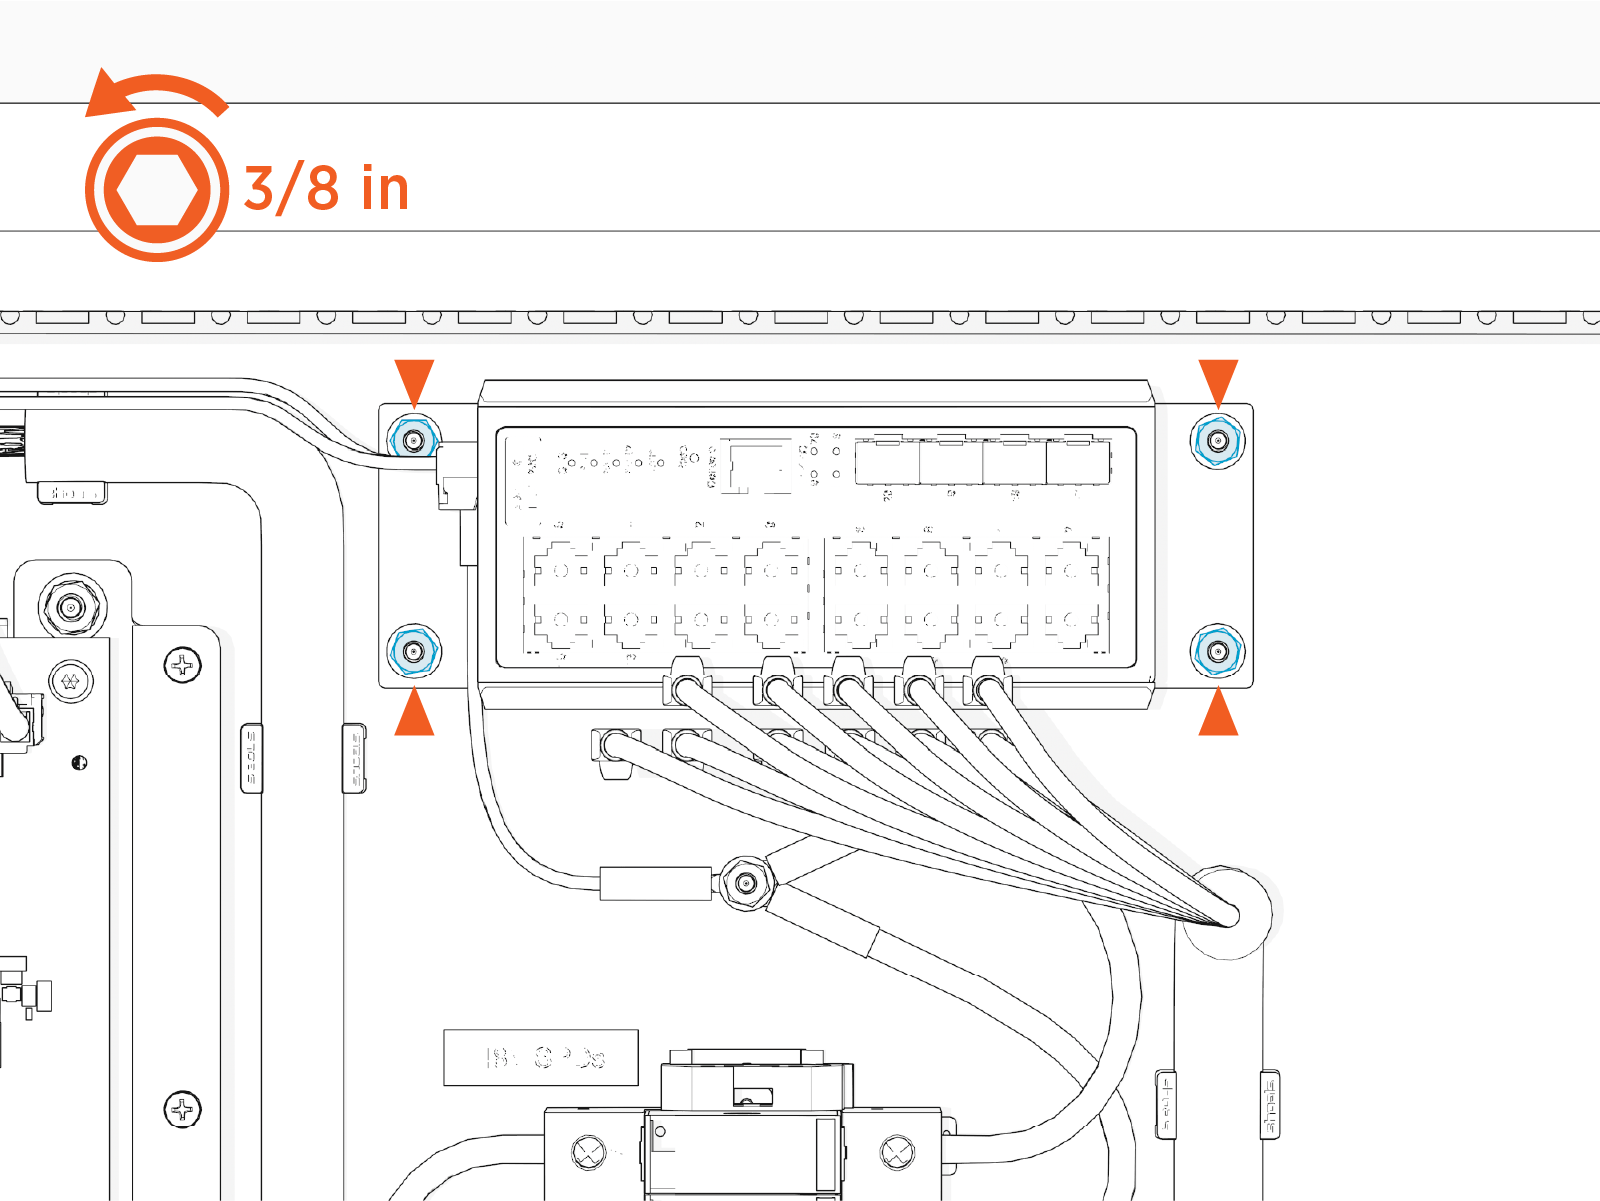 When installing the replacement Ethernet switch, torque the fasteners to 3.4 Nm (30 in-lb).
 -
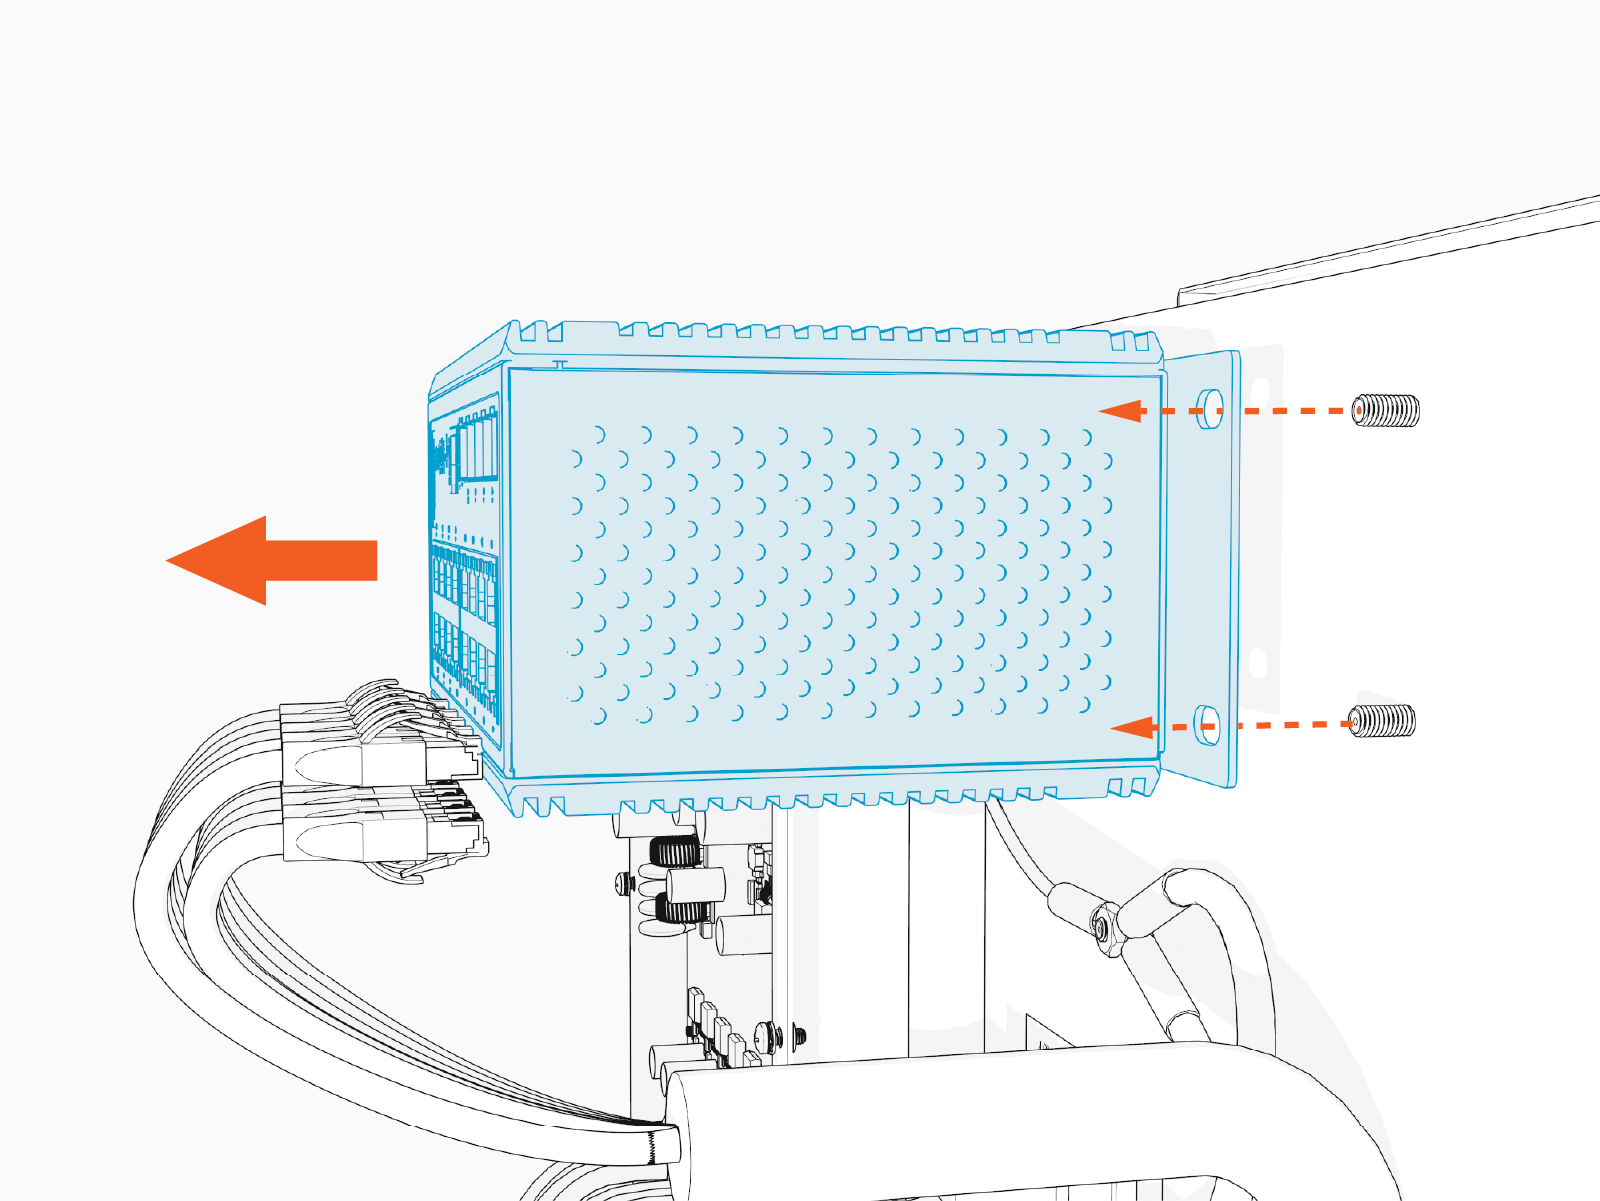
Remove the Ethernet switch from the back wall of the cabinet.
-
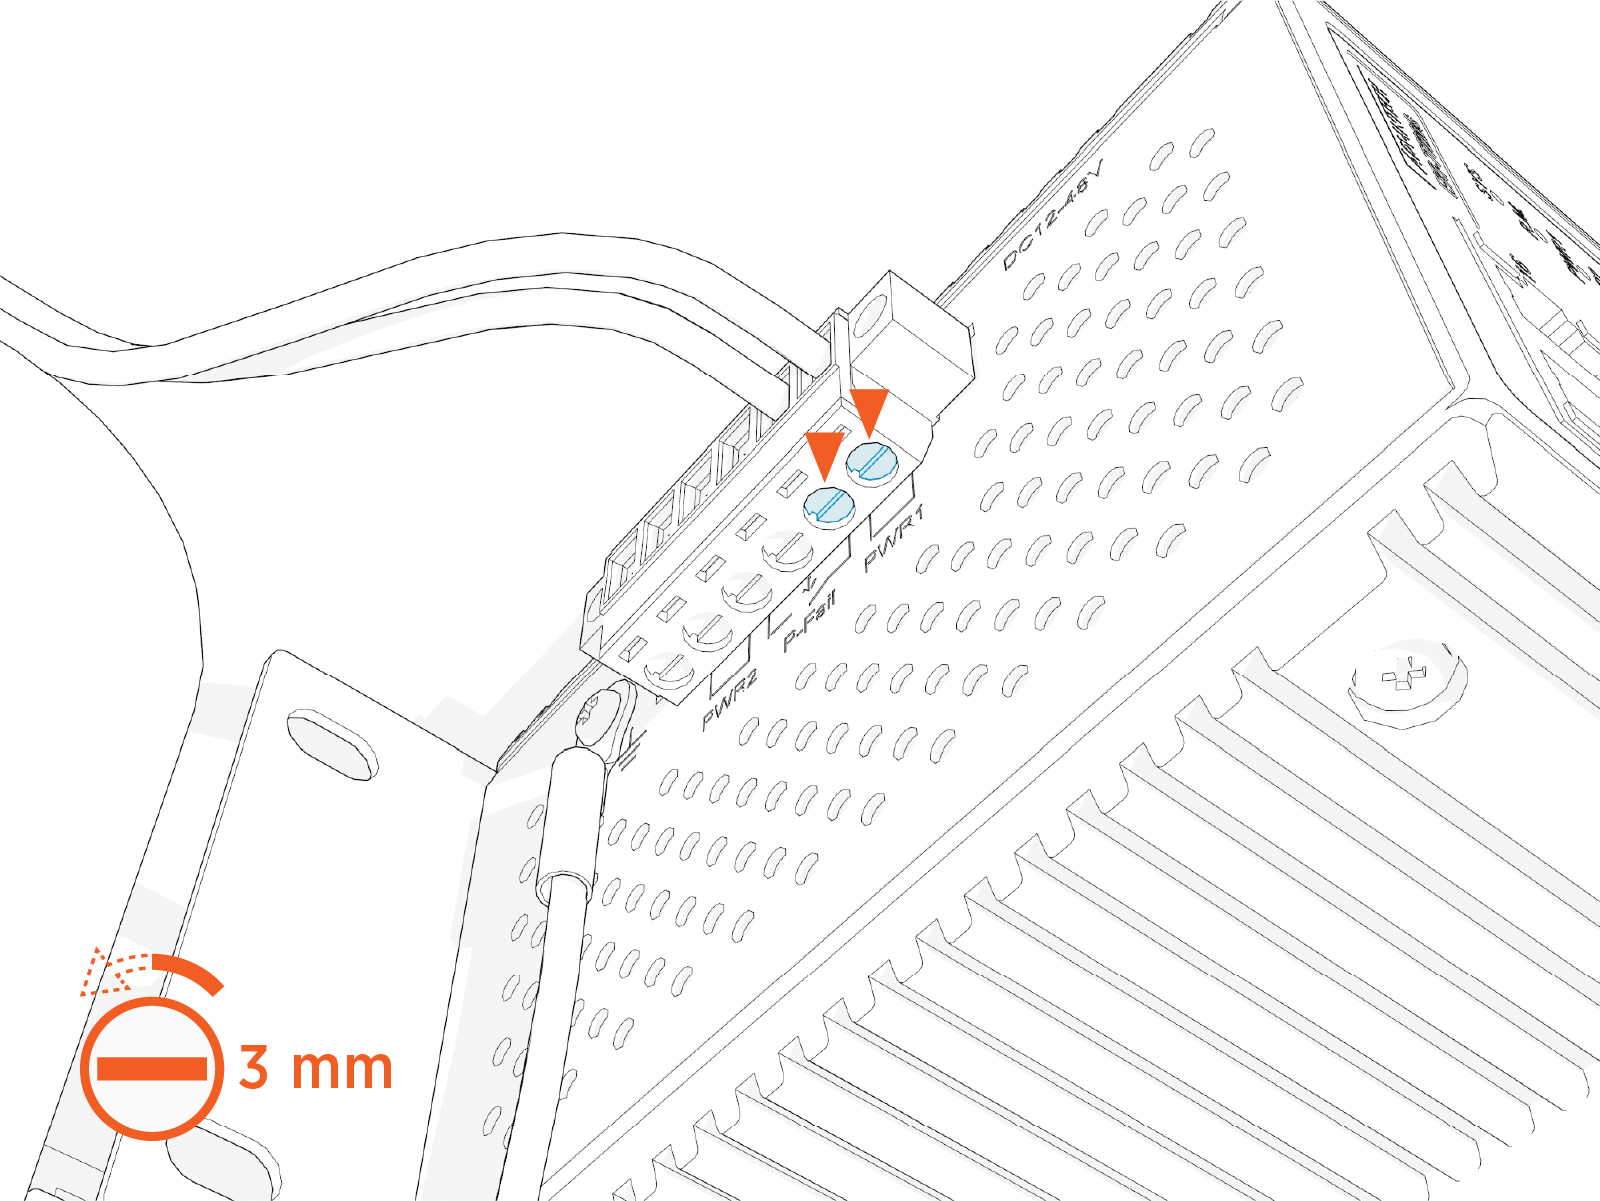
On the left side of the Ethernet switch, use a 3 mm flat head screwdriver to loosen the set screws securing the 24 V DC wires. Do not remove the screws.
-
Remove the 24 V DC wires (x2) from the terminal block.
 When installing the replacement Ethernet switch, reinstall the 24 V DC wires into the same terminals. Reinstall the red wire to the positive (+) terminal, and the black wire to the negative (-) terminal.
 -
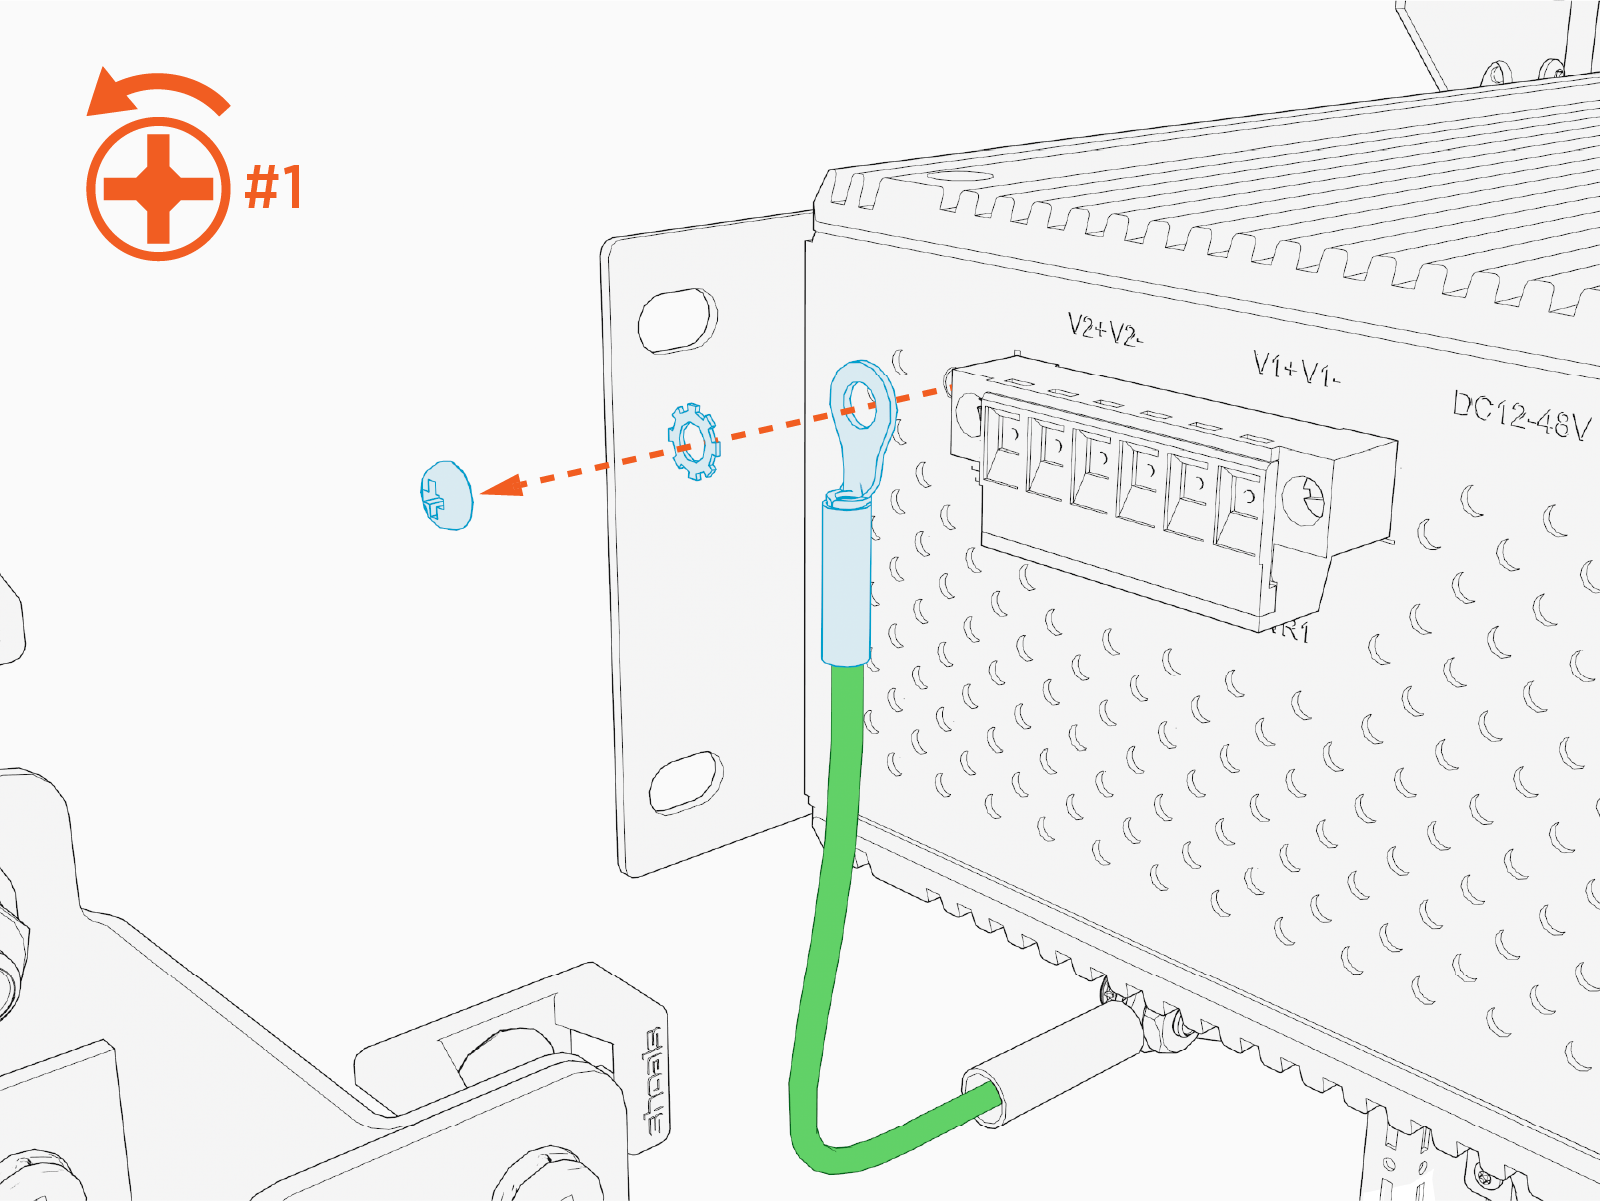
Using a #1 Phillips screwdriver, disconnect the ground wire from the Ethernet switch.
Reverse the above steps to install the replacement Ethernet switch.
To complete the service, power on the Power Hub.
- To adhere to ChargePoint best practices, complete the post-service checklist before you leave the site.
-
For assistance or to return a faulty part to ChargePoint, go to chargepoint.com/support and contact technical support using the appropriate region-specific number.
