Door and Panels
This section provides information on operating the door and removing and reinstalling panels on Power Hub.
Required Tools and Materials
|
|
#2 Phillips head screwdriver |
|
Torque screwdriver |
|
|
Stepladder |
|
Door
To operate the door, complete the following steps:
-
A key unlocks the Power Hub door.
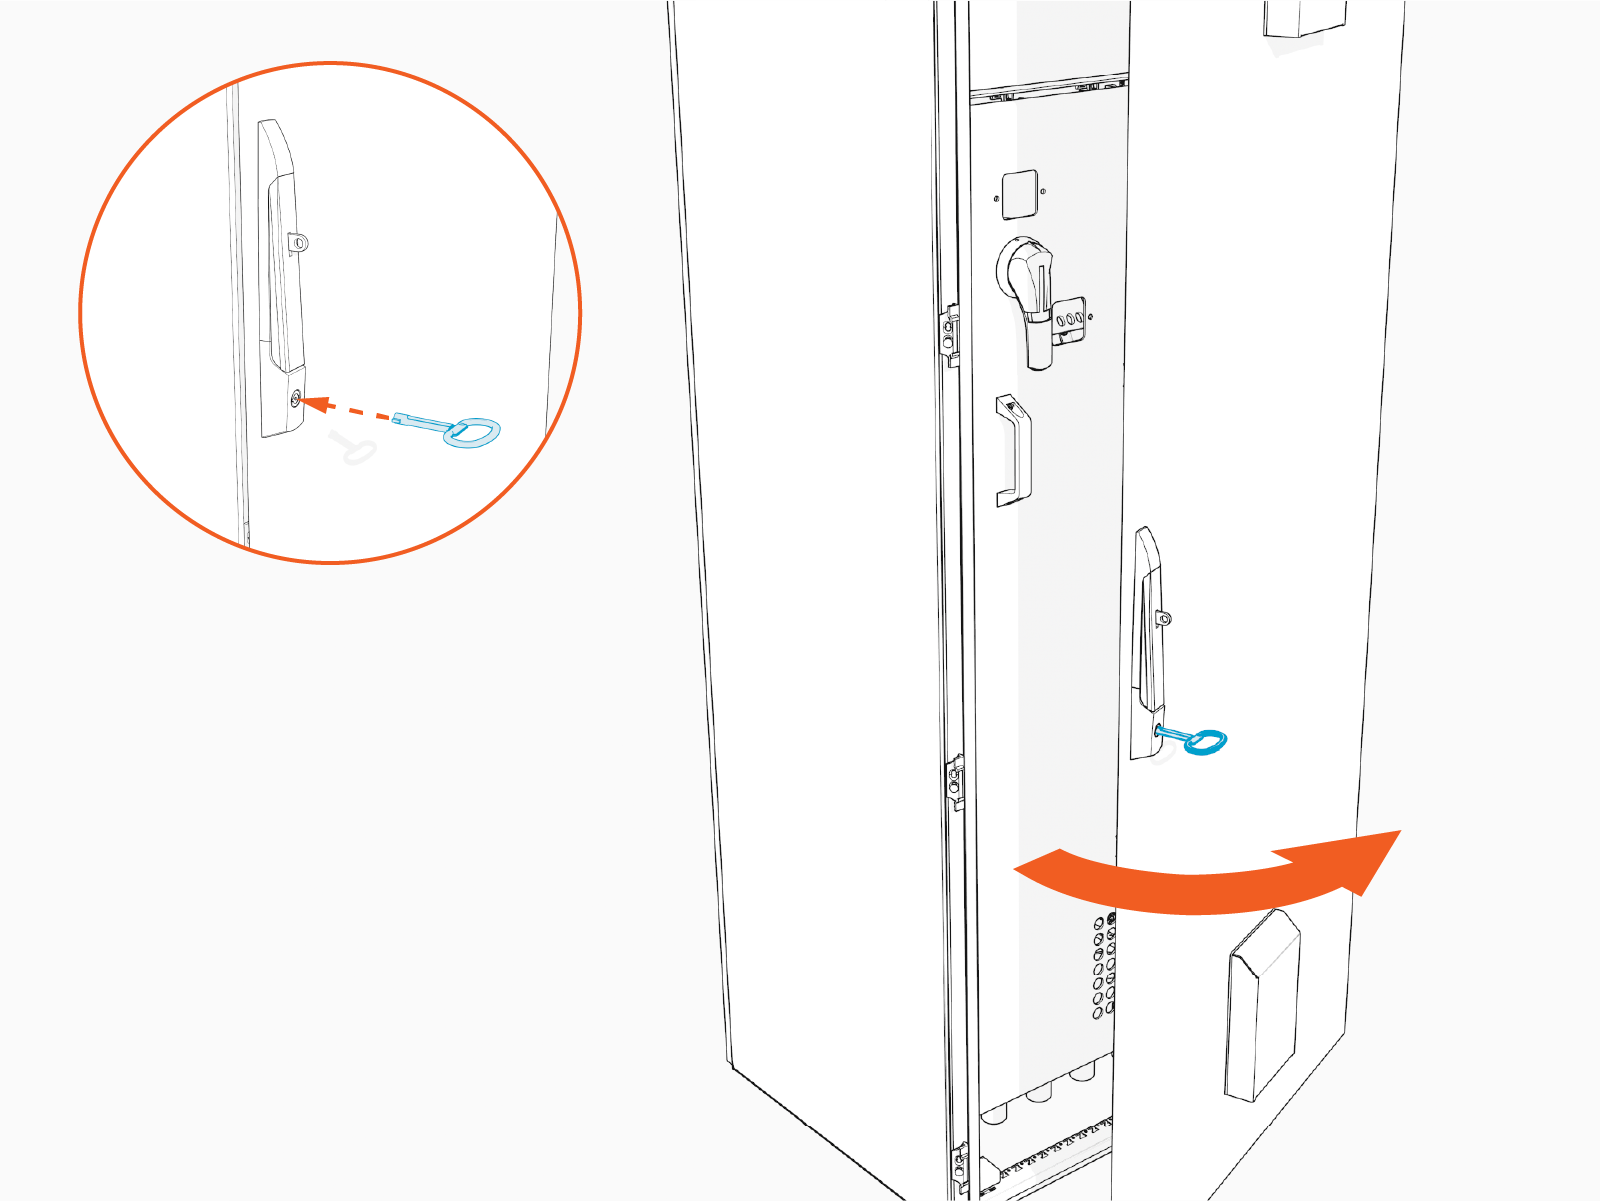
-
Always store the key safely after use, for future servicing of the Power Hub.
Low Voltage Deadfront
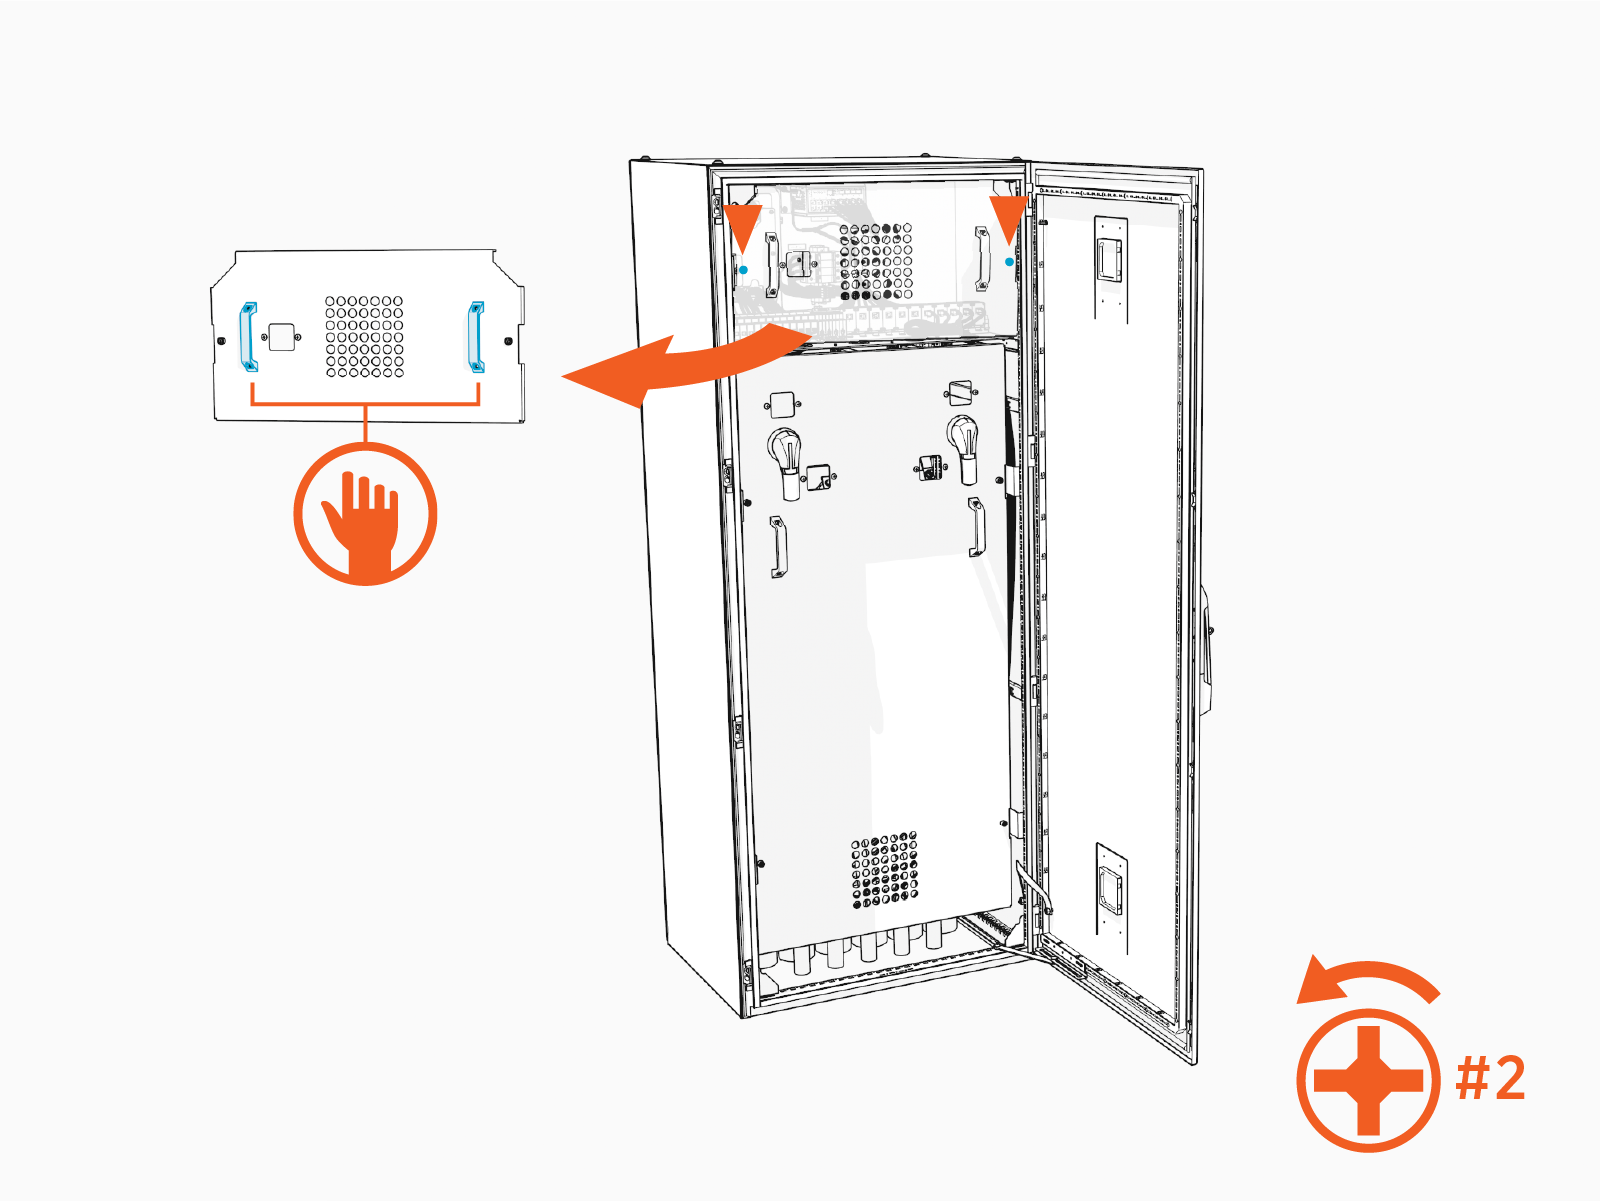
To rremove and replace the low voltage deadfront, complete the following steps:
-
To access the low voltage cabinet, loosen two captive screws at the low voltage deadfront and remove the deadfront.
-
To close up the low voltage cabinet, replace the deadfront and tighten two captives screws. Torque to 5.6 Nm (50 in-lb).
- To adhere to ChargePoint best practices, complete the post-service checklist before you leave the site.
-
For assistance or to return a faulty part to ChargePoint, go to chargepoint.com/support and contact technical support using the appropriate region-specific number.
High Voltage Deadfront
To remove and replace the high voltage deadfront, follow the procedures given below.
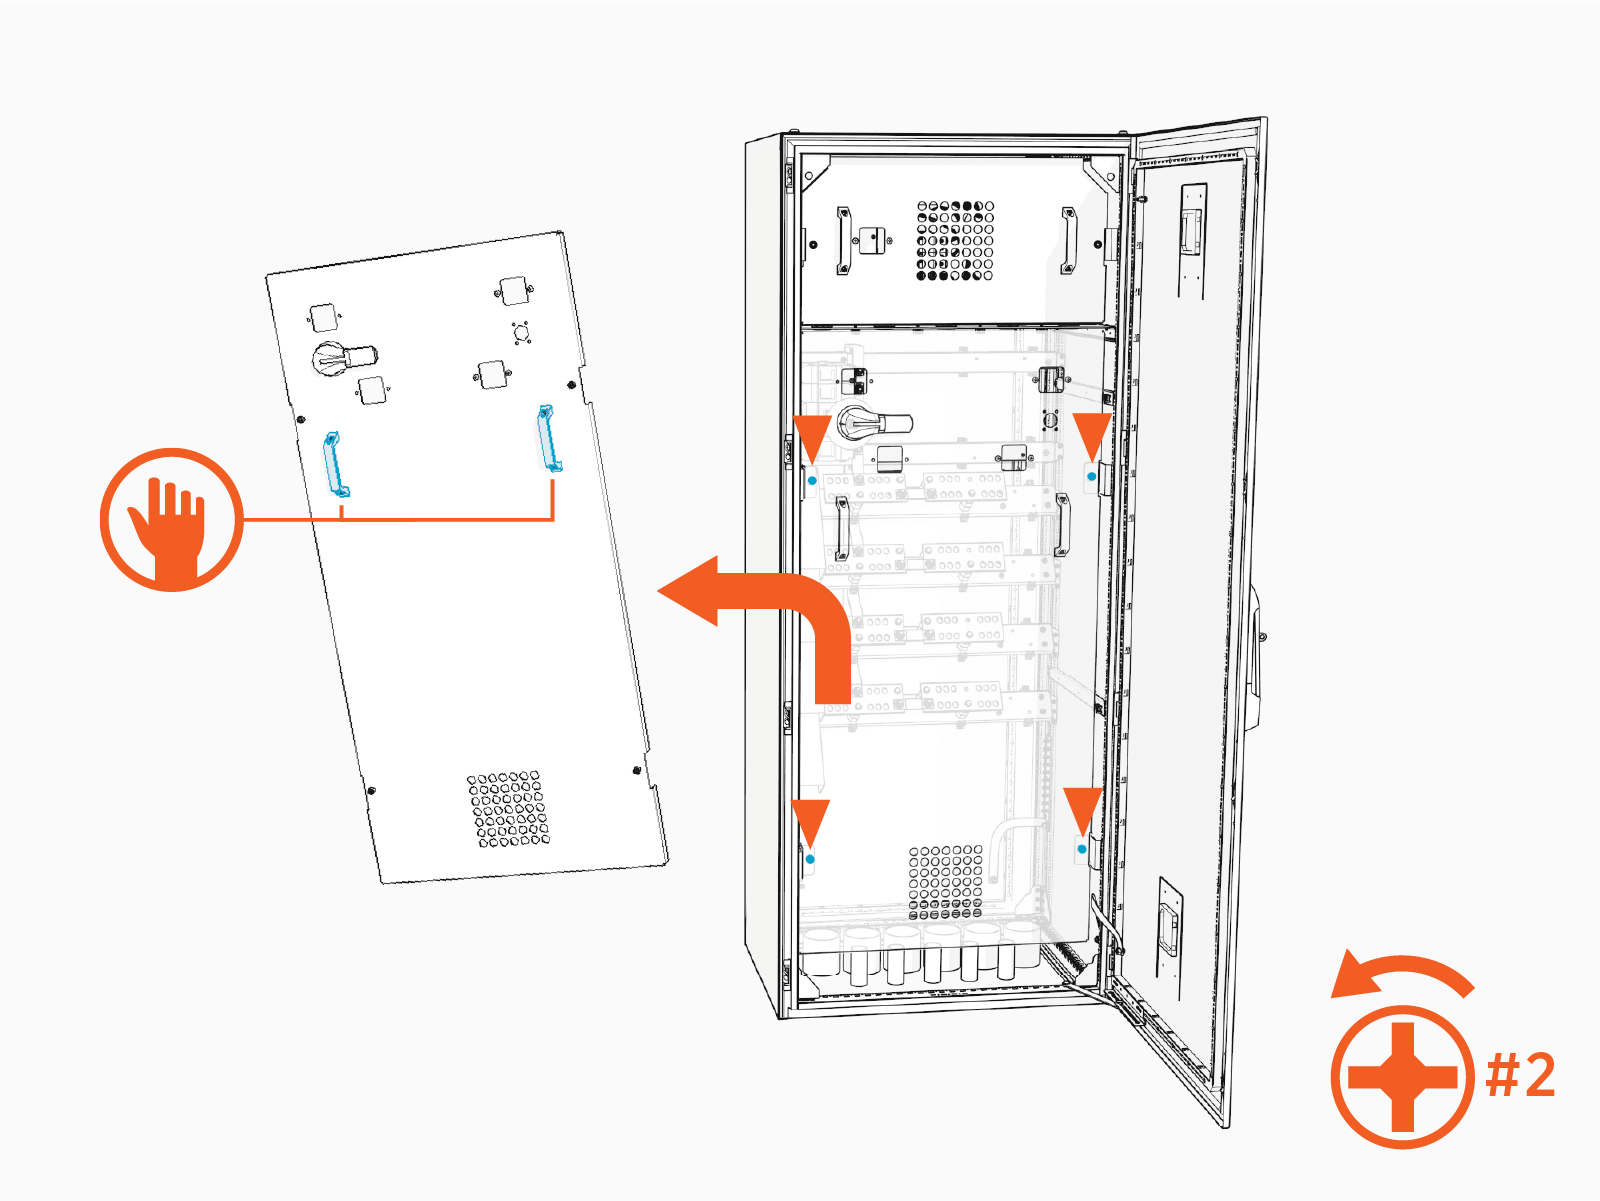
Remove High Voltage Deadfront
-
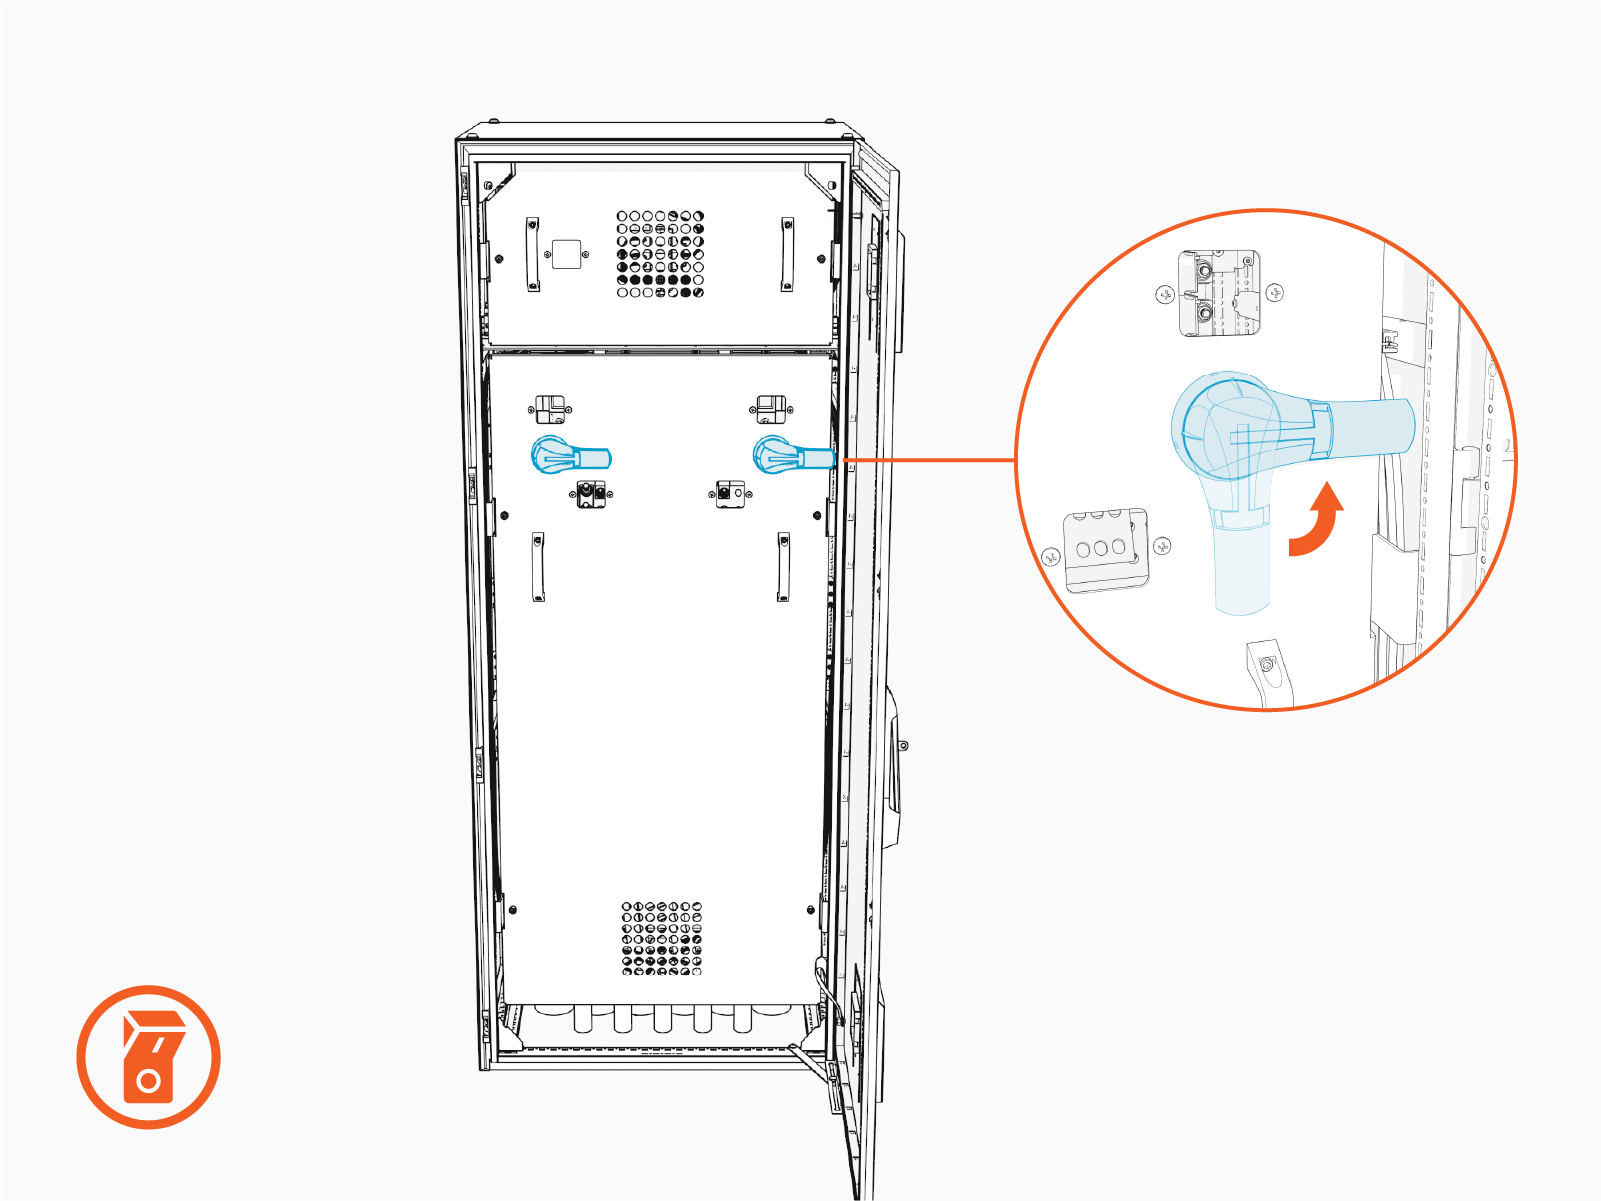
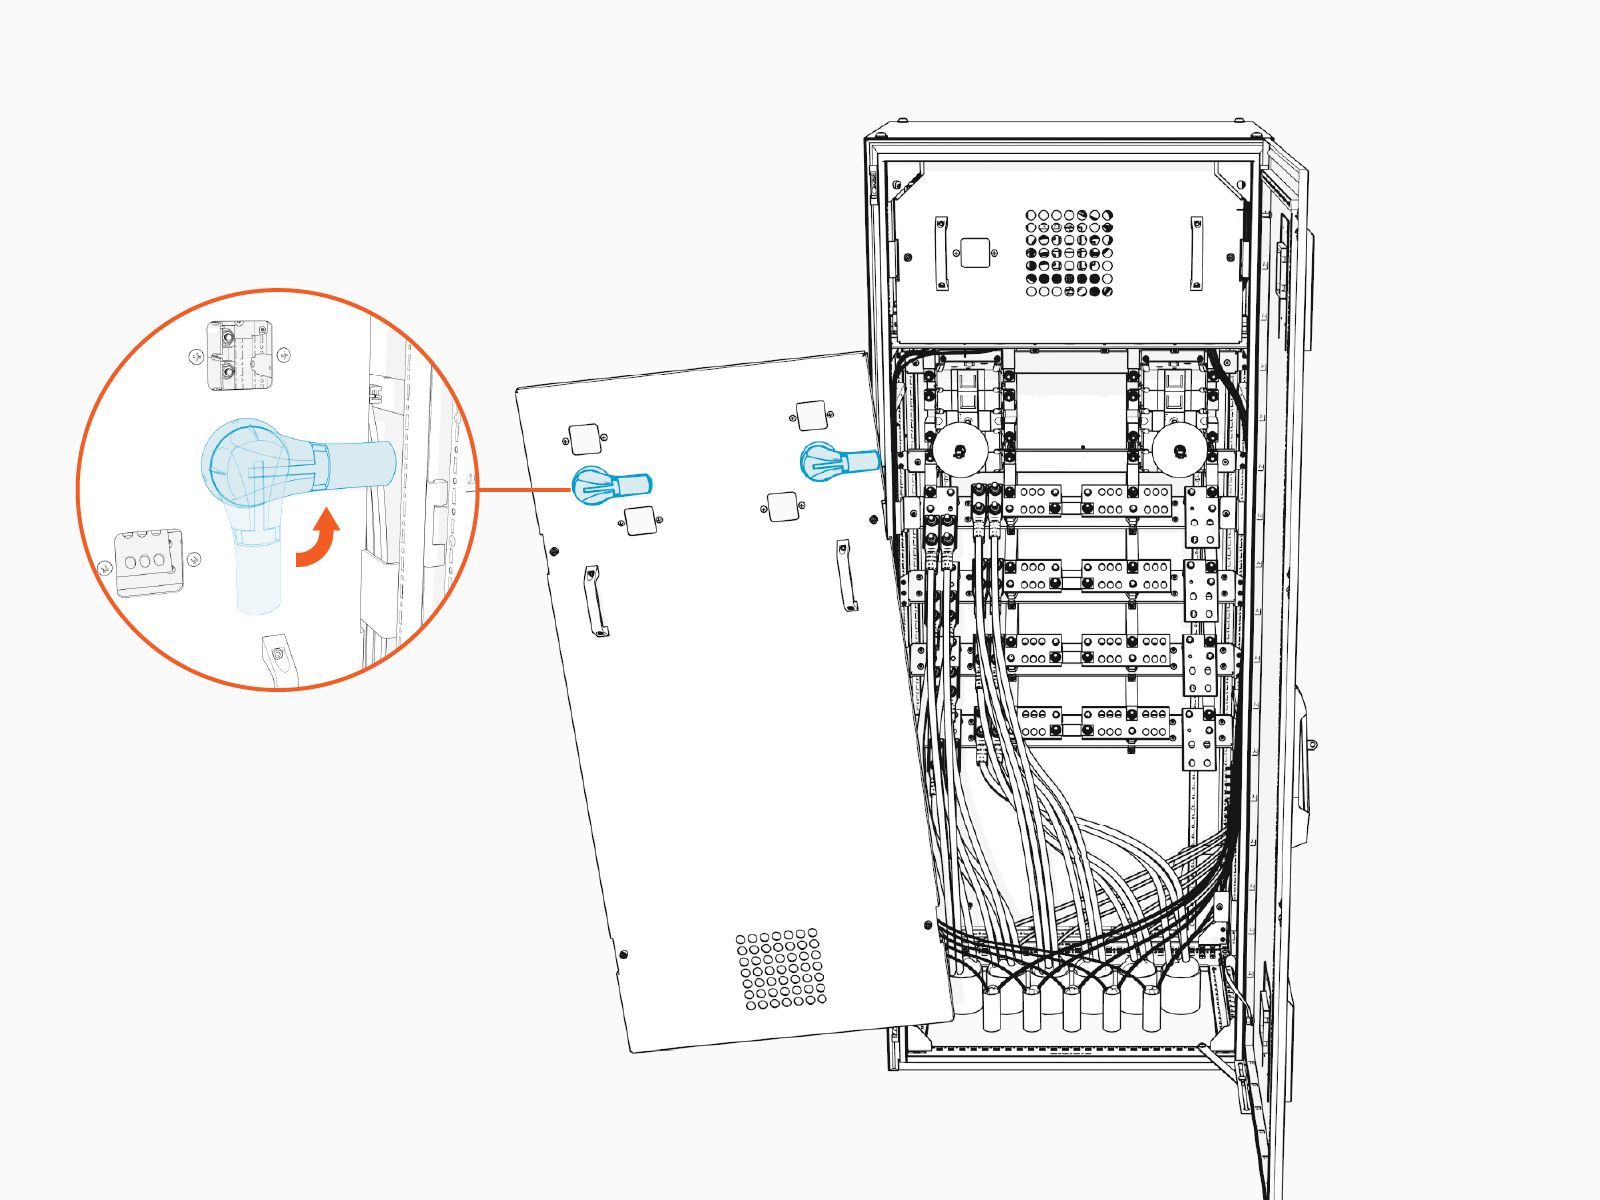
Ensure all disconnect switch handles on the high voltage deadfront are in the OFF position.
-
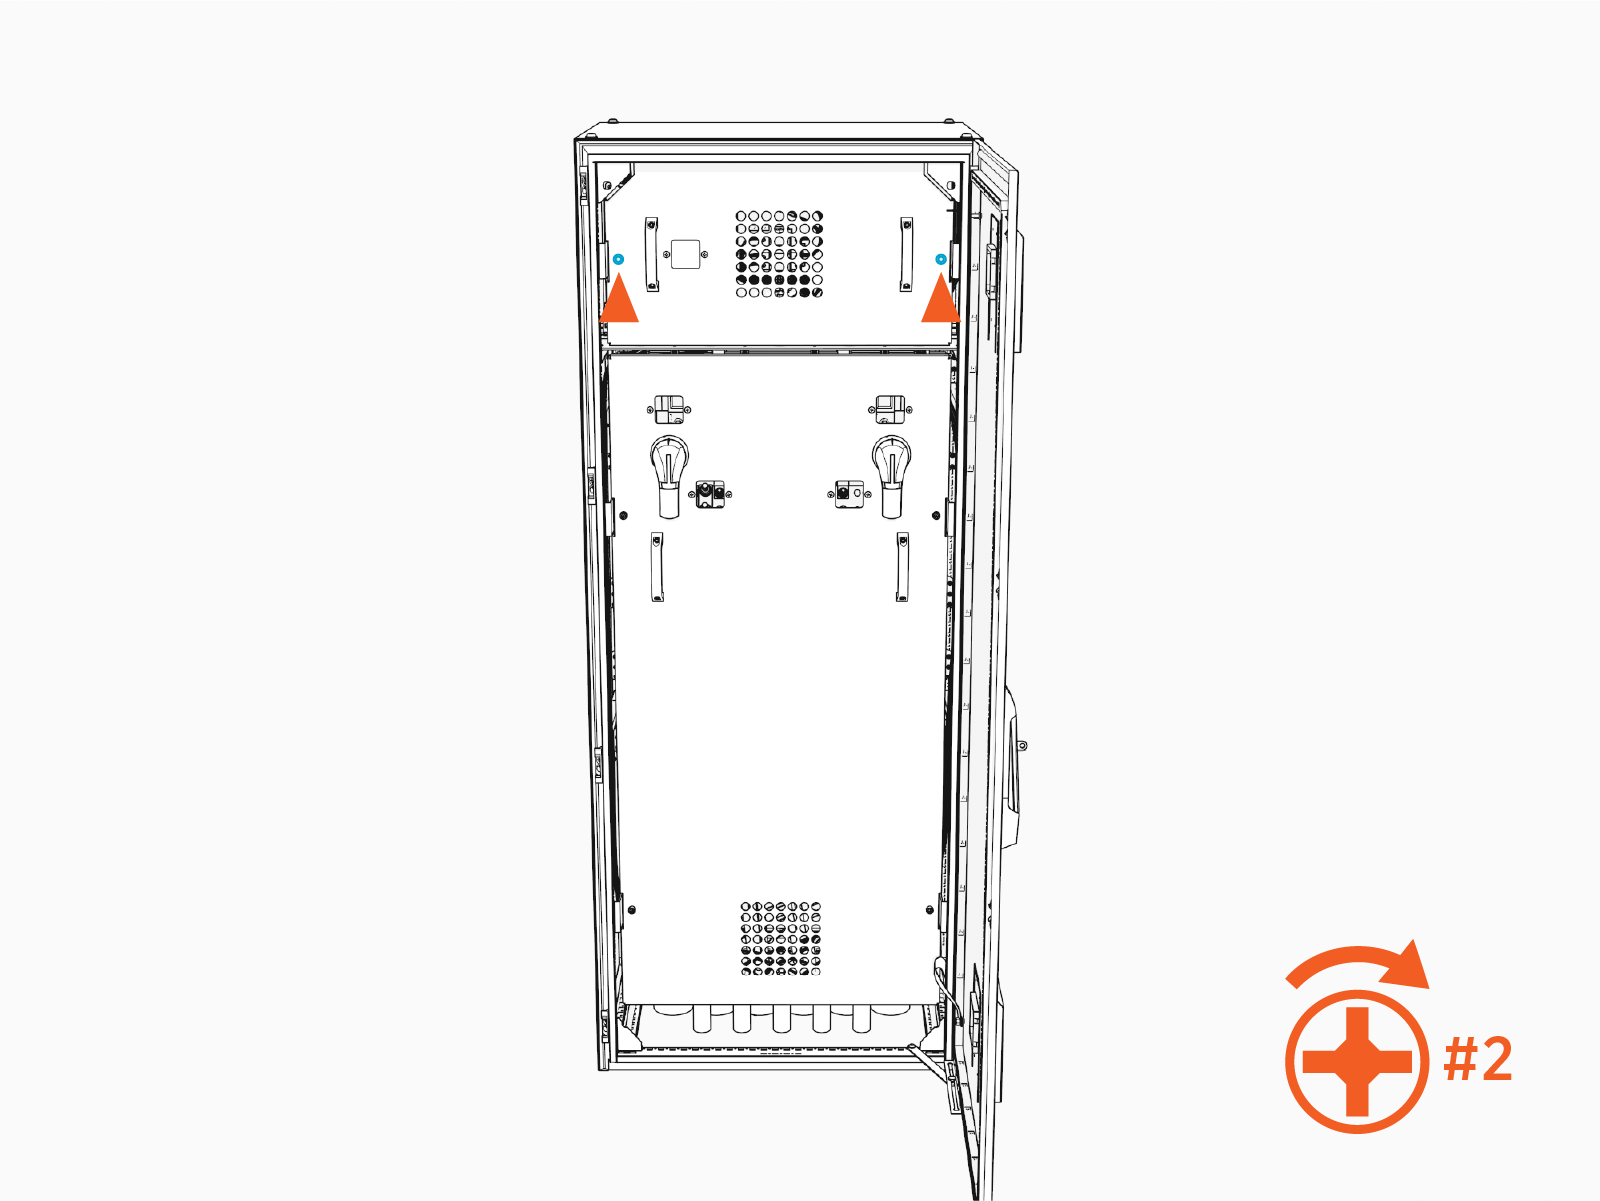
Loosen four captive screws at the high voltage deadfront and remove the deadfront.
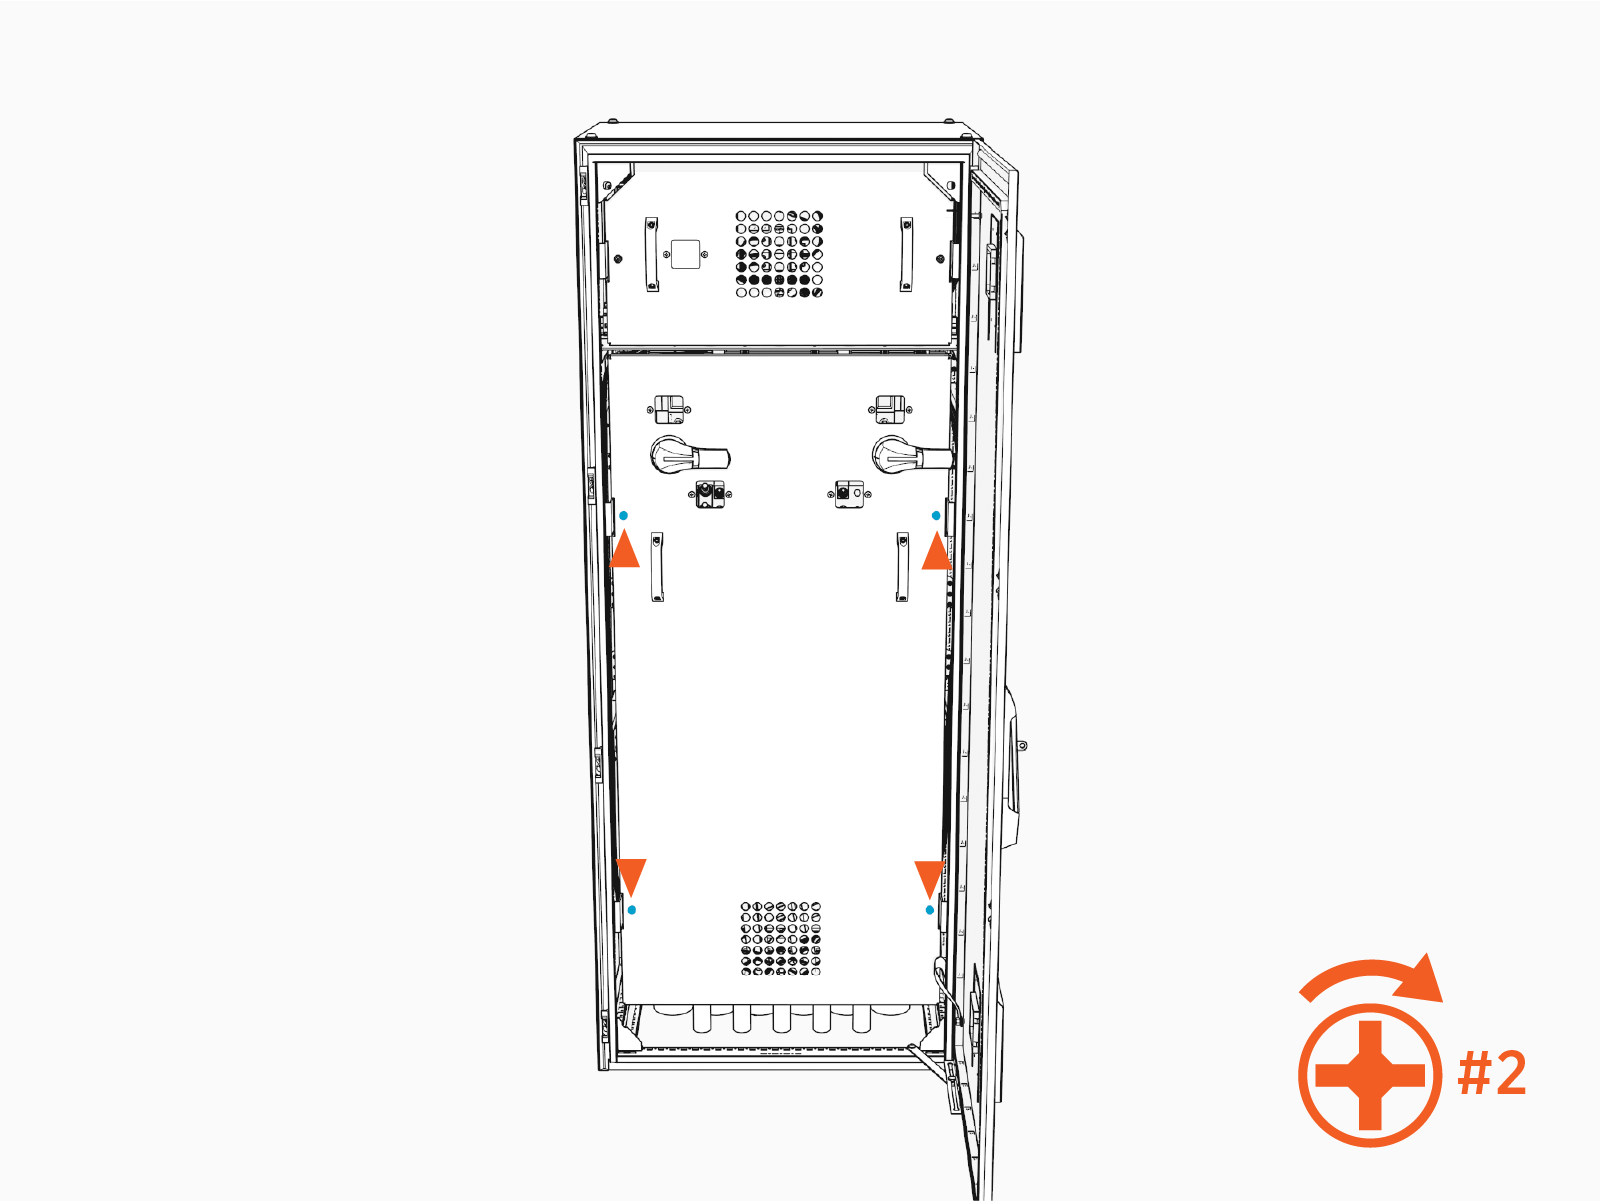
Install High Voltage Deadfront
-
Ensure all disconnect switch handles on the high voltage deadfront are in the off position.
-
Replace the deadfront and tighten four captives screws. Torque to 5.6 Nm (50 in-lb).
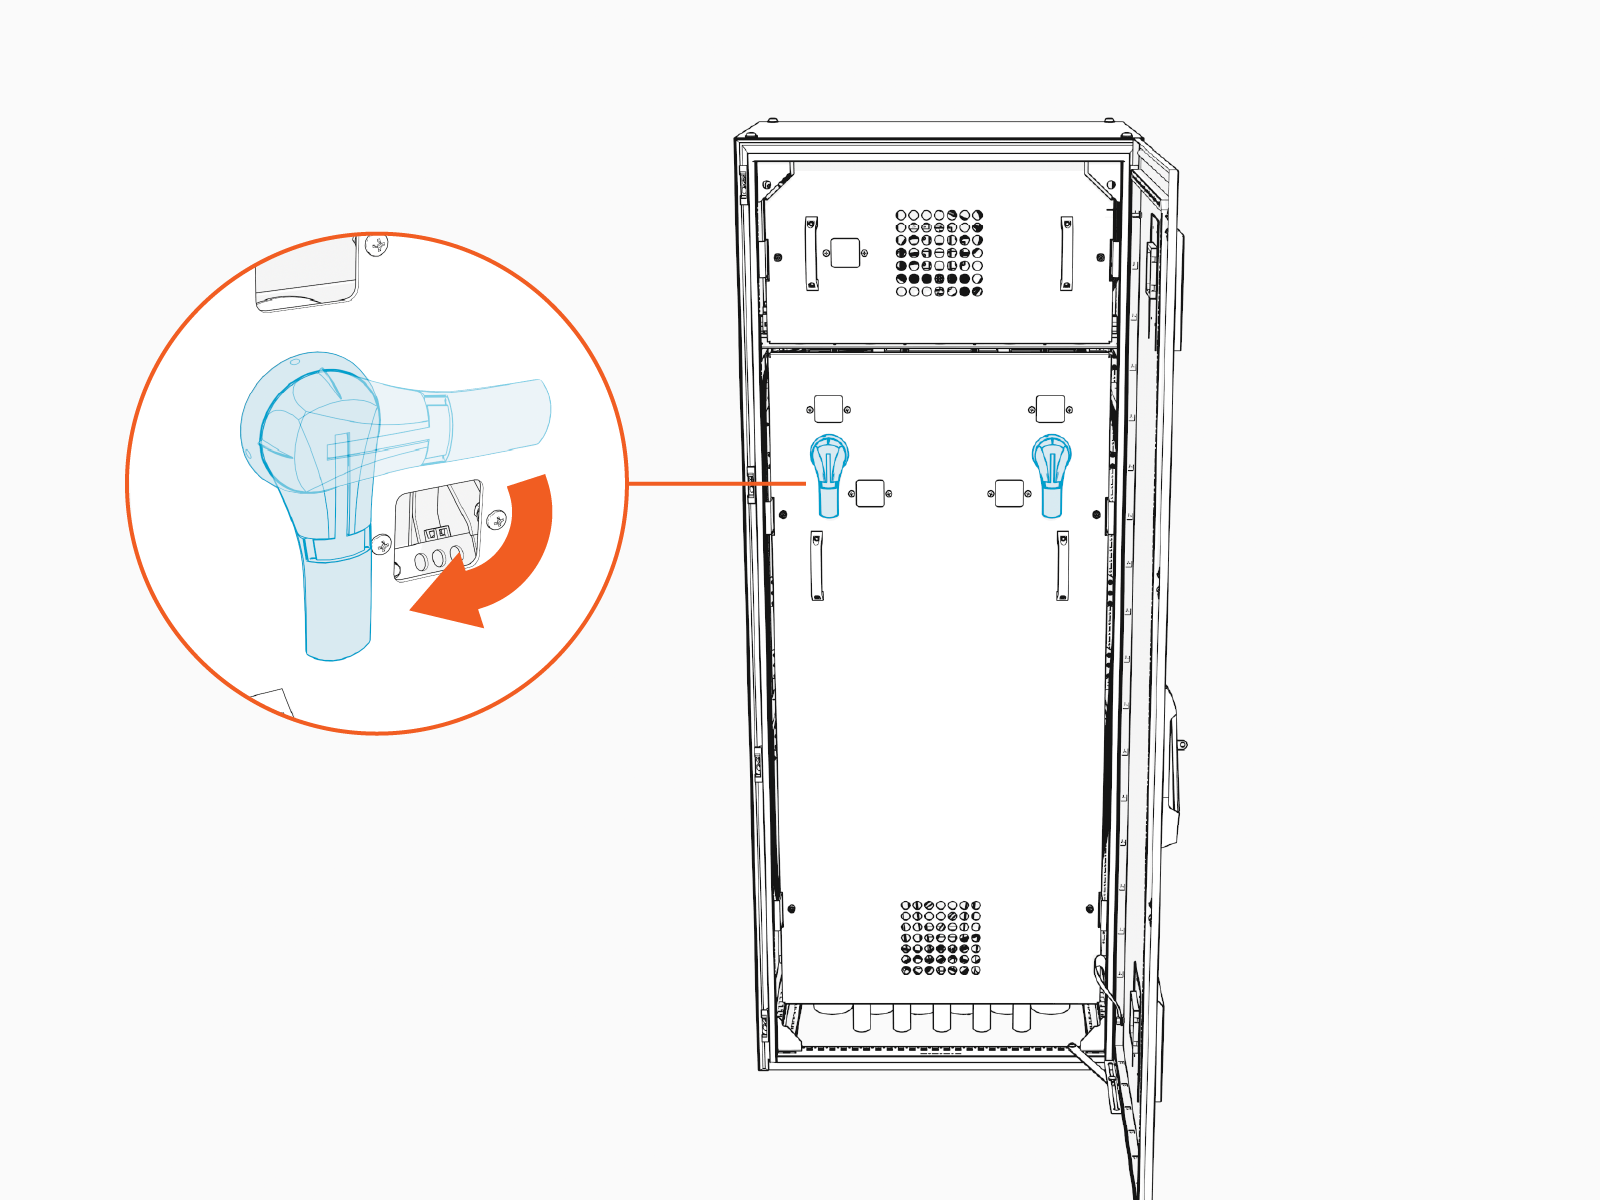
-
Turn each disconnect switch handle to the ON position. Align the fin on the handle with the ON mark.
- To adhere to ChargePoint best practices, complete the post-service checklist before you leave the site.
-
For assistance or to return a faulty part to ChargePoint, go to chargepoint.com/support and contact technical support using the appropriate region-specific number.
