Install the Housing
Perform the following steps to install the housing:
-
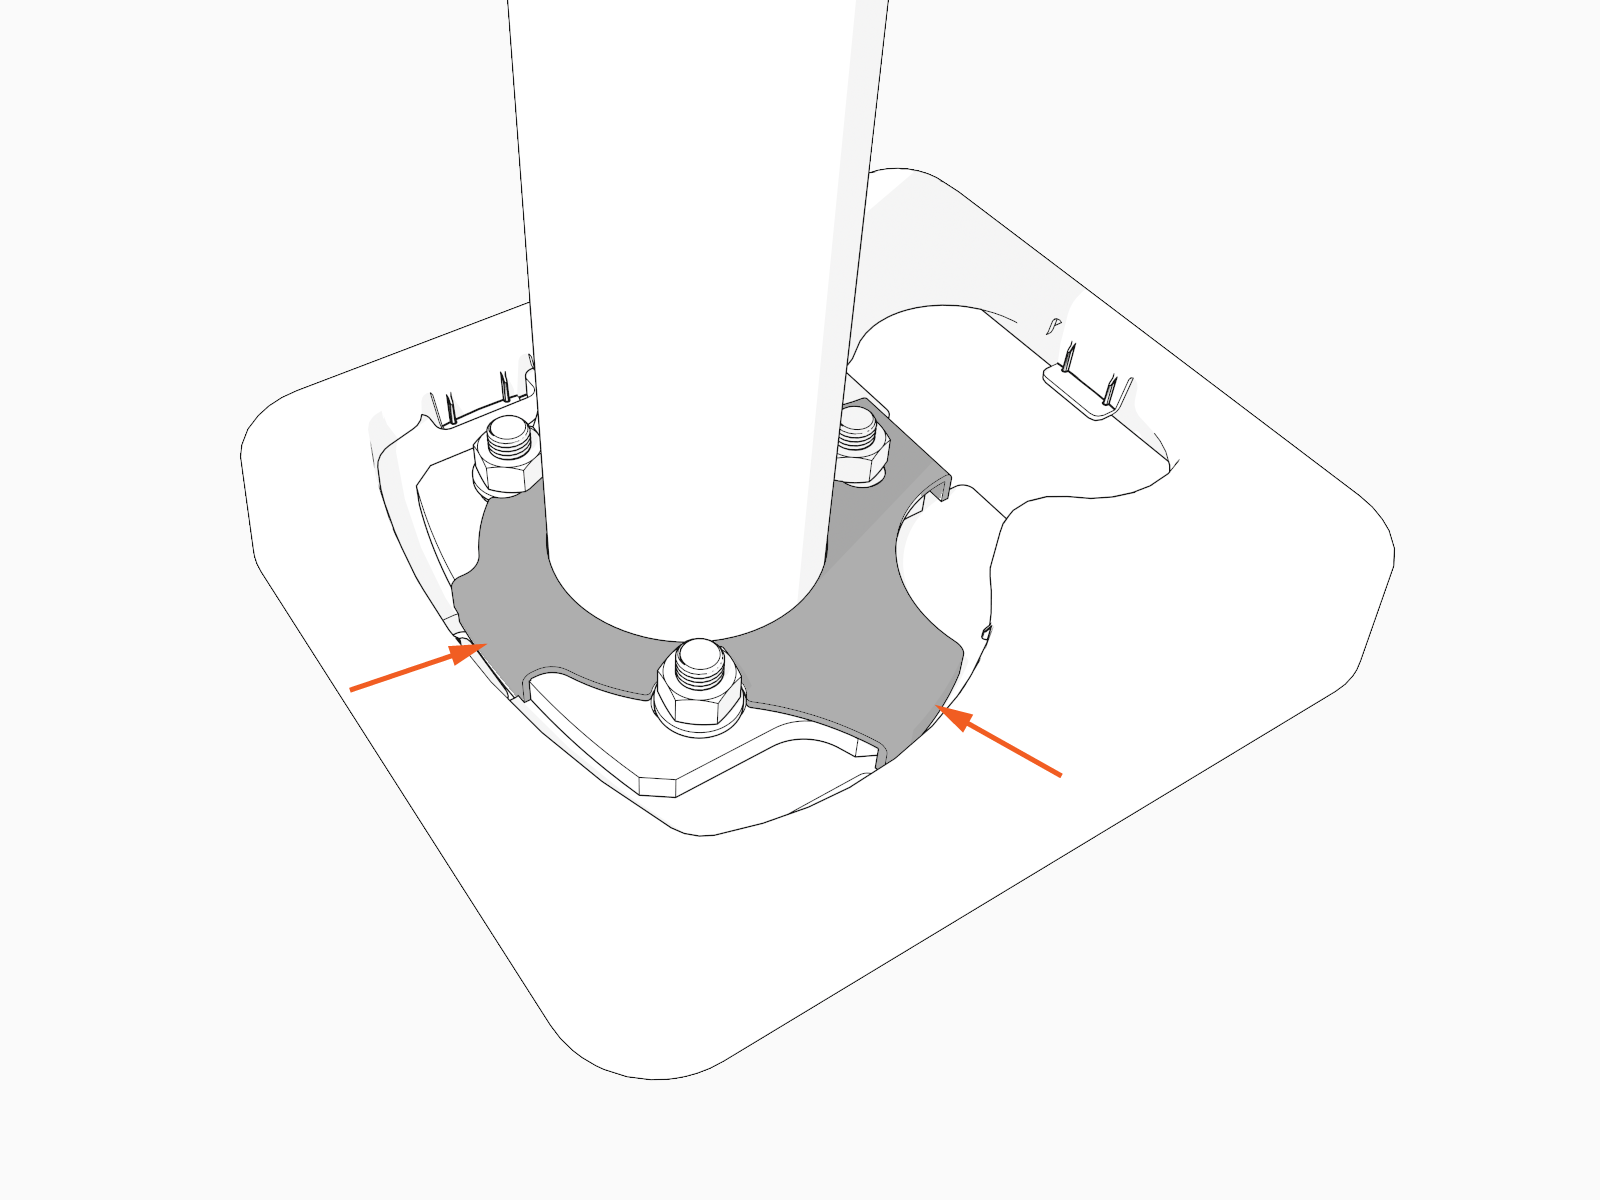
Align and slide the rubber spacer down.
-
Optional: If replacing a CPF50, tuck the edges of the rubber spacer below the black plastic cover.
-
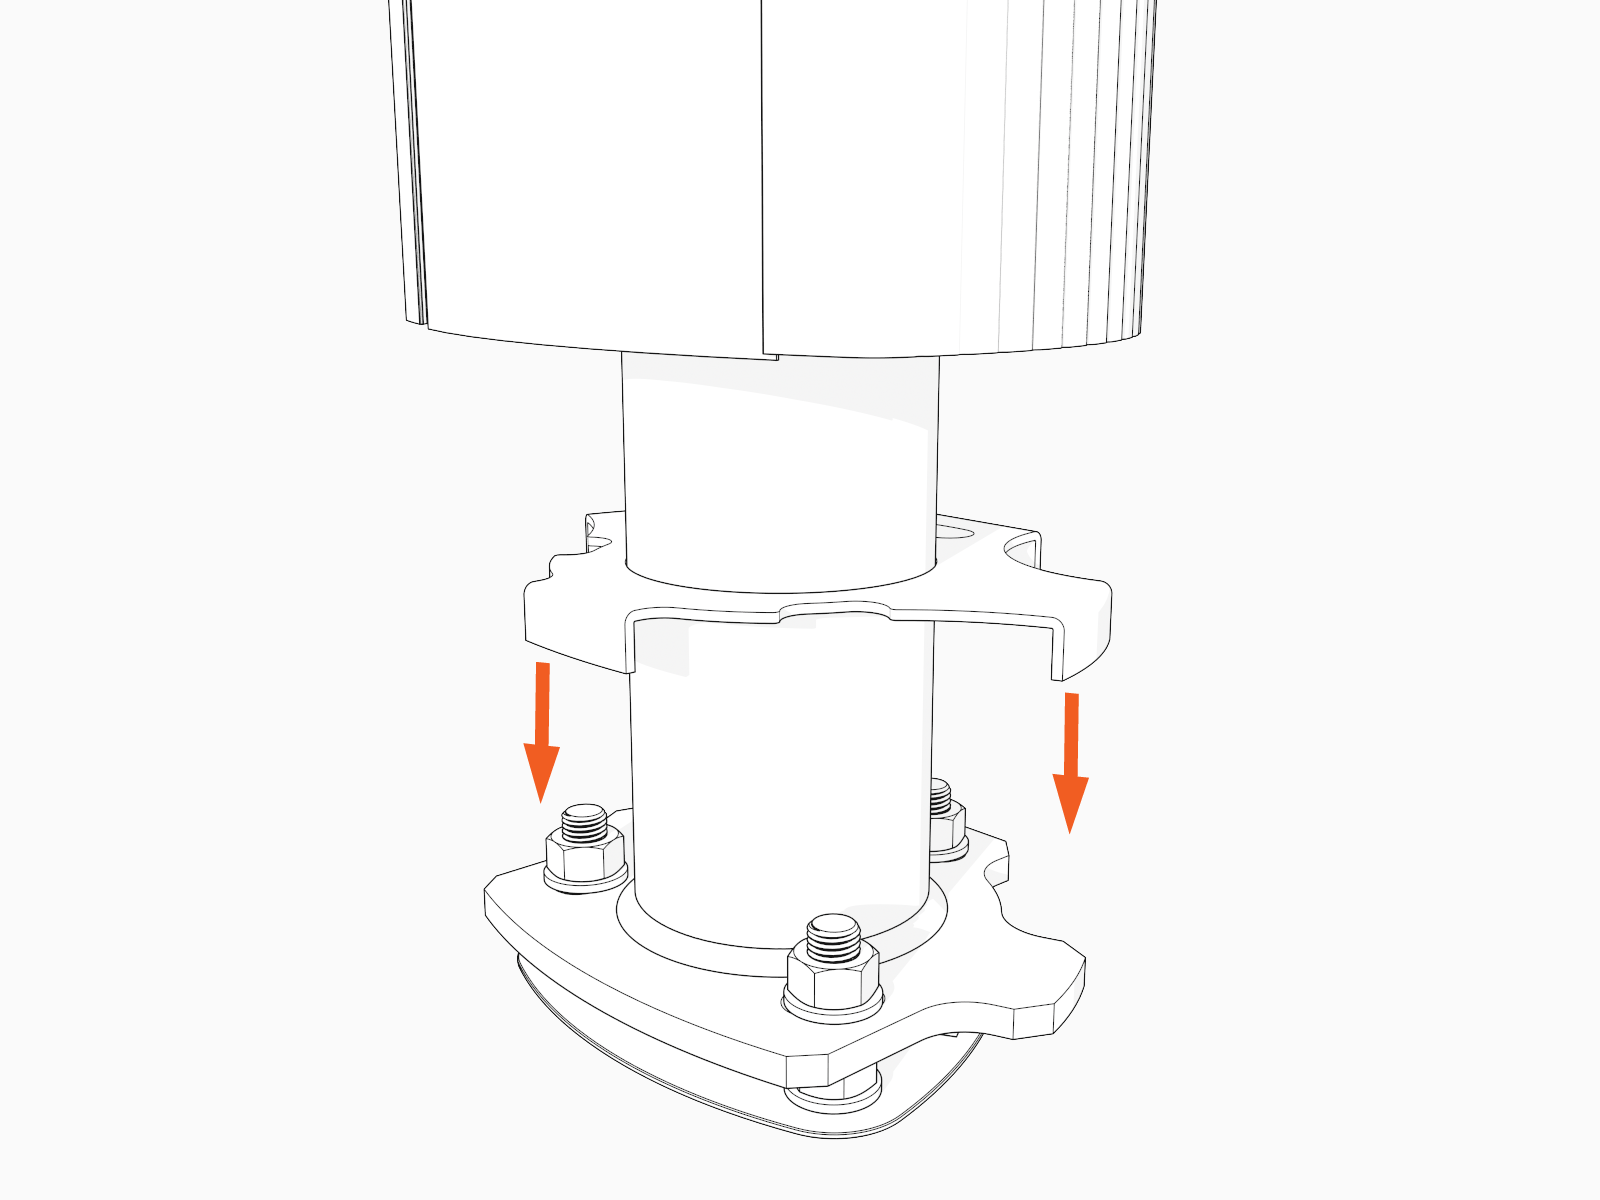
Slide the housing down.

-
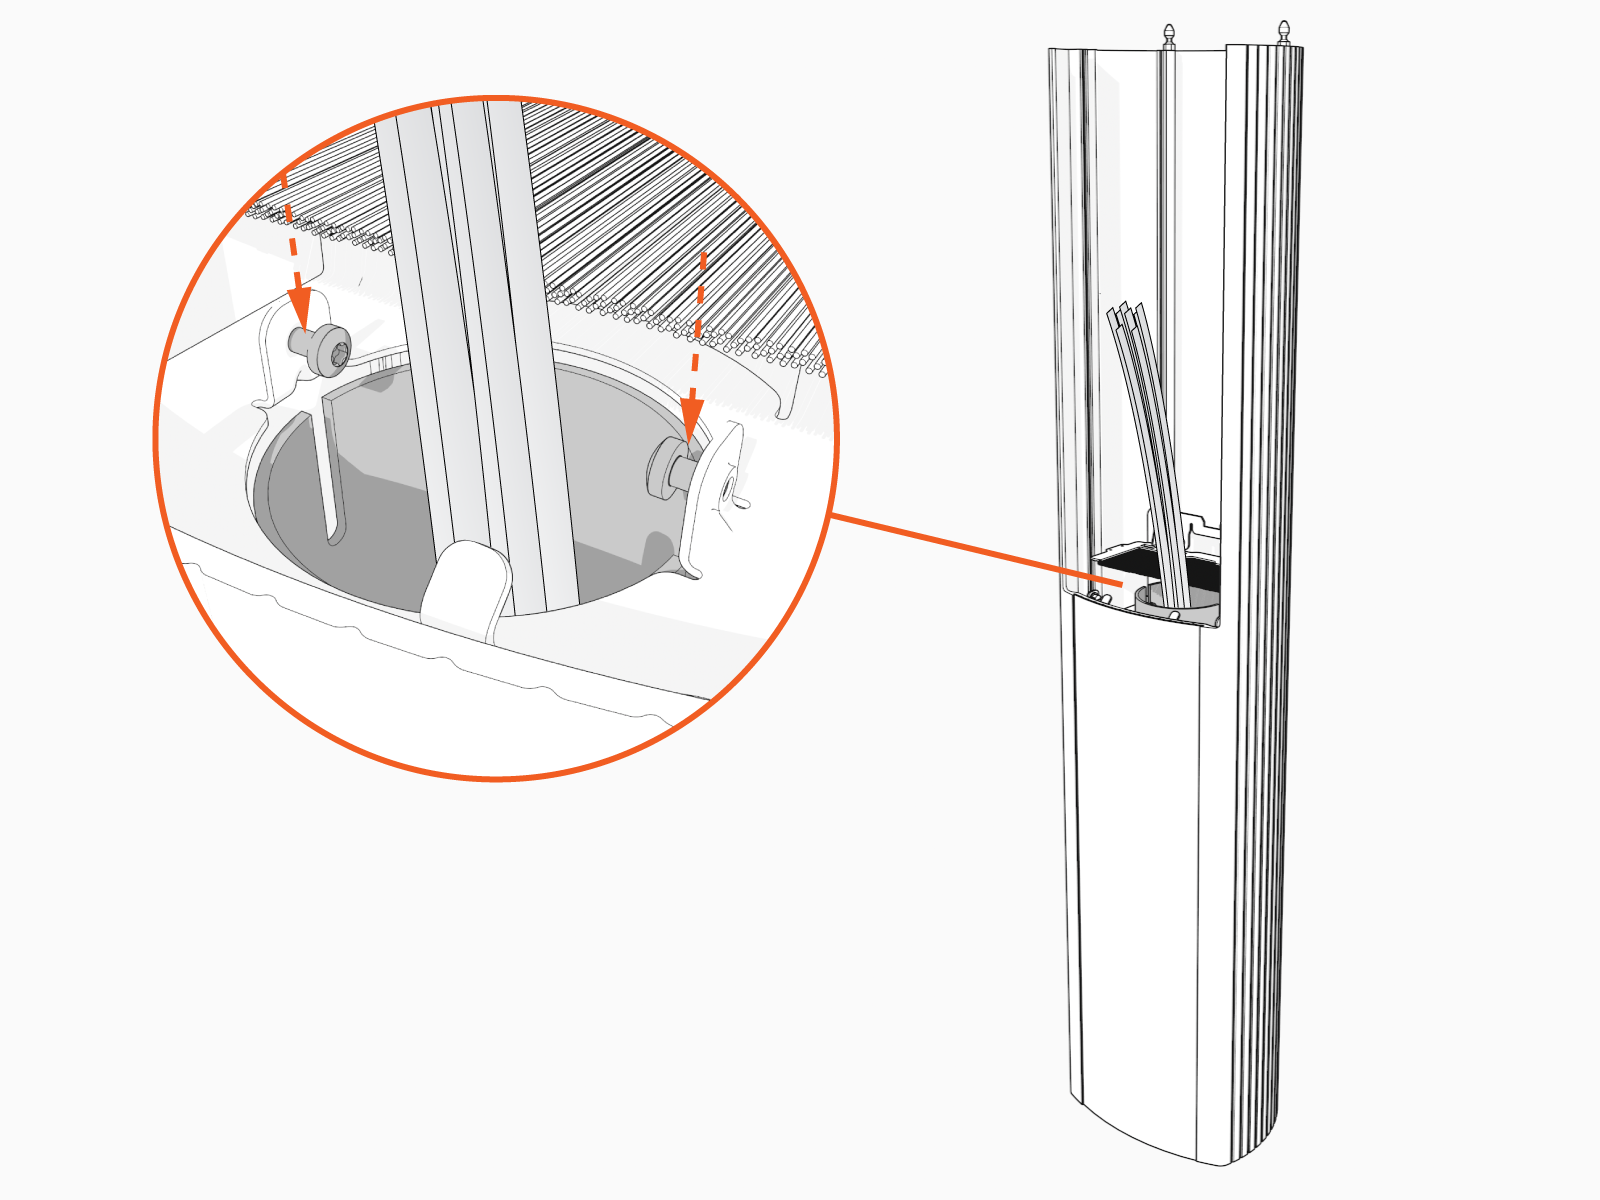
Ensure screws are aligned.
-
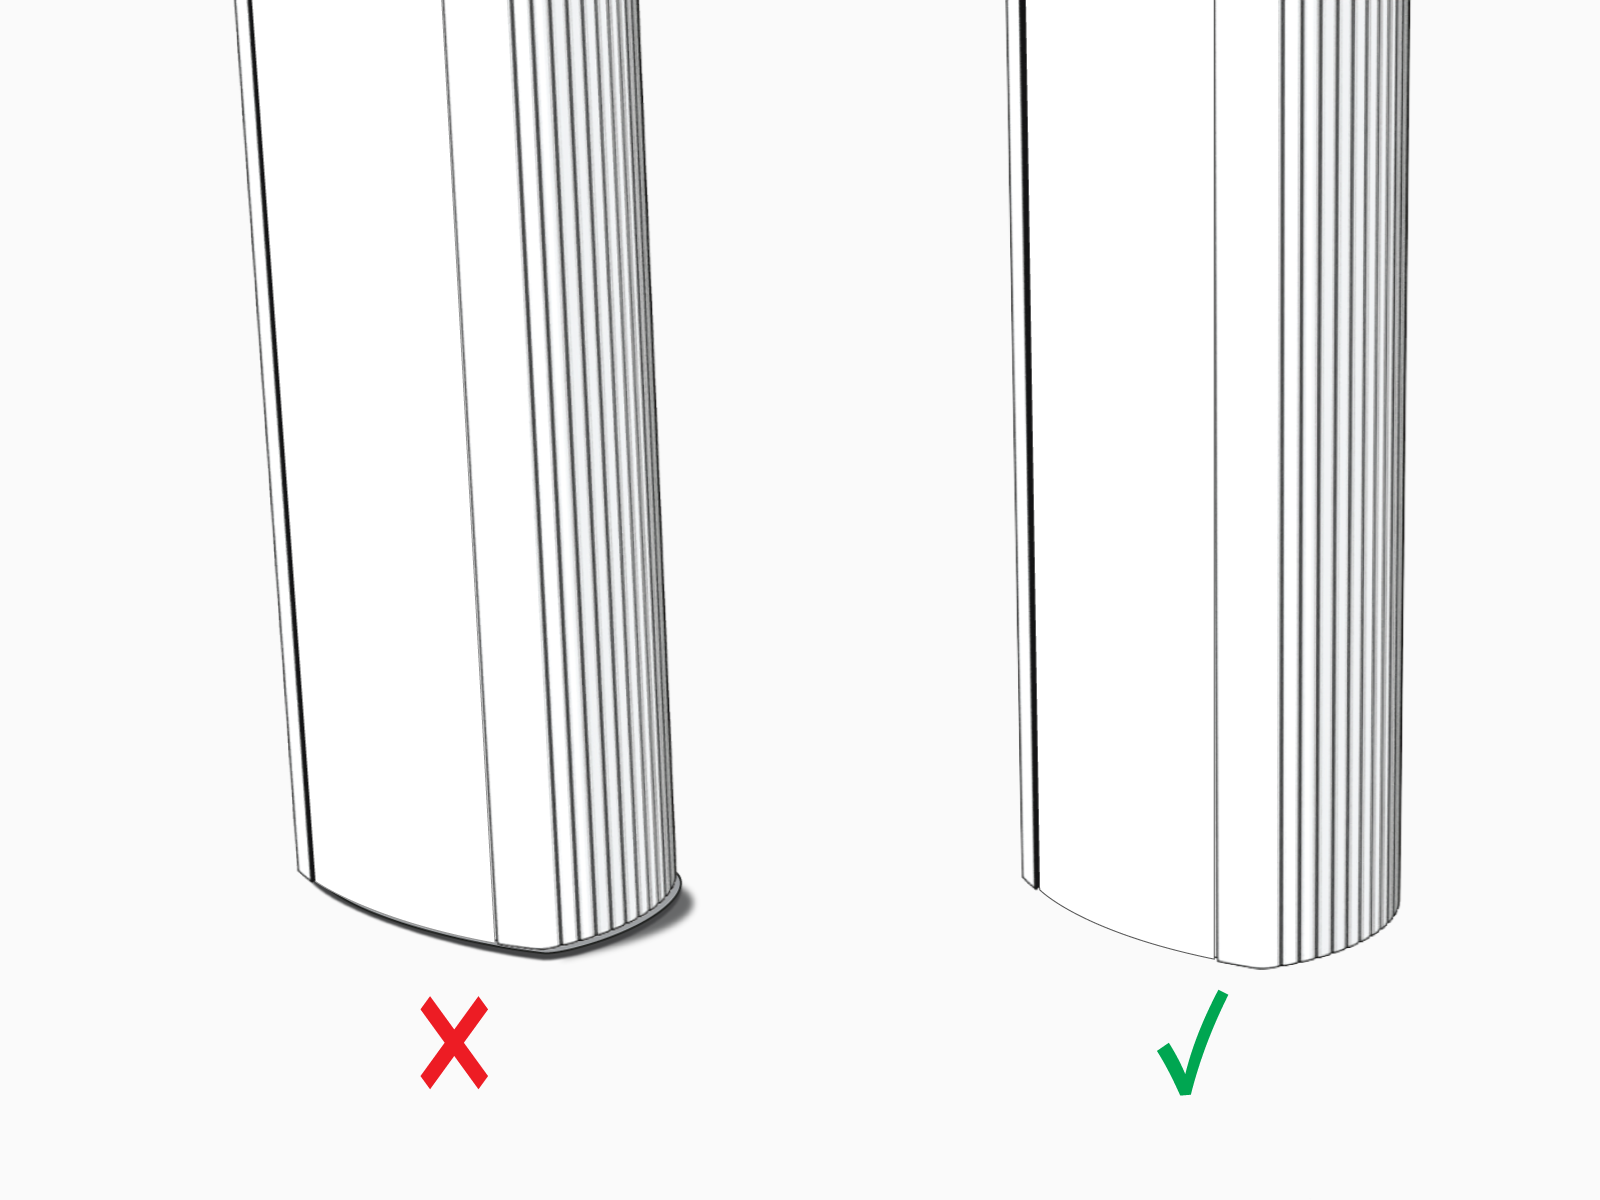
Firmly align pedestal to the bottom surface.
 Do not seal the pedestal to the concrete pad with caulking, silicone, or other sealing material. The pedestal is designed to shed moisture between its bottom surface and the concrete pad. Sealing the pedestal to the concrete can trap water inside the housing.
 -
Use the L-wrench or mini-rachet wrench to torque screws to 4.6 Nm (40 in-lb).

Alternative Installation: Side Mounted Conduit
If the conduit cannot come from below the pedestal (existing concrete in a parking garage, for example), mount the pedestal and ensure it is level and tight, then follow these steps.
You need a hole saw or a knockout punch.
-
Mark the conduit entry point on either side of the housing. The center of the opening must be 635 mm (25 in) from the bottom and 100 mm (4 in) from the front, a location that does not intersect any internal ribs.
Drill or punch a hole for a 32 mm (1.25 in) trade size knockout.
Images are not to scale. Measurements appear in metric units (mm) followed by imperial equivalents (inches).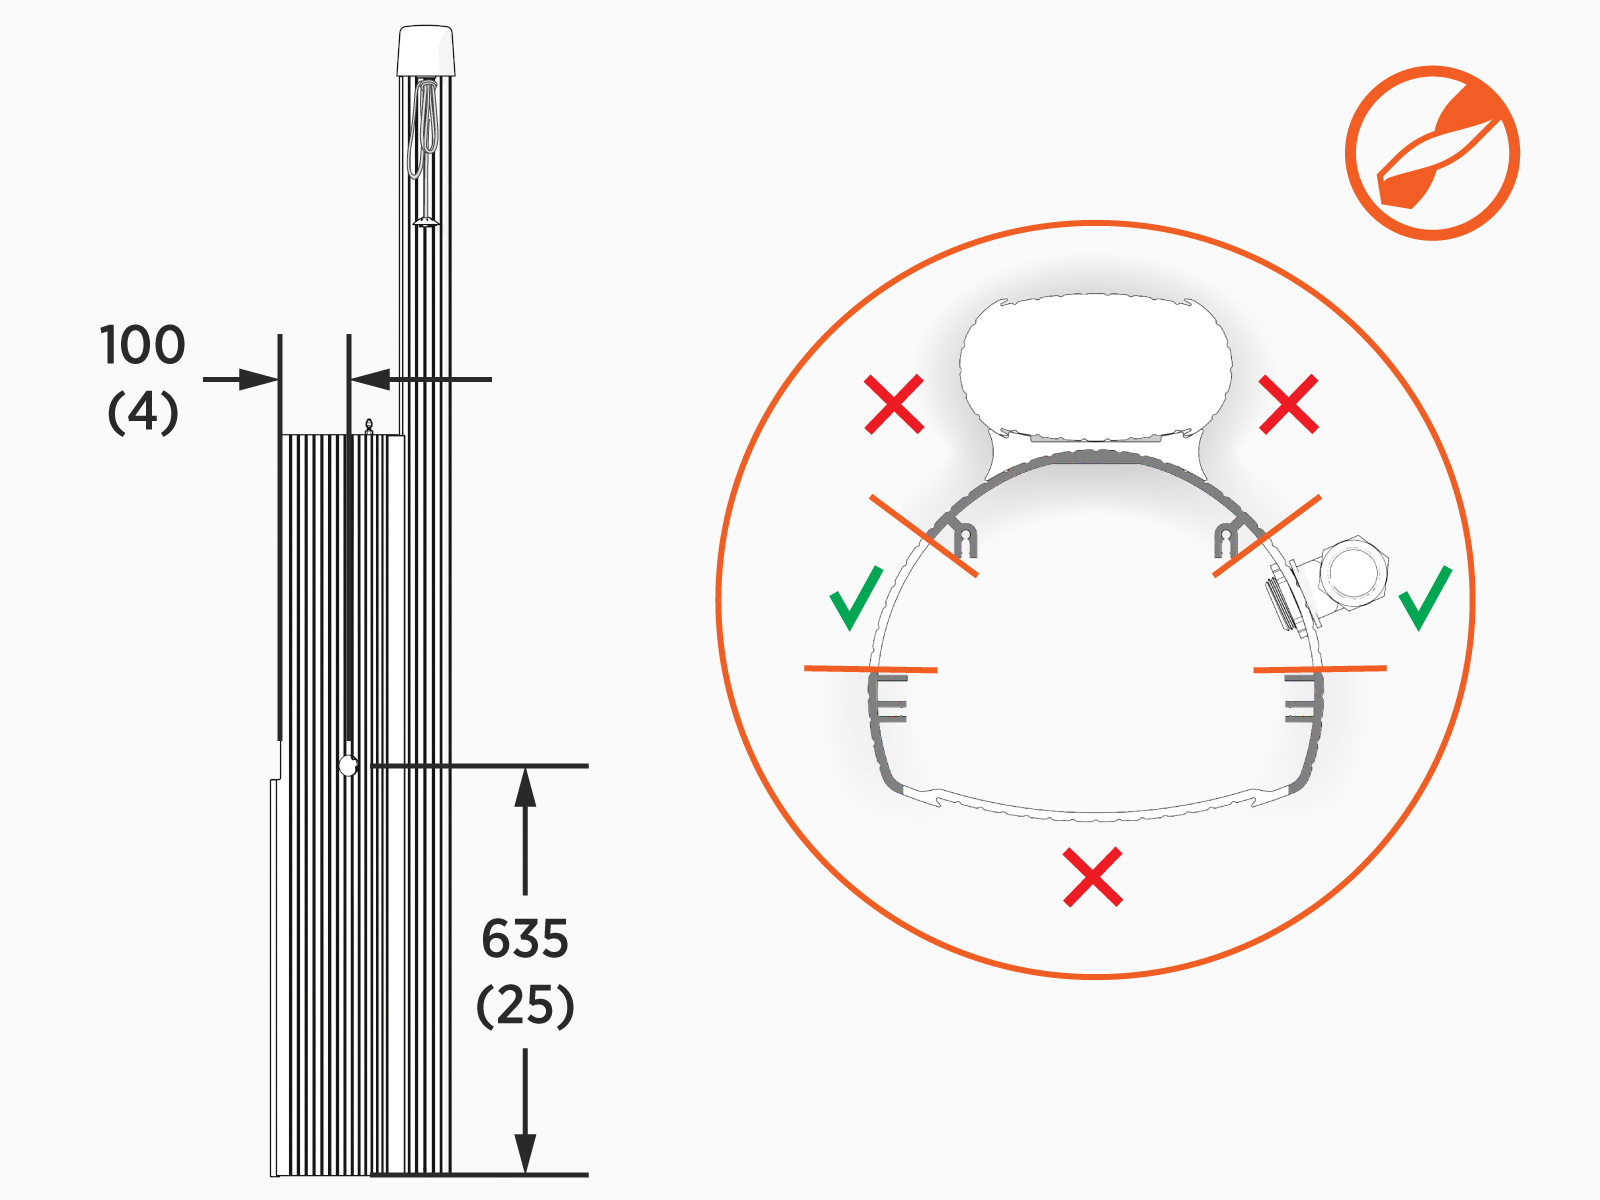
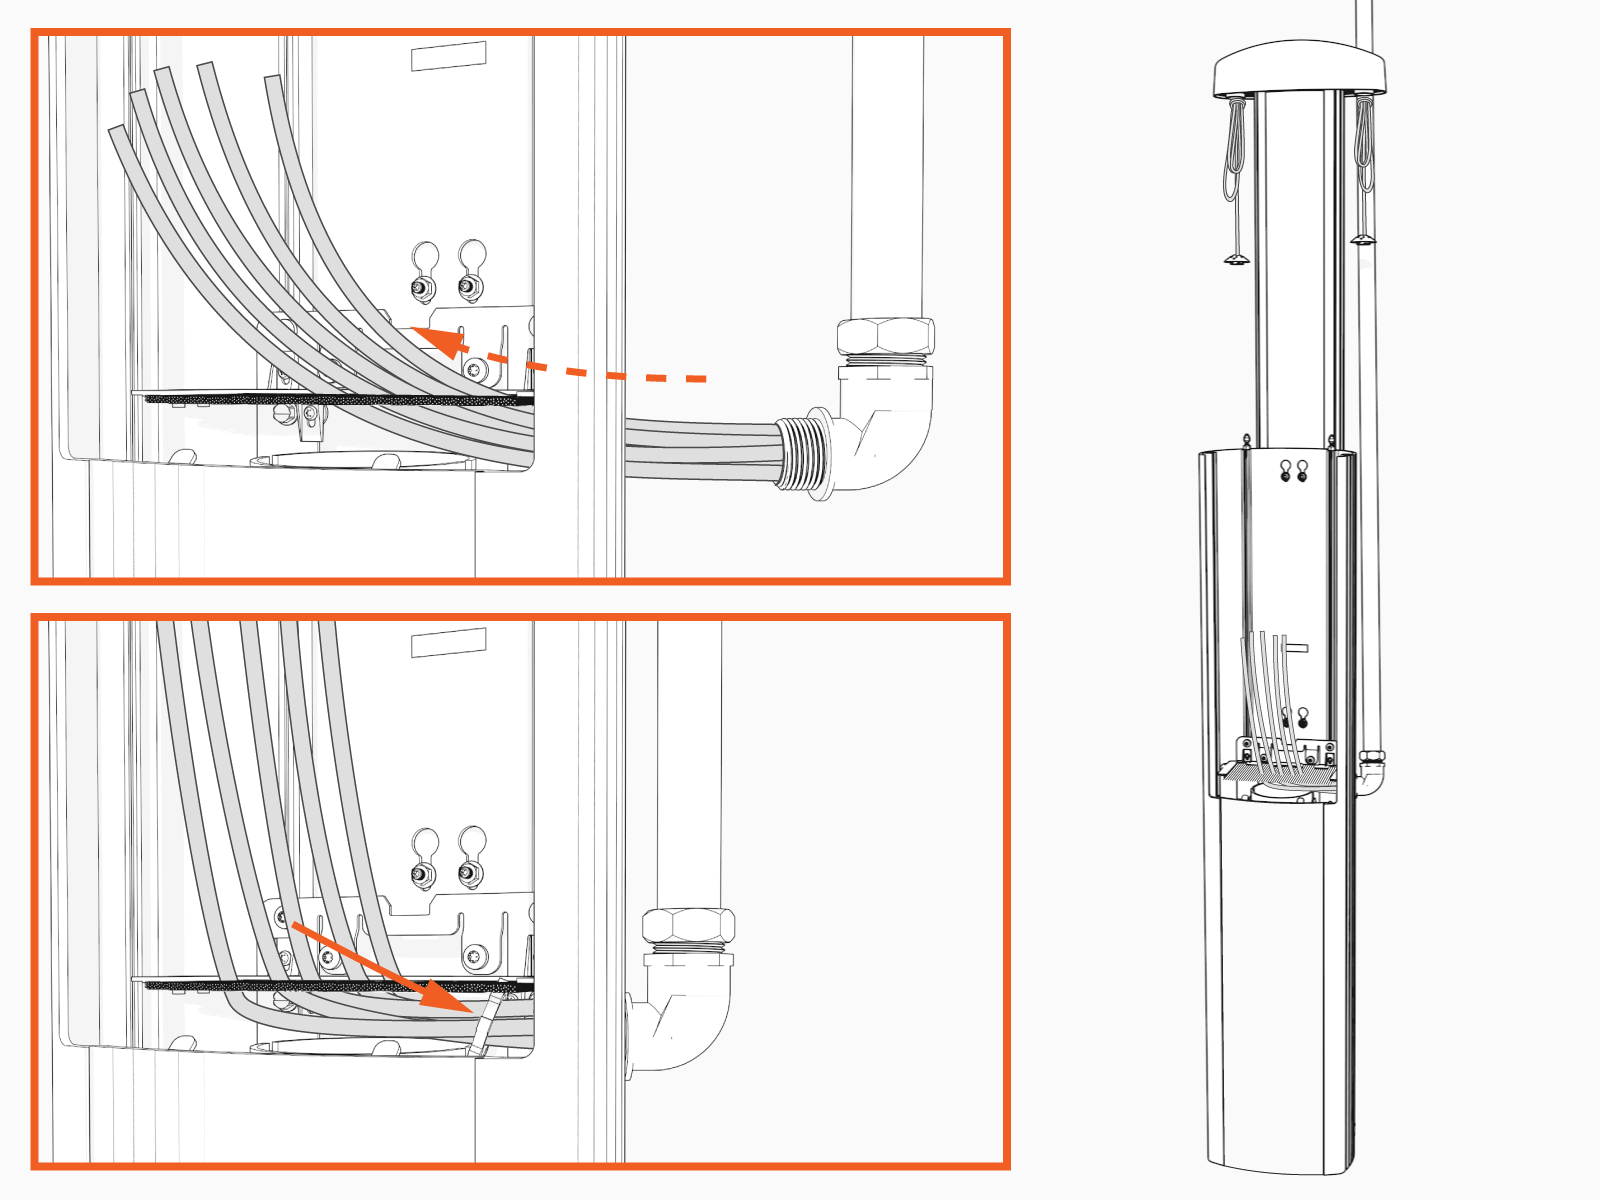
-
Pull wire through the conduit, protecting the wires from sharp edges of the internal structural components.
-
Seal the conduit entry into the pedestal housing using an approved sealing method that is compliant with applicable codes.
Ensure that the installation complies with all applicable codes and ordinances.
