Appendix: Set Up Power Link 1000
To complete station set up, complete the following steps:
Power On
After you power on the charging station at the breaker panel , complete the station setup. You must have completed the installer training and received your installer login. To complete the next steps, you need the following information:
-
Installer login
-
Activation label (i.e., QR
 Quick Response code label including the MAC Message Authentication Code address and activation password) for Power Block and Power Link 1000, if not already applied to the station
 -
A smartphone with camera, QR
Quick Response code scanning app (usually built into the camera app), Internet connectivity -
The exact location (to the parking space) where the Power Block and Power Link 1000 are physically installed
Run Installation Wizard
To run the installation wizard, complete the following steps:
-
On the Power Link 1000 touchscreen display, select your language.
This does not permanently affect the charging station’s display language.
-
Select “New station” or “Replace an existing station.”
-
Ensure that you have all required items and select Yes.
-
Follow the onscreen prompts.
Pinpoint Location of Power Link 1000
To pinpoint the location of Power Block and Power Link 1000, complete the following steps:
Complete this procedure for both Power Link 1000 and Power Block separately. Both Power Link 1000 and Power Block have their own MAC![]() Message Authentication Code address and activation password.
Message Authentication Code address and activation password.
-
Find the activation label:
-
Power Link 1000: You can find it on top of the display or non-display unit.
-
Power Block: You can find it behind the security panel (see Adhere Ratings Label).
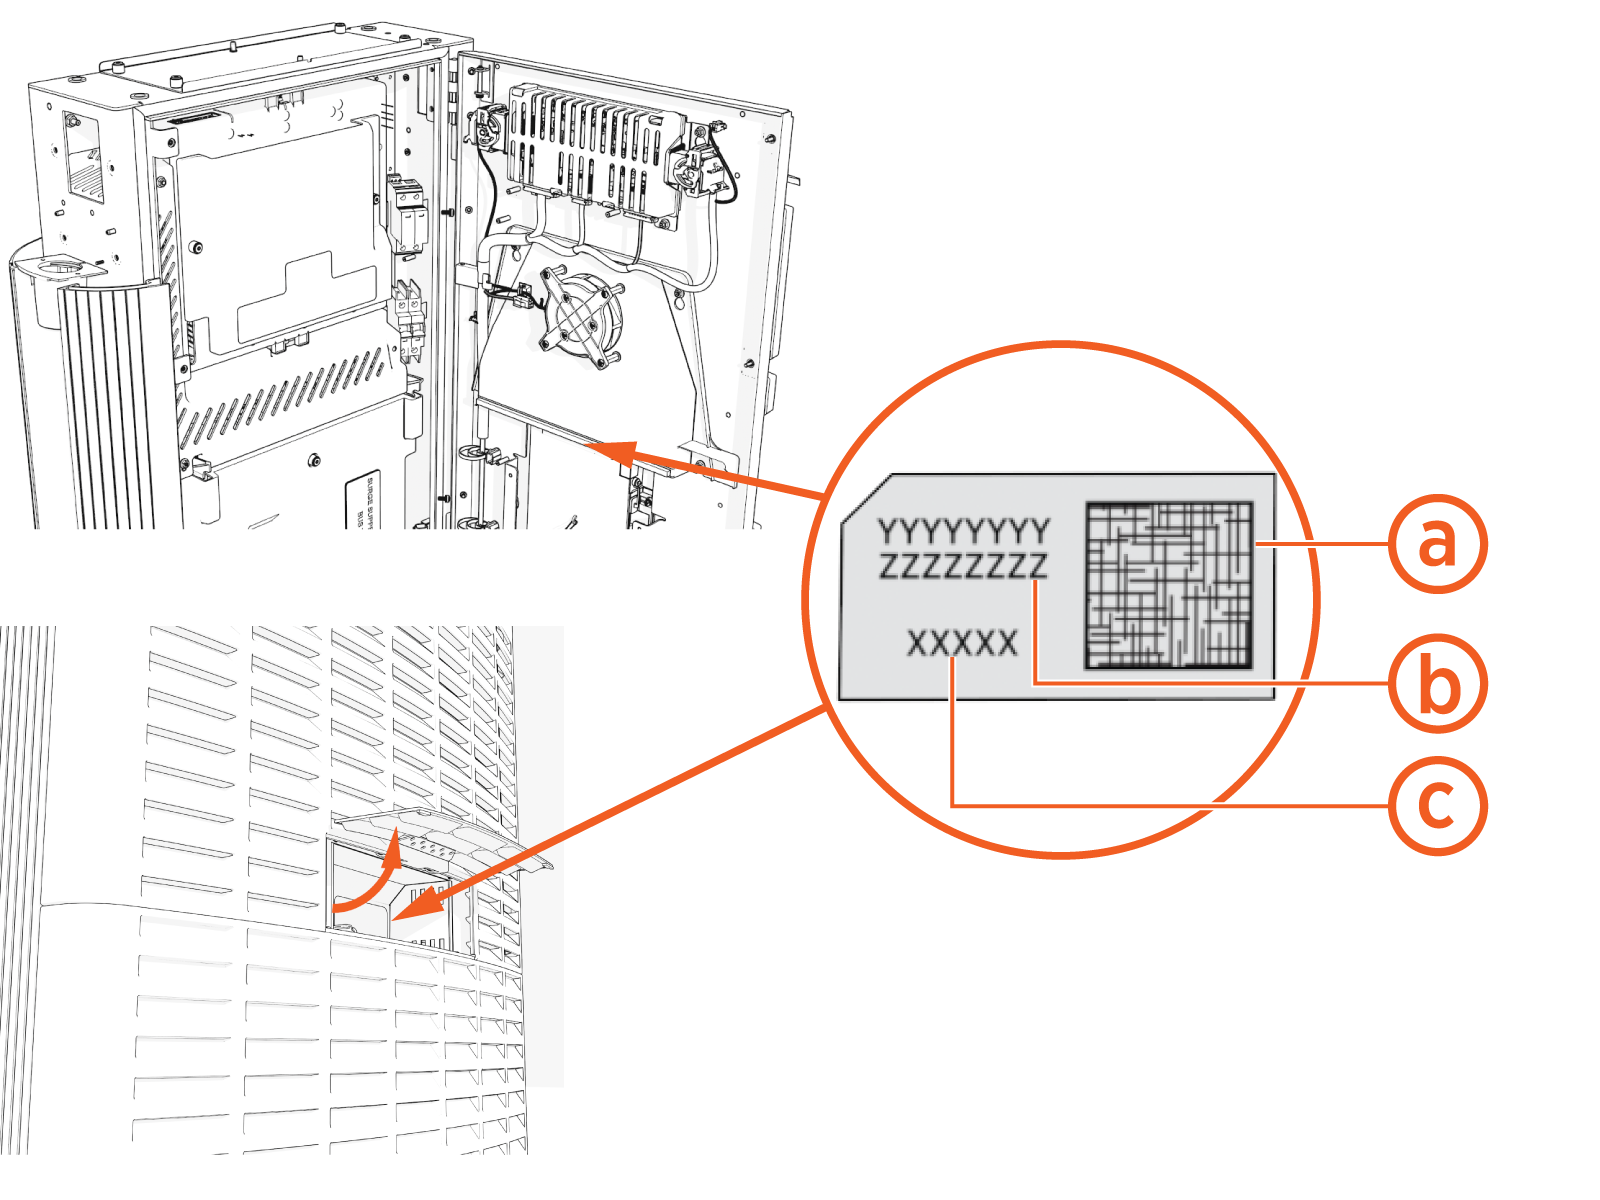
(a) QR
Quick Response code(b) MAC
Message Authentication Code address(c) Activation password
-
If your smartphone has QR![]() Quick Response code scanning app, follow the steps below:
Quick Response code scanning app, follow the steps below:
-
Open the QR
Quick Response Code scanning app on your smartphone and point the camera at the QR Quick Response code on the activation label. Your smartphone browser automatically redirects to the installer pinpointing page. Confirm that the URL of the page is o.chargepoint.com.
-
Log into the installer site using your installer login.
-
Confirm the MAC
Message Authentication Code address and activation password are automatically entered and correct, select Next. Continue from Step 5 below.
If your smartphone does not have QR![]() Quick Response code scanning app, follow the steps below:
Quick Response code scanning app, follow the steps below:
-
Using your smartphone or laptop browser, go to o.chargepoint.com.
-
Log into the installer site using your installer login.
-
Enter the MAC
Message Authentication Code address and activation password printed on the activation label, and select Next. -
Select the Location Permission button. Your GPS coordinates are required to complete the pinpointing process.
-
Select the type of installation and select Next.
-
Enter the site address and select Next.
-
Verify the address and select Next.
-
Move pin to exact location of charging station on the map and select Next.
-
Enter additional station location details such as parking lot name, building name, floor label, and parking restrictions, if applicable and select Next.
-
Add Helpful Information for Drivers and select Take a photo to upload an image such as photo of the location and station.
-
Follow any onscreen prompts to complete the pinpointing.
