Install the Pedestal
To install the pedestal, follow these steps:
Mount and Level the Pedestal
-
Ensure that the concrete has been prepared according to the Bolt Pattern Template . This includes:
-
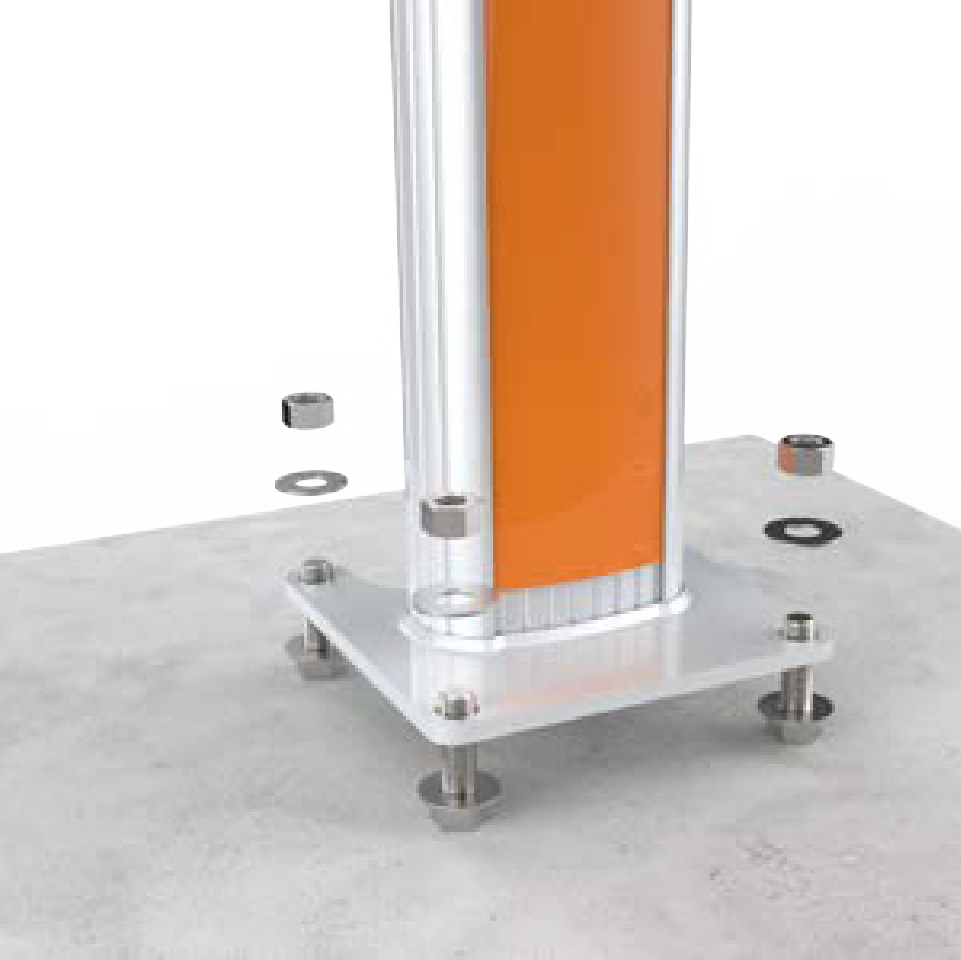
Four bolts set into concrete with two nuts and two washers for each bolt, with the bolt extending 63.5 mm (2 1/2 inches) above the surface.
-
Conduit stub-up measuring approximately 0.3 m (1 ft) above the concrete surface.
-
Approximately 1.5 m (5 ft) of service wiring extending above the concrete surface.
-
-
Remove the top nut and top washer from each of the four bolts in the pad.
-
Place the pedestal over the conduit and route the service wiring through the column. Ensure that the edge with the cut-out for CMK
 Cable Management Kit is located at the back of the station.
 -
Adjust the lower nuts to ensure that the pedestal is level.
-
When level, fasten the pedestal to the bolts using the washer and nut removed from the bolt. Torque the top nuts to 122 Nm (90 ft-lbs).
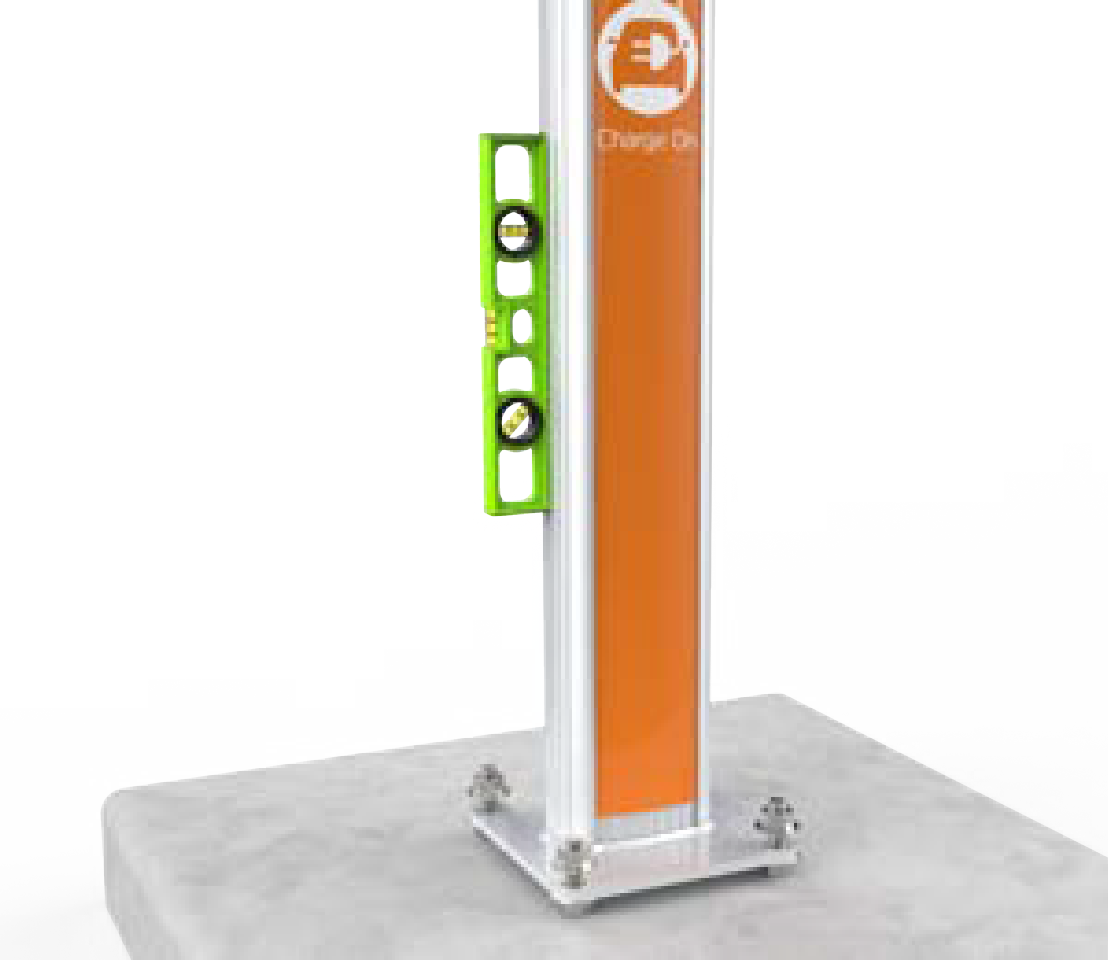
Verify that the pedestal is level and plumb after each adjustment by positioning the level at various locations on the base plate and on the pedestal.
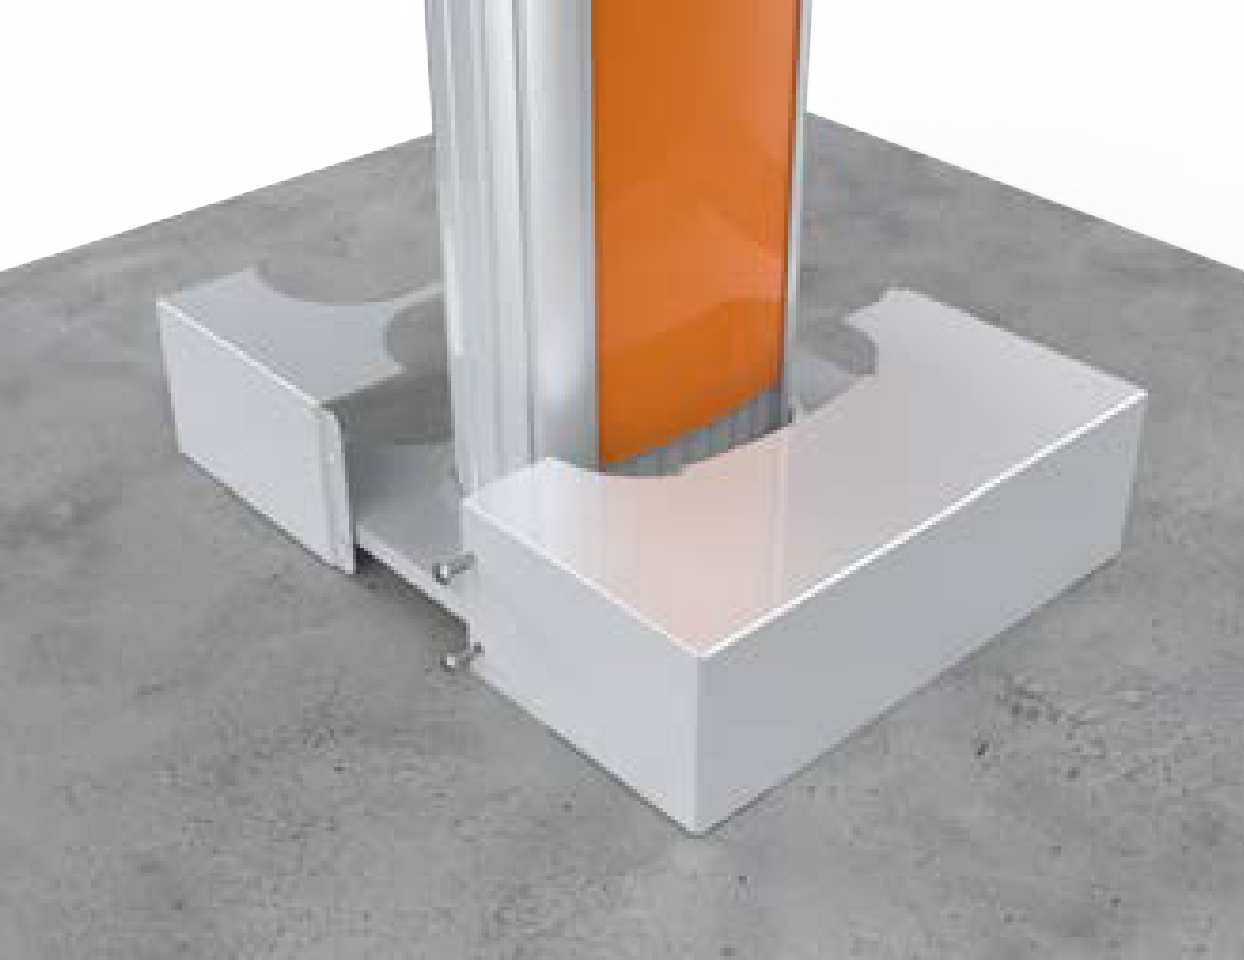
Install Pedestal Covers
-
Select the appropriate pedestal covers from the three pieces provided:
-
If the station is not using a CMK
Cable Management Kit, use the back pedestal cover without a cut-out. -
If the station is using a CMK
Cable Management Kit, use the back pedestal cover with the cutout for the CMK Cable Management Kit.
-
-
Position the two-piece pedestal cover over the bottom of the pedestal.
-
Insert the four 3/8 inch screws, two into each side of the pedestal cover.
-
Tighten the screws using a Phillips screwdriver.
-
If the station is not using a CMK
Cable Management Kit, slide the spacer at the back of the pedestal upward to remove it.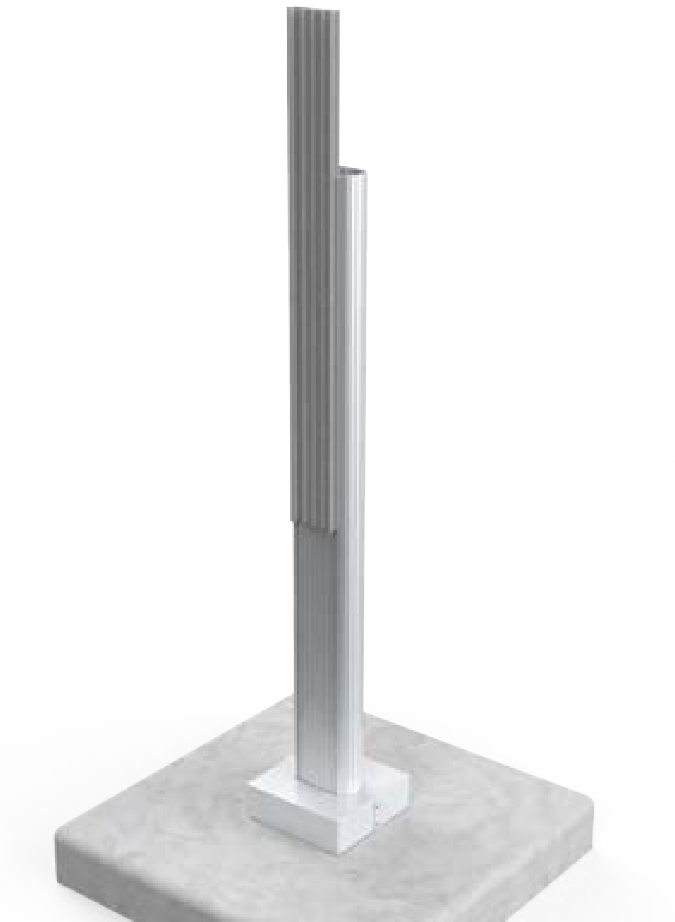
-
Discard the extra pedestal cover and the spacer, if you are installing a station without a CMK
Cable Management Kit.
Select Your Configuration
Proceed to the next section according to the configuration of the installation:
-
For single station installation without CMK
Cable Management Kit, proceed to Mount a Single Station Bracket (Without a CMK). -
For single station installation with CMK
Cable Management Kit, proceed to Mount a Single Station Bracket and CMK. -
For dual station installation without CMK
Cable Management Kit, proceed to Mount a Dual Station Bracket (Without a CMK). -
For dual station installation with CMK
Cable Management Kit, proceed to Mount a Dual Station Bracket and CMK.
