Install Power Block Internal Parts and Fill Coolant
A Power Block can use up to five Power Modules, which ship in separate pallets. To install Power Block internal parts and fill coolant, complete the following steps:
Install Left and Right Racks
To install the left and right racks, complete the following steps:
-
Align each rack vertically along the guide rails. Slide into the lower cabinet.

-
Install screws into the cabinet interior (front and rear, upper and lower) for each rack and torque to 19 Nm (14 ft-lb).
 for each rack and torque them.")
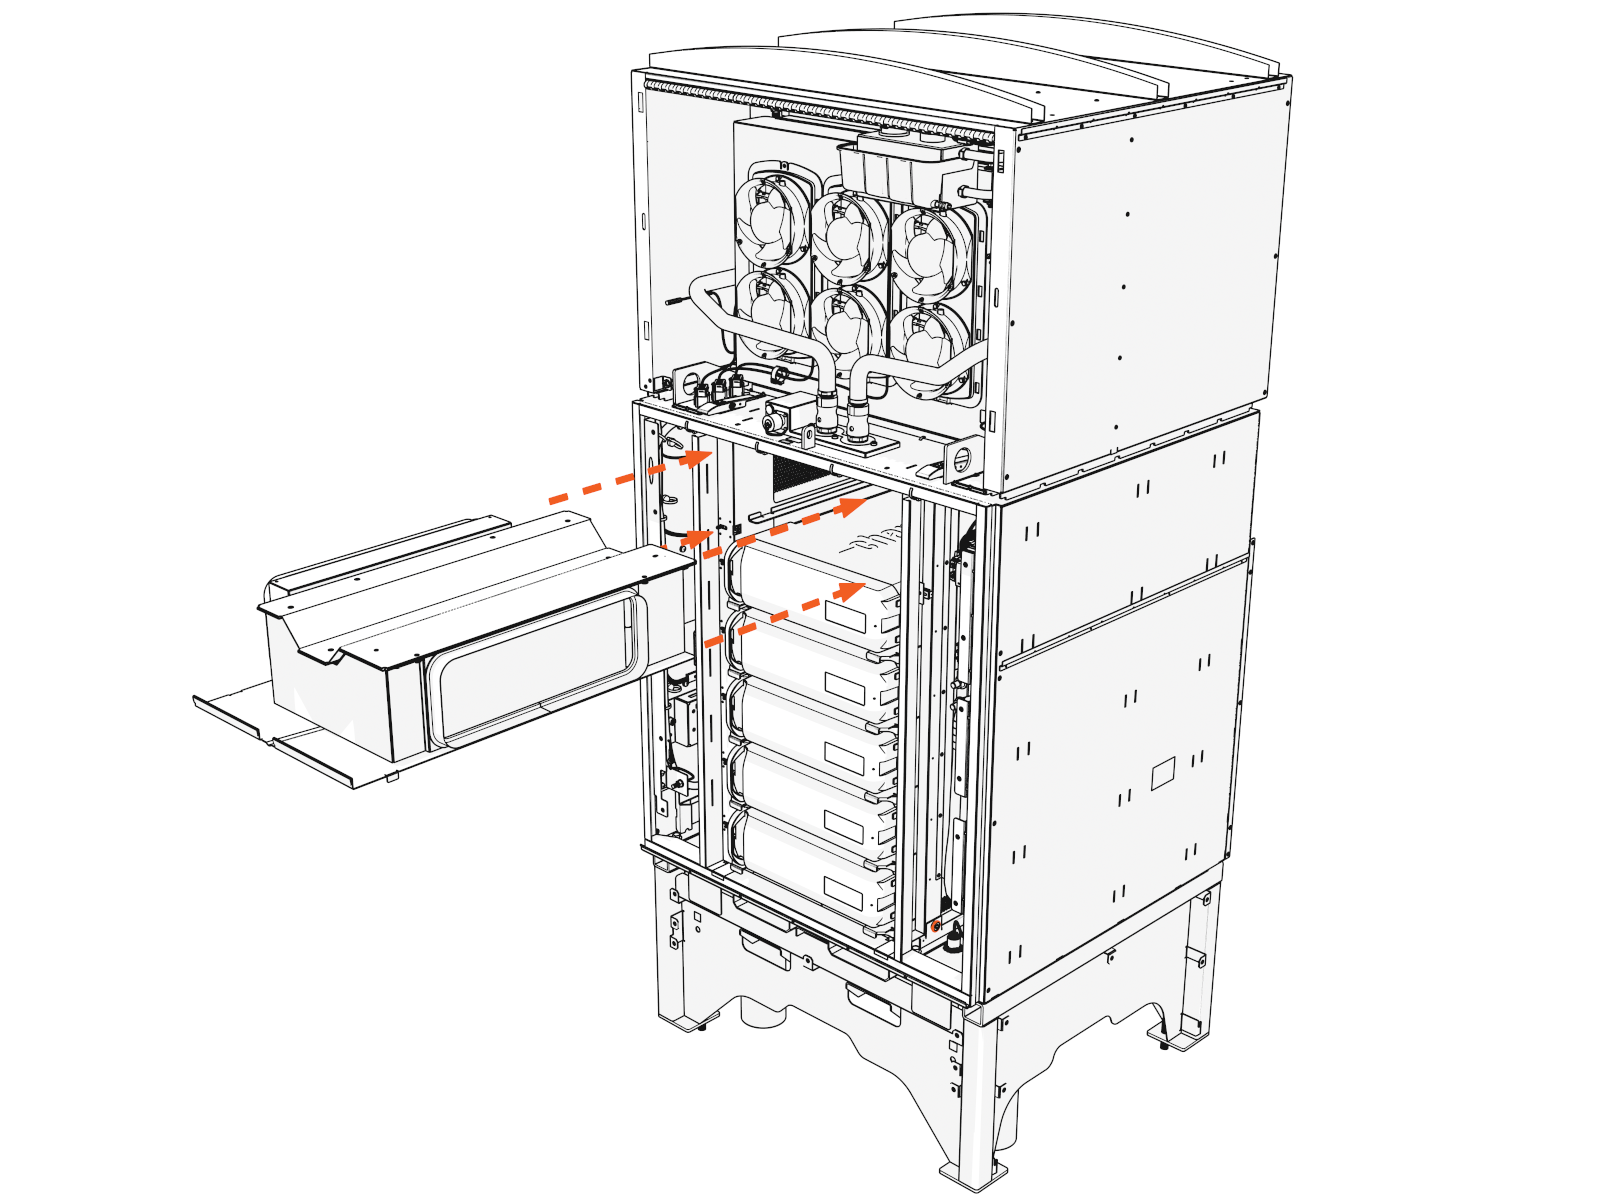
Power Module Installation
To install the Power Modules, complete the following steps:
-
Remove caps from the coolant ports.

-
Position the Power Module with the data connector above the coolant port to align with the module mate.

-
Insert the Power Module onto the rack and slide it in until the latch locks.
 Install Power Modules from lowest to highest.
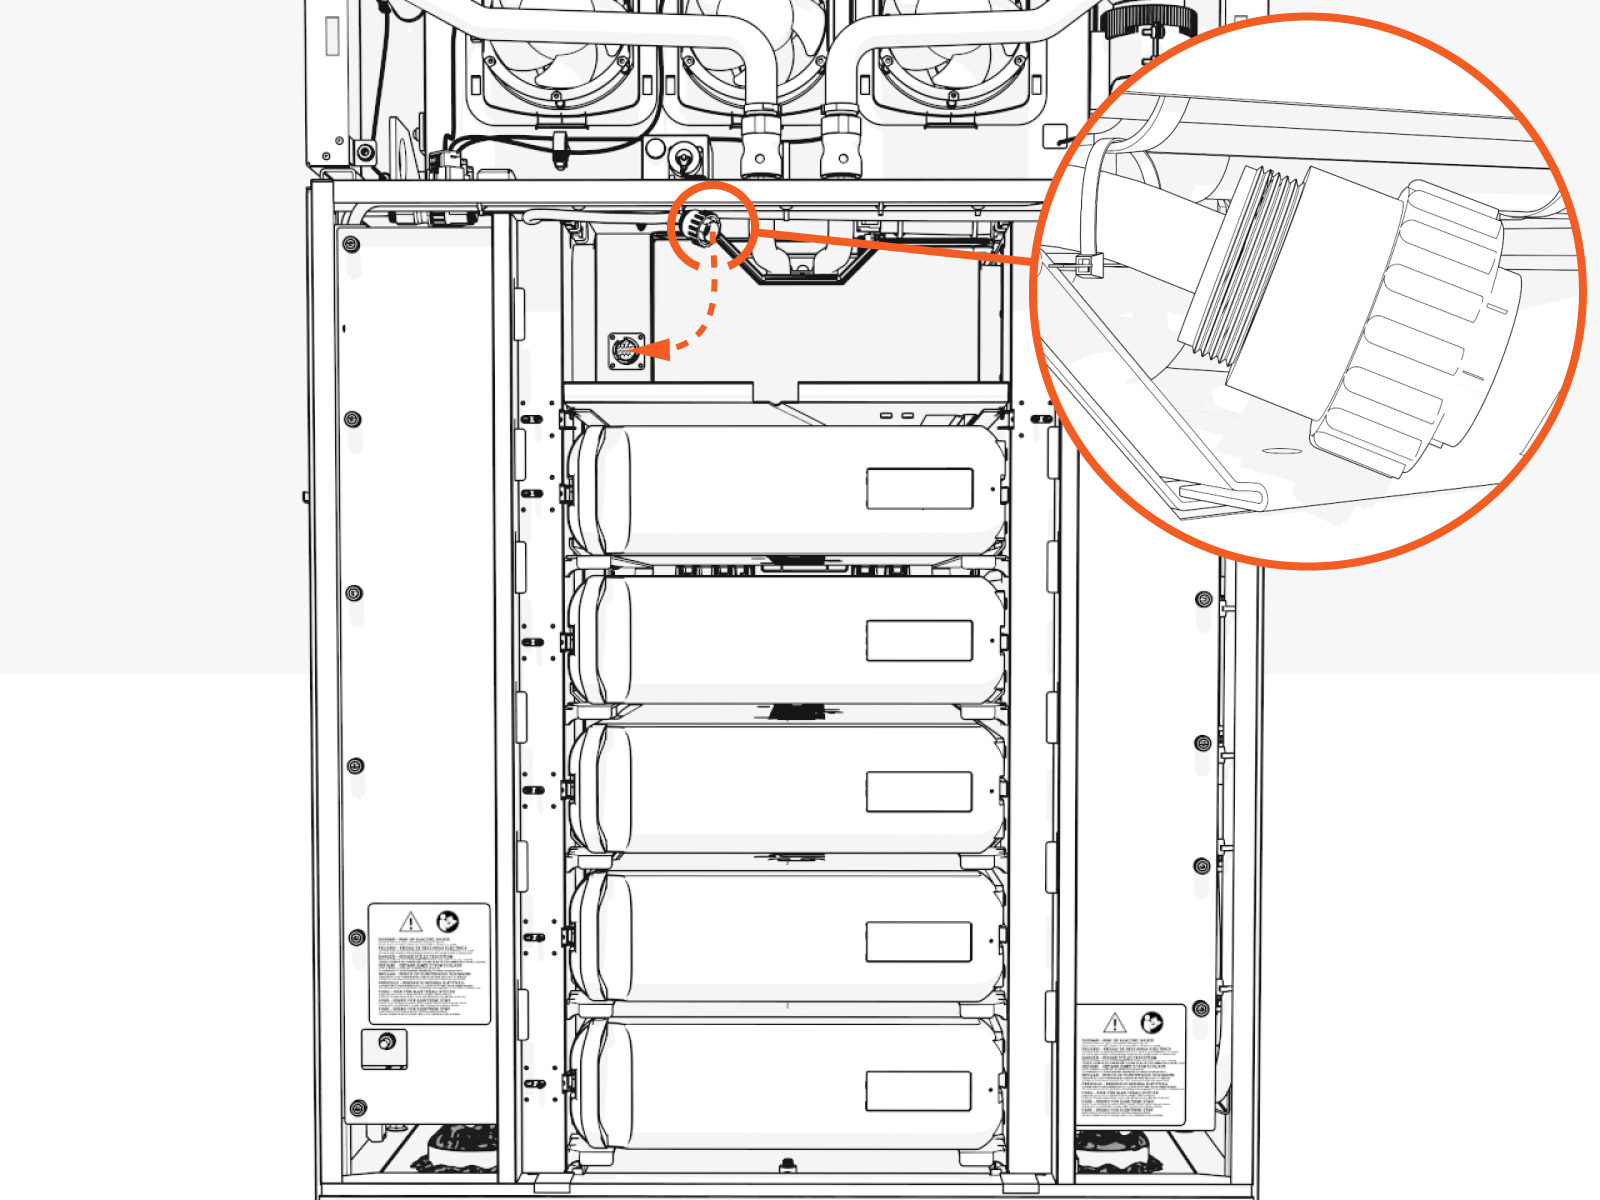
Install the Lower Heat Exchanger
To install the lower heat exchanger, complete the following steps:
Cut any zip ties to release the round multipin power connector.
-
Slide the heat exchanger onto the top shelf.
-
Reconnect the round multipin connector (front left). Push down and rotate the outer ring to screw down.
Push-pull to test.
Fill Coolant
To fill coolant, complete the following steps:
Open Reservoir
To open the coolant reservoir, complete the following steps:
-
Open the coolant reservoir to release pressure. Loosen the captive screw.

-
Pull the left side of the reservoir to rotate out. Hold it open.

-
Push down and unscrew the cap.

Pour Coolant
To pour the coolant, follow the instructions below:
Refill
-
Position the stepladder so you can view the top of the coolant reservoir.
-
Hold the reservoir open and place the funnel into it.
-
Pour in new coolant. Fill to the bottom of the neck or to the maximum level indicated on the reservoir.

-
Replace the cap.
-
Slowly release the reservoir back into position. Tighten the captive screw by hand.
Deaerate
Deaerate to clear any trapped air that may have entered the coolant hoses during service. You must power on the Power Block to do this. If you fail to do so, you may impair performance and damage components.
-
If you removed them, reinstall all Power Modules. (For details, see the Power Module topic (in this guide) or under the Power Block Service Guide.)
-
If you removed it, reinstall the front door. (For details, see the Panels, Doors, and Safety Shields topic under the Power Block Service Guide.)
-
Reinstall the removed panels. (For details, see the Panels, Doors and Safety Shields topic under the Power Block Service Guide.)
-
Power on. (For details, see Appendix: Set Up Power Block .)
RISK OF SHOCK
-
Do not turn on Power Block if other people are installing or servicing any other connected units.
-
First check that all connected units are off and no work is being performed. Inform everyone on-site of your plan and timing, follow lock out/tag out procedures, and ensure that everyone remains safe.
-
Alternatively, you may postpone the step to drawdown and deaerate until it is safe to do so. Continue to close up the Power Block now. Then after all units are installed and the site is clear to power on the Power Block, follow the steps to drawdown and deaerate.
-
-
The Power Block startup runs the deaeration sequence.
-
Alternatively, log in to the ChargePoint Platform Dashboard (na.chargepoint.com or eu.chargepoint.com).
-
Find and select the Power Block you are servicing.
-
Go to Status/Actions tab and select the Purge Coolant System button.
-
If coolant level is low, top off the coolant.
Top Off
-
Remove the front upper panel. (For details, see the Panels, Doors and Safety Shields topic under the Power Block Service Guide.)
-
Top off the coolant.
-
Place the cap.
-
Slowly release the reservoir back into position. Tighten the captive screw by hand.
Reinstall Transparent Shields
To reinstall the transparent shields, complete the following steps:
-
Align the tabs on the transparent panel with the slots in the racks. Insert the tabs into the slots.
For the left shield only, align the hole over the door switch.

-
Tighten the captive screws.

-
Slide the heat exchanger onto the top shelf.
