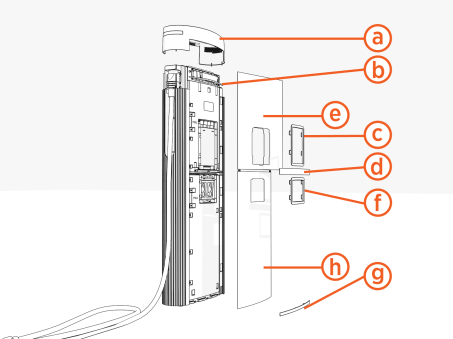
Determine Cover Type
-
Determine if the Power Link 1000 has preassembled covers or unassembled covers (vinyl signs, trims, and top cap).
Preassembled Covers
Unassembled Covers
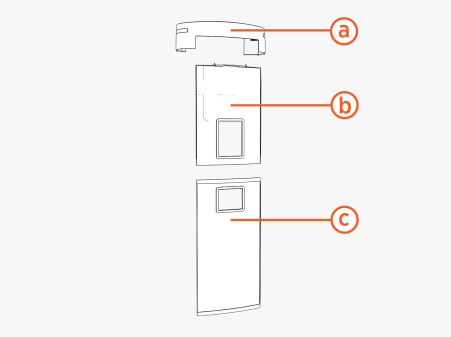
(a) Top cap
(b) Upper cover
(c) Lower cover
(a) Top cap
(b) Upper trim
(c) Interactive display trim (optional)
(d) Middle trim
(e)Upper vinyl sign
(f) Holster trim
(g) Lower trim
(h) Lower vinyl sign
-
Proceed to the appropriate section to remove the Power Link 1000 lower front cover:
Remove Preassembled Lower Cover
Skip this section if the Power Link 1000 has unassembled covers.
-
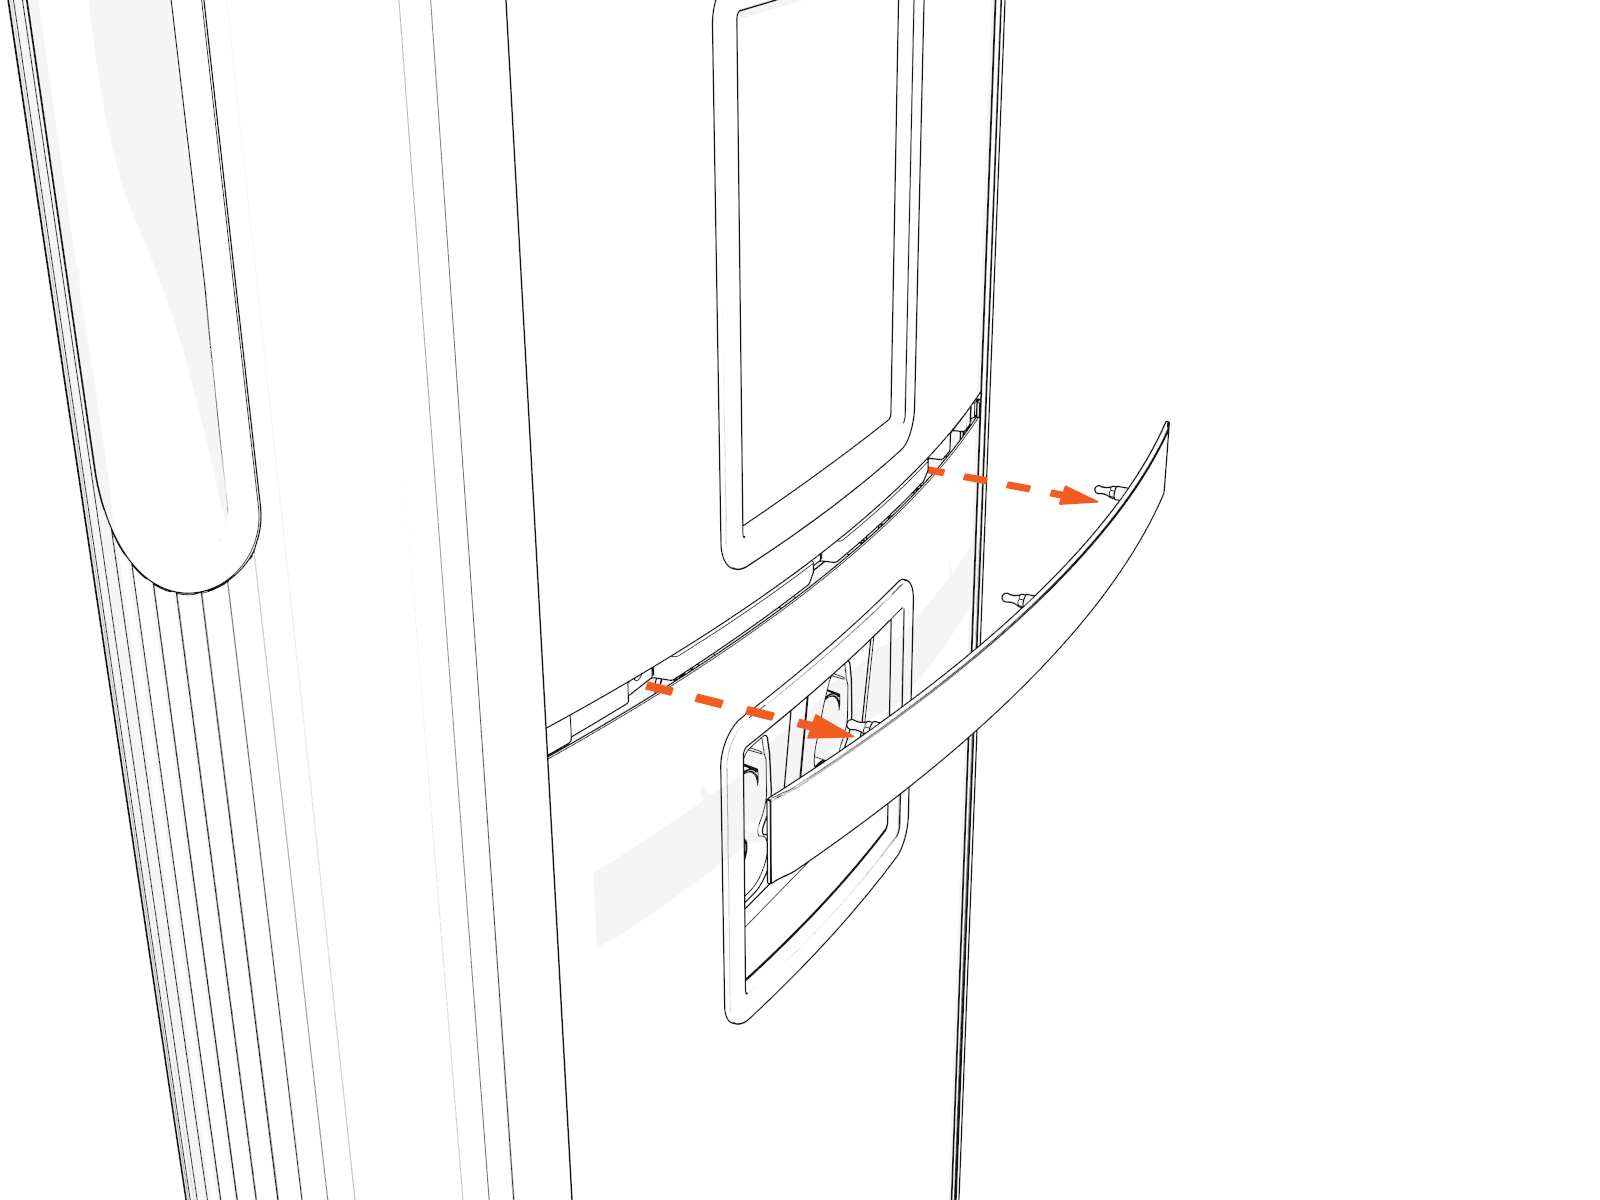
Study the diagram below to understand how the front covers are secured. Pins and hooks on the back of the covers fit into brackets on internal Power Link 1000 doors.
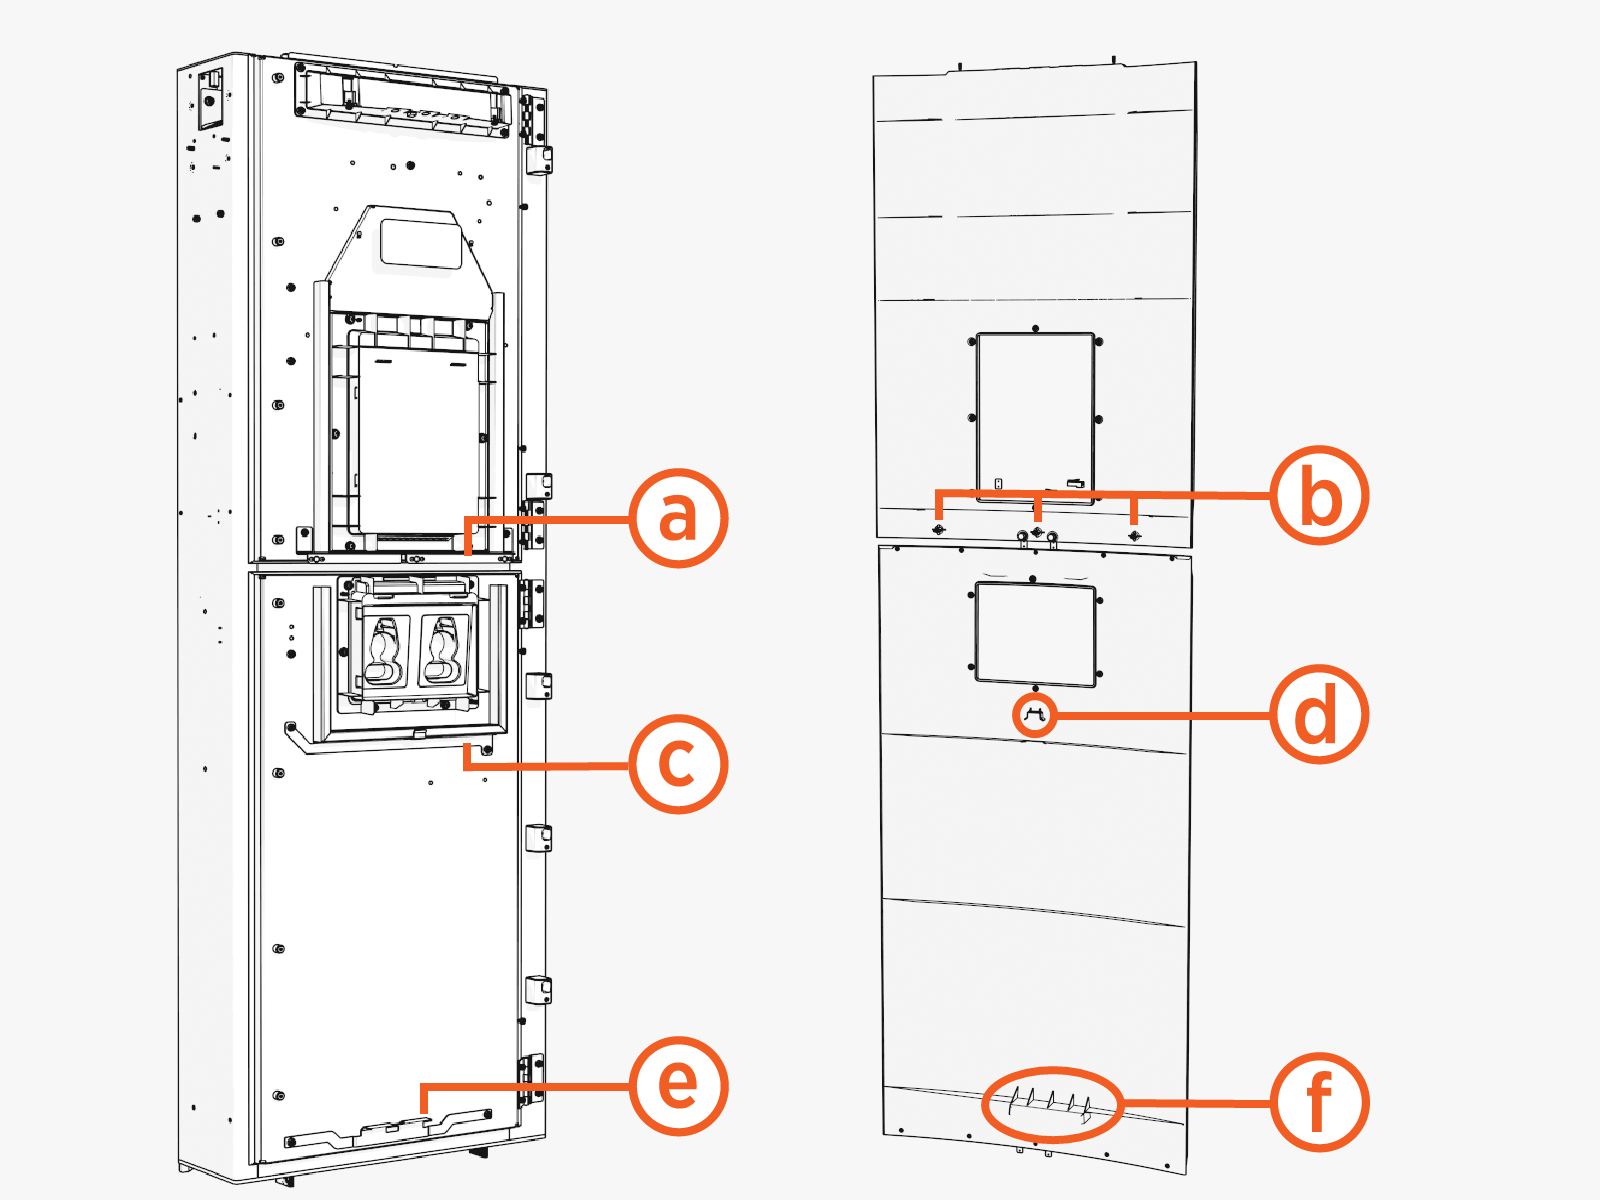
Upper door and cover:
(a) Upper bracket with three clips
(b) Three pins
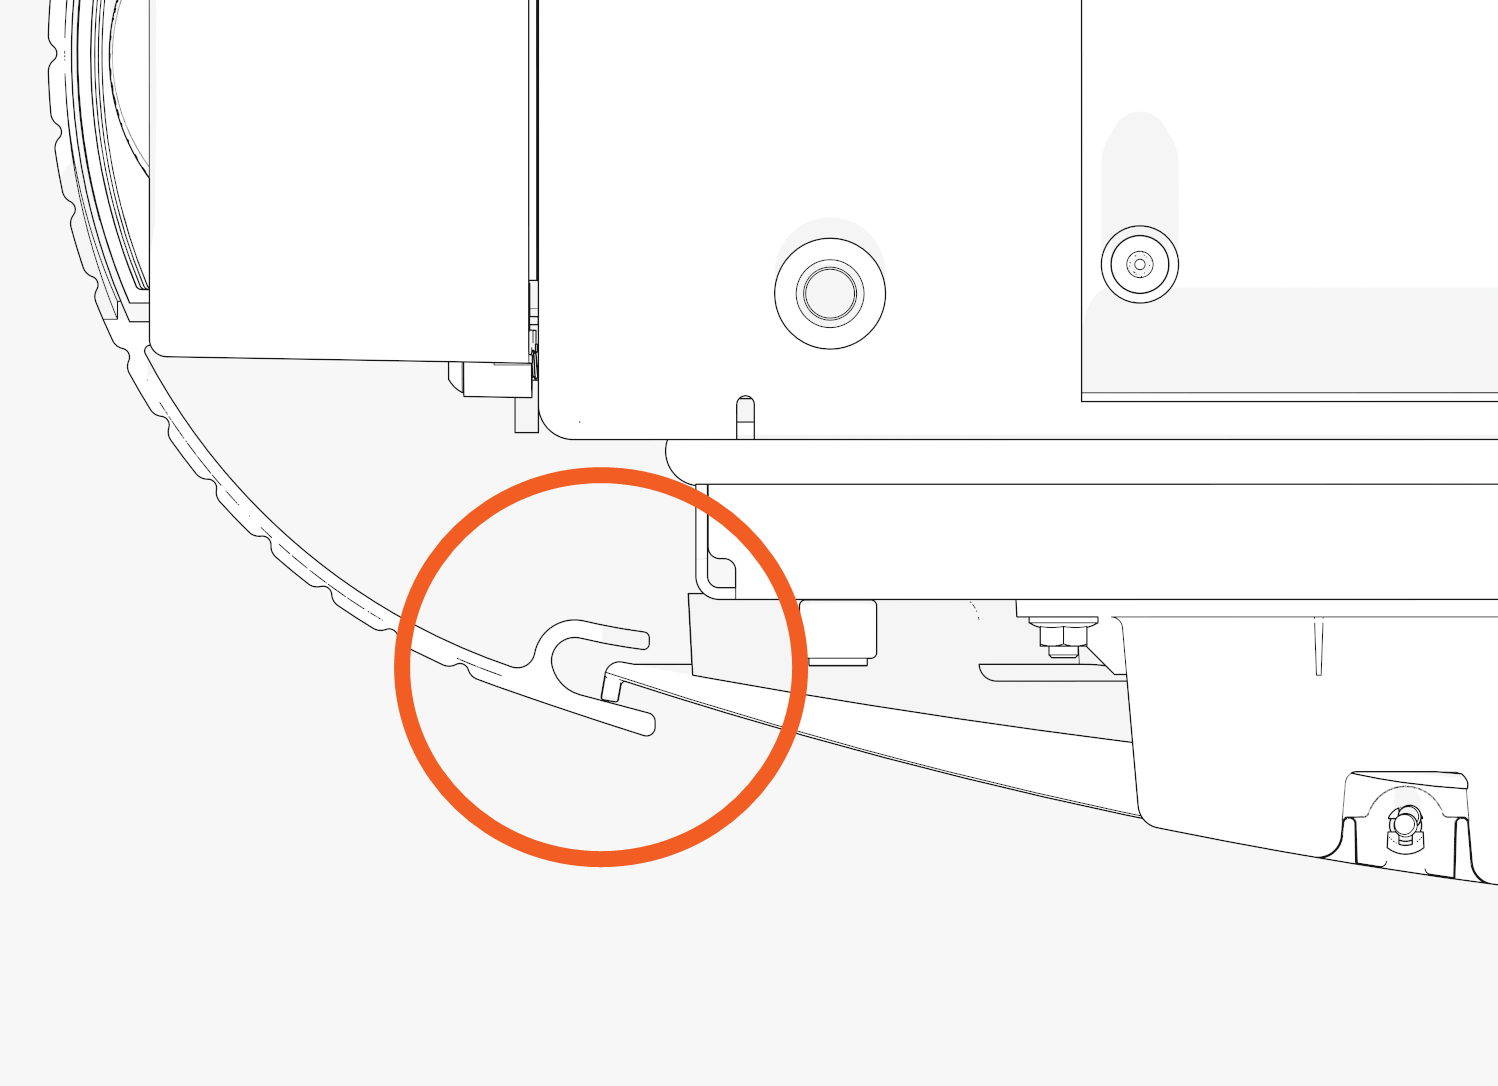
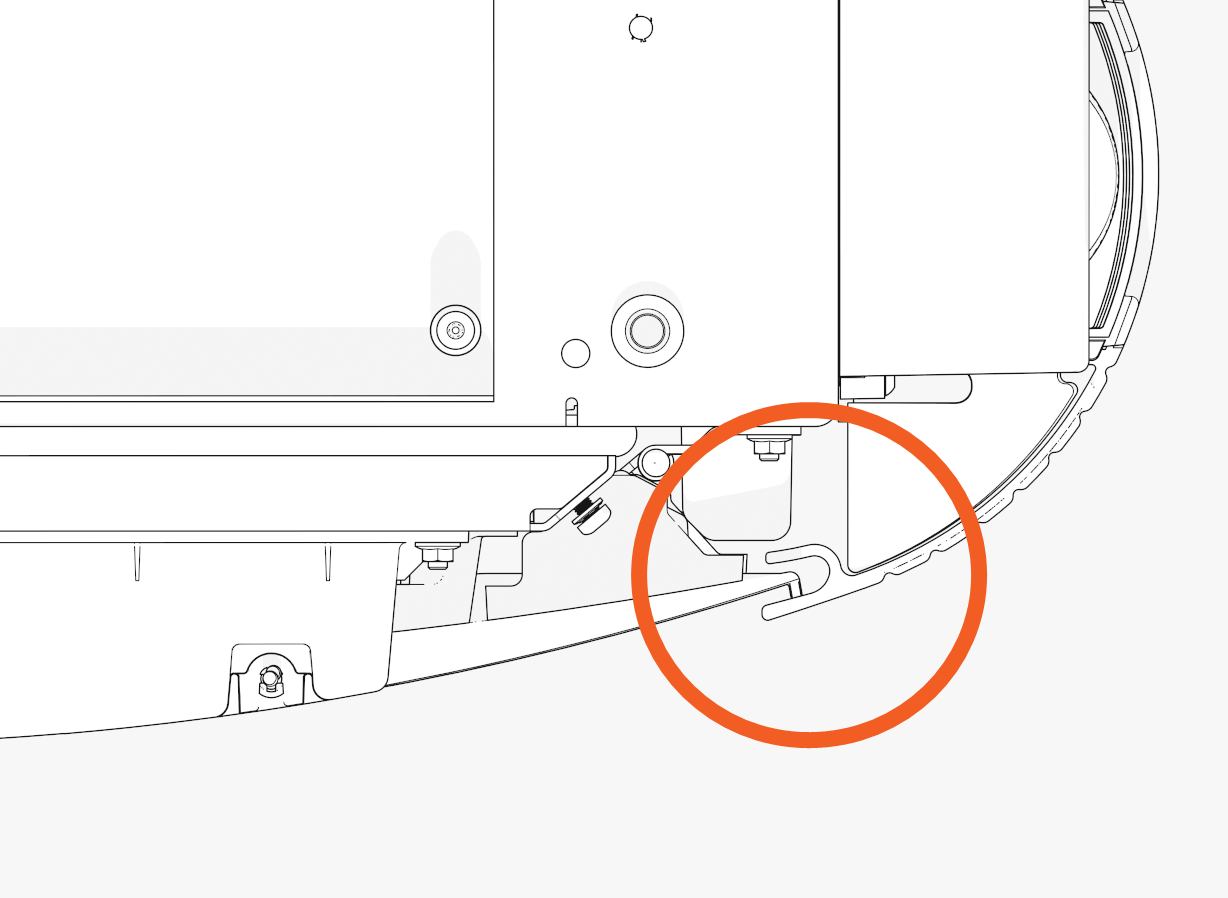
Lower door and cover:
(c) Middle bracket
(d) Middle hook
(e) Lower bracket(f) Lower hook
-
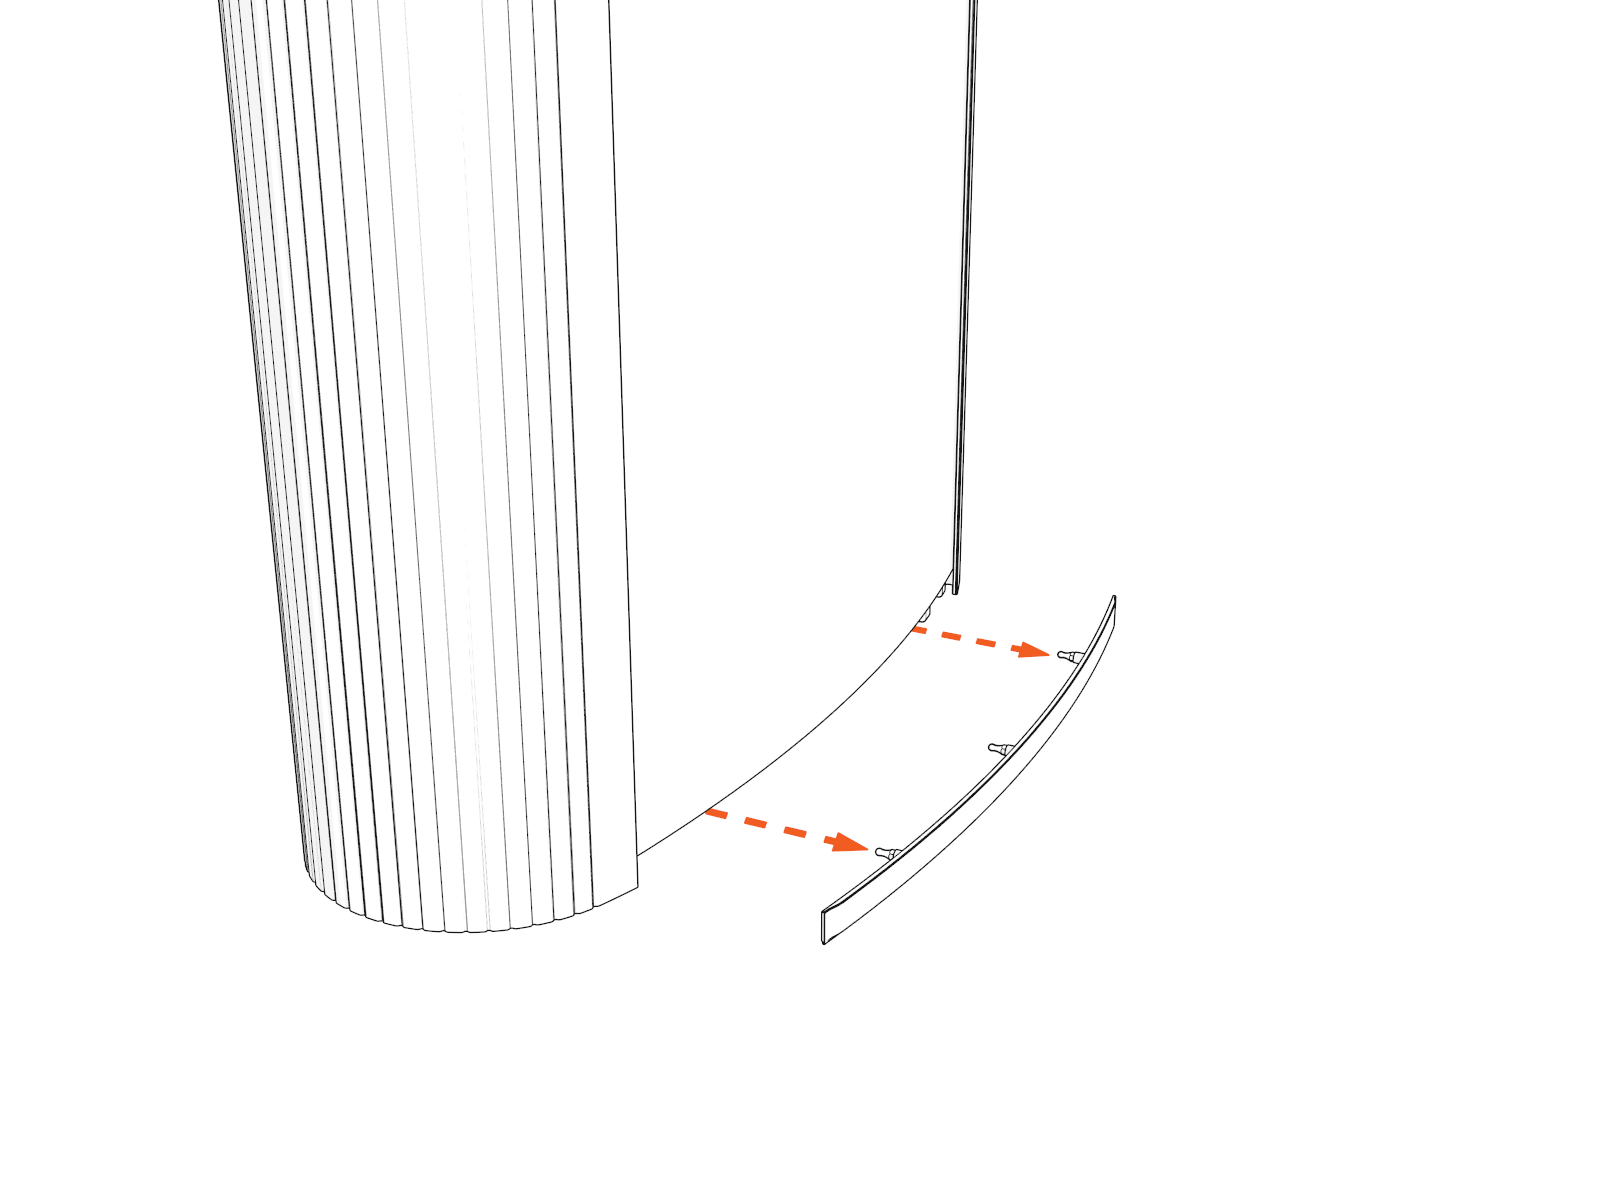
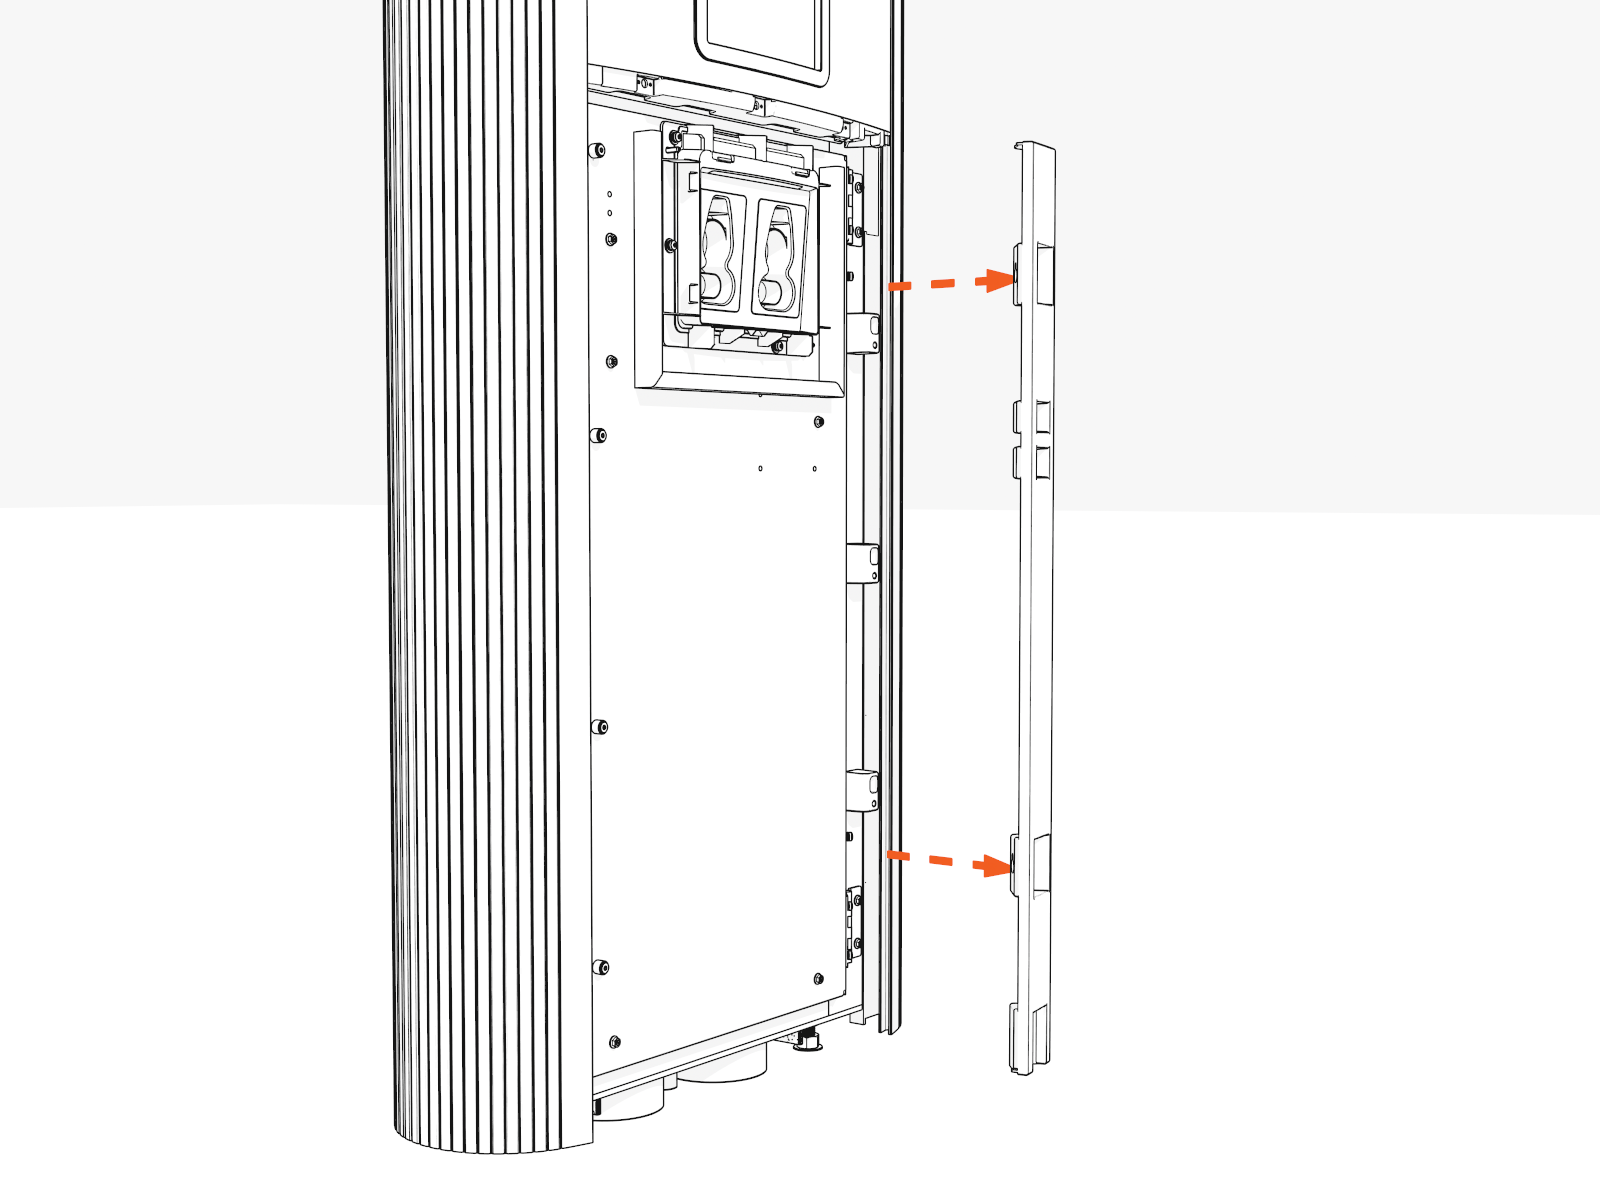
Study the diagram below to understand how the front covers fit into grooves at the left and right sides of the Power Link 1000. Notice the location of the grooves when viewed from the top.
Left
Right
-
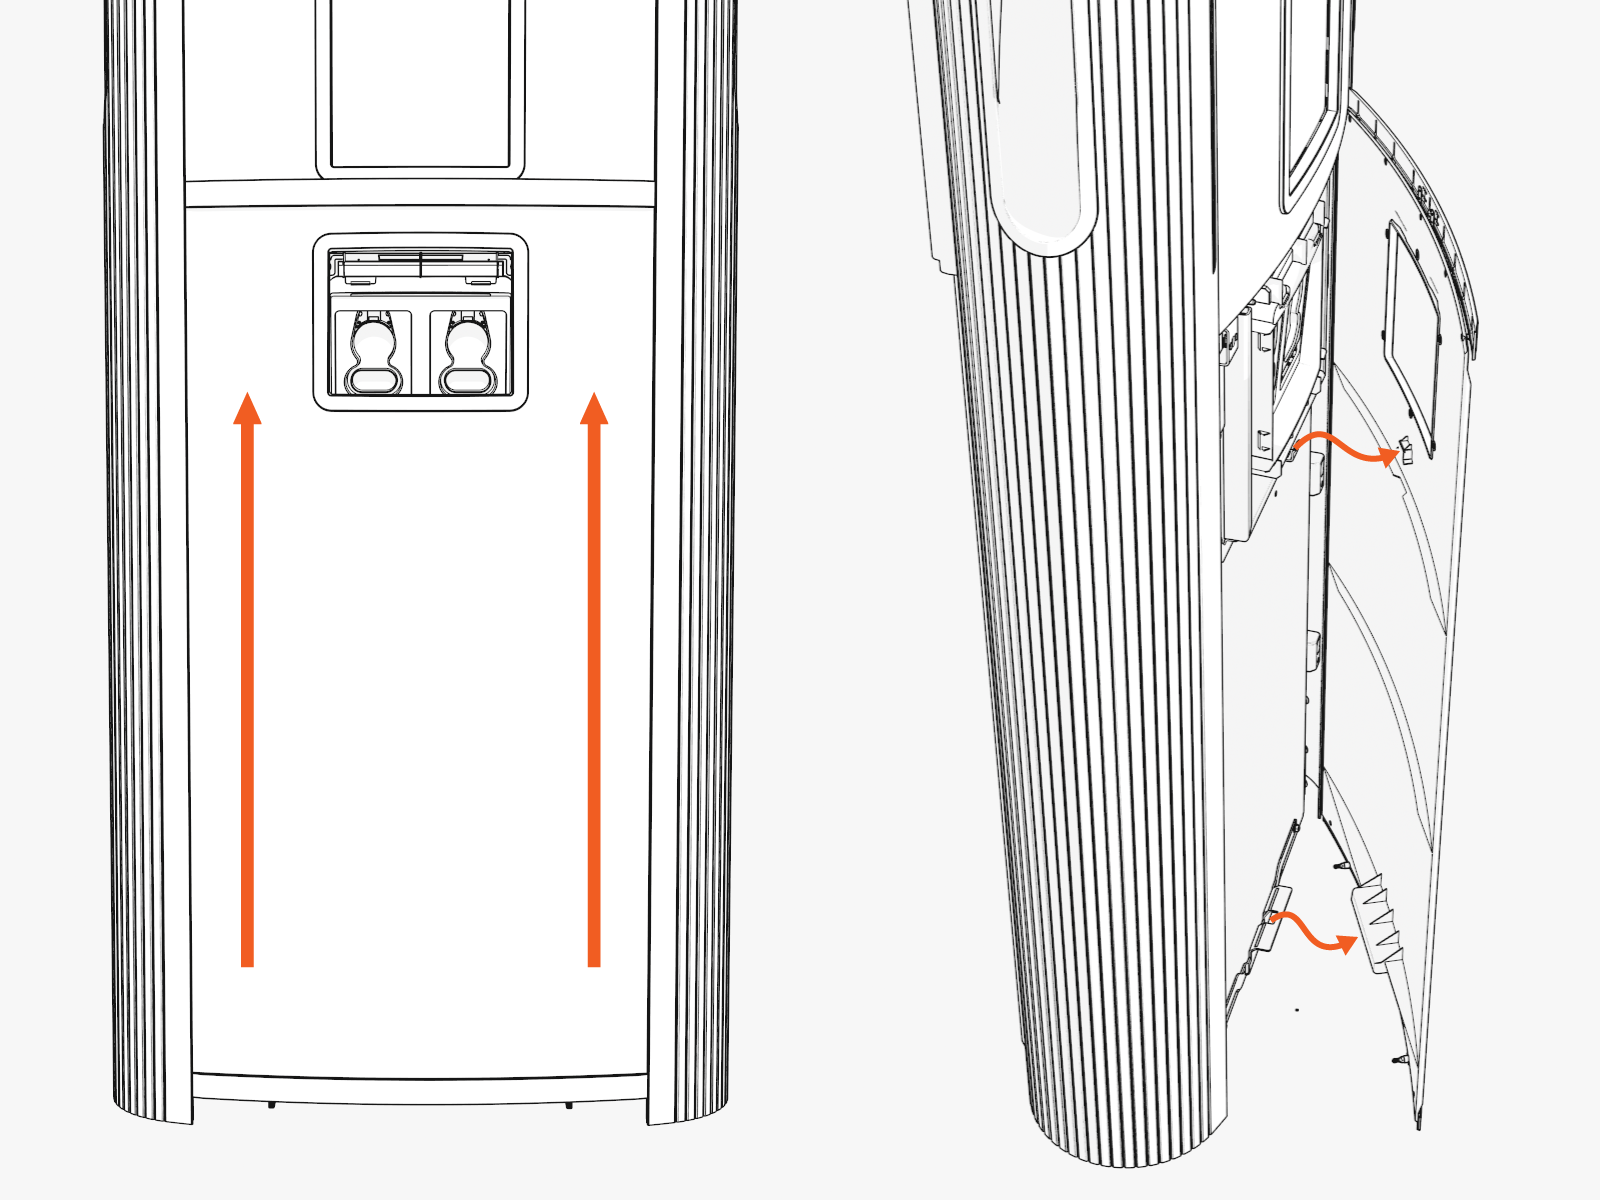
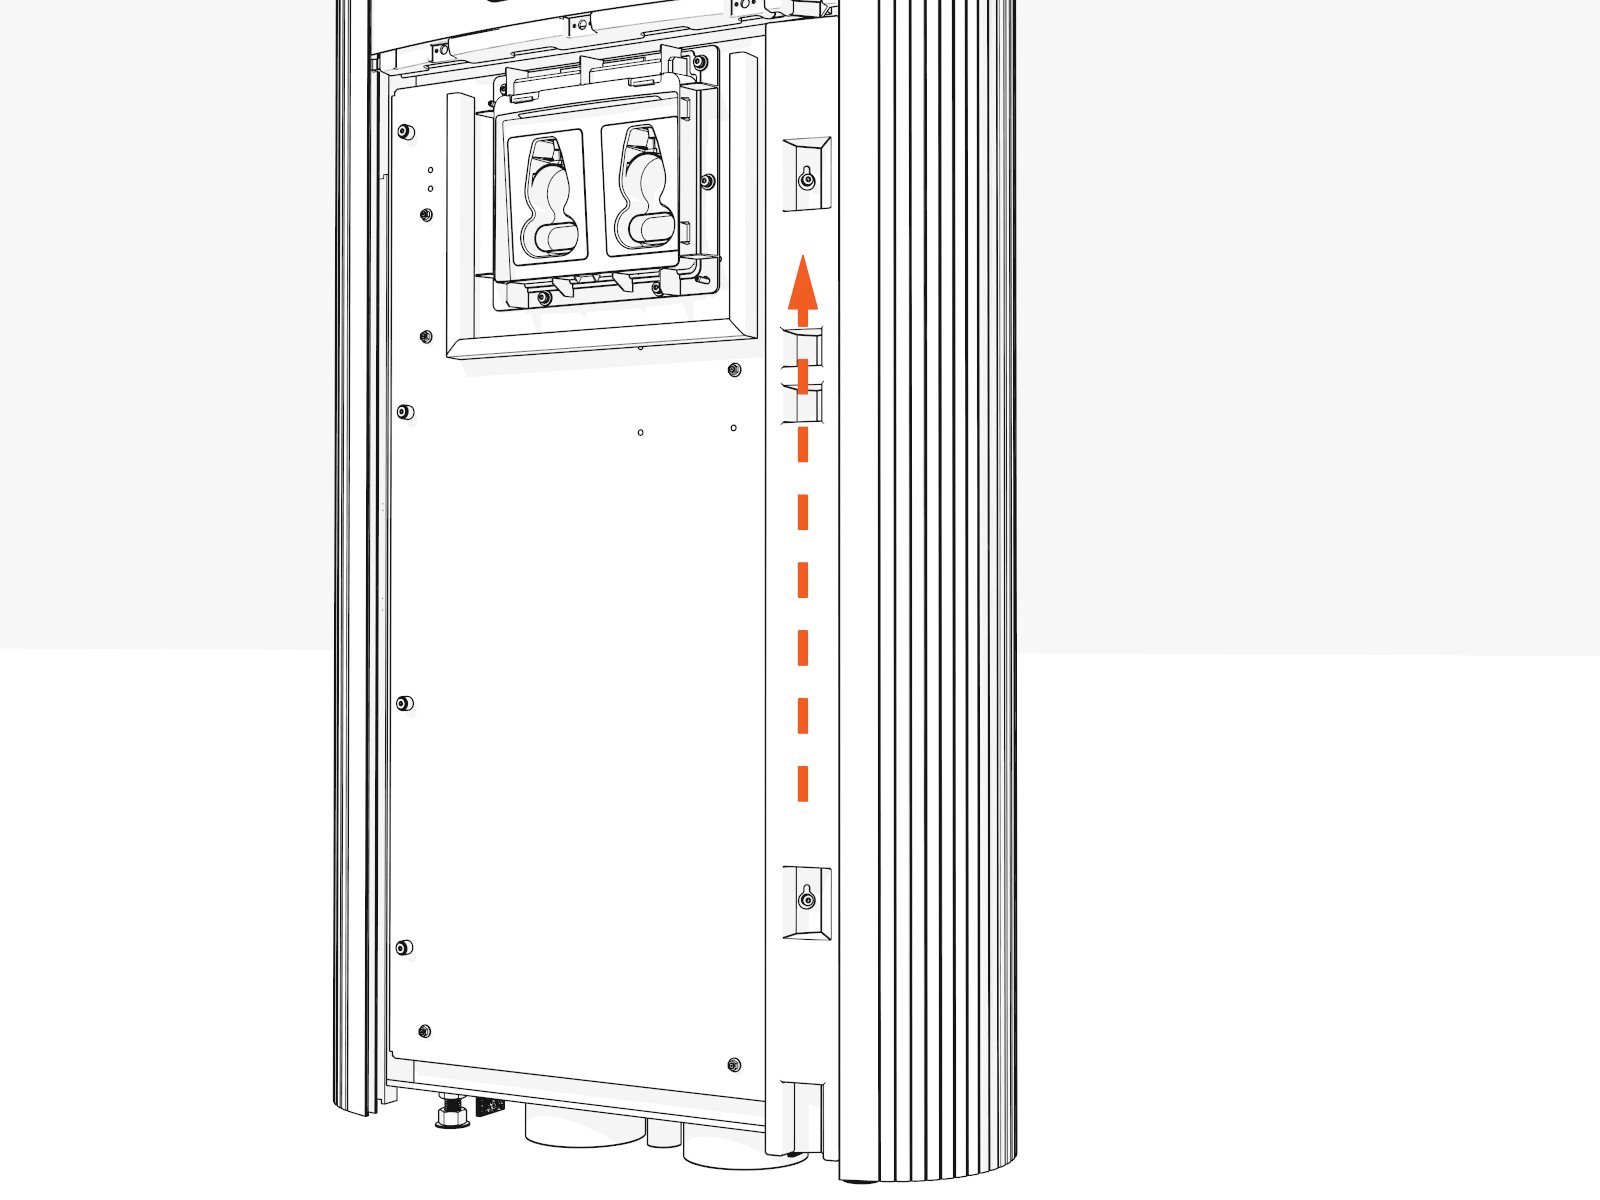
Slide the lower cover up. While sliding up, press on the lower edge of the holster trim and lower edge of the cover to release the hooks behind the cover. Remove the cover.
-
Push inwards along one side of the cover to release it from the side groove. As the cover bows out, grip the cover at its top edge. Pull the cover away out and away from the other side groove.
Remove Unassembled Lower Cover
Skip this section if the Power Link 1000 has assembled covers.
-
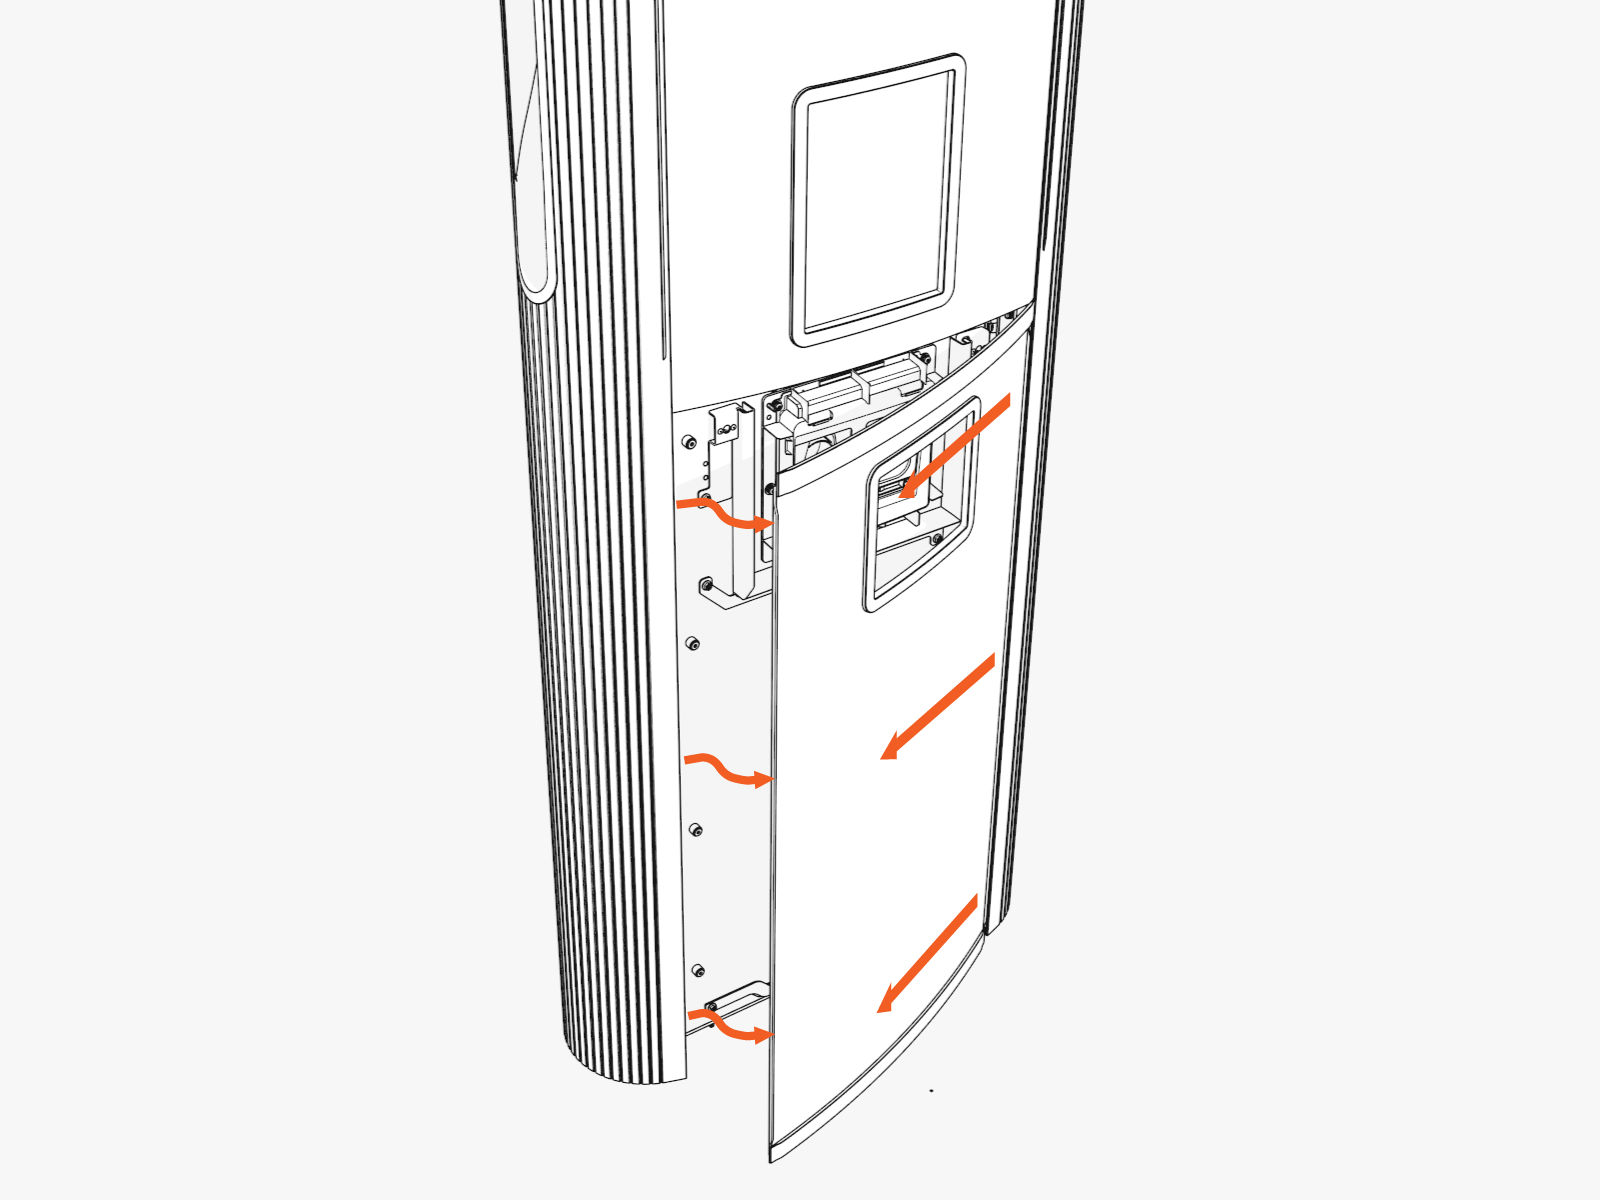
Pull out the middle trim.
-
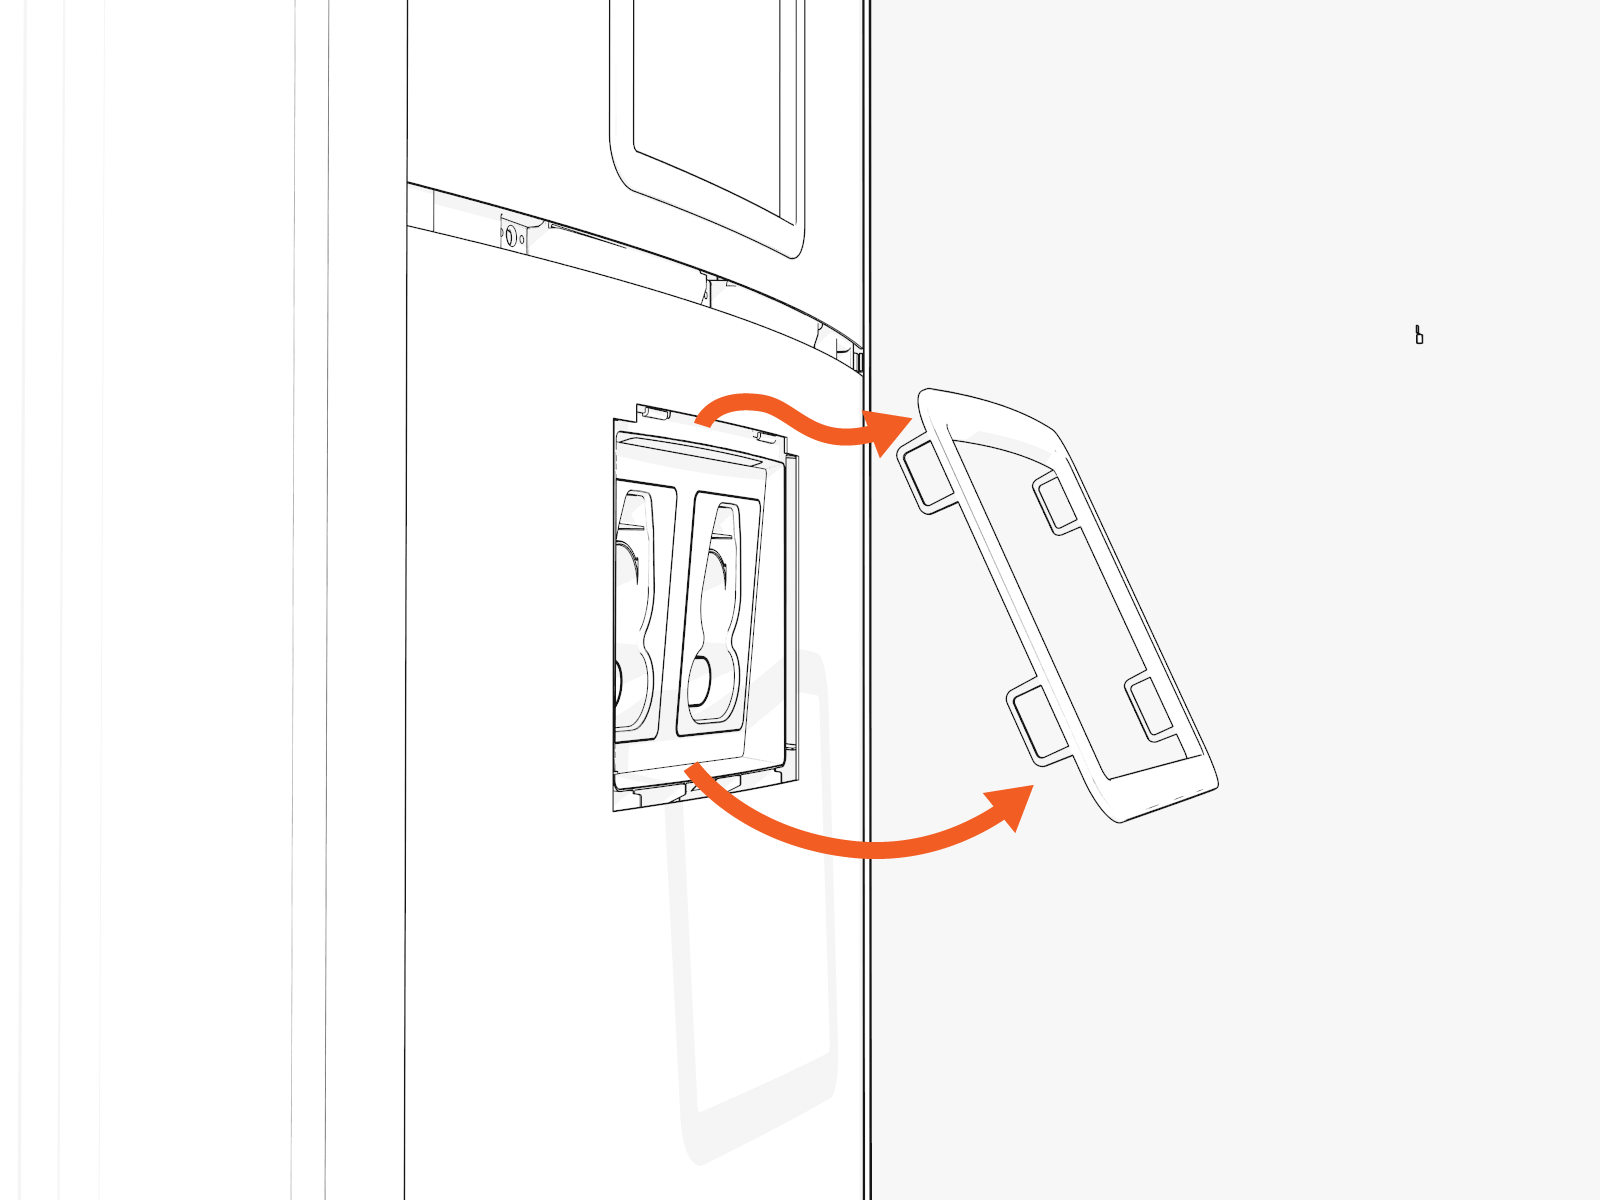
Hold the bottom of the holster trim. Pull down, up, and out.
-
Pull out the lower trim.
-
Push inwards along one side of the lower vinyl sign to release the sign.
Remove Lower Door
-
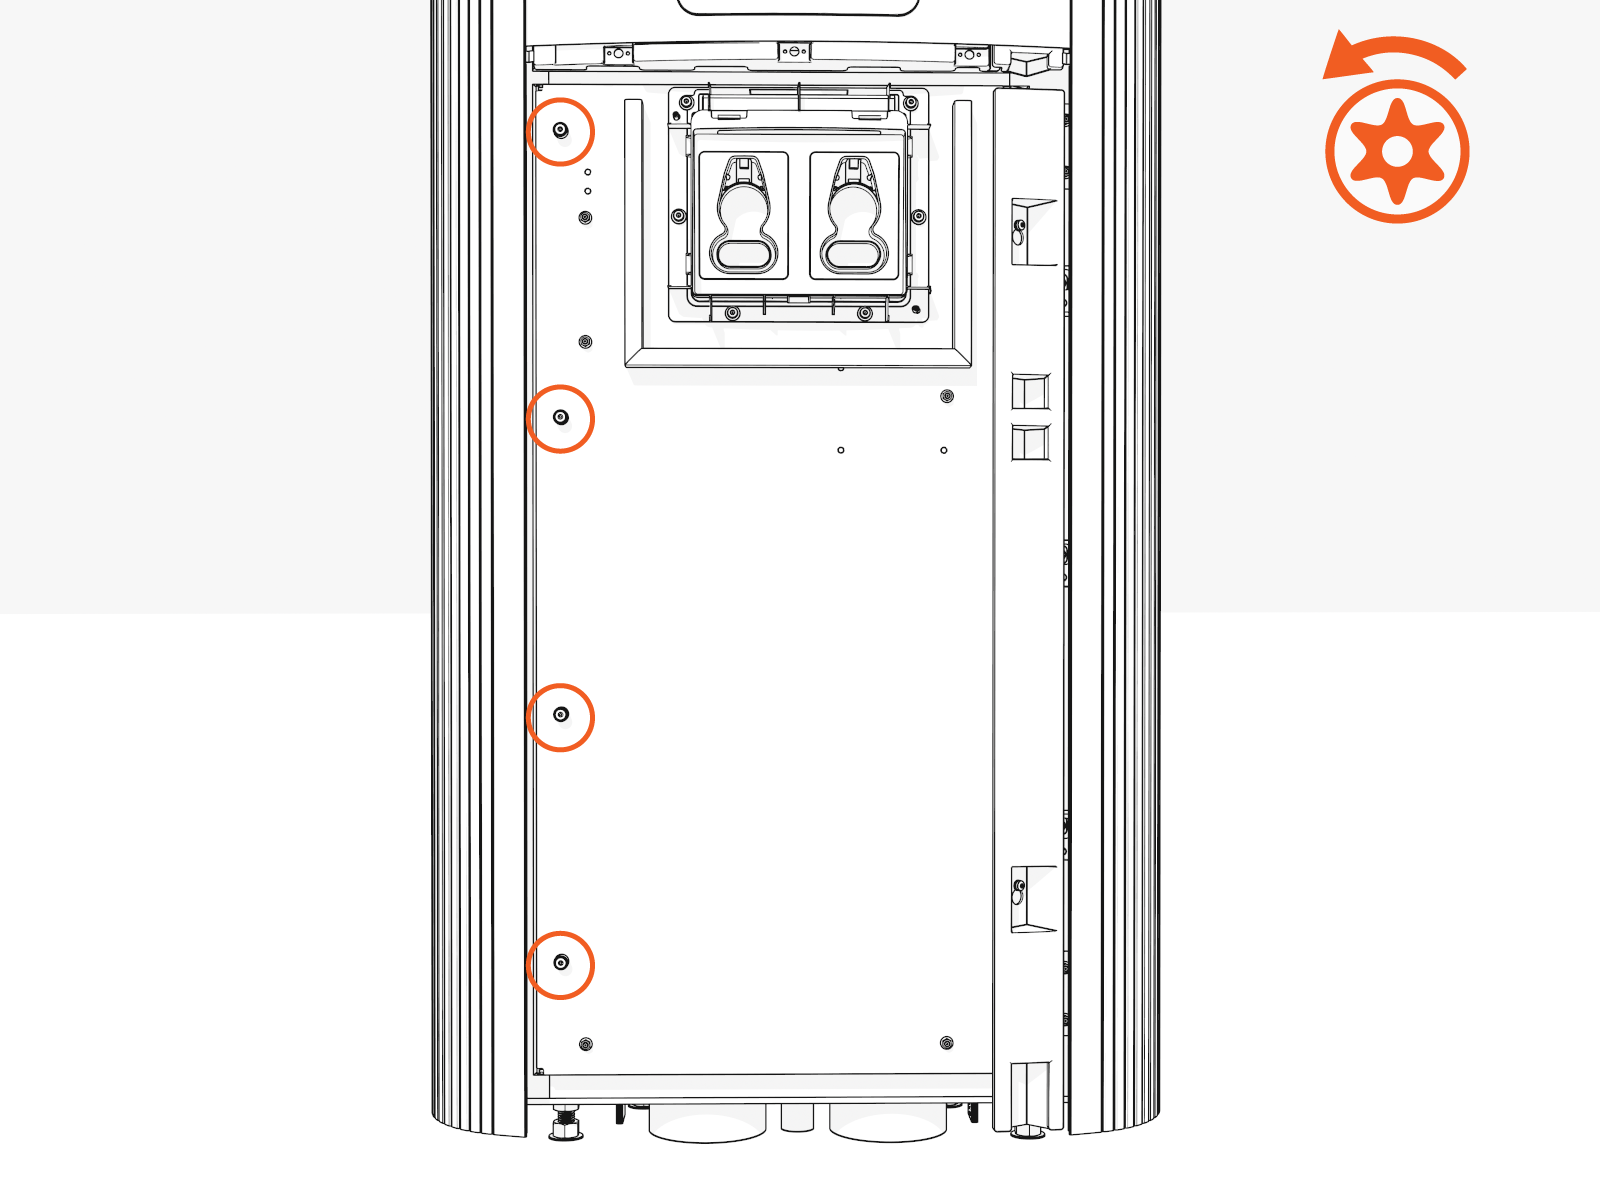
Loosen two screws securing the door bracket.

-
Slide the door bracket upwards.
-
Pull the door bracket away from the pedestal.
-
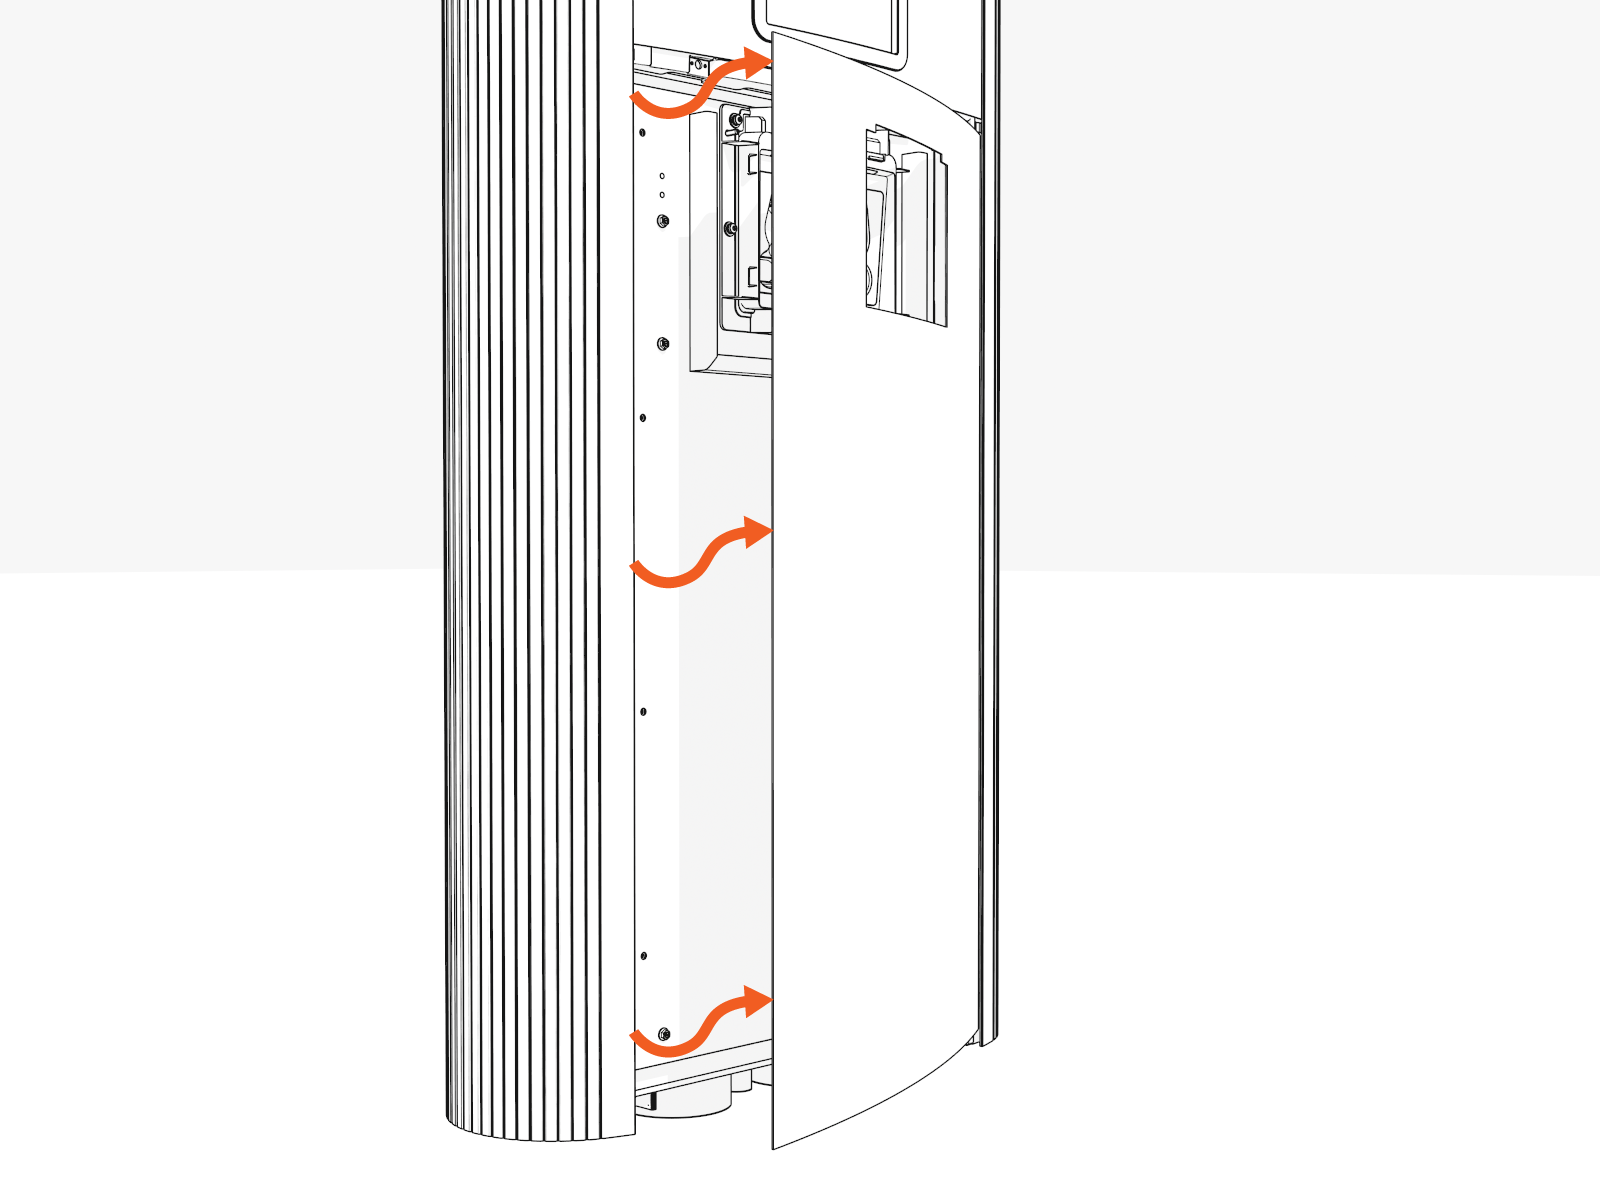
Remove four screws along the left side of the lower door.
-
Open the lower door.