Replace the Power Module
To replace a power module, complete the following steps:
Required Tools and Materials
|
|
T25 screwdriver |
|
Headlamp |
Power off the Station
Power off at the breaker panel and lock out/tag out before continuing work.
-
Before any procedure, disconnect the power. If station is paired, disconnect the power to both paired charging stations.
-
Follow local code and site lockout/tagout procedure to de-energize the station.
-
Wait for energy to dissipate (approximately five minutes).
-
Keep power off until all covers and panels are reinstalled and the work is complete.
Failure to follow these instructions can result in serious injury, loss of life, or property damage.
Before You Begin
Remove the Front Lower Panels
-
Use a T25 screwdriver, to loosen the screws from the lower front panel.
Torque the set screws to 2.8 Nm (25 in-lb).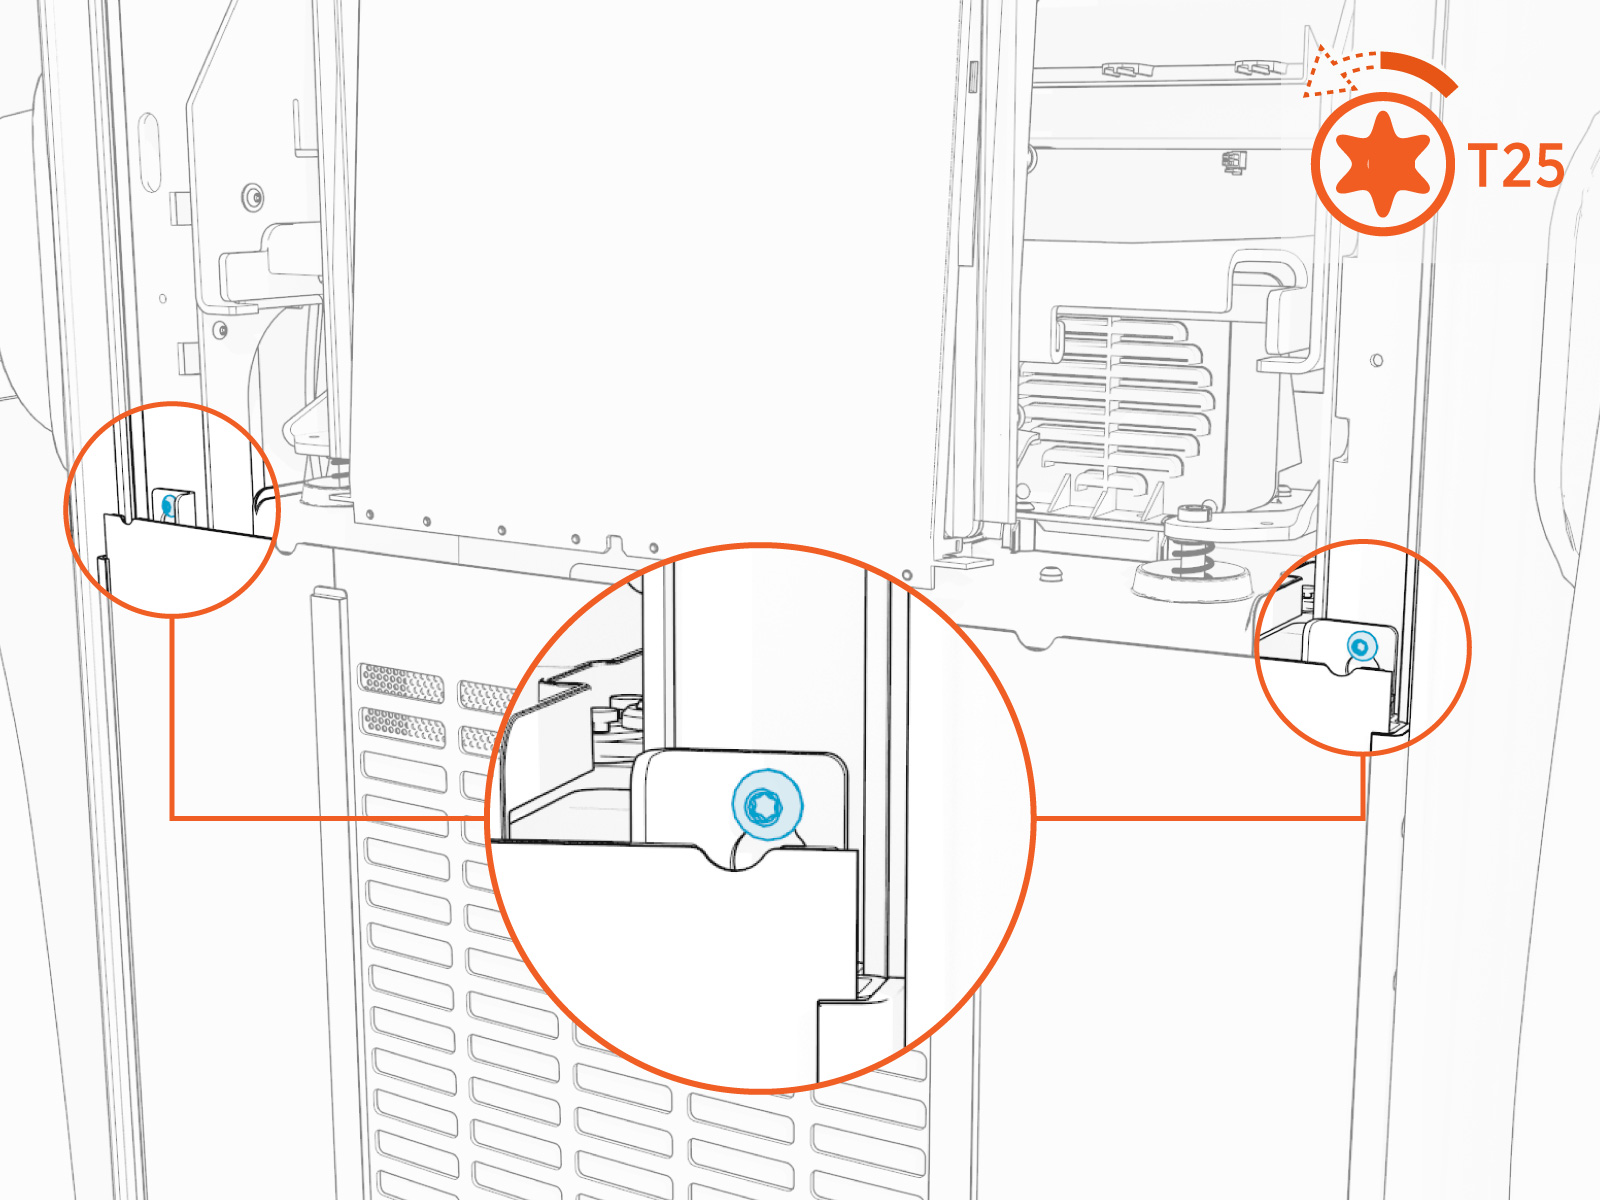
-
Lift the panel upwards to disengage from the keyslots and remove the lower front panel.

Remove the Power Module
To remove the Power Module, perform the following steps:
-
Tilt the bottom edge of the touchscreen upward until it forms a 90-degree angle. While one person holds the touchscreen in position, the second person proceeds to the next step.

-
Using both hands, press the release bar on the Power Module mechanism and lift it. While keeping the bar pressed, gently raise the mechanism to disengage it from the guide posts and connectors.

-
Verify that the mechanism is completely disconnected from all Power Module connectors.

-
On the bottom-right of the Express 280, press down and hold the yellow release latch, then pull the tray out of the station.
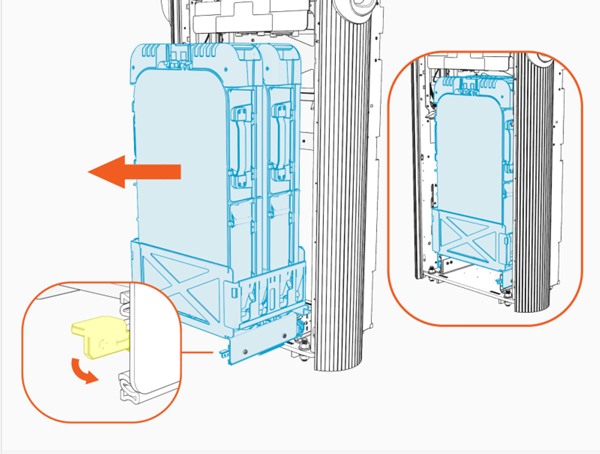
-
With two people, use the side handles to lift and remove the Power Module from its tray. Carefully rest it flat on the ground.

Install a Power Module
To install a Power Module, perform the following steps:
-
Using two people, lift the Power Module by its side handles and gently place it into its holder.
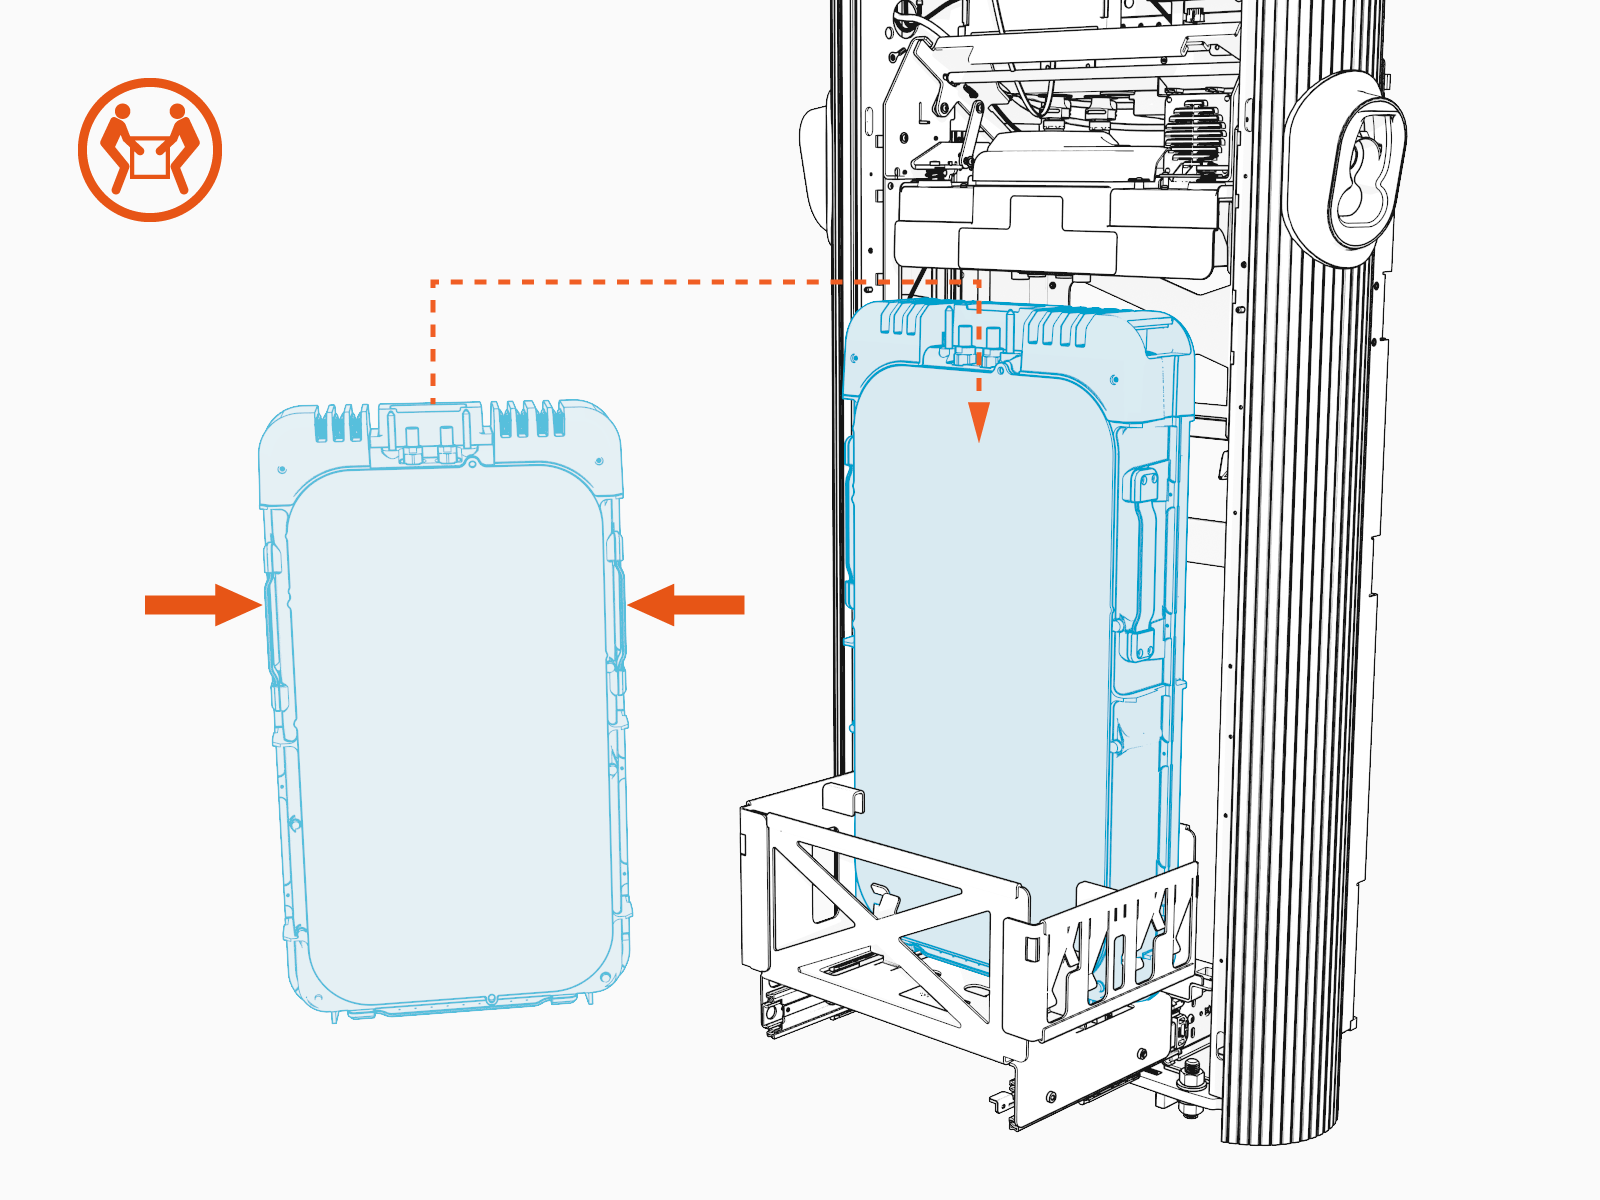
-
Install the rear Power Module first.
If only one Power Module is being installed, it must be installed in the rear holder.
-
Ensure the communication pins are closest to the back of the station.

-
Repeat the step for the second Power Module, if applicable.

-
If not already done, remove the safety caps from the coolant ports.

-
At the bottom right of the product, press down and hold the yellow release latch while pushing the Power Module tray into the station until it locks into place.

-
Using two hands, squeeze the Power Module mechanism’s release bar and lower it part of the way down while checking alignment with the ports and guide posts.

-
Lower the Power Module mechanism until you hear a click as the mechanism locks into place.
Ensure the mechanism is fully engaged with all Power Module connectors. The Power Module mechanism should fully cover the ridges on the Power Module’s top edge.
Reverse the steps in the Replace the Power Module and Remove the Top Front Panel procedures to install the panels.
Power On the Station
Once all parts are installed, power on the Express 280. The Express 280 runs a self test to verify that it can operate properly.
