Replace the Front or Rear LED Diffuser
To replace the front or rear LED diffuser, complete the following steps.
Required Tools and Materials
|
|
T25 Torx security screwdriver |
|
T25 Allen wrench or short multi-tool |


Power Off the Station
Power off at the breaker panel and lock out/tag out before continuing work.
-
Before any procedure, disconnect the power. If station is paired, disconnect the power to both paired charging stations.
-
Follow local code and site lockout/tagout procedure to de-energize the station.
-
Wait for energy to dissipate (approximately five minutes).
-
Keep power off until all covers and panels are reinstalled and the work is complete.
Failure to follow these instructions can result in serious injury, loss of life, or property damage.
Before You Begin
Remove the LED Diffuser
-
For the front LED diffuser:
-
Disconnect the LED cable “+DC5V” from the secondary display controller.
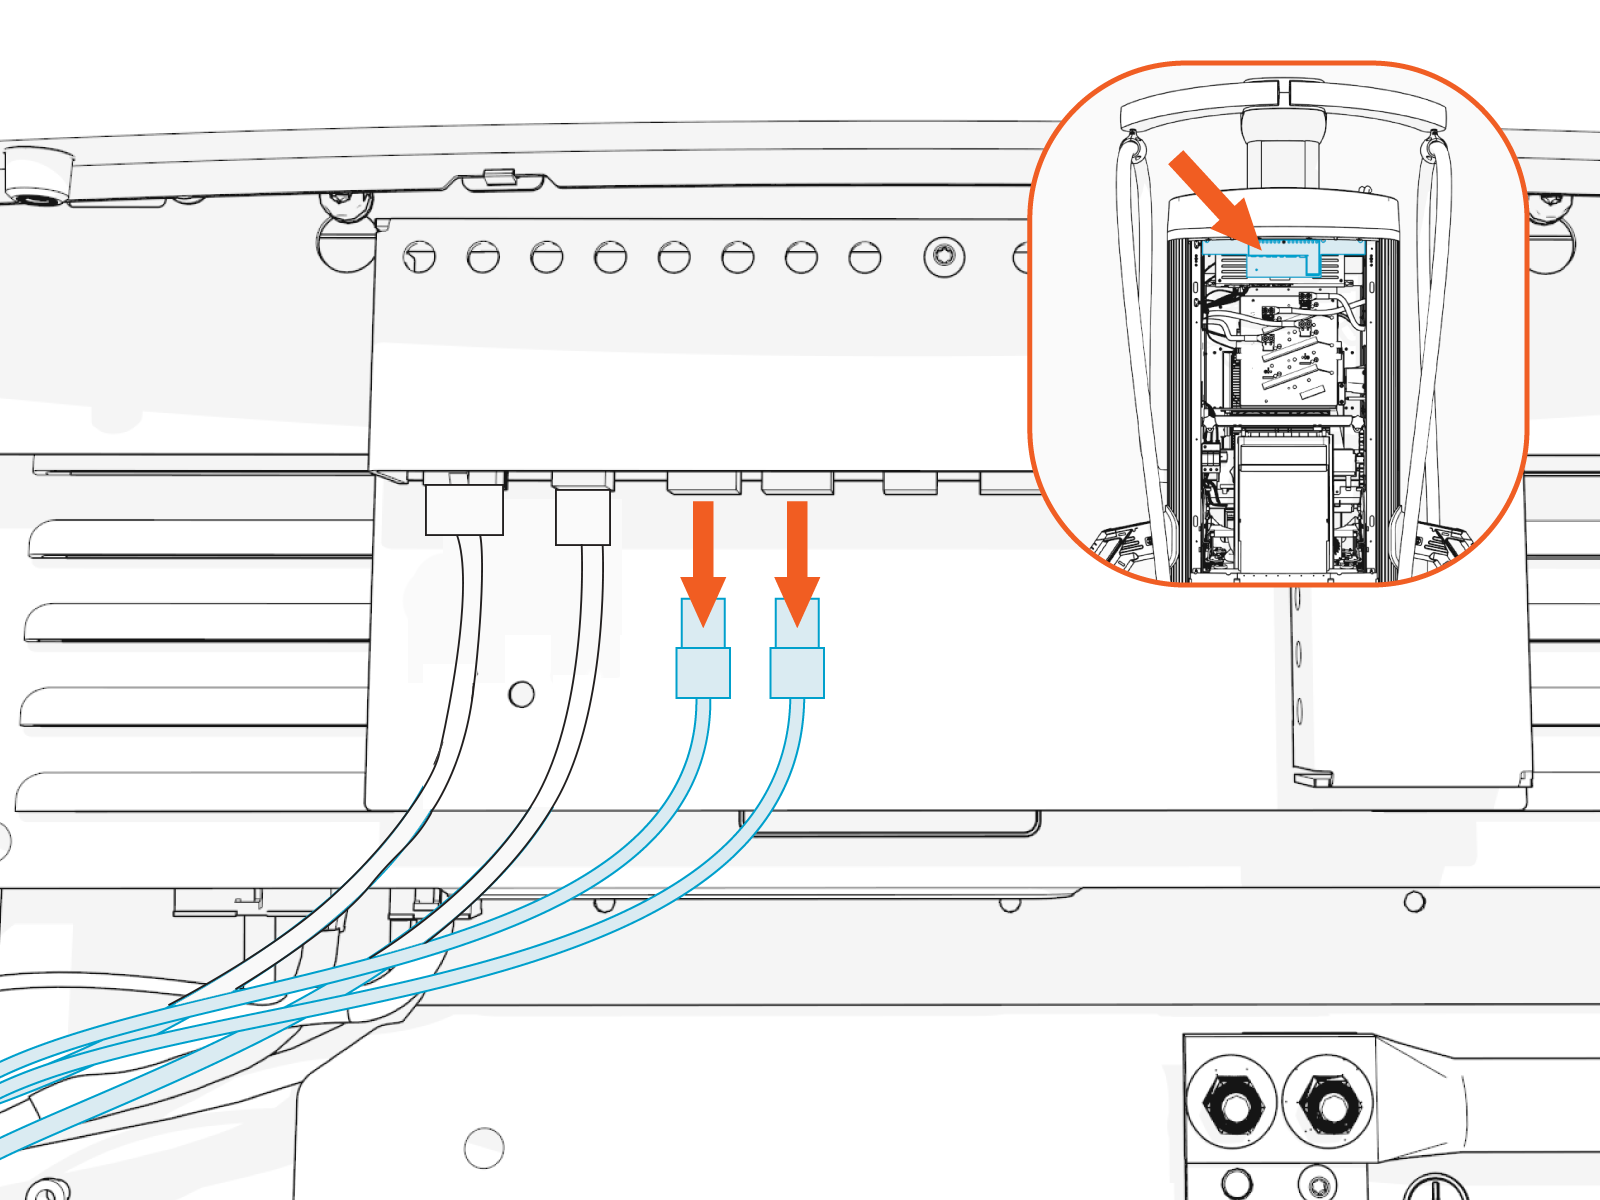
-
Use a T25 Security Torx to remove the screws (x2) from the left and right corners of the frame rail (a) that secure the front LED diffuser to the frame.
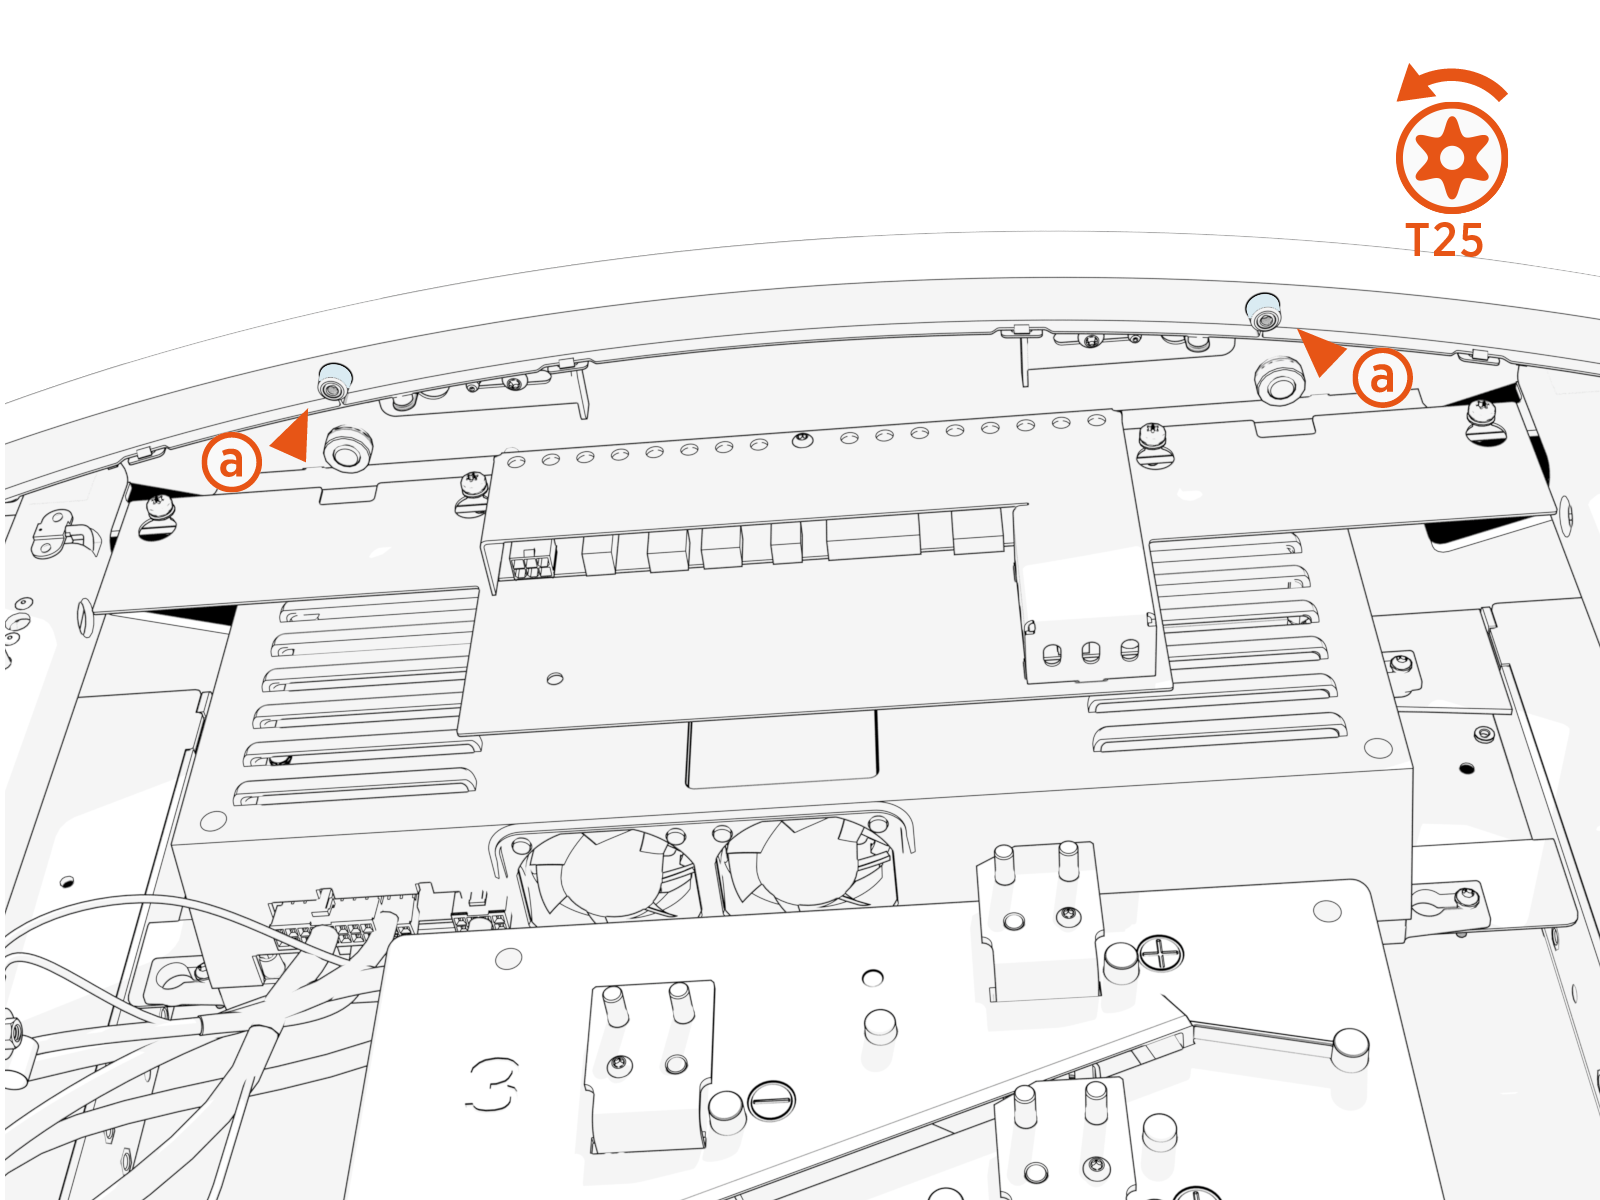
-
Pull out the cables. Remove the old diffuser.
-
-
For the rear LED diffuser:
-
Disconnect the LED cable “+DC5V” from the secondary display controller.
-
Use a T25 Security Torx to remove the screws (x2) from the left and right corners of the frame rail (b) that secure the rear LED diffuser to the frame .
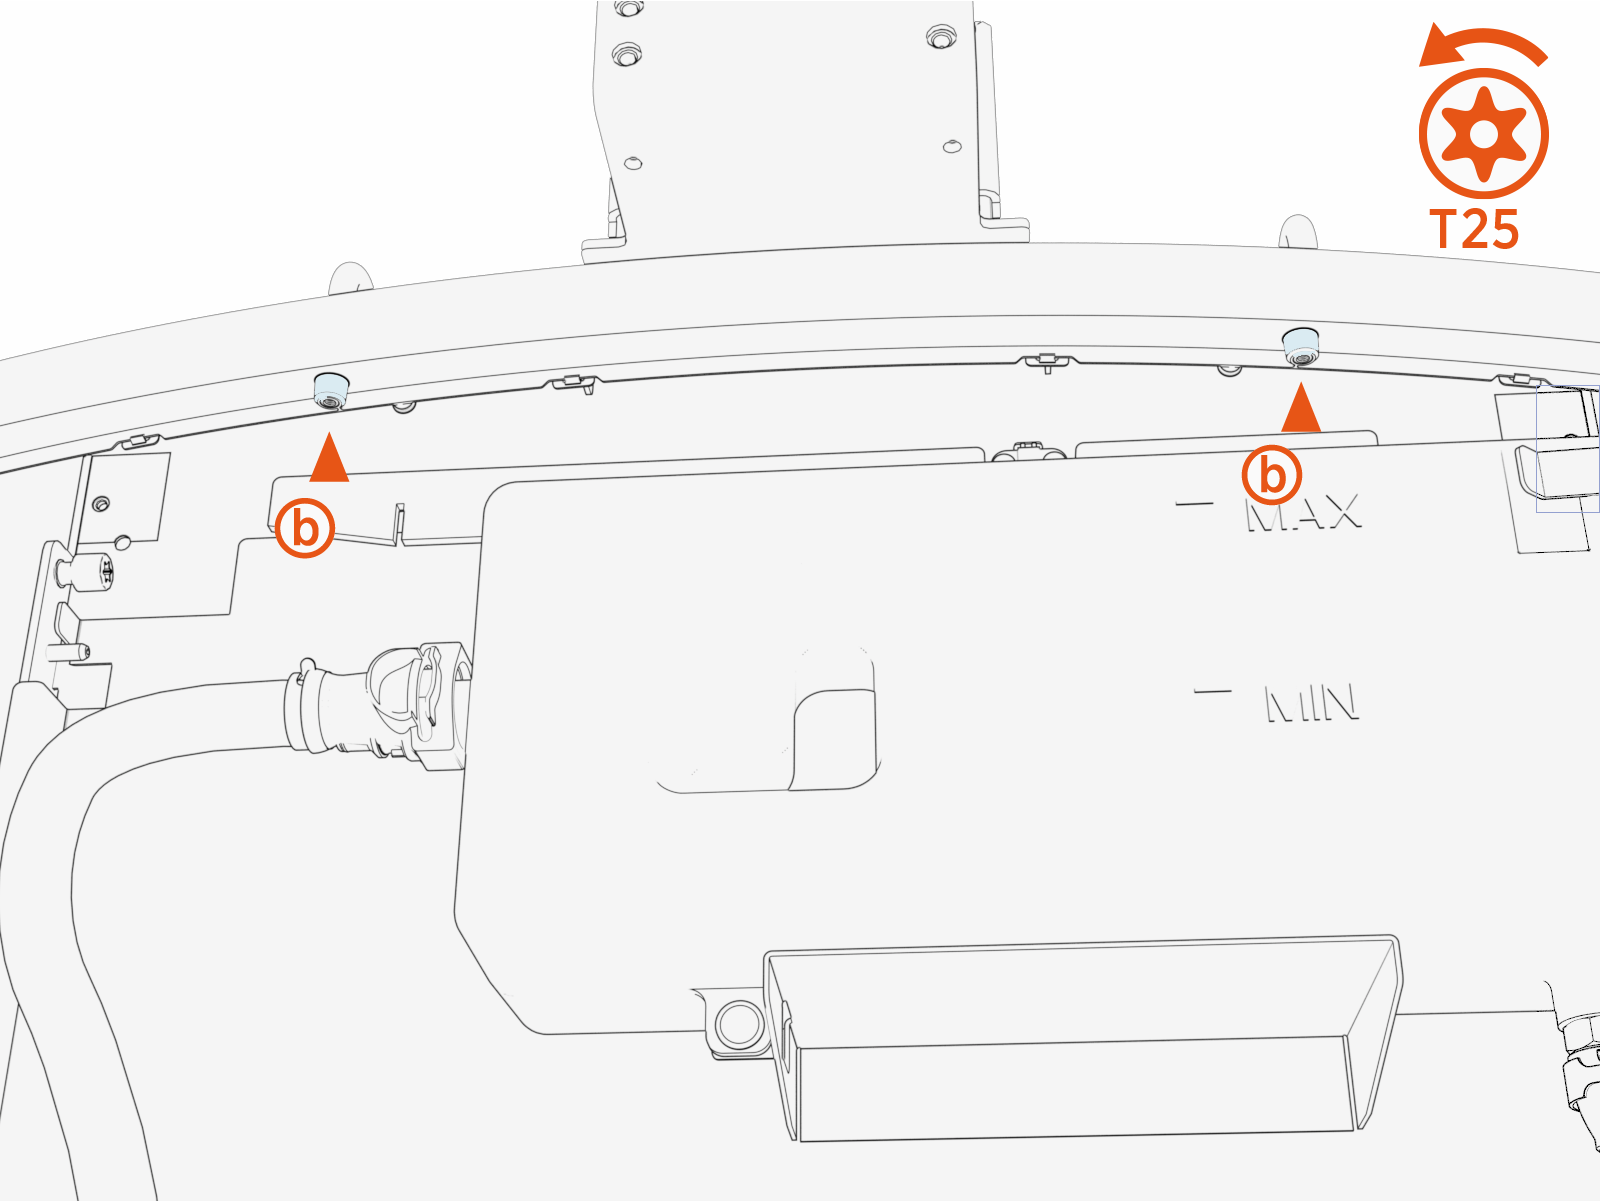 For the rear diffuser, clearance is tight between the top frame and the top of the coolant reservoir. Use an Allen wrench or short multi-tool for easier access.
 -
Pull out the cables. Remove the old diffuser.
-
Replace the LED Diffuser
-
Hold the new diffuser firmly in place against the gasket.
Make sure that the new diffuser is the same (front or back) as the old diffuser. When installed correctly, the cable exits on the left side of the dispense (when viewing the station from the front). -
Install the two T25 screws to fasten the LED diffuser (front or rear) to the top frame. Torque to 2.5 Nm (22 in-lb).
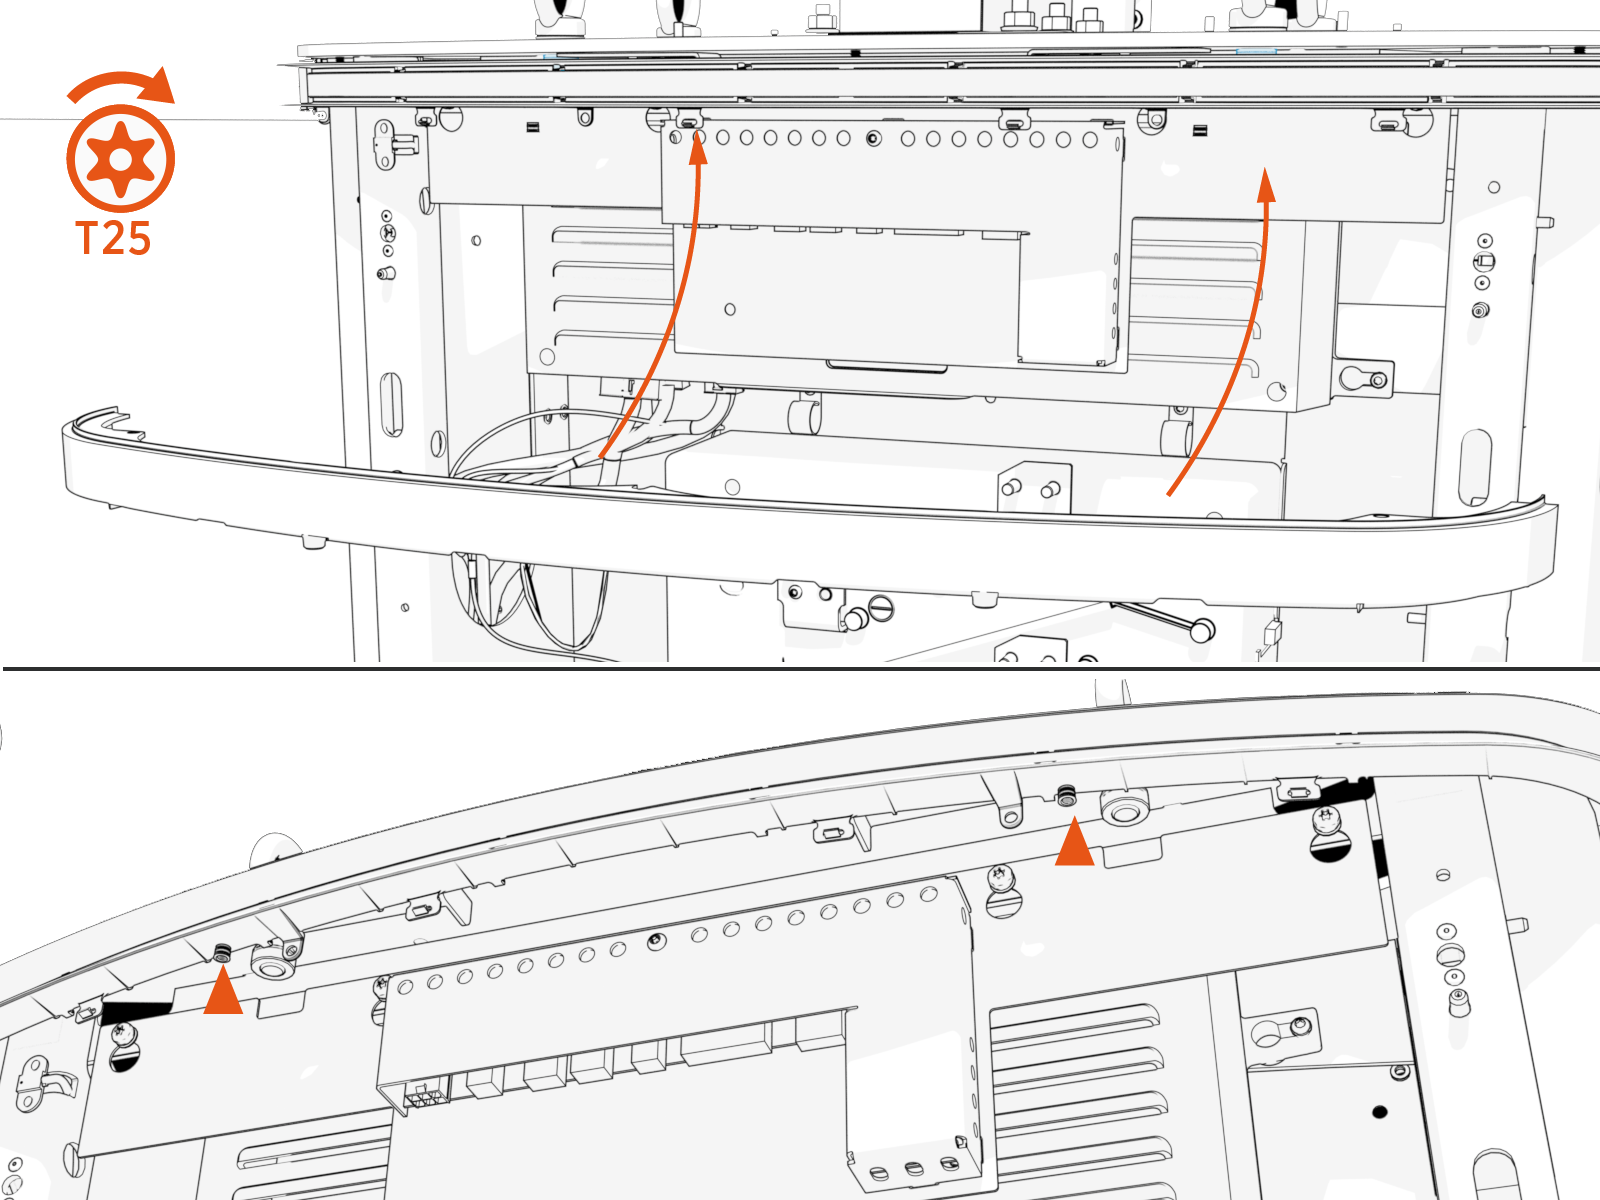 When reinstalling, keep the brass inserts on the diffuser faced down to ensure correct orientation.
 -
When reinstalling the LED diffuser, route the cable through the side panel to connect to secondary display. Plug the cables.
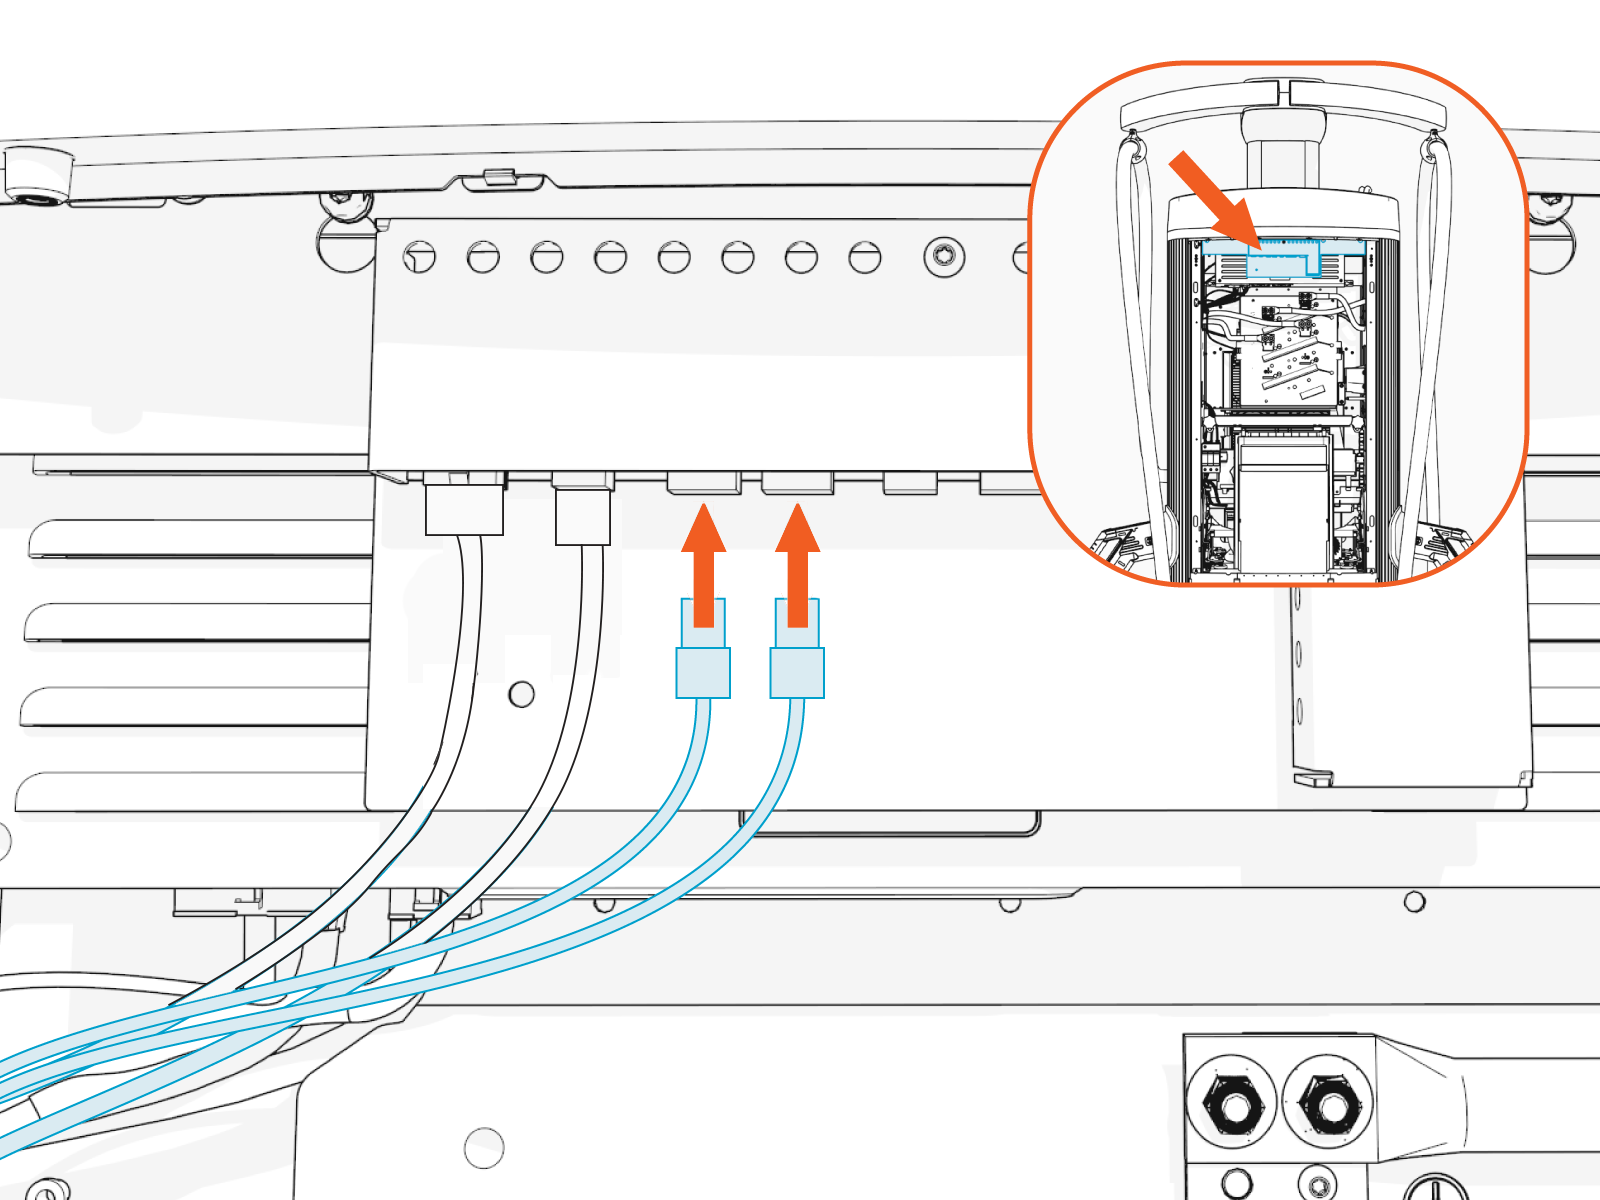
Since the two LED diffuser always have the same state, there are two plugs but they are the same plug and do not need to be plugged into a specific front or back port. They should be interchangeable.
Reverse the steps in the Remove the Area Light Bar and Remove the Side Panel procedures to install the Area Light Bar and Side Panel.
Power On the Station
Once all parts are installed, power on the Express 280. The Express 280 runs a self test to verify that it can operate properly.
