Mount Schunk 201 Pantograph
- If the charging station is not installed, commissioned, or serviced by a ChargePoint certified technician using a ChargePoint-approved method, it is excluded from all ChargePoint and other warranties and ChargePoint is not responsible.
- You must be a licensed electrician and complete training at https://www.chargepoint.com/partners/training-certification to become ChargePoint certified and to access ChargePoint's web-based installer tools or ChargePoint Installer app.
Uncrate and Prepare Pantograph
To uncrate and prepare the pantograph, complete the following steps:
-
Remove protective wrapping and uncrate the pantograph.

-
Remove the pallet bolts (x4).
.")
-
On the frame of the pantograph, mark the location of the high voltage DC terminals (positive, negative, and ground).
.")
-
Photograph the label on the pantograph and submit the photograph to the project manager.
If there are multiple pantographs being installed at the site, ensure there is some way to match each photograph to its corresponding pantograph. The label contains information required to complete commissioning, and will be difficult to view after the pantograph is installed at final height.
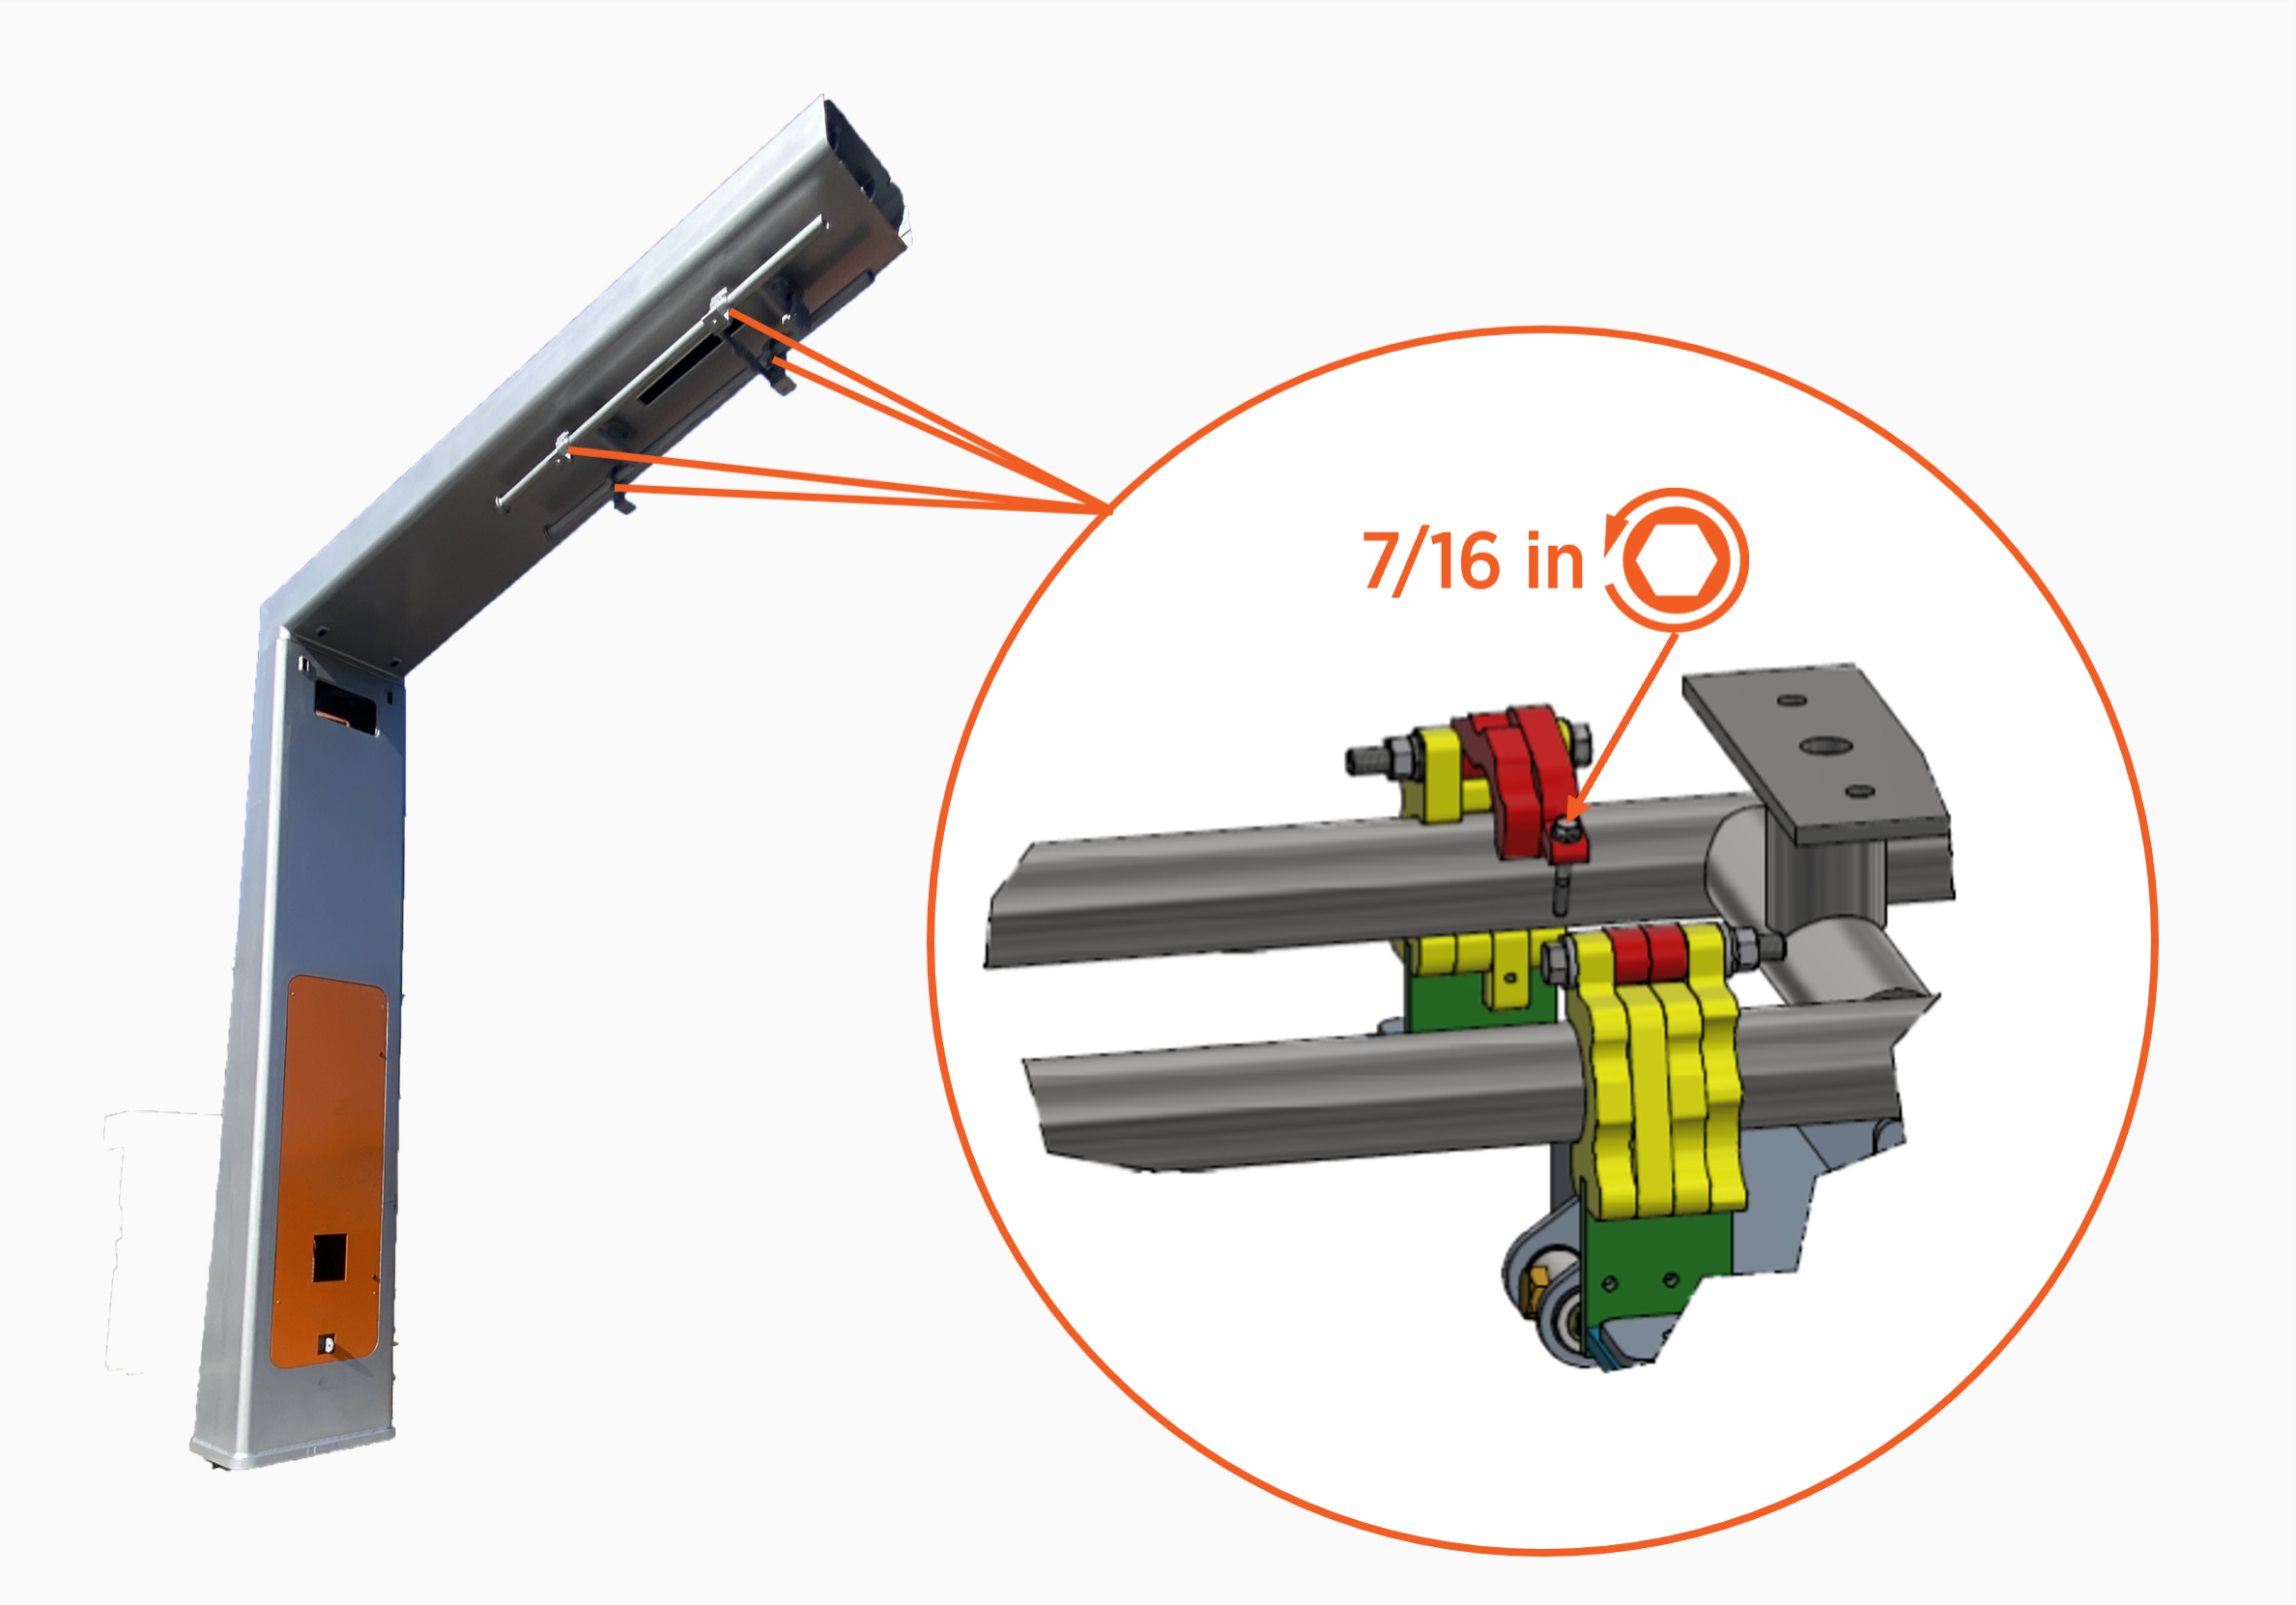
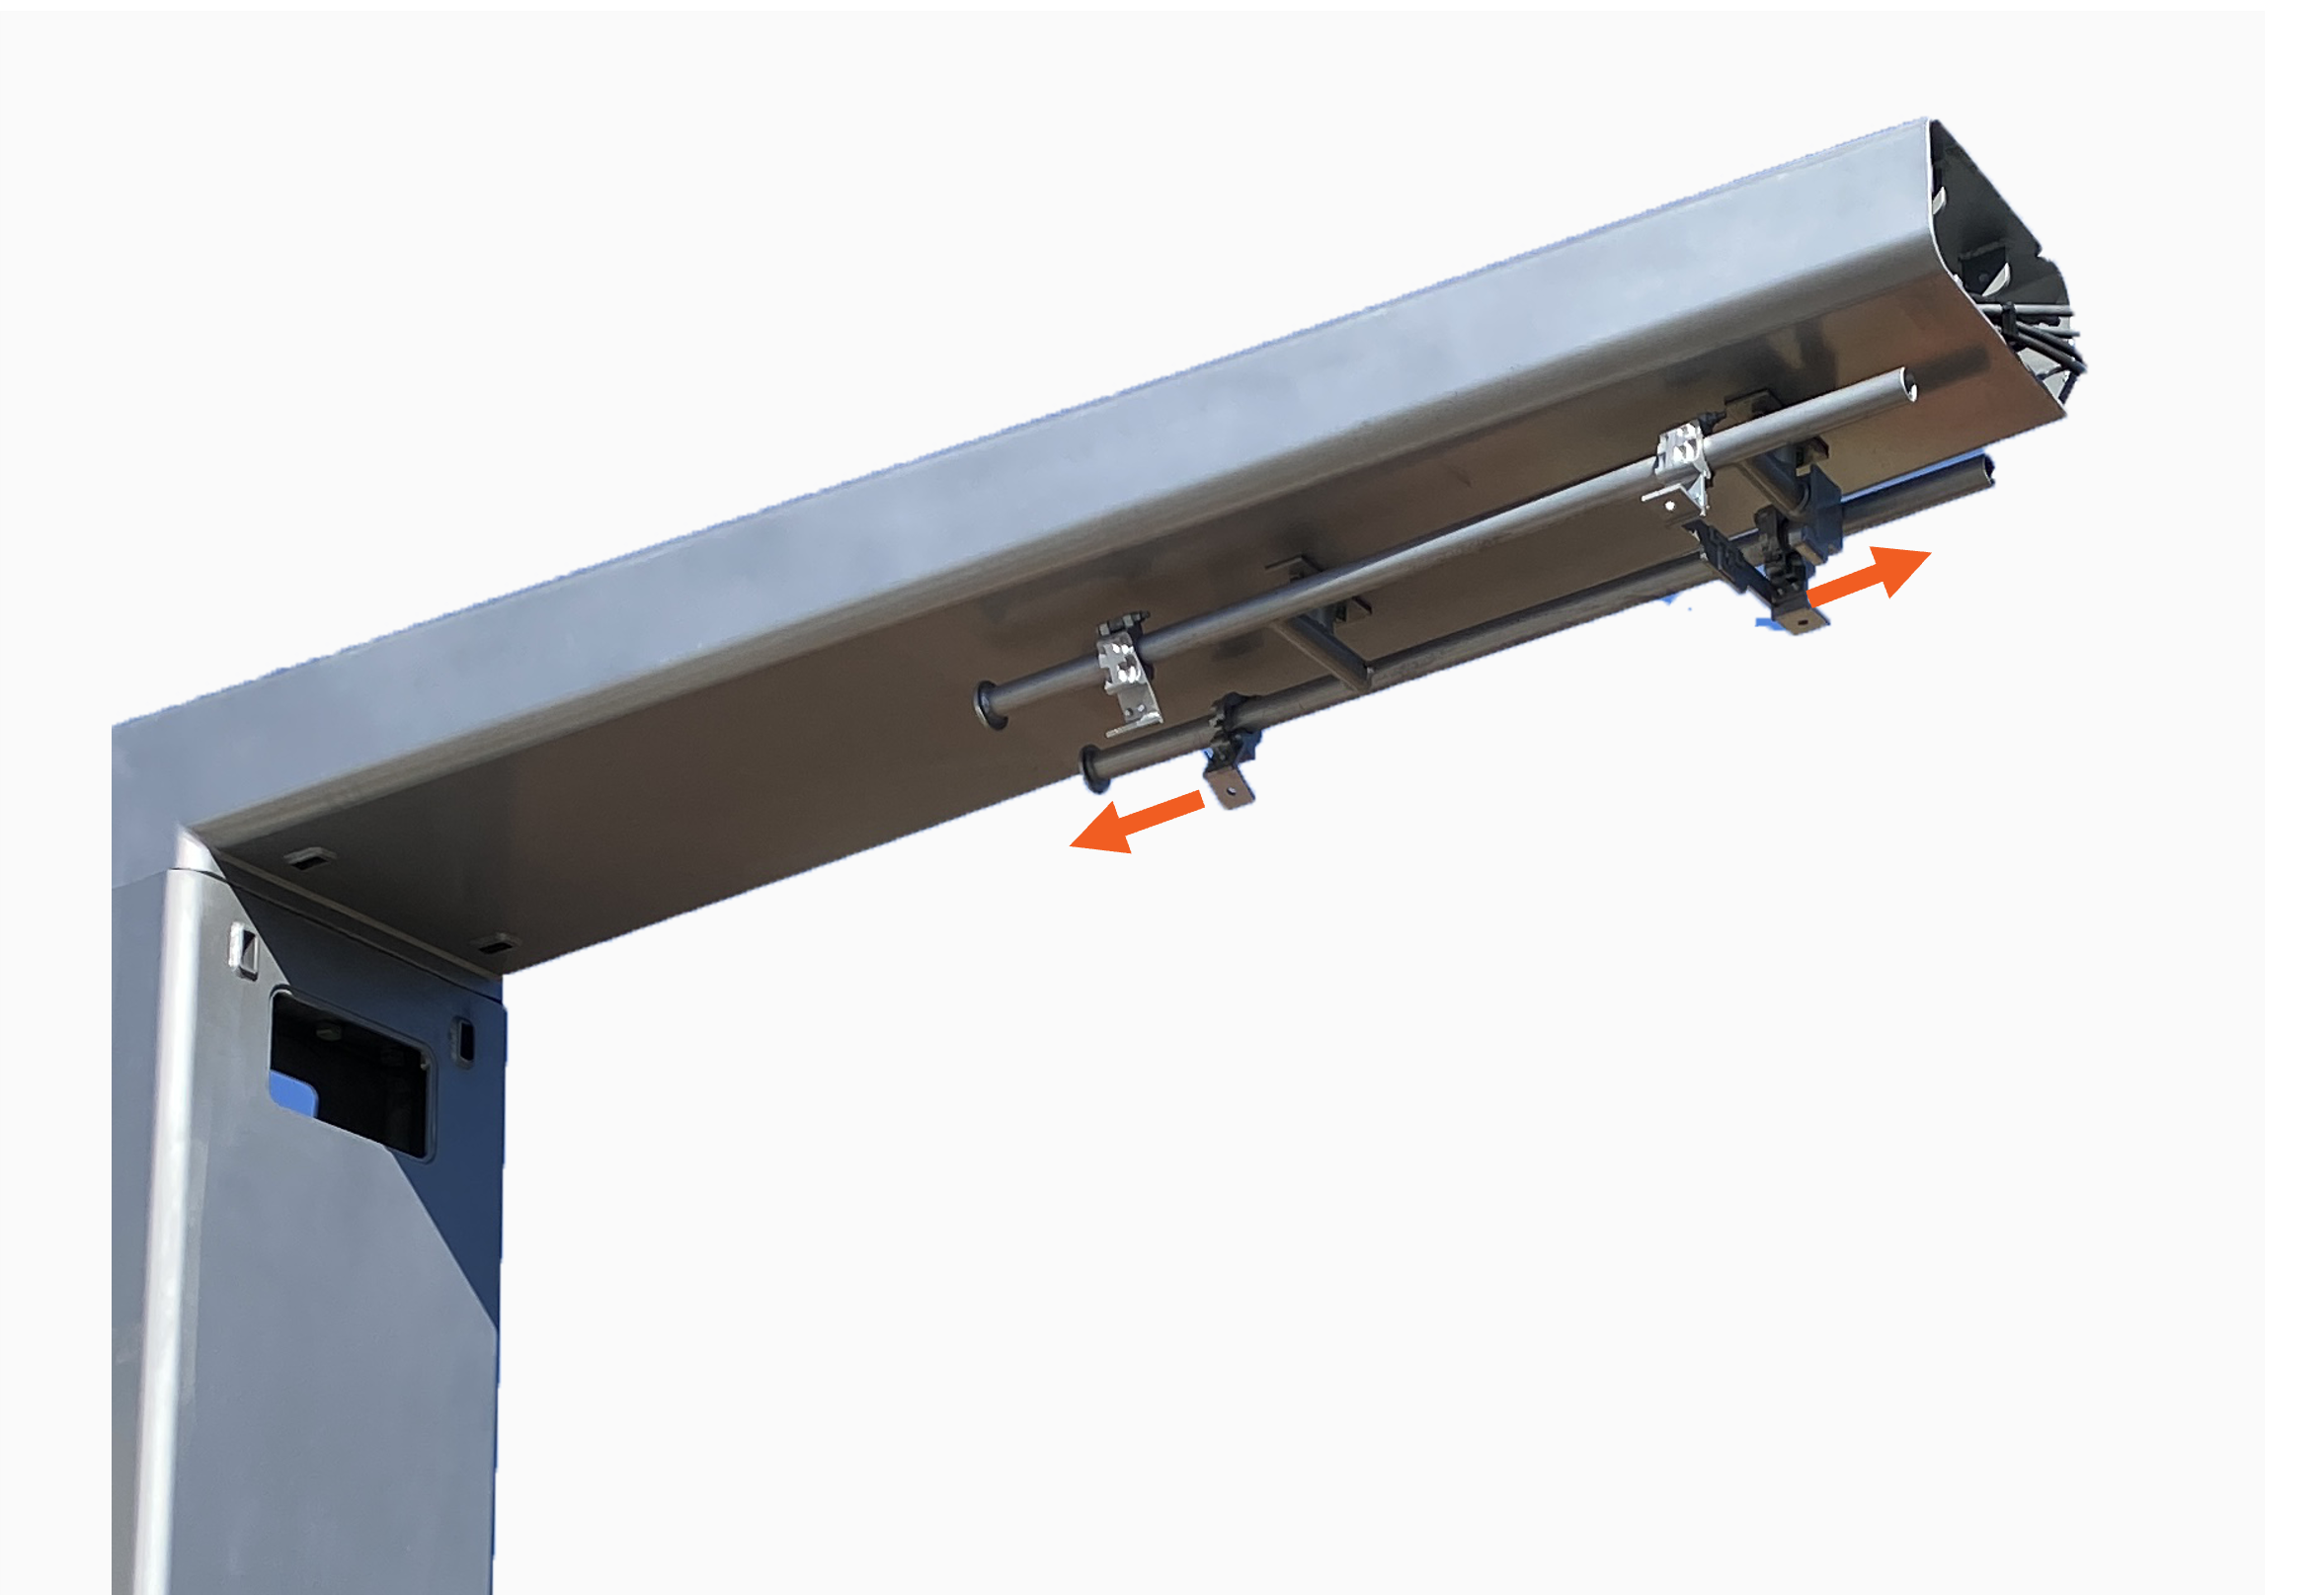
Prepare Mounting Clamps
-
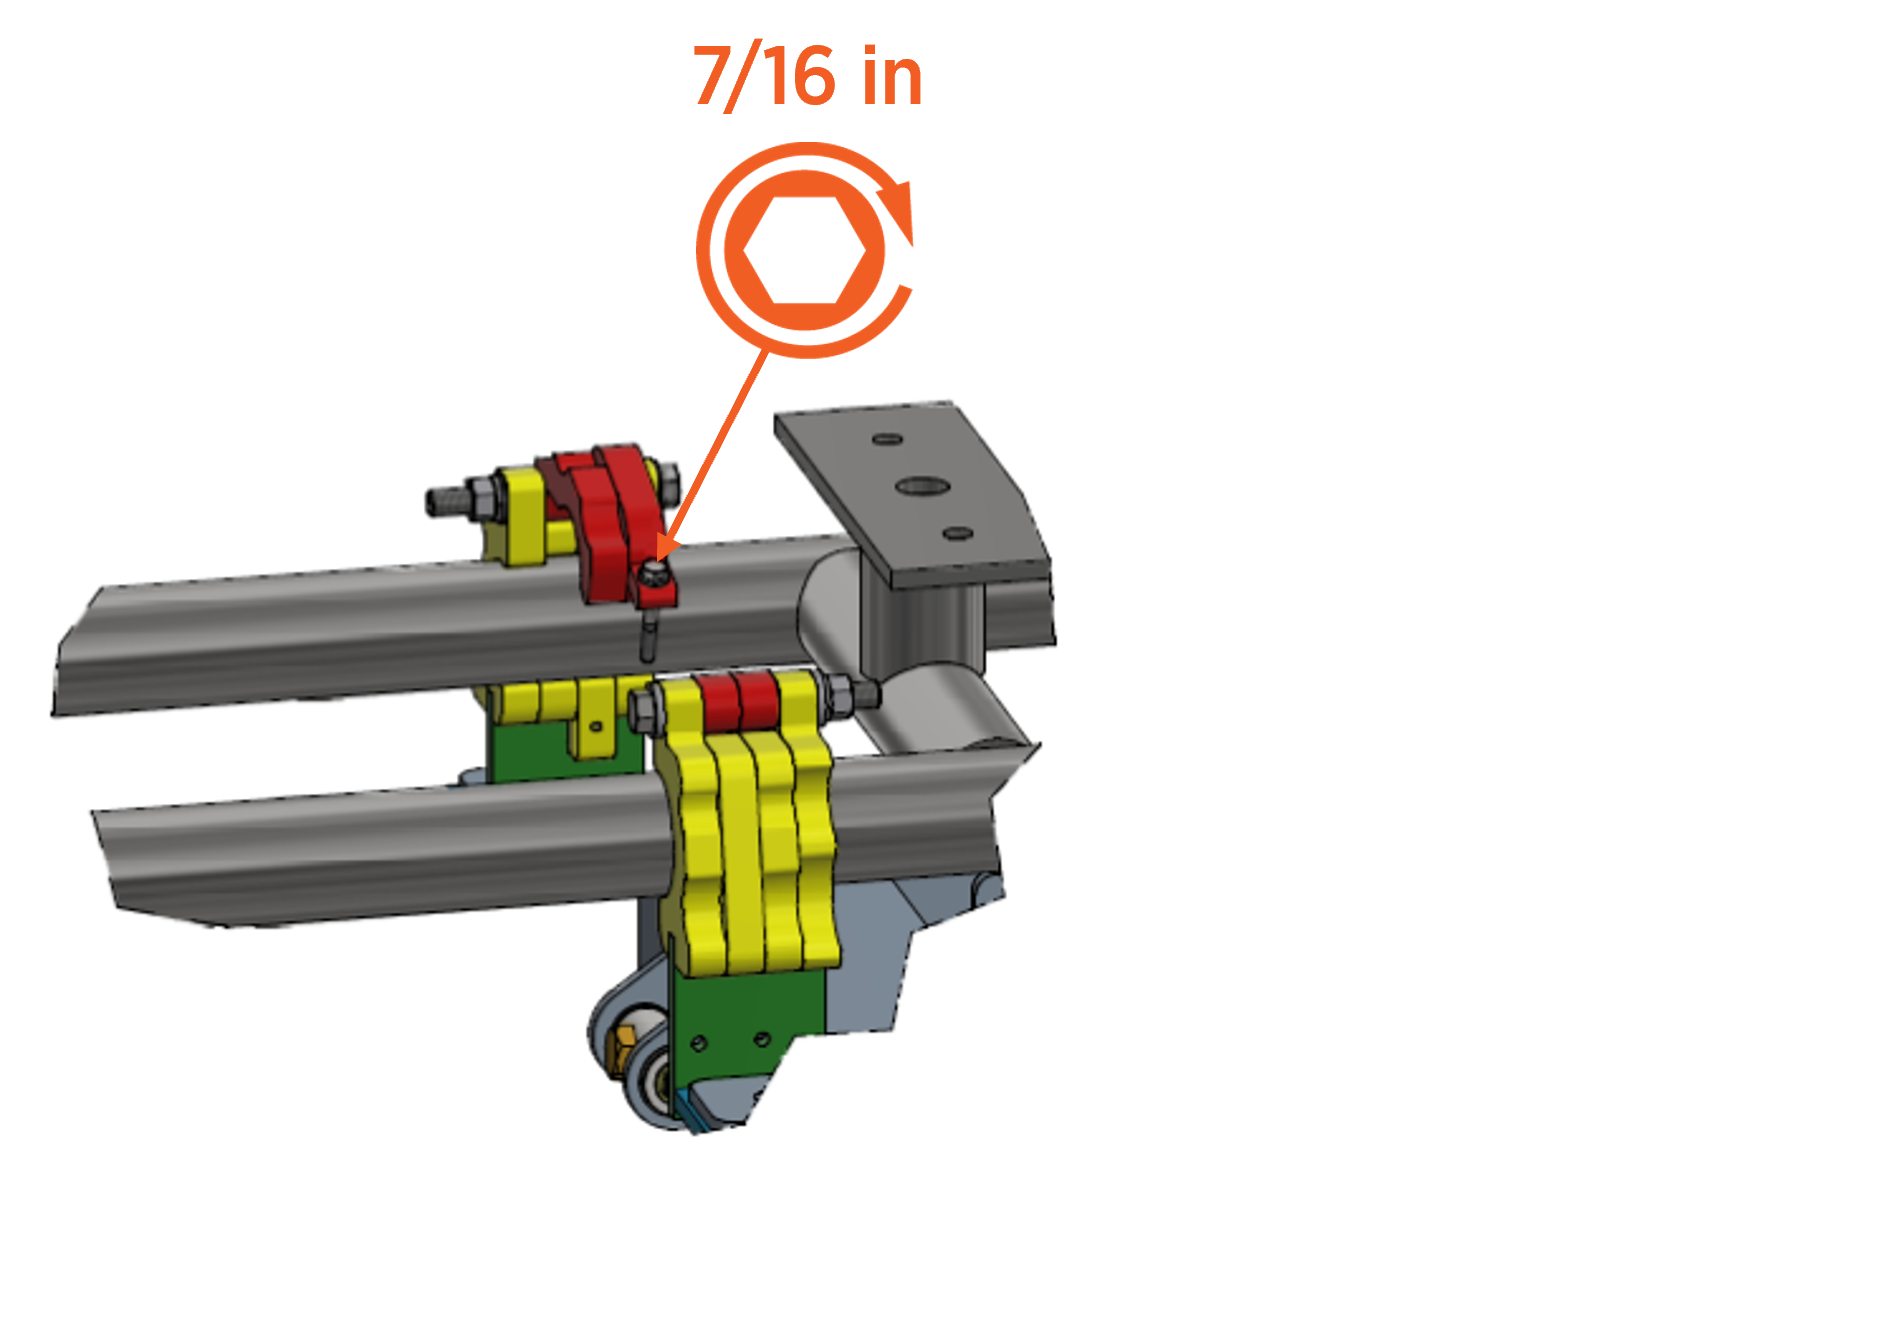
At the pantograph mounting rails, loosen (do not remove) the rail clamps (x4).
-
Slide and position the two front clamps forward of where the pantograph will mount. Slide and position the two rear clamps behind where the pantograph will mount.
Mount Pantograph
To mount the pantograph, complete the following steps:
-
Insert forklift tines into pantograph lifting brackets.

-
Lift and transport the pantograph to its intended position at the mounting rails. Slide the rail clamps to align clamp tabs to the pantograph mounting tabs.
Check the site plan to confirm the pantograph installation orientation. Be careful you do not install the pantograph rotated 180 degrees from intended orientation. The system will not operate successfully if the pantograph is incorrectly installed.
The pantograph is able to shift up to 18 inches along the mounting rails. Check site plans for pantograph positioning before fixing the pantograph in place.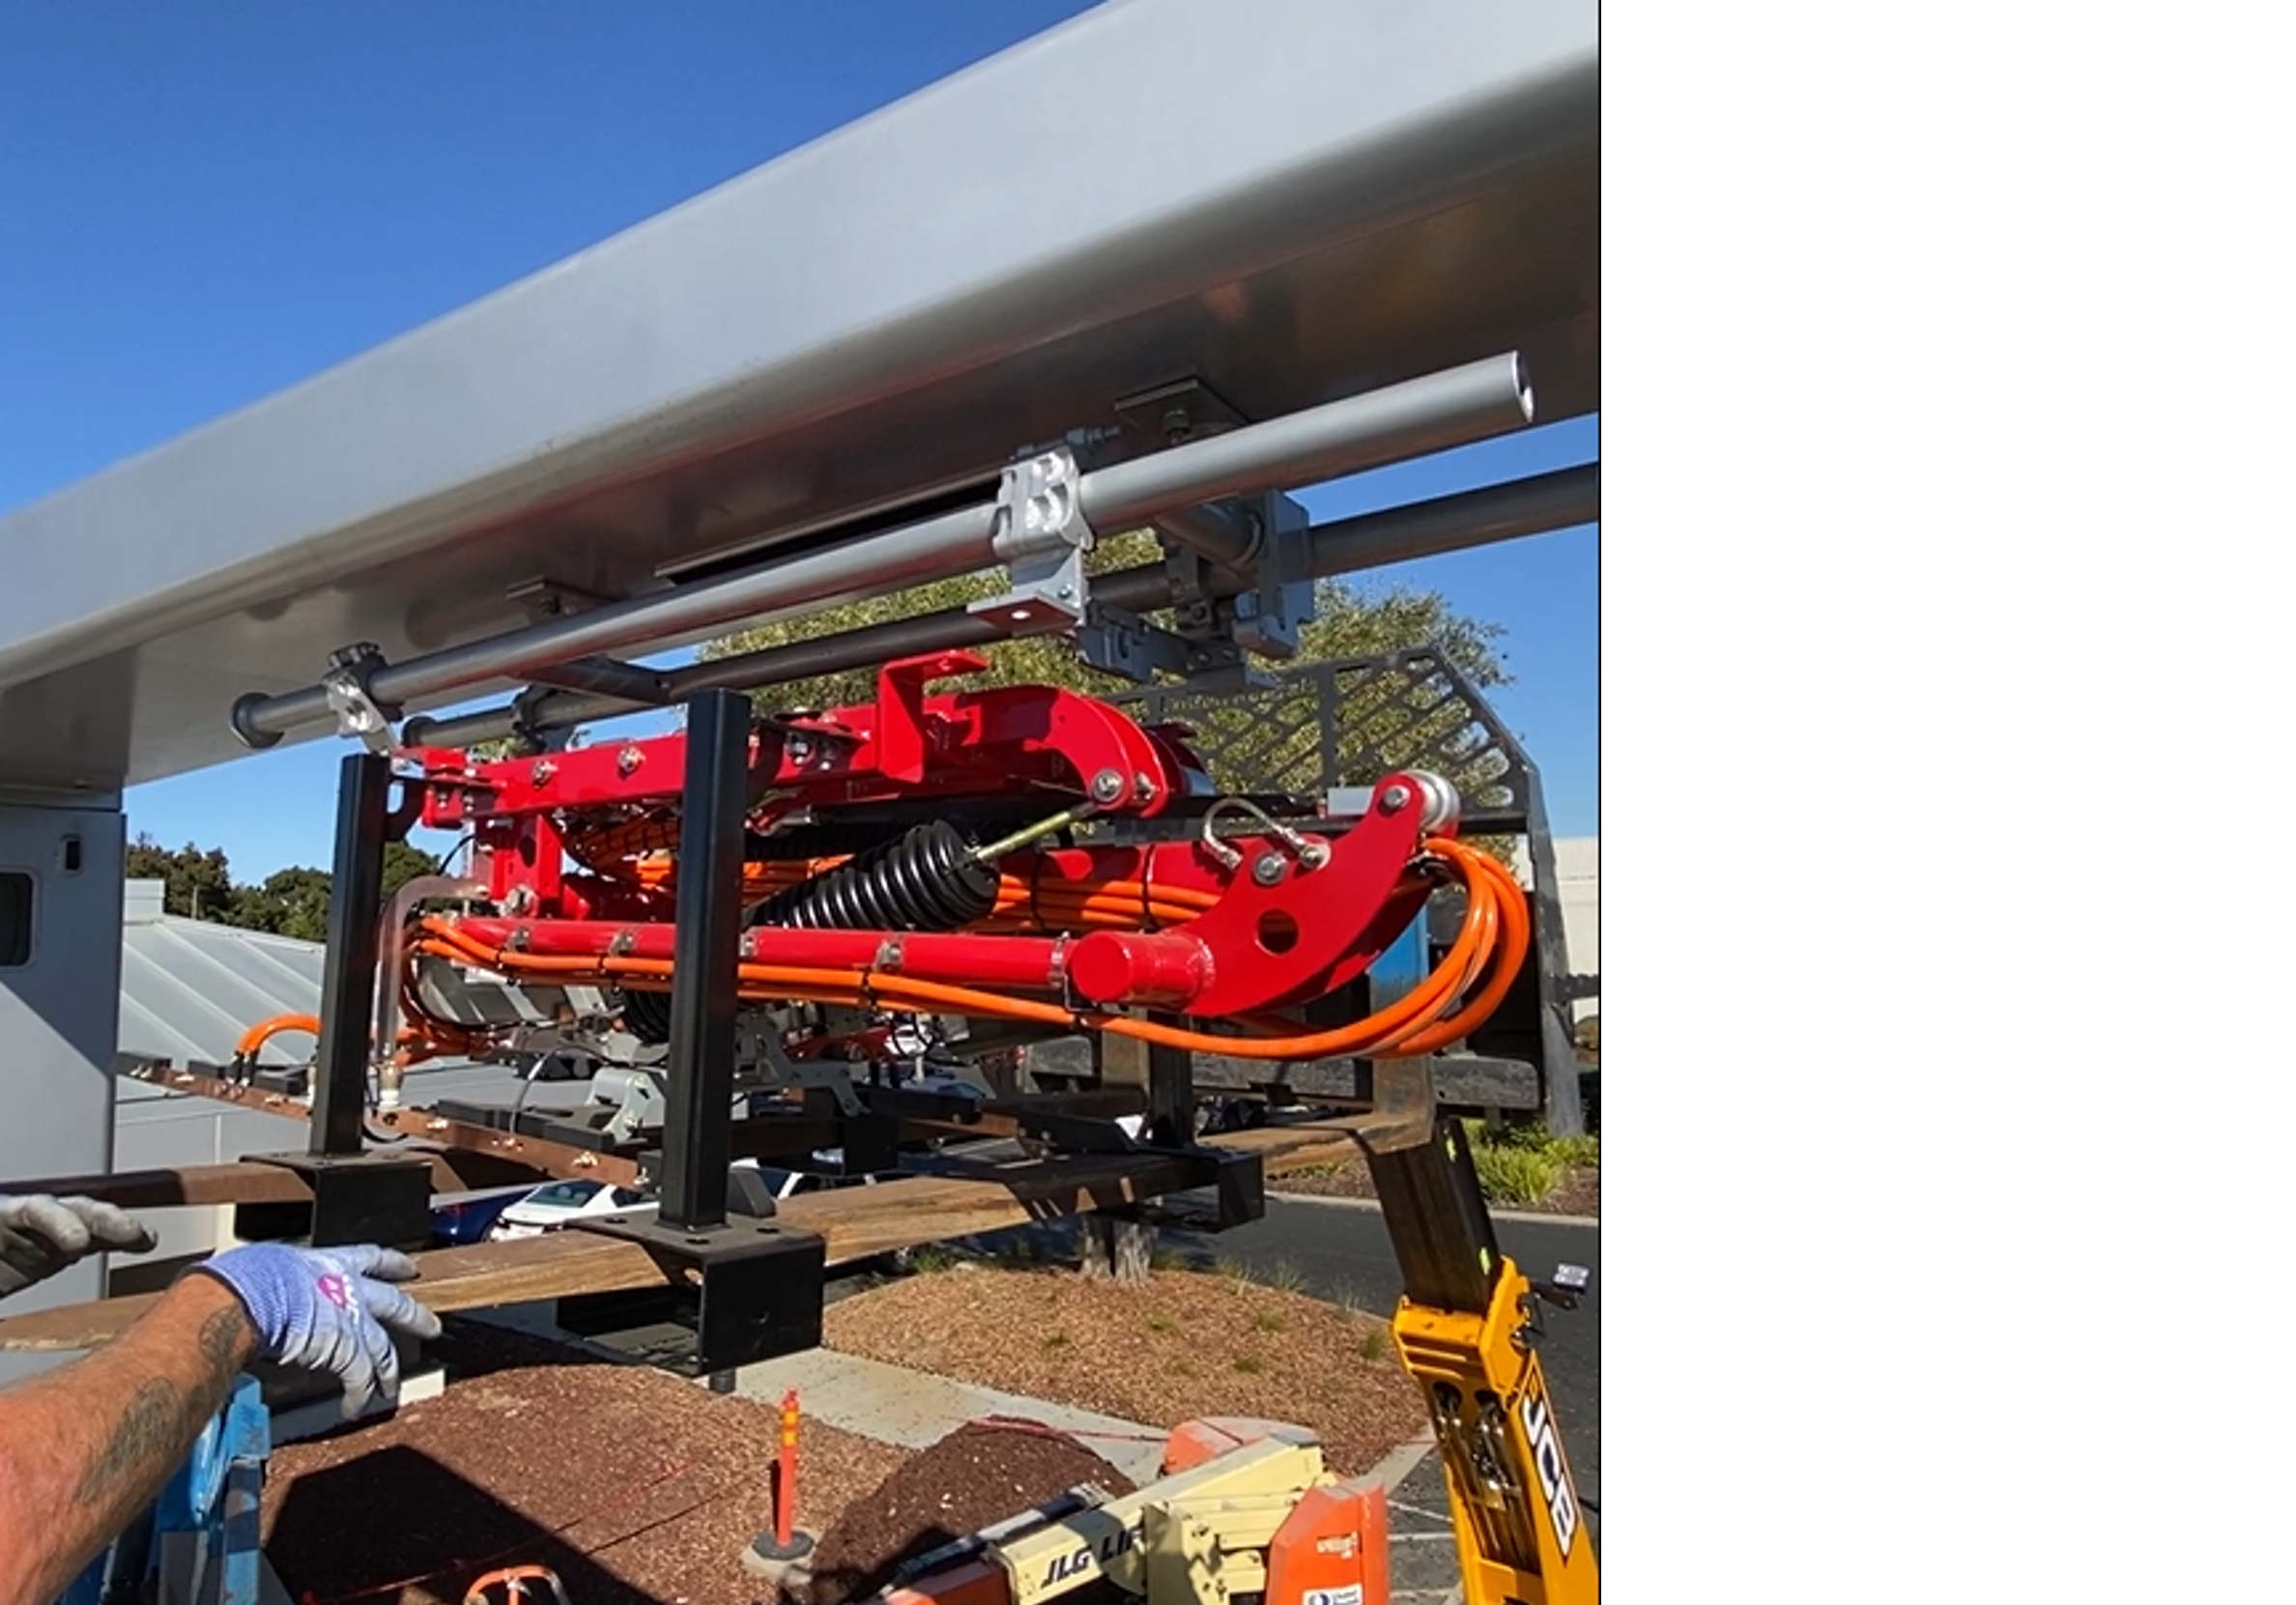
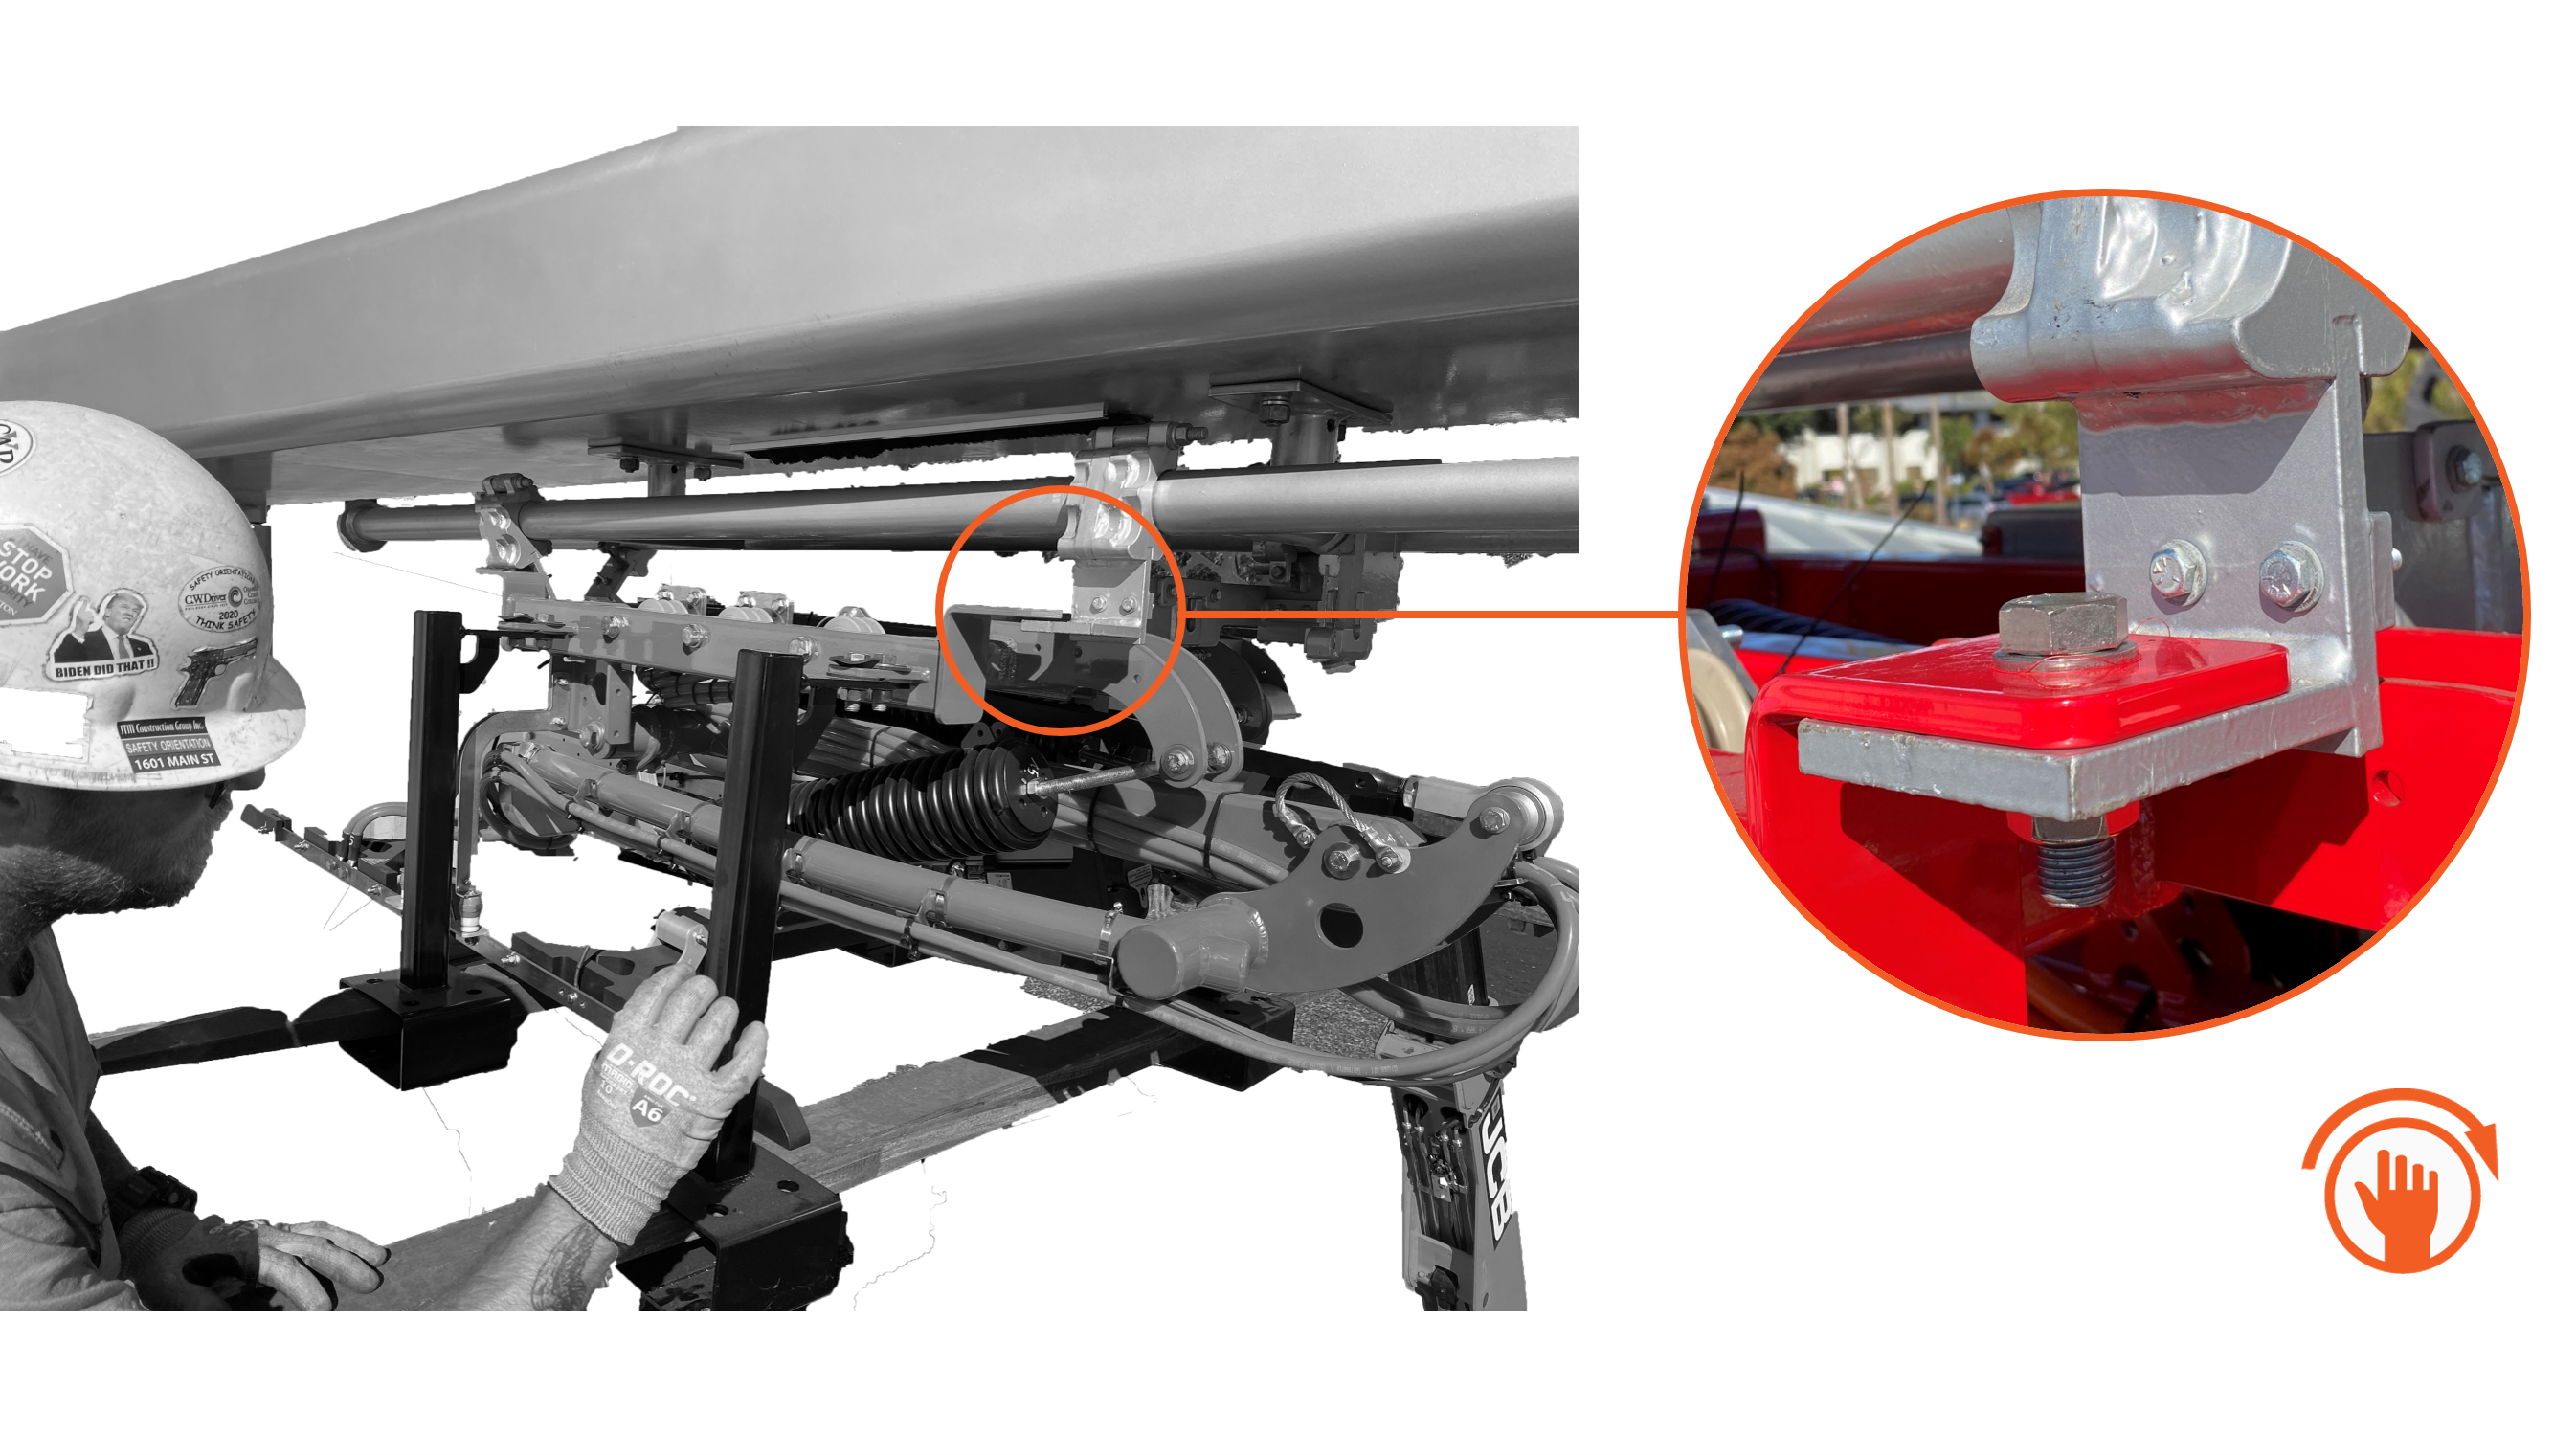
-
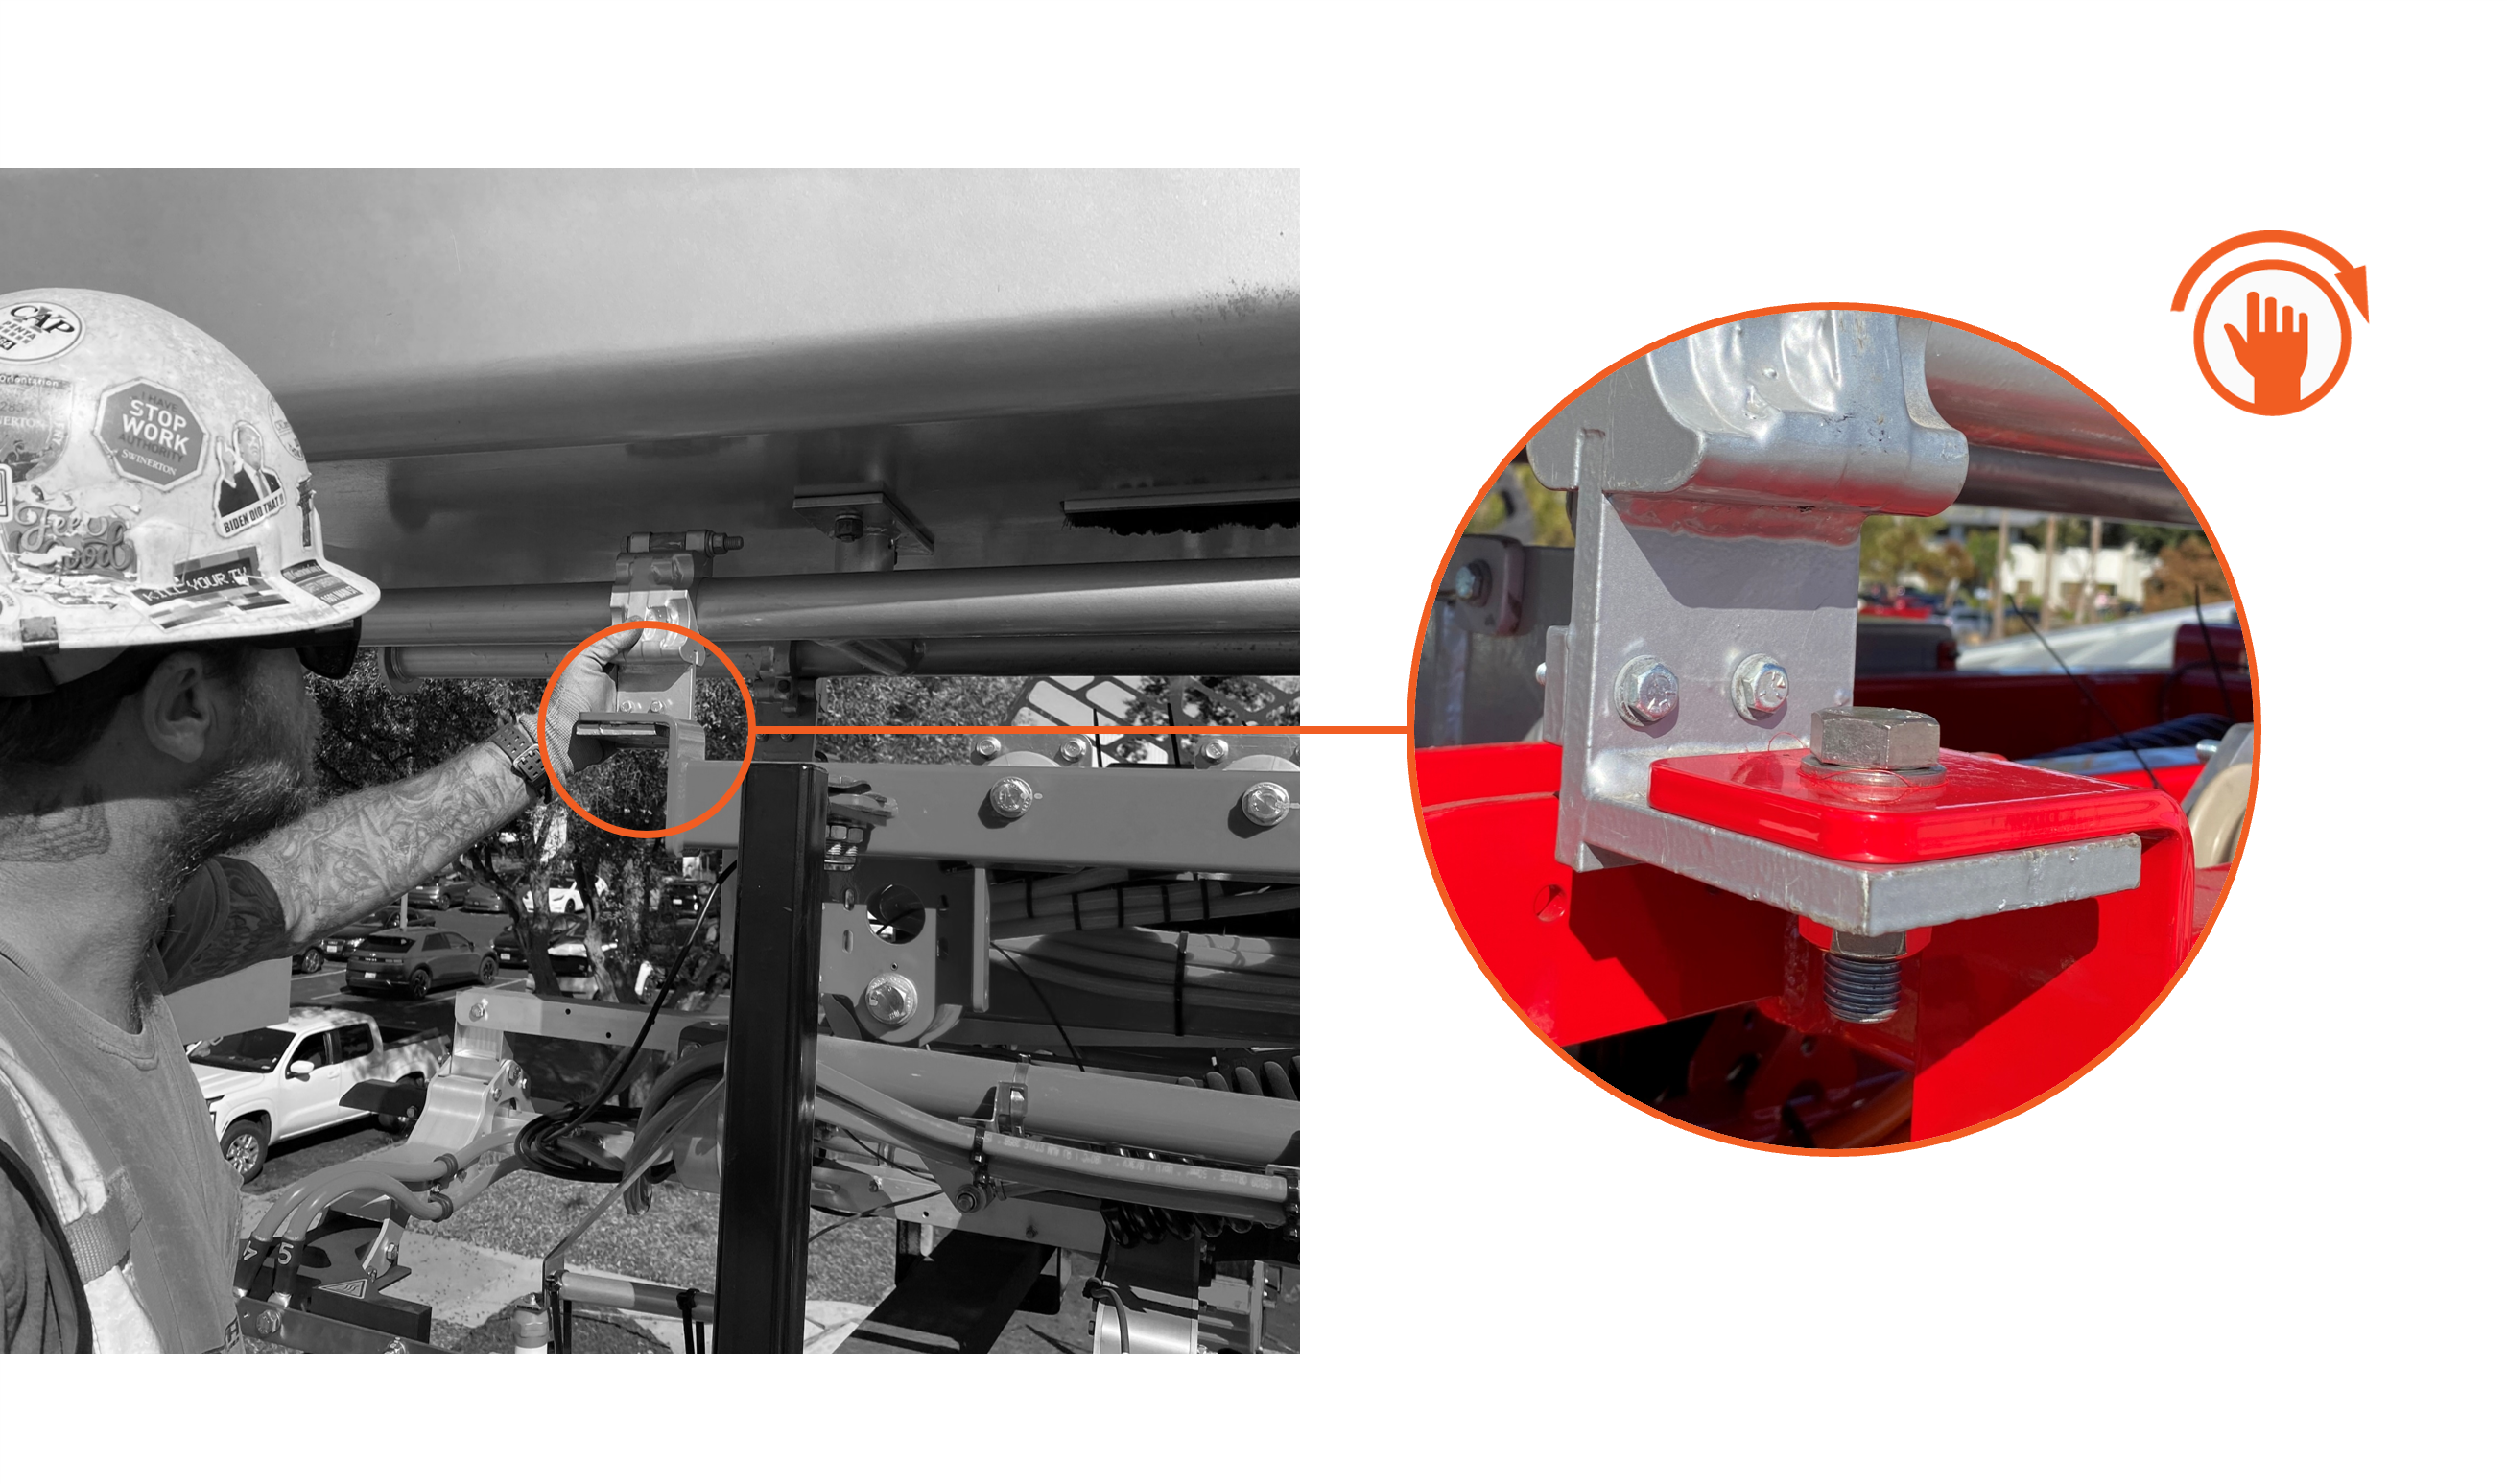
Slide each front rail clamps to align its mounting support with a pantograph mounting support. At each mounting point, fasten the supports together with 5/8 x 2 in hex bolt, 5/8 in flat washer, 5/8 in lock washer, and 5/8 in hex nut. Hand tighten.
-
Slide the rear two clamps to align each clamp mounting support with a pantograph mounting support. At each mounting point, fasten the supports together with 5/8 x 2 in hex bolt, 5/8 in flat washer, 5/8 in lock washer, and 5/8 in hex nut. Hand tighten.
-
Torque the fasteners to (missing or bad snippet). Use a 15/16 in socket.
After mounting the pantograph, double-check the fasteners to ensure they are torqued to the correct value.
-
Tighten the rail clamps (x4). Torque to (missing or bad snippet).
-
Lower the forklift tines slightly to release the weight of the pantograph. Do not remove the forklift from the pantograph lifting brackets.

-
Remove fastener to release the pantograph lifting bracket (x4). Slide the brackets off the forklift tines or up against the forklift.
. Slide the brackets off the forklift tines or up against the forklift.")
-
Remove the forklift.
-
Cut and remove zip ties (x4) to free the pantograph charging rails.
Extending the pantograph with the zip ties installed can damage the equipment.
 to free the pantograph charging rails.")
