Panels, Doors, and Safety Shields
This section provides instruction for removing and replacing panels, doors, and safety shields in the Power Block.
Required Tools and Materials
|
|
Padlock key or code (only if your site requires it) |
|
Stepladder |
|
|
#5 Phillips screwdriver |
Before You Begin
Before beginning work, complete the following steps:
AFTER REPLACING THE COMPONENTS, REVERSE THE ABOVE STEPS TO COMPLETE THE SERVICE.
Replace the Upper Panel (Front or Rear)
-
Open the security panel, and unlock and remove the padlock.

-
Slowly press and push the upper panel sides up to disengage the hooks (x4) behind the panel.

REVERSE THE ABOVE STEPS TO REINSTALL THE PANEL.
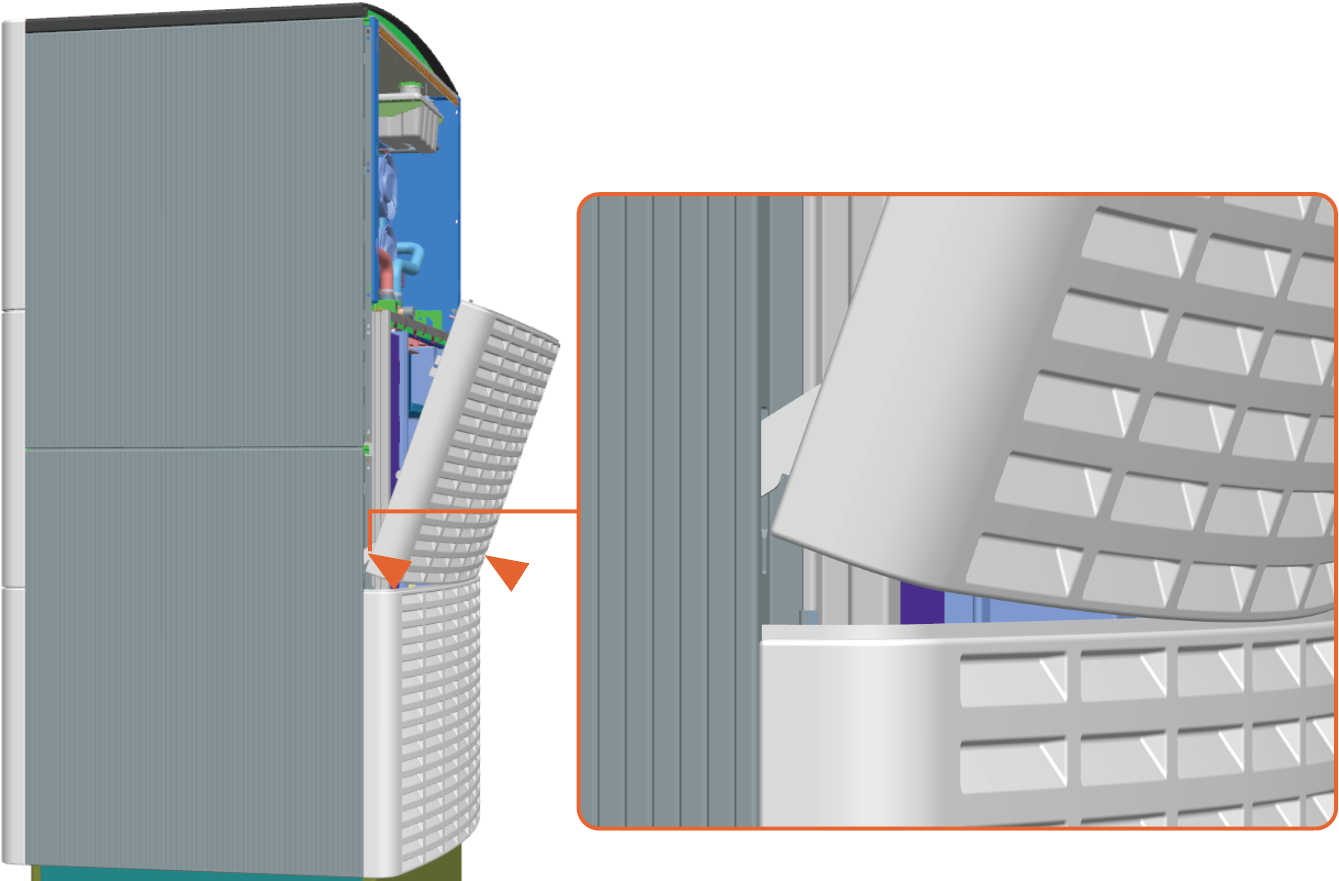
Replace the Mid or Lower Panel (Front or Rear)
To replace the mid or lower panel (front or rear), complete the steps given below.
Remove the panel
-
Pull the hook levers (x2) out to disengage the hooks (x2) behind the panel's upper side.

-
While the hook levers (x2) are pulled out, tilt out the panel's upper side to remove.

-
Repeat for the lower panel.
Reinstall the panel
-
Align and seat the lower hooks (x2).
-
Tilt in the upper side to engage the upper hooks (x2).

-
Repeat for the lower panel.
Replace the Front Door
-
Hold the door to support it and disengage the latches (x2).

-
Hold the door handles (x2) and tilt out to lift the door off of the flange at the bottom of the door.

REVERSE THE ABOVE STEPS TO REINSTALL THE DOOR.
Replace the Transparent Shield
To remove and replace the transparent shield, complete the steps given below.
Remove the shield
-
Loosen six captive screws by hand for each transparent shield (or, use a #5 Phillips screwdriver).
.")
-
Slightly rotate out the edge with the screws.

Reinstall the shield
-
Align the tabs on the transparent panel with the slots in the racks. Insert the tabs into the slots.
For the left shield only, align the hole over the door switch.
-
Tighten the captive screws.

- To adhere to ChargePoint best practices, complete the post-service checklist before you leave the site.
-
For assistance or to return a faulty part to ChargePoint, go to chargepoint.com/support and contact technical support using the appropriate region-specific number.
