Tall Cable Management Kit (CMK)
This section provides instructions for replacing the tall CMK![]() Cable Management Kit on the Power Link 2000.
Cable Management Kit on the Power Link 2000.
Inspect the Box for Contents
Check the package for the following components:

-
Mast
-
Front and rear covers
-
Single or dual tall CMK
 Cable Management Kit assembly
 -
M6 Torx screws (x8) and M10 hex screws (x4)
Required Tools and Materials
Installing or replacing the CMK![]() Cable Management Kit requires at least two people. Bring these tools and materials:
Cable Management Kit requires at least two people. Bring these tools and materials:
|
|
Torx screwdrivers (T20, T30) |
|
6 mm hex wrench |
|
|
Stepladder (x2) |
|
Box cutter |
Before You Begin
Before servicing the component, complete the following steps:
Remove the Tall CMK
To remove the tall CMK![]() Cable Management Kit, complete all steps given below.
Cable Management Kit, complete all steps given below.
Remove the CMK covers
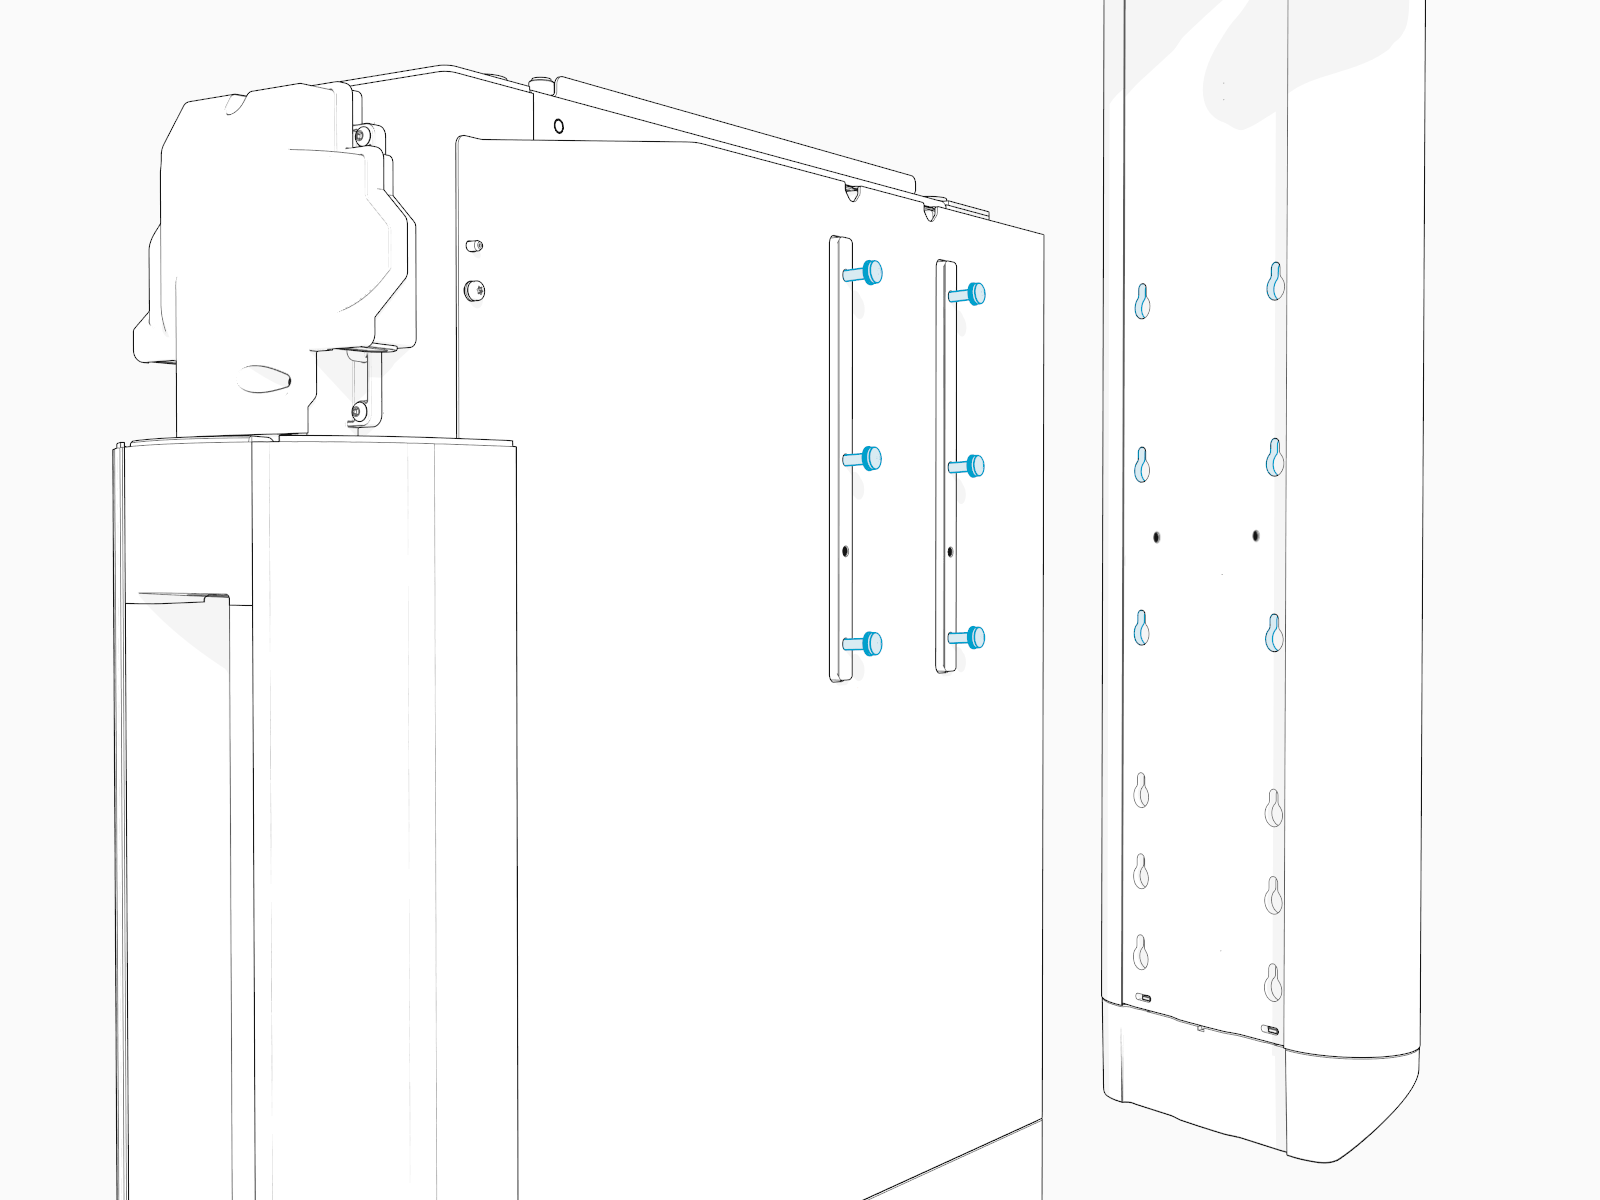
Remove the tall CMK assembly
-
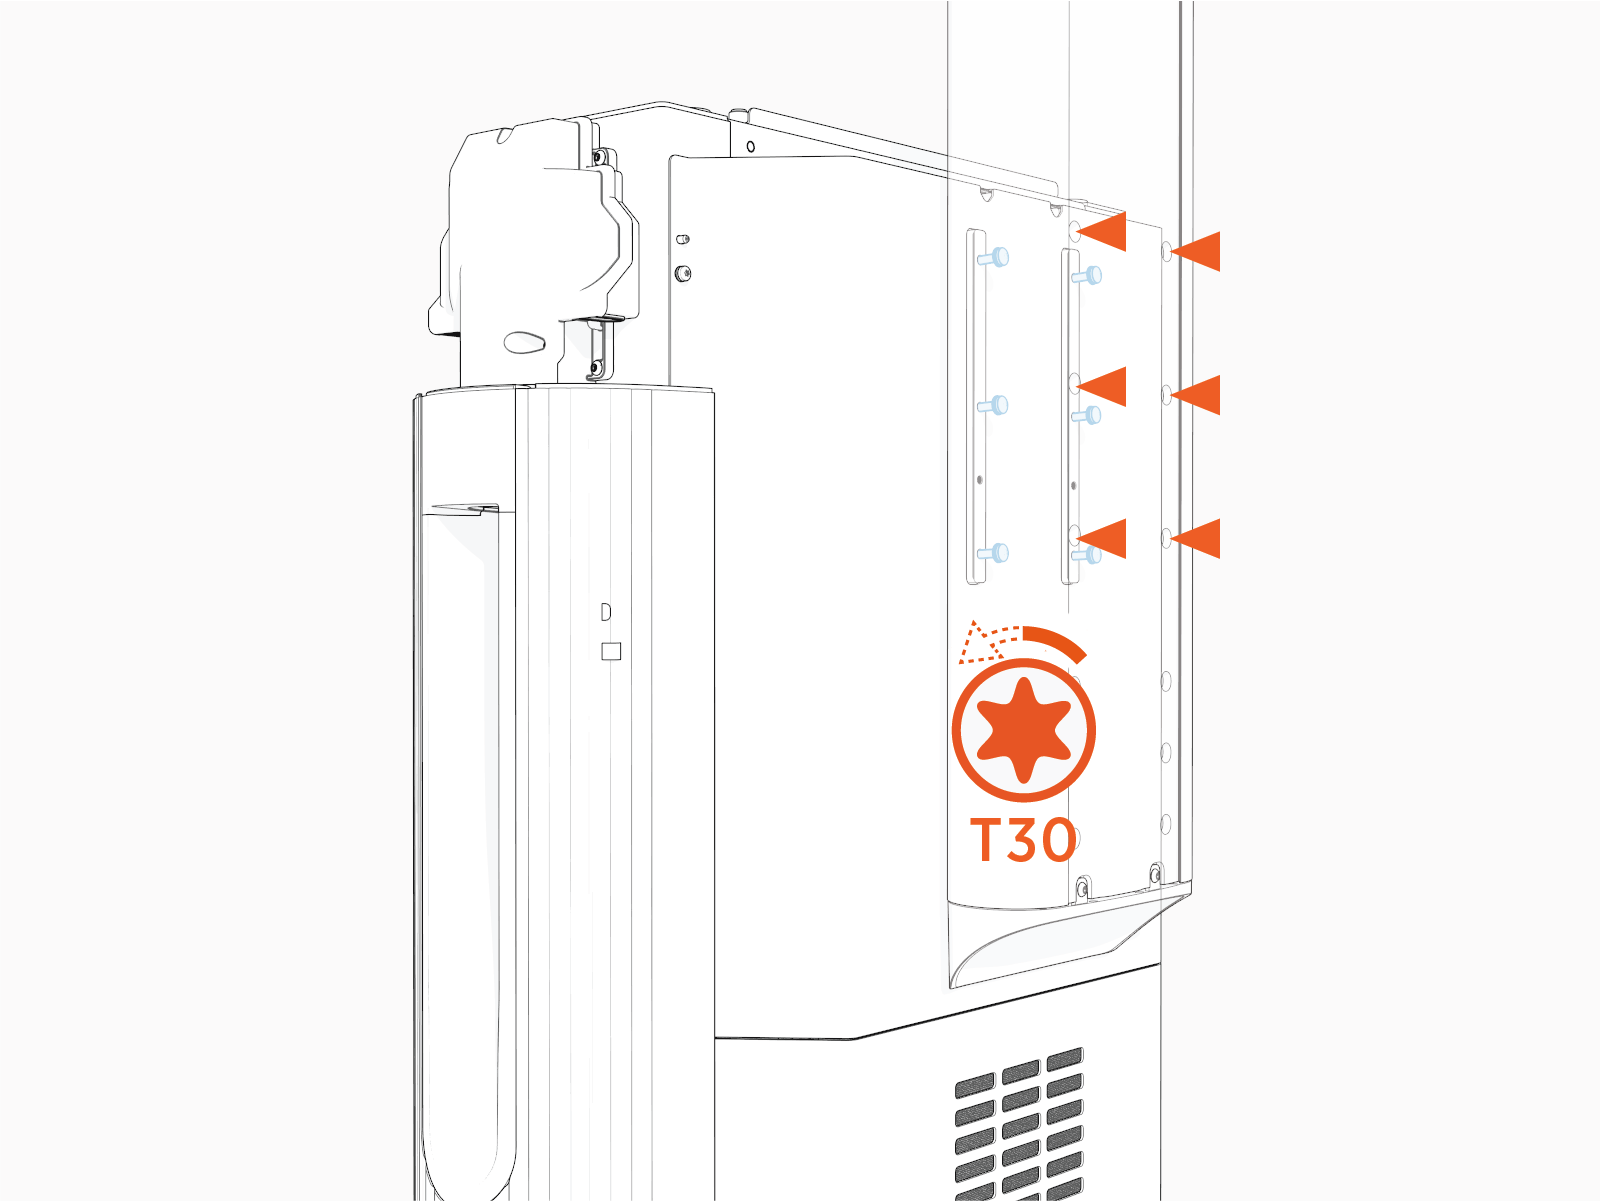
Remove the screws (x4),
,") Torque these screws to 13.5 Nm (120 in-lb).
Torque these screws to 13.5 Nm (120 in-lb). -
Remove the tall CMK
Cable Management Kit assembly from the mast.
Remove the mast
Depending on the space or clearance available above the Power Link 2000, such as in a parking garage, the tall CMK![]() Cable Management Kit may be installed with one of following two height settings:
Cable Management Kit may be installed with one of following two height settings:
-
Maximum height: 3 m (10 ft)
-
Minimum height: 2.41 m (7 ft 11 in)
If the mast is installed at minimum height, follow instructions below to remove the mast.
-
Loosen (do not remove) the screws (x6) through the screw holes at the back of the mast.
-
Unhook the mast from the screws.
If the mast is installed at maximum height, follow instructions below to remove the mast.
-
Loosen (do not remove) the screws (x8) through the screw holes at the back of the mast.
 the screws through the screw holes at the back of the mast.")
-
Unhook the mast from the screws.

Reinstall the Tall CMK
To reinstall with the replacement tall CMK![]() Cable Management Kit, complete the steps given below.
Cable Management Kit, complete the steps given below.
Install the mast
See Remove the mast and reverse the steps to reinstall.
Install the tall CMK assembly
See Remove the tall CMK assembly and reverse the steps to reinstall.
Install the sign covers
Complete the Service
-
Reinstall the charging cable. See Release the cable and reverse the steps to reinstall.
When reinstalling the cable, be sure to tighten the set screw securing the tetherball to the CMK Cable Management Kit. Torque to 4.5 Nm (40 in-lb).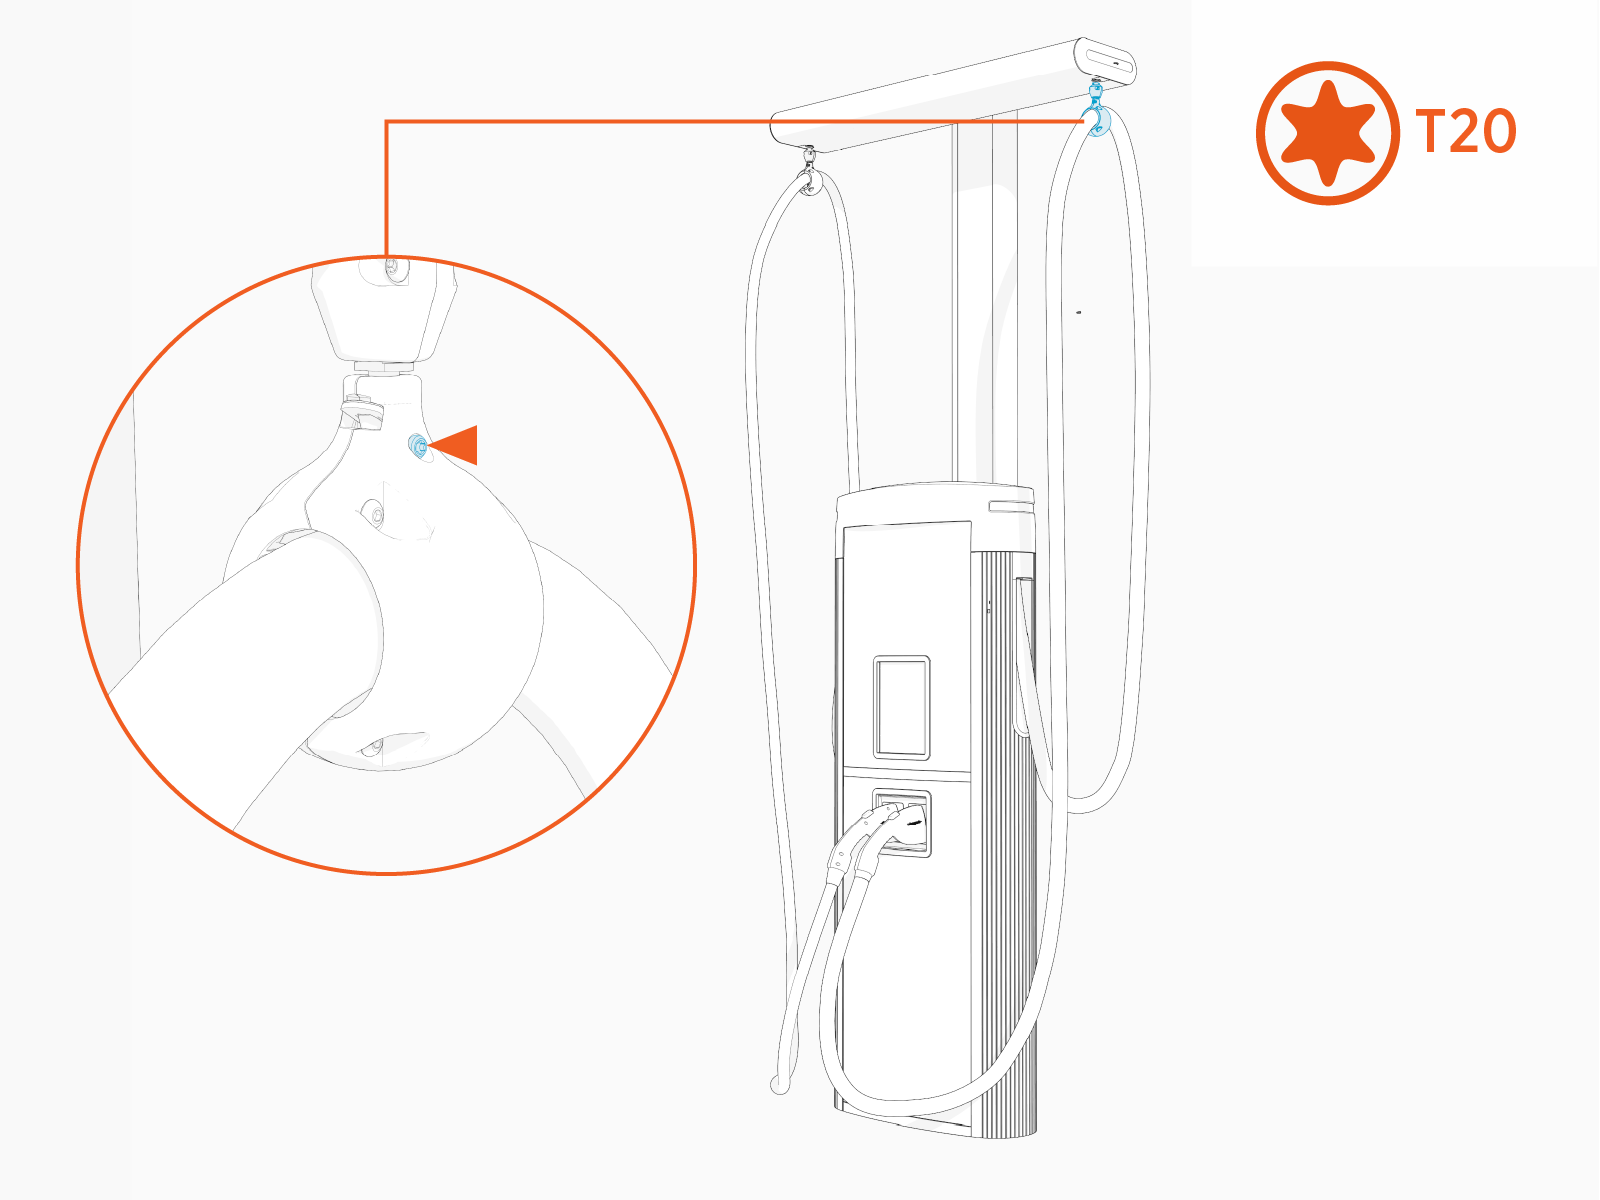
- To adhere to ChargePoint best practices, complete the post-service checklist before you leave the site.
For assistance or to return a faulty part to ChargePoint, go to chargepoint.com/support and contact technical support using the appropriate region-specific number.
