Replace the Charging Connector DC Contact
To replace the charging connector DC contacts and front cover on a Phoenix Liquid Cooled Cable (LCC![]() Liquid Cooled Cable) CCS1 assembly, perform the following steps. These instructions apply only to assemblies identified by the approved Express Plus SKUs listed below.
Liquid Cooled Cable) CCS1 assembly, perform the following steps. These instructions apply only to assemblies identified by the approved Express Plus SKUs listed below.
|
Part Number |
Description |
|---|---|
| 99-007905-02-FT | EXPP-PL202X1BC-FTA |
| 99-007910-01 | EXPP-PL2011BC-6A1S1-MB |
| 99-007910-02 | EXPP-PL2011BC-6A1S1 |
| 99-007910-02-FH | EXPP-PL2011BC-6A1S1-FHWA-A |
| 99-007910-02-FT | EXPP-PL2011BC-6A1S1-FTA-A |
| 99-007911-01 | EXPP-PL202X1BC-6A1S1-6A1S1-MB |
| 99-007911-02 | EXPP-PL202X1BC-6A1S1-6A1S1 |
| 99-007911-02-FH | EXPP-PL202X1BC-6A1S1-6A1S1-FHWA |
| 99-007911-02-FT | EXPP-PL202X1BC-6A1S1-6A1S1-FTA-A |
| 99-007911-03 | EXPP-PL202X1BC-6A1S1-6A1S1-A |
| 99-007916-02 | EXPP-PL202X1BC-6A1S1 |
| 99-007916-02-FH | EXPP-PL202X1BC-6A1S1-FHWA-A |
| 99-007925-01 | EXPP-PL202X1DC-6A6S1-6A6S1-A |
Required Tools and Materials
|
|
Torque adjustable screwdriver with 1/4‑inch hex bit holder (10–19 in-lb range) |
|
T5 Torx bit |
Inspect the Box for Contents
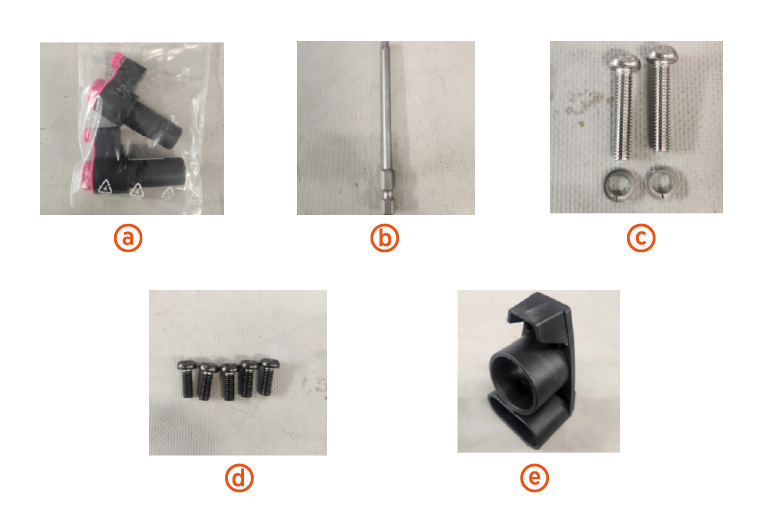
The replacement kit for charging connector DC contact includes:
-
DC contacts (x2)
-
S2 T20 Screw Bit
-
DC contact screw washers (x2)
-
M4X10-5TX short screws (x5) (Included in applicable kits only)
-
Front cover (Included in applicable kits only)
Before you begin
-
Remove the charging cable connectors from the holster.
Replace the Charging Connector DC Contact
-
Using the T5 screwdriver, remove the five M4x10‑5TX screws securing the front cover.
A typical LCC Liquid Cooled Cable CCS1 DC-connector profile is shown for reference.
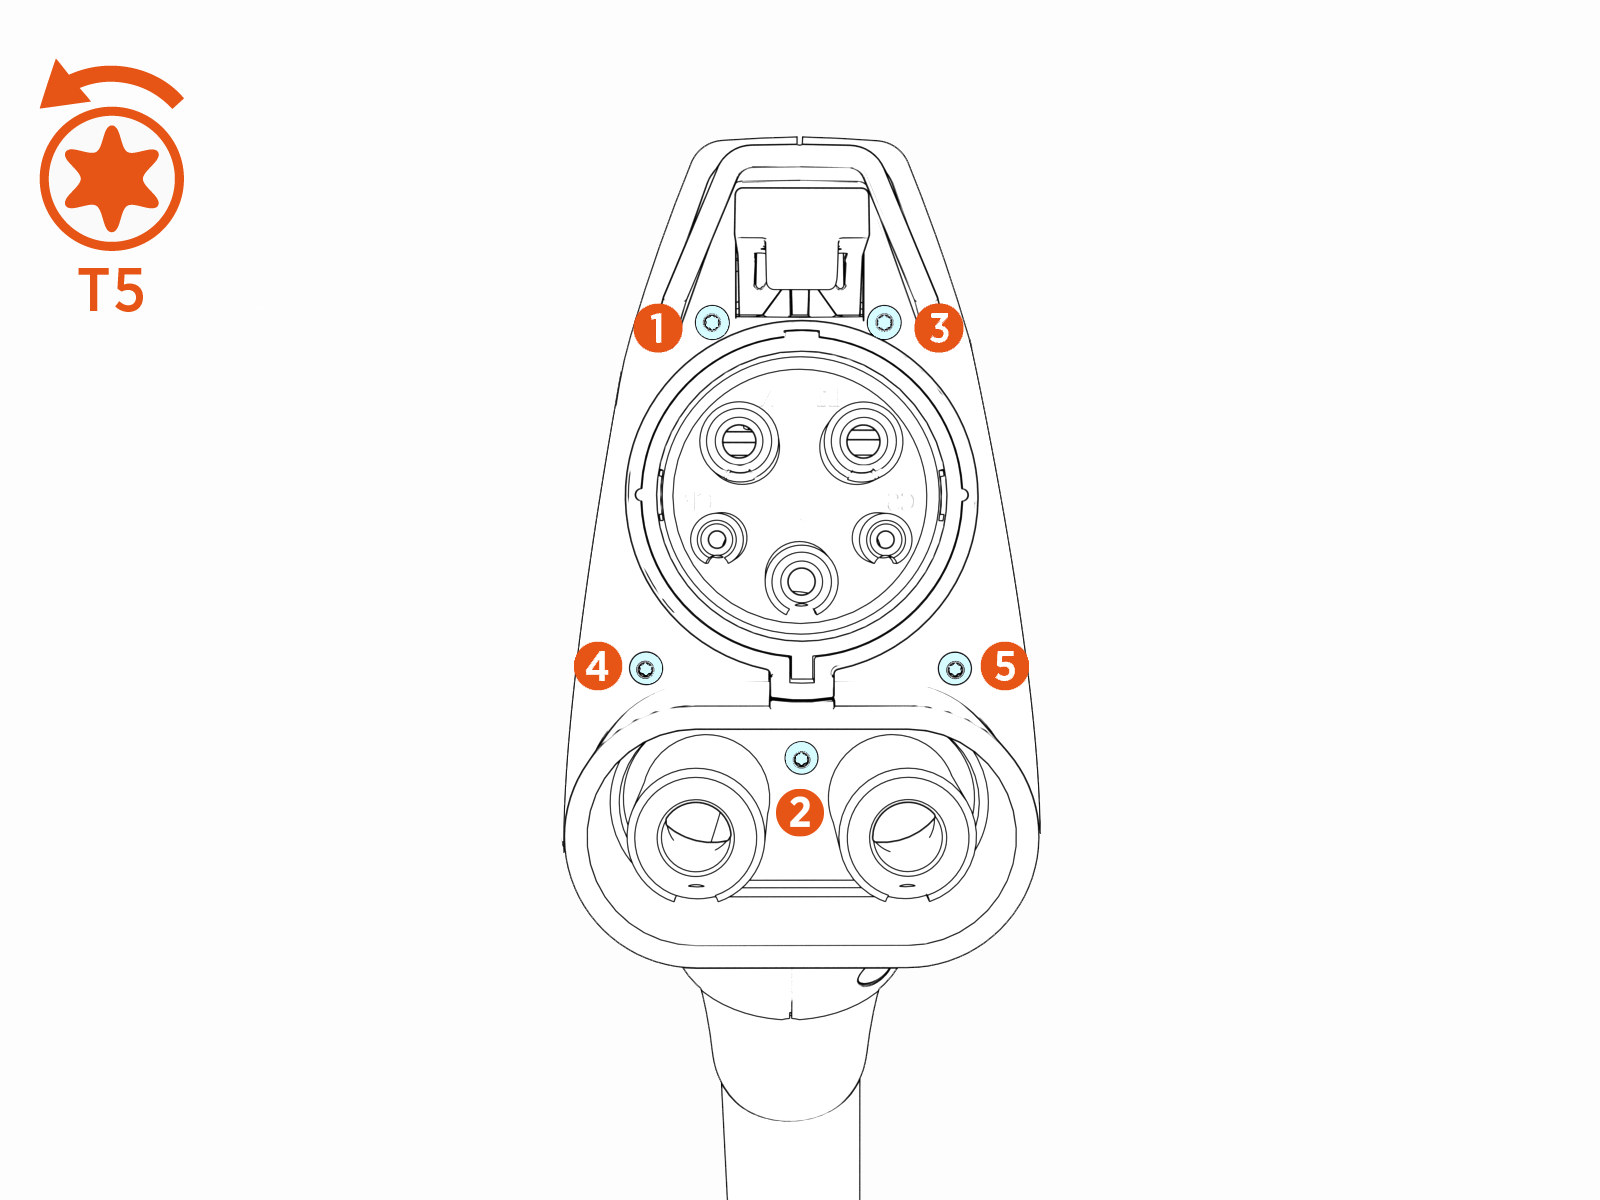
-
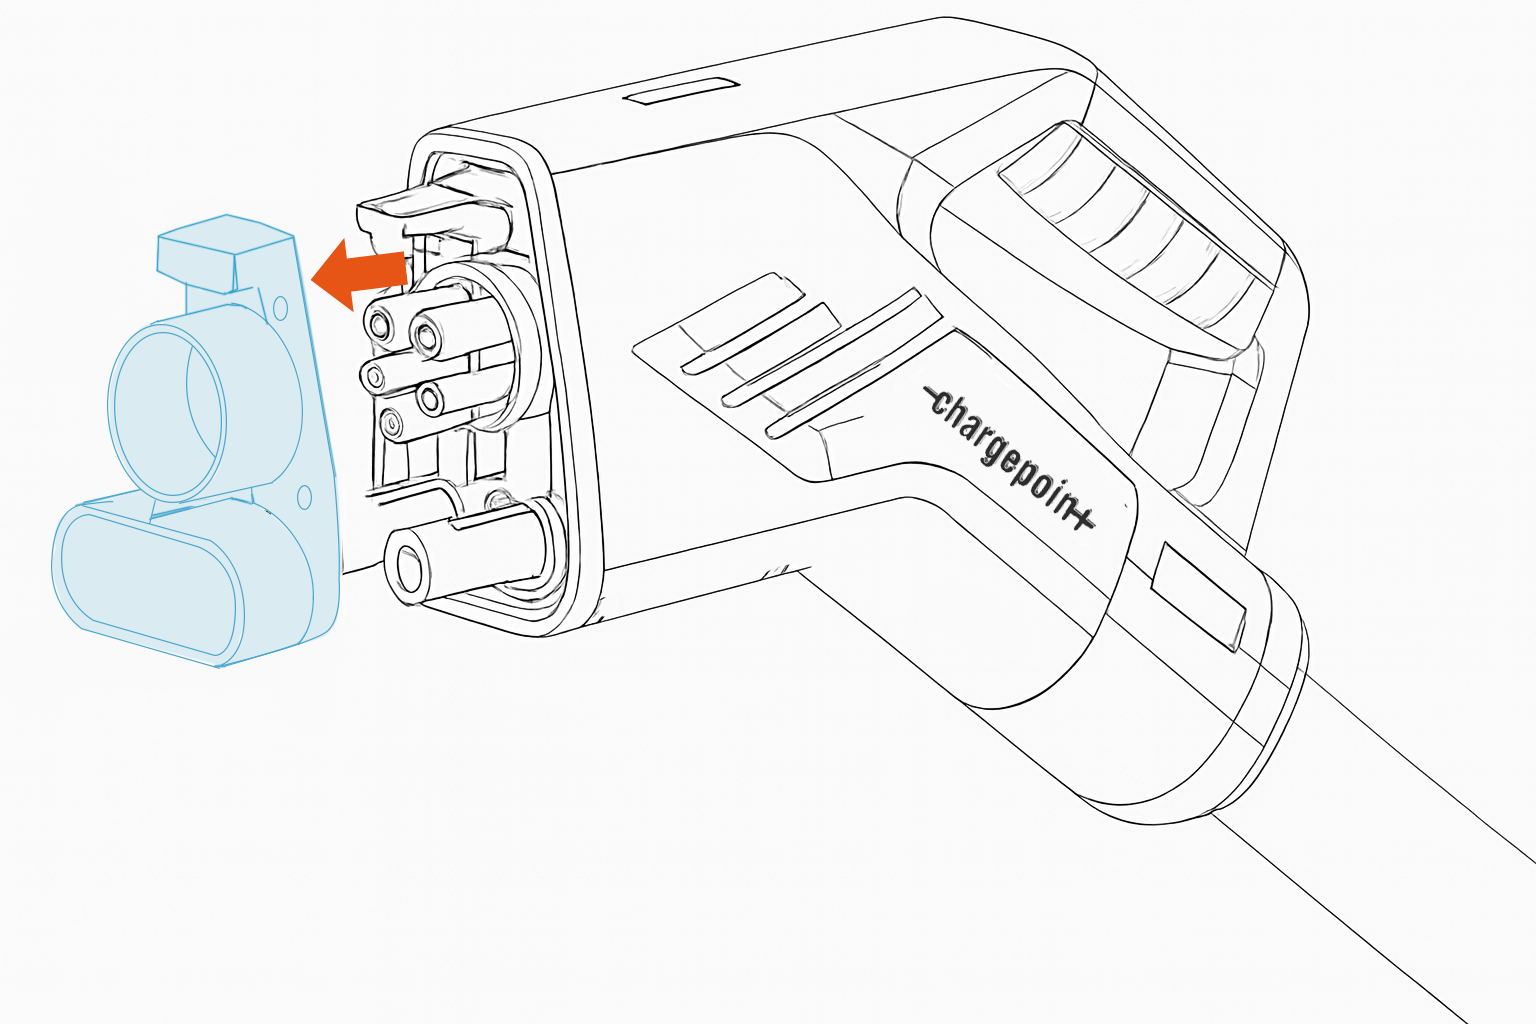
Remove the front cover and set it aside.
-
Using the S2 T20 screwdriver, remove the two charging connector DC contact screws and their washers.
Do not reuse the removed screws or washers.
-
Install the two new charging connector DC contacts with the new screws and washers.
Ensure the washer is placed between the screw and the DC contact.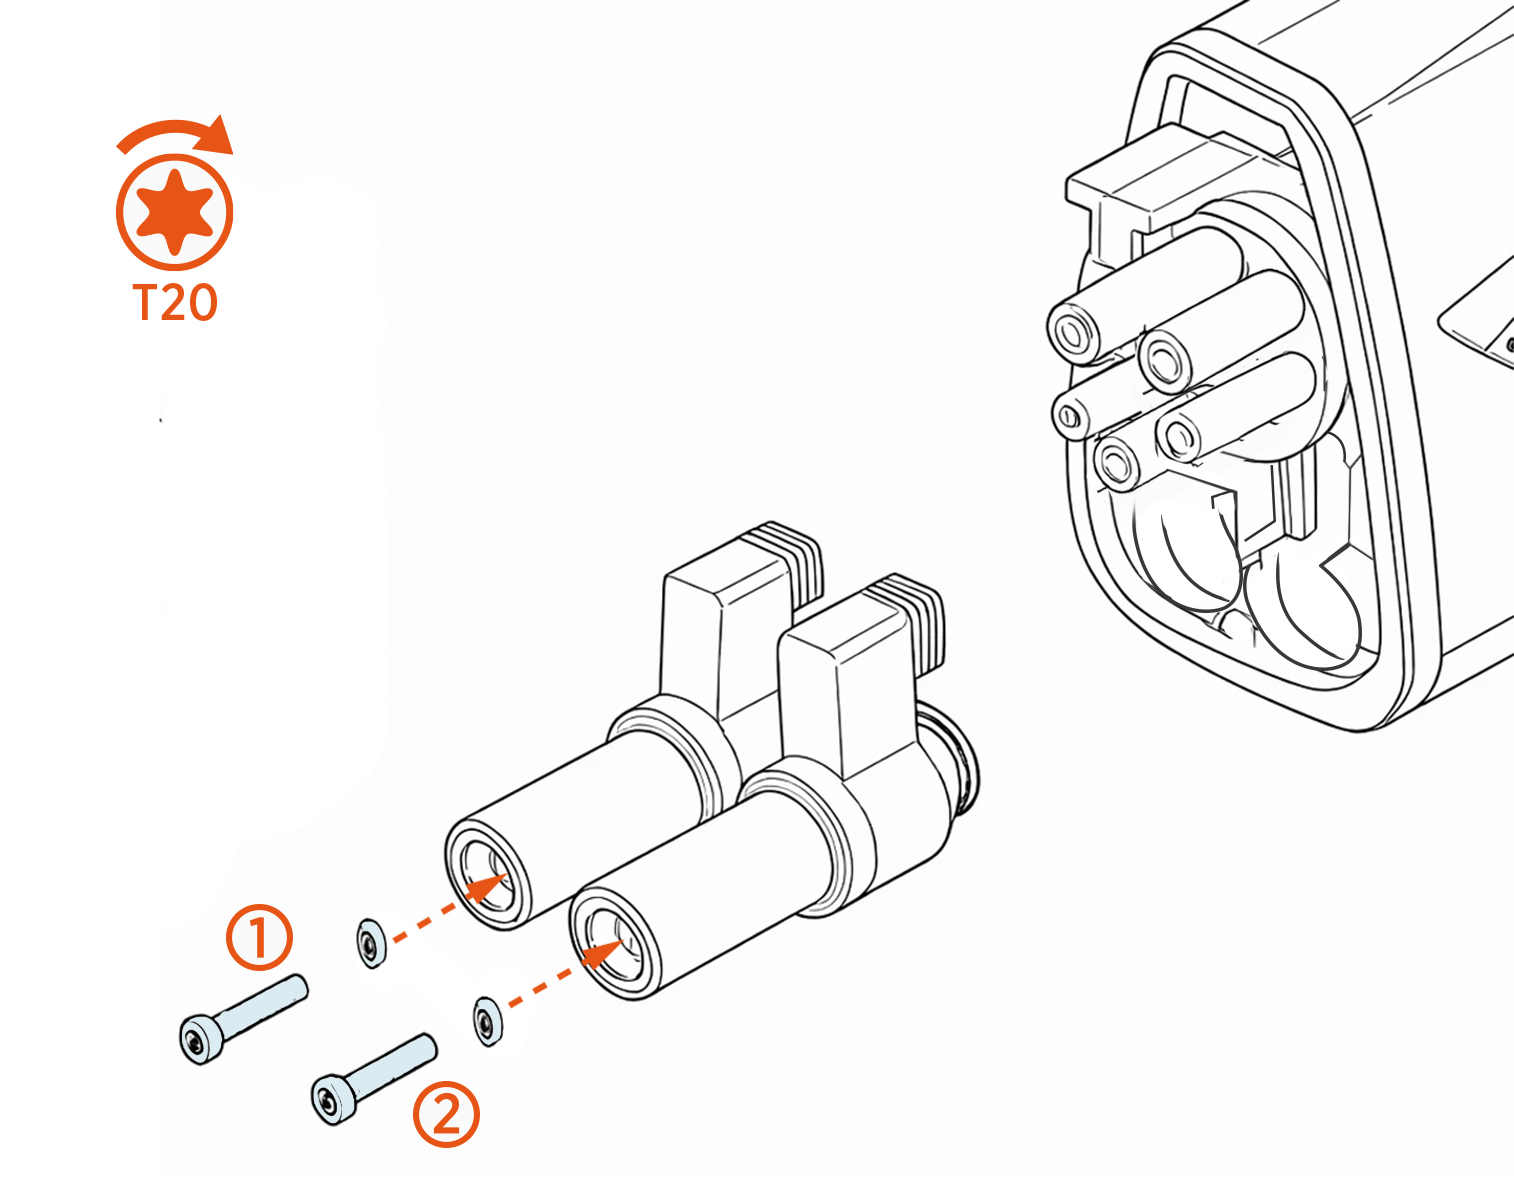
-
Torque the screws (x2) to 2.2 Nm (19 in‑lb).
-
Using the T5 screwdriver, install the five M4x10‑5TX screws to secure the front cover.
If available, use the new front cover and new screws.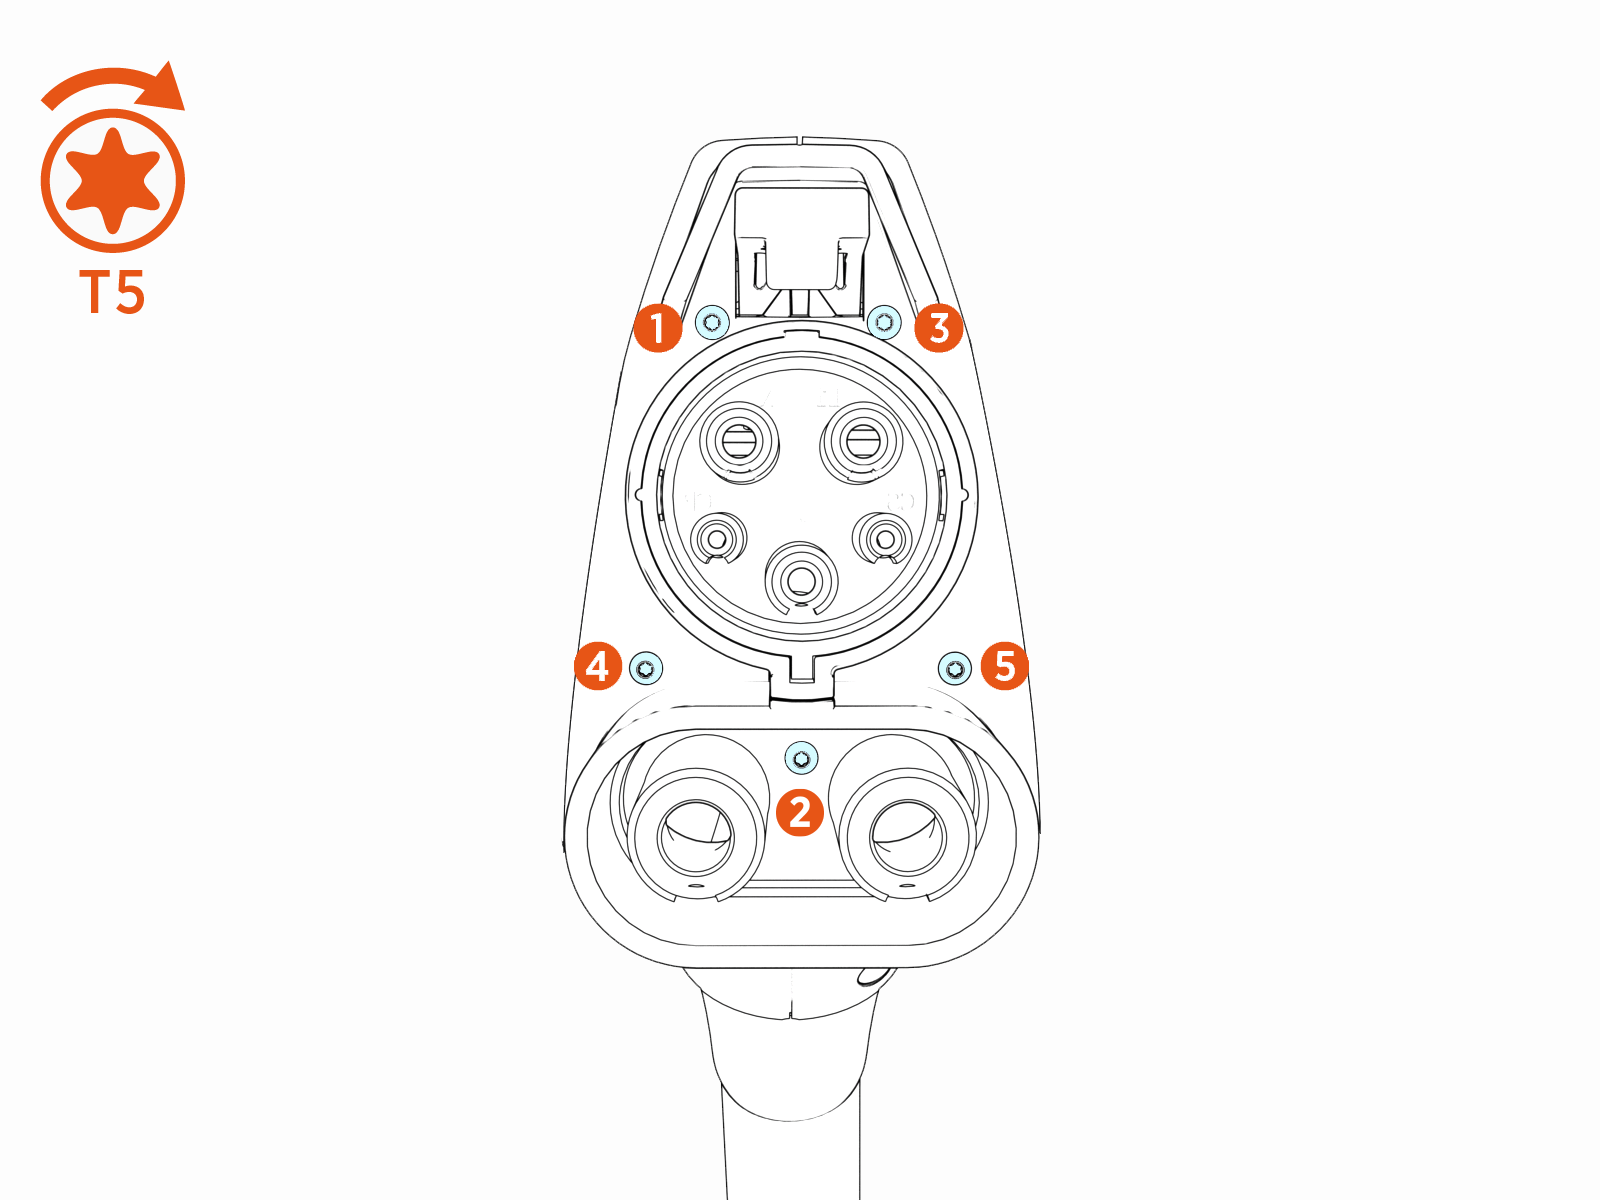
-
Torque the screws (x5) to 1.2 Nm (10 in‑lb).
-
Place charging cable connectors into the holsters.
- To adhere to ChargePoint best practices, complete the post-service checklist before you leave the site.
For assistance or to return a faulty part to ChargePoint, go to chargepoint.com/support and contact technical support using the appropriate region-specific number.
